Containers over Raspberry PI with Docker, RancherOS and Portainer
Last Updated on 15th September 2020 by peppe8o
Today’s computer world is experiencing a new concept of thinking apps and how to deploy them. Old application practices were focused on stacks created over a complete machine (phisical or virtual). This approach has demonstrated to lead some concerns regarding resources use, infra-application conflicts and poor development flexibility management.
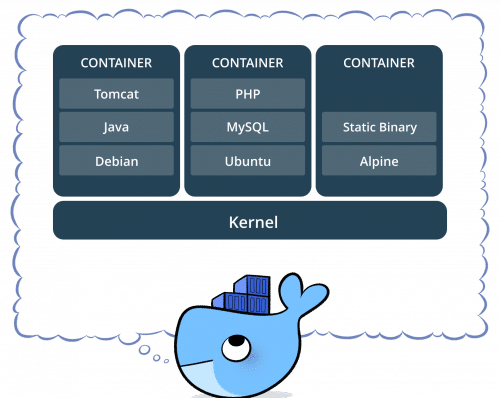
Containers have born to help developers and system administrators to help in this sense. Docker has become the most known company who implemented this concept. As defined in Docker website: “A container image is a lightweight, stand-alone, executable package of a piece of software that includes everything needed to run it: code, runtime, system tools, system libraries, settings. Available for both Linux and Windows based apps, containerized software will always run the same, regardless of the environment. Containers isolate software from its surroundings, for example differences between development and staging environments and help reduce conflicts between teams running different software on the same infrastructure.” (Ref. https://www.docker.com/what-container).
But using containers alone may require advanced knowledge. For this reason a good hand is given by another company: Rancher. Rancher is “open source software that combines everything an organization needs to adopt and run containers in production. Built on Kubernetes, Rancher makes it easy for DevOps teams to test, deploy and manage their applications. Operations teams use Rancher to deploy, manage and secure every Kubernetes deployment regardless of where it is running.“.
Now, what if we try to use them togheter over a consumer grade hardware? In this article we will try it on a Raspberry PI.
What we need
As usual, I suggest adding from now to your favourite e-commerce shopping cart all the needed hardware, so that at the end you will be able to evaluate overall costs and decide if to continue with the project or remove them from the shopping cart. So, hardware will be only:
- Raspberry PI (3 or 4 Model B) including proper power supply or using a smartphone micro usb charger with at least 3A
- micro SD card (at least 16 GB, at least class 10)
- micro HDMI cable or HDMI cable (check your Raspberry PI HDMI port in Comparing main features of latest RPI models)
- USB/wireless keyboard
- Network cable to connect your Raspberry to your router
SOFTWARE
- rancheros raspberry pi64 image (you can download it from here, I’m going to use version v1.5.3)
- an image flashing software like, for example, Etcher
- a remote ssh software (like Putty if you’re working from a Windows remote PC)
Step-by-step guide
Download and install in your PC Etcher.
Download rancherOS zip file in your computer and extract .img file locally.
Run Etcher in your PC.
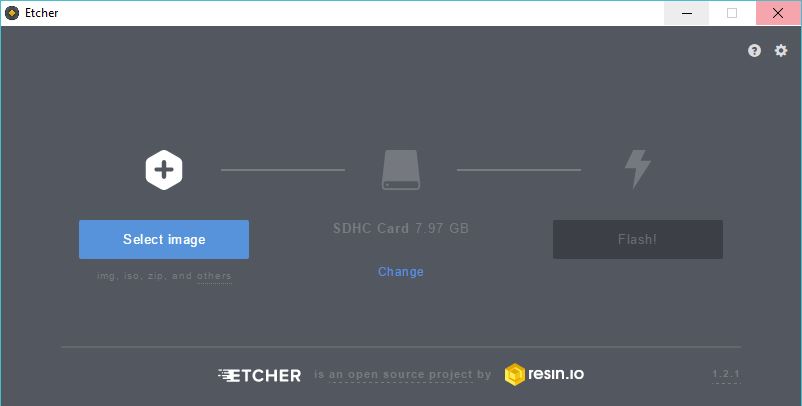
Click over Select Image and select RancherOS image previously downloaded. Now Etcher should also have recognised your SD card. Otherwise, click change and select correct SD card.
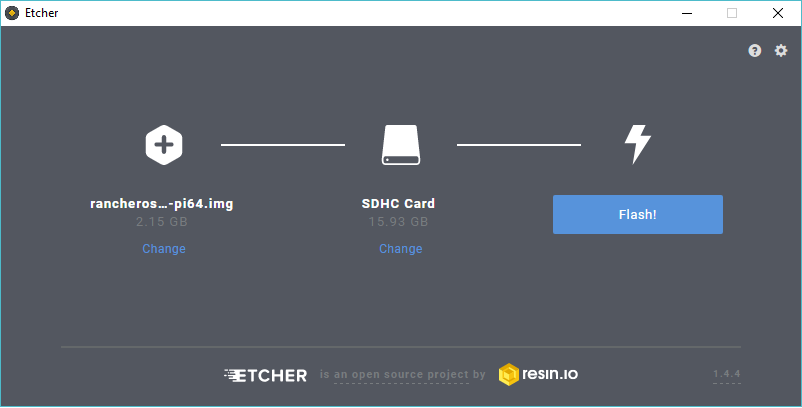
Click on “Flash! button and wait for operation to be completed.
Now you can insert SD card in your Raspberry PI, connect your network cable and boot it. Login using default user “rancher” and default password “rancher”.
As warned by old RancherOS installation guide, it does not currently expand the root partition to fill the entire SD card automatically. Instead, the following workaround can be used to store Docker containers on a larger partition that fills the remaining space.
sudo fdisk /dev/mmcblk0when it prompts:
- press “n” to create a new partition
- press ENTER 4 times to accept default settings for new partition
- press “w” to write the table and exit
an alert message will warn you that system needs a reboot in order to apply new configuration. so, let’s reboot:
sudo rebootAfter reboot, re-connect to your Raspberry. Create the directory to be used as the new Docker root:
sudo mkdir /mnt/dockerConfigure Docker to use the new root:
sudo ros config set rancher.docker.extra_args [-g,/mnt/docker]Format the disk:
sudo mkfs.ext4 /dev/mmcblk0p3Preserve this mount after reboots:
sudo ros config set mounts "[['/dev/mmcblk0p3','/mnt/docker','ext4','']]"Mount the Docker root:
sudo mount /dev/mmcblk0p3 /mnt/dockerRestart Docker using the new root:
sudo system-docker restart dockerConfiguring WiFi
With RancherOS version 1.5 the WiFi support has been implemented. From terminal you will need to edit the cloud-config.yml file to enable WiFi. The only text editor available is VI, so you need to understand the basis of this editor (just how to edit a file and hot to quit and save) to configure WiFi.
Let’s start from editing the file:
sudo vi /var/lib/rancher/conf/cloud-config.ymlthen you must find rancher section and manually add the network group so that your file appear something similar to the following:
rancher:
  docker:
    extra_args:
      - -g
      - /mnt/docker
  network:
    interfaces:
      wlan0:
      wifi_network: network1
    wifi_networks:
      network1:
        psk: <<your-wifi-password>>
        ssid: <<your-wifi-ssid>>
Restart network service:
sudo system-docker restart networkand check with ifconfig command that wlan0 has correctly an IP address assigned. If so, you can now connect from your favourite remote ssh software.
Enable a persistent console
Switch to a persistent console (for example ubuntu):
sudo ros console switch ubuntuNow docker is ready and running.
Additional GUI
A graceful web GUI helping in managing containers is portainer. In our case, we need to install an arm compatible version:
sudo docker pull portainer/portainer:linux-arm
docker run -d -p 9000:9000 -v /var/run/docker.sock:/var/run/docker.sock -v portainer_data:/data portainer/portainer:linux-arm
Now you can reach your docker server with a browser, just connecting to https://<<RaspberryIpAddress>>:9000.
You will be required to set your default password for admin user, then you will be prompted to portainer GUI
Enjoy!
