Connecting Raspberry PI Zero W to Arduino only via terminal
Last Updated on 2nd September 2023 by peppe8o
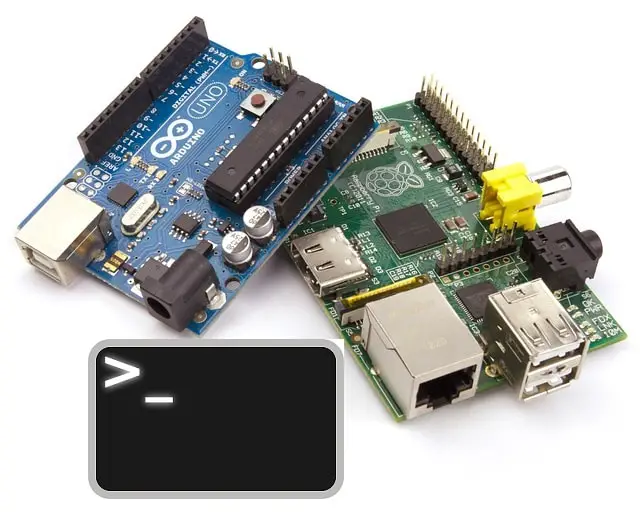
In this article I’m going to show you how to connect Raspberry PI Zero W to Arduino Uno. I choose Raspberry PI Zero W because of its very low power consumption (typical bare board: 150 mA), built-in WiFi connectivity and reduced dimensions.
Raspberry PI and Arduino are the 2 most loved boards between makers. These small electronic cards are often seen as competitors. A deeper look to their features (see my post Arduino vs Raspberry PI) make you realize that they are more likely to complete each other. And a fast communication way can’t come without terminal.
Please find differences between RPIs in Comparing main features of latest Raspbery PI Models. A deeper look to Raspberry PI Zero W / WH can be found in Raspberry PI Zero WH Datasheet. It is also able to power an Arduino, so that Raspberry Pi Zero W + Arduino are, IMHO, a strong duo for makers and electronics lovers. On the other side, RPI low hardware capacity suggests avoiding desktop environments, however being easy and useful with Raspberry PI SO Lite (with terminal connected via remote SSH). Anyway, this guide should work also with newer Raspberry PI models (RPI 3 Model A+, RPI 3 Model B/B+, RPI 4 Model B).
At the end I’ll show you how to make commands a lot easier to remember using linux command “alias”.
Step-by-Step Guide
I’ll use arduino-cli software installed on Raspberry PI OS Lite. Please find arduino-cli github page in https://github.com/arduino/arduino-cli.
At we’ll also prepare a simple sketch test and upload it to Arduino board.
What We Need
As usual, I suggest adding from now to your favourite e-commerce shopping cart all the needed hardware, so that at the end you will be able to evaluate overall costs and decide if to continue with the project or remove them from the shopping cart. So, hardware will be only:
- Raspberry PI Zero W (including proper power supply or using a smartphone micro usb charger with at least 3A) or newer Raspberry PI Board
- high speed micro SD card (at least 16 GB, at least class 10)
- Arduino Uno board with its USB cable or compatible kit (like, for example, the cheap Elegoo Starter Kit described in Elegoo starter kit – Arduino based electronics for dummies)
In this guide I’ll use the Elegoo kit with its Elegoo Uno R3. Elegoo industries refers that its board is 100% compatible with Arduino, so following steps should be the same also with Arduino Foundation board.
Install Raspberry PI OS Lite Operating System
Let’s start from installing OS in our Raspberry PI Zero W. Please find the simple procedure in my post Install Raspberry PI OS Lite. Be sure to update and upgrade after installation finish.
Install Arduino-Cli
To install arduino-cli, I’ll use the official install script. Before all, create a directory where user executables will be stored:
mkdir -p local/bin
add this directory to user $PATH variables (so that you can execute arduino-cli without typing full path):
nano .bashrc
add the following line to the end of file:
export PATH="$HOME/local/bin:$PATH"
logout/login to make it running. Now install arduino-cli with default script. Note the BINDIR variable telling the script to use our $PATH directory for installation:
curl -fsSL https://raw.githubusercontent.com/arduino/arduino-cli/master/install.sh | BINDIR=/home/pi/local/bin sh
Now create the default configuration file (suggested from arduino-cli man page to avoid a lot of typing when issuing each command):
arduino-cli config init
Connect Arduino Uno / Elegoo Uno Board
Before installing our board, we need to update the local cache of available platforms and libraries:
arduino-cli core update-index
Connect Elegoo Uno/Arduino board to your Raspberry PI using the miniUSB-to-USB cable. You should be able now to list your board:
pi@raspberrypi:~ $ arduino-cli board list
 Port         Type              Board Name  FQBN            Core
 /dev/ttyACM0 Serial Port (USB) Arduino Uno arduino:avr:uno arduino:avr
 /dev/ttyAMA0 Serial Port       Unknown
If you can see only Unknown port, a Raspberry PI reboot could help in refreshing hardware recognition. My output shows that I have an Arduino Uno based board, with FQBN (fully qualified board names) set to “arduino:avr:uno”.
Install your board:
arduino-cli core install arduino:avr
Verify that installed board is properly running:
pi@raspberrypi:~ $ arduino-cli core list
 ID          Installed Latest Name
 arduino:avr 1.8.2     1.8.2  Arduino AVR Boards
Test Your Installation
Create Your First Sketch
To create a new sketch, simply type:
arduino-cli sketch new MyFirstSketch
This will create a “MyFirstSketch” directory inside pi user home folder, containing “MyFirstSketch.ino” file inside. View sketch content:
pi@raspberrypi:~ $ cat MyFirstSketch/MyFirstSketch.ino
 void setup() {
 }
 void loop() {
 }
Edit sketch content with common board LED control sketch (same as BLINK example):
nano MyFirstSketch/MyFirstSketch.ino
and modify like following:
void setup() {
   pinMode(LED_BUILTIN, OUTPUT);
 }
 void loop() {
   digitalWrite(LED_BUILTIN, HIGH);
   delay(4000);
   digitalWrite(LED_BUILTIN, LOW);
   delay(1000);
 }
Before uploading our skecth, we need to compile it (the very first time, compile may take a few seconds) using your fqbn:
arduino-cli compile --fqbn arduino:avr:uno MyFirstSketch
Upload the sketch using your phisical port and fqbn:
arduino-cli upload -p /dev/ttyACM0 --fqbn arduino:avr:uno MyFirstSketch
This way you should see your Arduino board reprogramming itself and executing the sketch (4 seconds built-in LED on, 1 second off).
Tips To Simplify Command
Typing fqbn and port every time can be really boring. An help comes from linux alias command. The following line will associate “acompile” with arduino-cli compile and its full parameters. The second line will make the same work but with the update command:
alias acompile="arduino-cli compile --fqbn arduino:avr:uno"
alias aupload="arduino-cli upload -p /dev/ttyACM0 --fqbn arduino:avr:uno"
If you want to make these alias running also after reboot for pi user, you have to add them to your bashrc file. From terminal, let’s add alias with echo:
echo 'alias acompile="arduino-cli compile --fqbn arduino:avr:uno" ' >> ~/.bashrc
echo 'alias aupload="arduino-cli upload -p /dev/ttyACM0 --fqbn arduino:avr:uno"' >> ~/.bashrc
Now you can complile and upload sketches simply by typing:
acompile MyFirstSketch/
aupload MyFirstSketch/
or with combined command:
acompile MyFirstSketch/ && aupload MyFirstSketch/
Enjoy!
