Emulating MVS Mainframe on Raspberry PI
Last Updated on 22nd November 2023 by peppe8o
In this tutorial, I’m going to show you how to set up and use Hercules on Raspberry PI, which brings a lite version of MVS (Mainframe) to our loved single-board computers.
What is a Mainframe
Mainframes mainly belong to a remote computer era, when Windows or Linux on PCs were quite not used on the company’s main servers. Anyway, they are still installed and running in many server farms and run a number of services we use every day (like, for example, banking back-end). Hercules brings a light (and old) version of MVS emulation to get Mainframe on Raspberry PI
Wikipedia Mainframe Computer page defines Mainframe as following:
Mainframe computers or mainframes (colloquially referred to as “big iron”) are computers used primarily by large organizations for critical applications; bulk data processing, such as census, industry and consumer statistics, enterprise resource planning; and transaction processing. They are larger and have more processing power than some other classes of computers: minicomputers, servers, workstations, and personal computers.
Mainframes are focused on some key factors, vital for critical businesses:
- high availability
- security
- high I/O volumes
- reliability for transaction processing
Even if they are currently considered as an outdated technology (compared to modern virtual machines/container technology), they are still deep-rooted in modern data centres, especially for banks, stock exchanges, etc
In this article I’m going to show you how to run a Mainframe MVS (Multiple Virtual Storage) inside … a Raspberry PI!
What We Need

As usual, I suggest adding from now to your favourite e-commerce shopping cart all the needed hardware, so that at the end you will be able to evaluate overall costs and decide if to continue with the project or remove them from the shopping cart. So, hardware will be only:
- Raspberry PI (including proper power supply or using a smartphone micro usb charger with at least 3A)
- high speed micro SD card (at least 16 GB, at least class 10)
Step-by-Step Guide
This guide will use an amazing MVS package available from the page https://wotho.ethz.ch/tk4-/, no longer available, which also included a User Manual explaining how to use this MVS emulation. At the time of this update (2023) the page is no longer available, so I’ve placed a copy of the user manual and code in my download area. If anyone knows if the page has been redirected to a new domain, please notify me so that I can update the links and give it the right mention.
Installing OS
Start setting up the operating system. You can install Raspberry PI OS Lite (for a headless, fast OS) or install Raspberry PI OS Desktop (in this case, using its internal terminal). This tutorial uses the Lite distribution with a remote SSH connection.
Also note that you have to install the 32-bit OS version, in order to get the MVS emulator running.
Install TK4 MVS Emulation
We’ll download and unzip the tk4 package inside a new folder from where our system will load. From Raspberry PI type the following commands:
mkdir mvs
cd mvs
wget https://peppe8o.com/download/python/mainframe/tk4-_v1.00.zip
unzip tk4-_v1.00.zip
Now your MVS emulation is ready to be started.
The basic configuration doesn’t need any change and runs in unattended mode with the simple command:
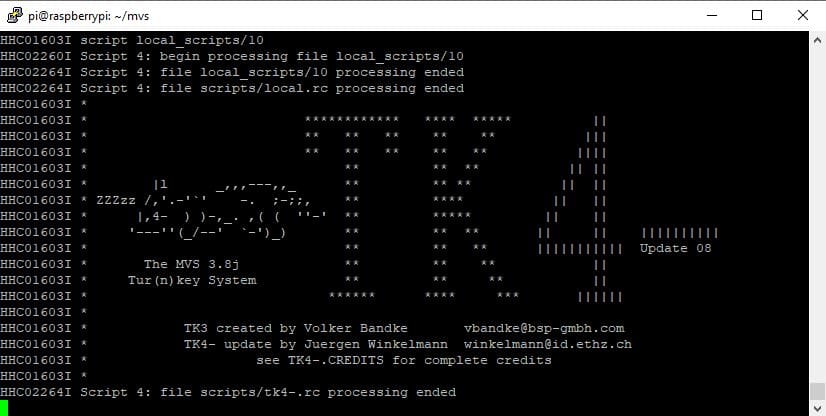
./mvsThis launches an unattended startup. At the end of the load procedure, you will see the following screen:
Connect To MVS
To login into your MVS, you will need a terminal capable of starting an x3270 session.
For Windows PCs, a free terminal can be downloaded from https://sourceforge.net/projects/x3270/. Another alternative is the good Mocha TN3270 available with 30 days trial as Chrome Extension from Mocha Chrome store.
In both cases, set your connection parameters with:
- Host: IP address of your Raspberry PI
- port: 3270
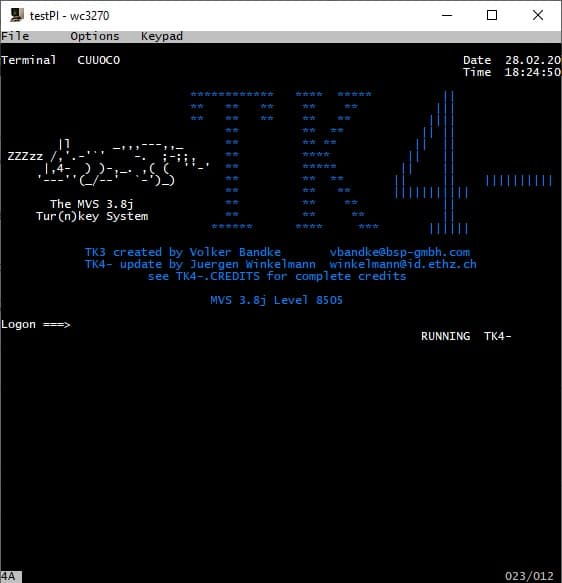
Once connected, a logon is required:
Use one of the default users. For example:
- user: HERC01
- password: CUL8TR
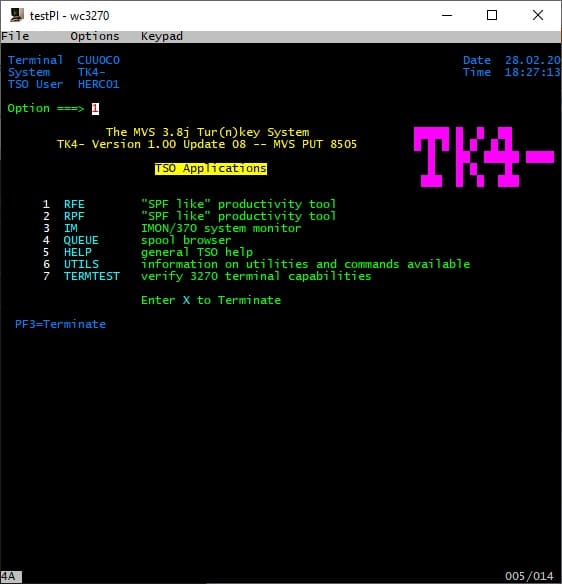
Once connected, with 2 RETURN pressing you will go to TSO home page:
Very First Exercise With TK4 TSO: Create a Simple Dataset
Terminal Emulator Screen
Before all, a few descriptions of the main parts of the Terminal Emulator. It is composed of 3 main parts:
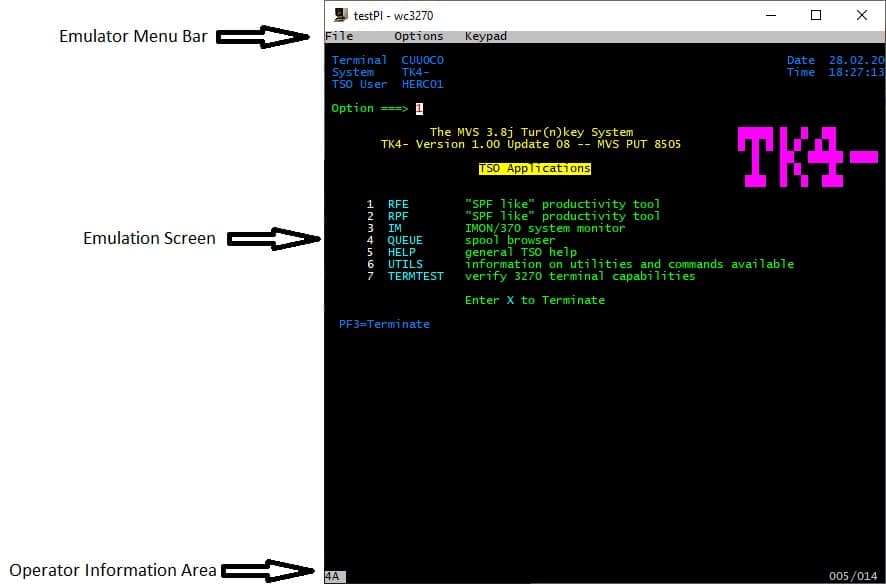
The emulation screen usually gives in the top section an Options field where you can select the desired option to execute (Return to execute in some terminal emulators, or CTRL in some other terminal emulators). Options are listed in the following section, each line reporting the option number and related action.
Function keys (F1 to F12) have an important role in the terminal because each one is a shortcut to a specific function. For example, the most common and most used is F3, to go back to the previous screen.
What Is a Dataset
A data set or dataset (refer to Wikipedia for Data set description) is a file with a record organization. It can be associated with a mix of more common Windows directories and files or Linux folders and files.
To create the first dataset (which will be a simple text dataset), from the TSO home page with option 2 select the RPF productivity tool. With the word “select”, in this paragraph, I will intend to write the option number and press Return (or CTRL where it is configured as option confirmation):
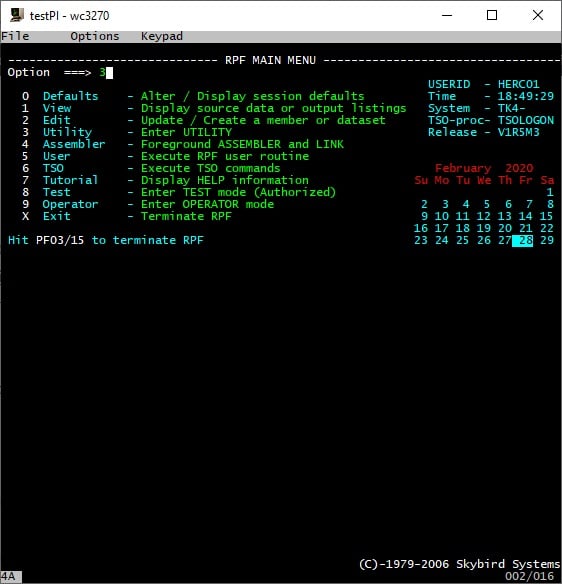
Select 3 to use RPF utility:
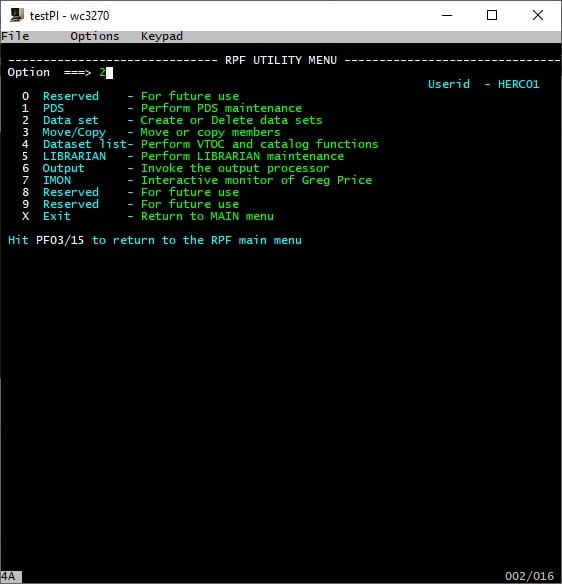
Select option 2 to Create a new dataset:
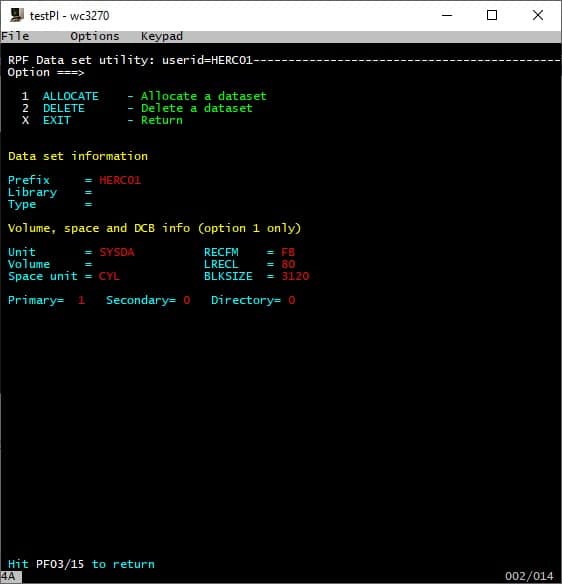
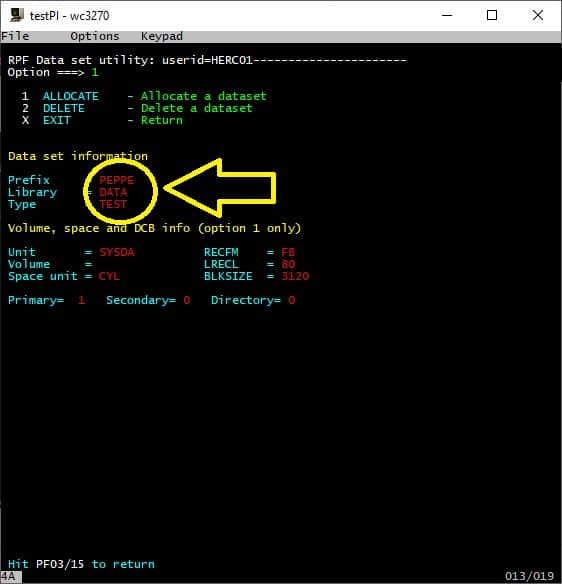
Here we’ll configure dataset naming (and logical position) modifying parameters circled in the following picture. All other parameters can be left with default values:
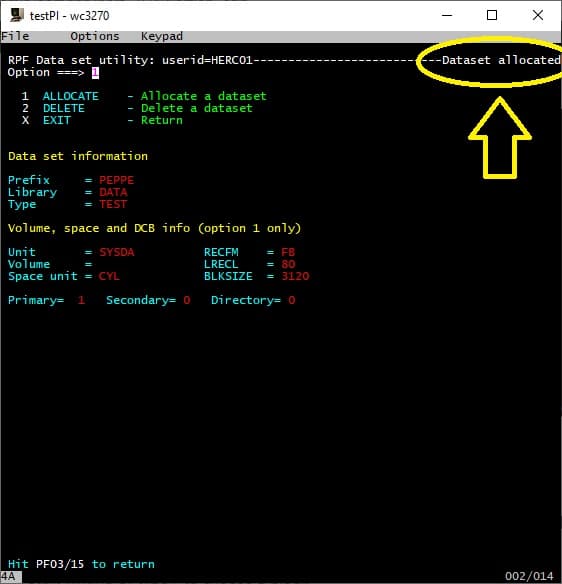
Now select option 1 to allocate (the space) the dataset. The terminal confirms that the dataset has been allocated:
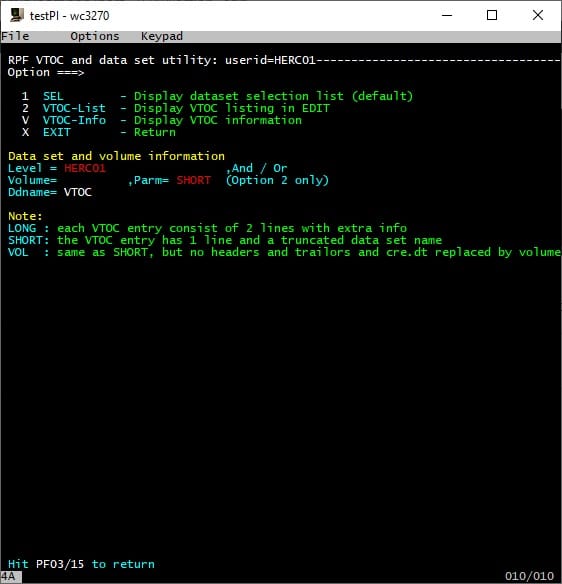
Press F3 to go back to RPF Utility Menu and select option 4 to search available datasets:
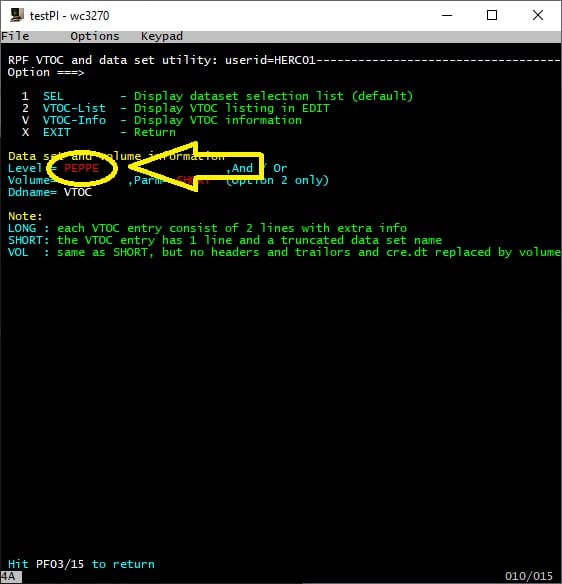
Edit in the search window (ops… sorry mainframers, I intended label 🙂 ) with the prefix setup in the previous step. In my case, “PEPPE”:
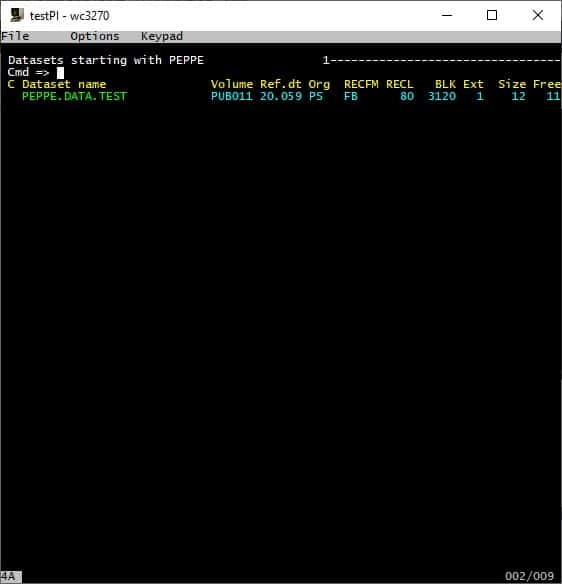
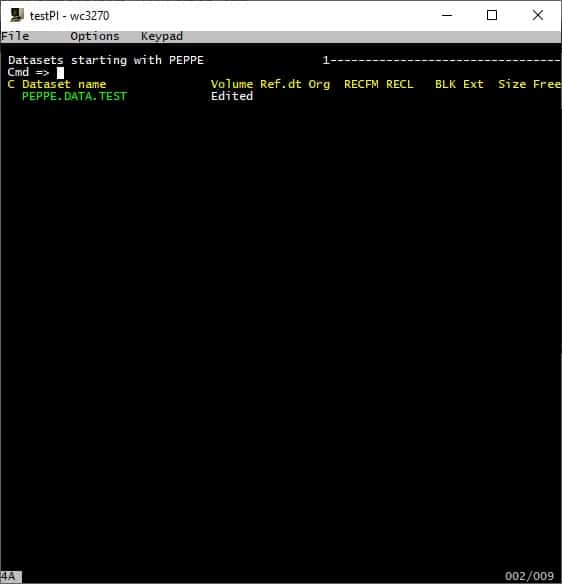
And press Return (or CTRL) to list available datasets with the same prefix. In a new environment, it will show the only one dataset allocated:
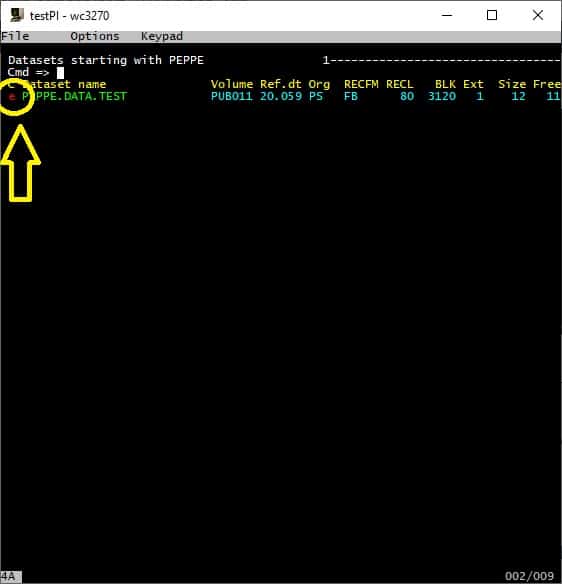
Now, the most common actions with a dataset are browse (to view their content), edit (to modify their content) or delete (to delete the entire dataset). These actions can be performed by adding the related command letter (b=browse, e=edit, d=delete) on the left of the dataset. We’ll perform and edit to add content to our dataset. So, add the “e” at the left of the dataset:
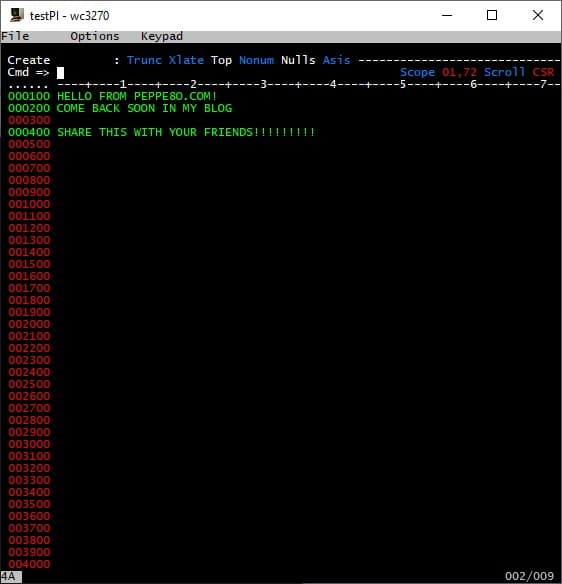
And press Return (or CTRL). An empty editor screen will appear. Fill in with text of your choice and press return to have the prompt back in the “Cmd” area:
type save near the Cmd area and press return.
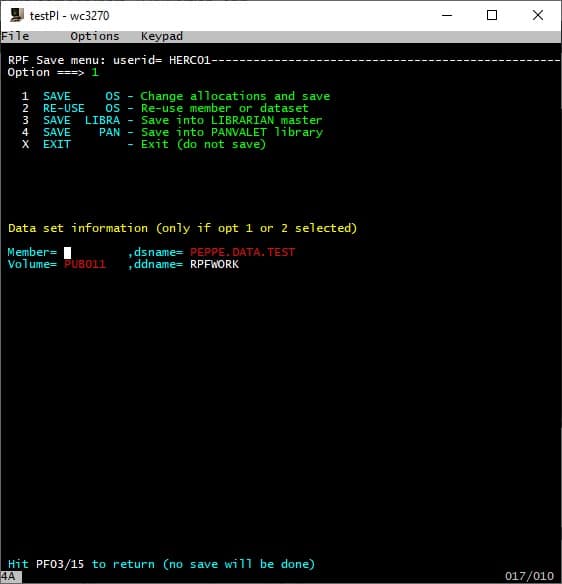
Select option 1 and press Return. The terminal will go back in the dataset list, also confirming that your dataset has been edited:
Congratulations, you have created your very first dataset!
Now press F3 as many times as to go back to TSO home screen.
Closing Emulation
To shut down, simply exit from TSO (from TSO home screen press F3):
and simply type “shutdown” and press Return (or CTRL). This will start the shutdown procedure.
User Manual
The complete user manual is currently available in my download area with the following link:
https://peppe8o.com/download/python/mainframe/mvs_tk4-_v1.00_users_manual.pdf
Next Steps
Interested in more projects with your RPI? Take a look at peppe8o Raspberry PI computers tutorials pages.
Enjoy!

You could add that one needs to intall 32bit RaspberryOs (Lite/Desktop) otherwise there will be an exec error while starting the mvs.
Post updated with the warning. Thank you very much for your notification!
Better is the modified package by Rob: http://www.prince-webdesign.nl/tk4rob
This works with 64bit RaspberryOs (Lite/Desktop) out of the package. You can even upgrade with the hercules helper https://github.com/wrljet/hercules-helper to the newest Hercules version by copy the compiled binary to TK4 instance.