Image Classification Video Streaming from TensorFlow with headless Raspberry PI
Last Updated on 2nd September 2023 by peppe8o
In this tutorial I’m going to show how to get image classification video streaming from headless (Lite) Raspberry PI installation with TensorFlow Lite.
Artificial Intelligence with Tensorflow is a standard for image intelligent recognition industry. Even if examples are available to use Raspberry PI with tensorflow, all of these work only if an HDMI cable is connected to a monitor. Image classification video streaming from headless Raspberry PI is also possible with a few code edits.
What is TensorFlow
With Tensorflow spreading in Artificial Intelligence applications and becoming more and more used in this industry, developers from all the world have adapted this open source framework to run on quite every device. A relatively new brunch merged from original one, adapting this framework to small devices using ARM processors. This is the case of IoT devices, smartphones and… Raspberry PIs. A lighter version of TensorFlow was born: TensorFlow Lite.
With Raspberry PI, new examples have been published on GitHub, the most significant being https://github.com/tensorflow/examples/tree/master/lite/examples/image_classification/raspberry_pi. But I wasn’t able to find tutorials explaining how to get it working on a headless installation. I think this is based on the fact that they used one of the most common PI camera python frameworks: “picamera”. Default usage includes a preview function, which should require an HDMI cable connected. This means a Desktop installation that wastes Raspberry PI computing resources for desktop environment when not used.
In Picamera basic examples, on the other hand, network streaming is realized with start_recording function.
So, I decided to try changing TensorFlow image classification script, introducing socket management and streaming video over the network. the result is described in this guide.
In this tutorial, I’m going to use a Raspberry PI 3 model A+, but it applies to all Raspberry PI boards able to run TensorFlow lite.
What We Need
As usual, I suggest adding from now to your favourite e-commerce shopping cart all the needed hardware, so that at the end you will be able to evaluate overall costs and decide if to continue with the project or remove them from the shopping cart. So, hardware will be only:
- Raspberry PI 3 Model A+ (including proper power supply or using a smartphone micro usb charger with at least 3A) or newer Raspberry PI Board
- high speed micro SD card (at least 16 GB, at least class 10)
- Raspberry PI Camera
Check hardware prices with following links:

Step-by-Step Procedure
Prepare Operating System
Start with your OS. You can use install Raspberry PI OS Lite guide (for a headless, fast operating system). This tutorial is based, of course, on headless installation but, if you prefer, you can also use this guide with Raspberry PI OS Desktop (in this case working from its internal terminal).
Make your OS up to date. From terminal:
sudo apt update -y && sudo apt upgrade -yConnect your camera module to Raspberry PI and enable the camera from raspi-config tool. From terminal:
sudo raspi-configThe terminal will show the following page:
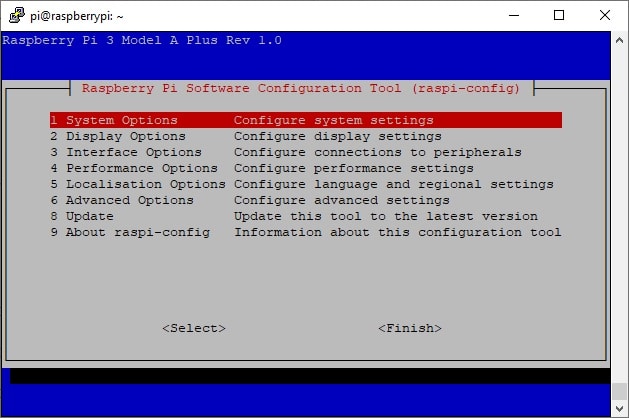
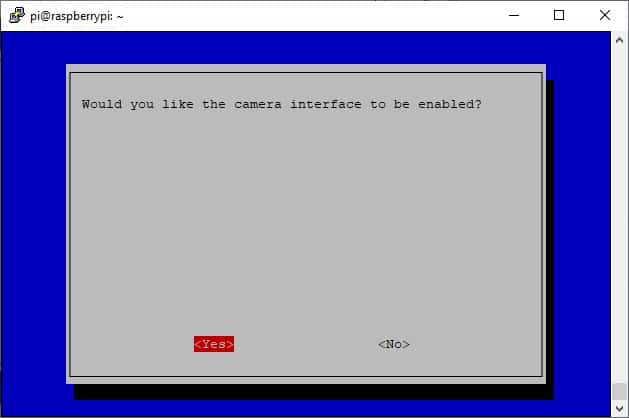
Go to option 3 (Interface Option) and press ENTER:
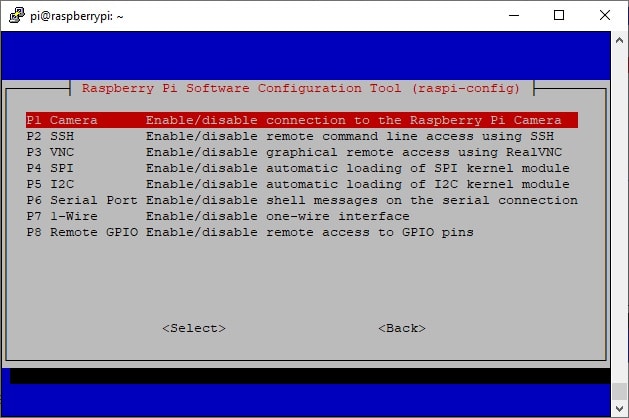
Select first option (Camera) and press ENTER. In the next screen move selection from “No” to “Yes”:
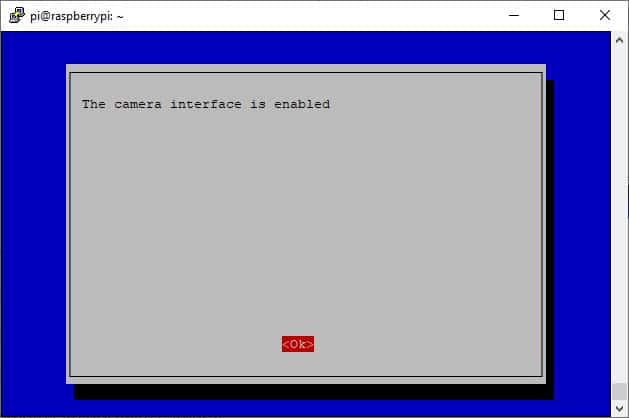
Press ENTER and confirm also in the following screen.
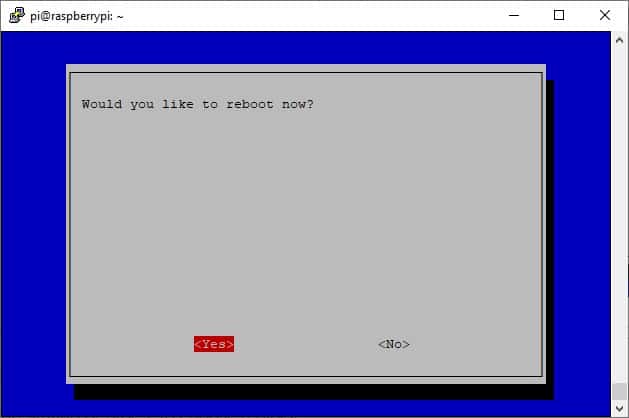
You will go back to raspi-config home. Move to the finish button and press ENTER.
This operation will require a reboot. Confirm in the next screen and wait for the reboot:
Once your Raspberry PI is rebooted, connect again to the terminal and install the required libraries. A note: NumPy coming from pip3 repository is not compatible with the current python3 default version from apt (3.7). For this reason, we need to be sure that NumPy from pip is uninstalled and get it from apt. This makes our versions a bit older, but we get a simpler way to install requirements. If you prefer to use the last versions, you need to get all required packages from the source. From terminal:
sudo apt install python3-pip git
pip3 uninstall numpy
pip3 install image
sudo apt install python3-numpy libopenjp2-7-dev libtiff5
Use pip to install TensorFlow lite. The link to .whl installation file is available from https://www.tensorflow.org/lite/guide/python?hl=en and depends on hardware and OS. With Raspberry PI OS (32-bit), at the time of this article installation will be done with this terminal command:
pip3 install https://github.com/google-coral/pycoral/releases/download/release-frogfish/tflite_runtime-2.5.0-cp37-cp37m-linux_armv7l.whlCreate a folder where files will be stored:
mkdir imclassif
cd imclassif
Get the raw requirements file and download the script from GitHub source portal:
wget https://raw.githubusercontent.com/tensorflow/examples/master/lite/examples/image_classification/raspberry_pi/requirements.txt
wget https://raw.githubusercontent.com/tensorflow/examples/master/lite/examples/image_classification/raspberry_pi/download.sh
Get modified classify script from my download area:
wget https://peppe8o.com/download/python/peppe8o_classify.pyFrom the terminal, download pre-trained models and labels:
bash download.sh ./Run classify script with the following command:
python3 peppe8o_classify.py --model mobilenet_v1_1.0_224_quant.tflite --label labels_mobilenet_quant_v1_224.txtRaspberry PI will start listening on port 8000 for incoming connections. You will be able to stop this process with common interrupt keys (CTRL+C).
That’s all on remote RPI. Now switch on the local computer where you want to get the image classification video stream.
Receiving Image Classification Streaming
I will use VLC media player, but you can use whatever media player able to manage network streams with h264 format.
Open VLC interface:
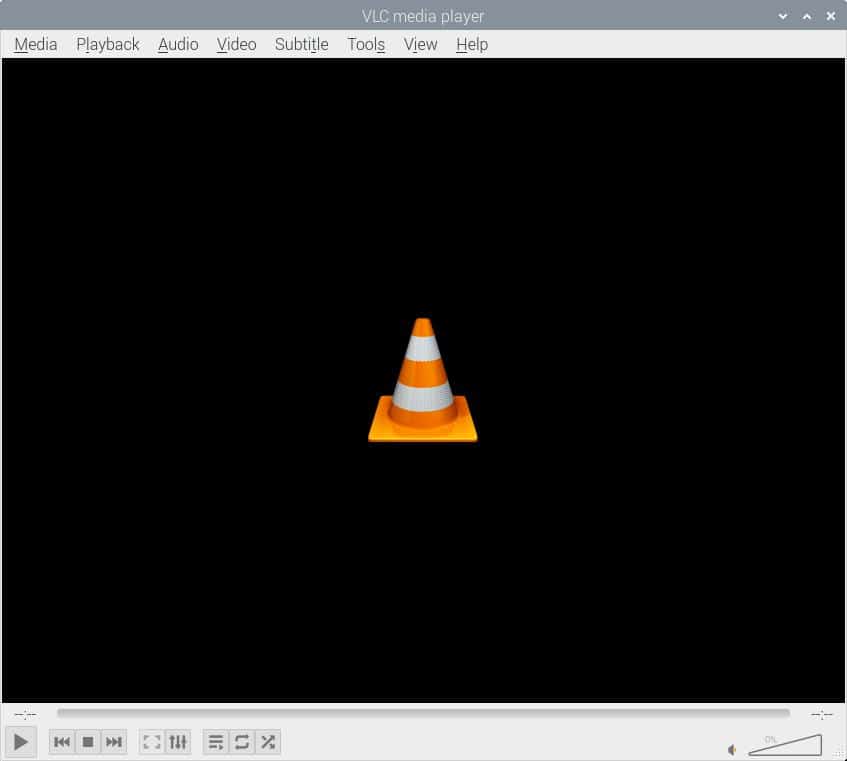
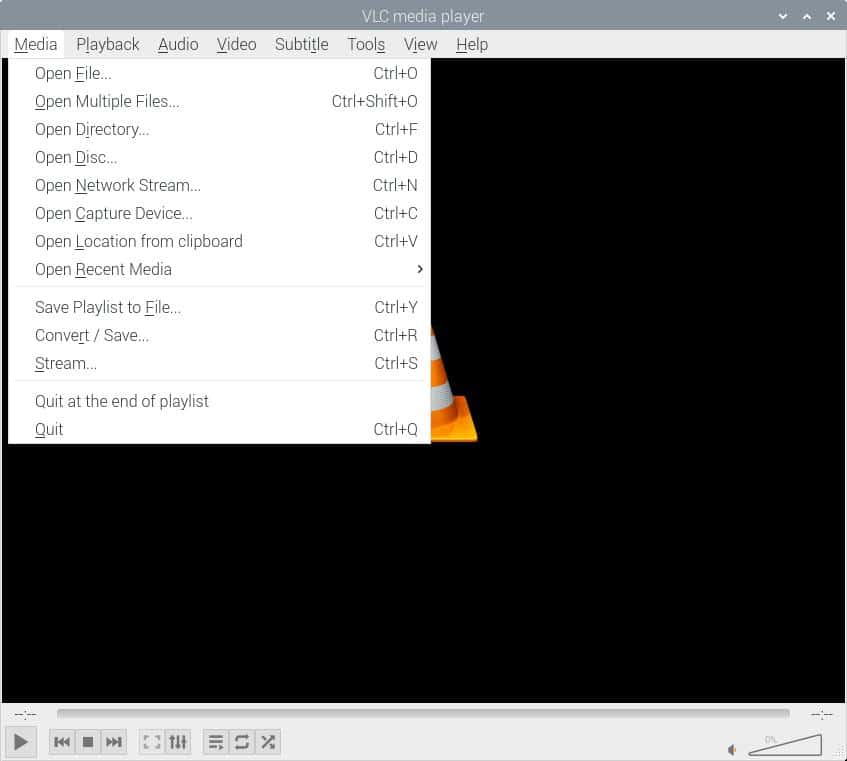
From “Media” menu use “Open Network stream” option:
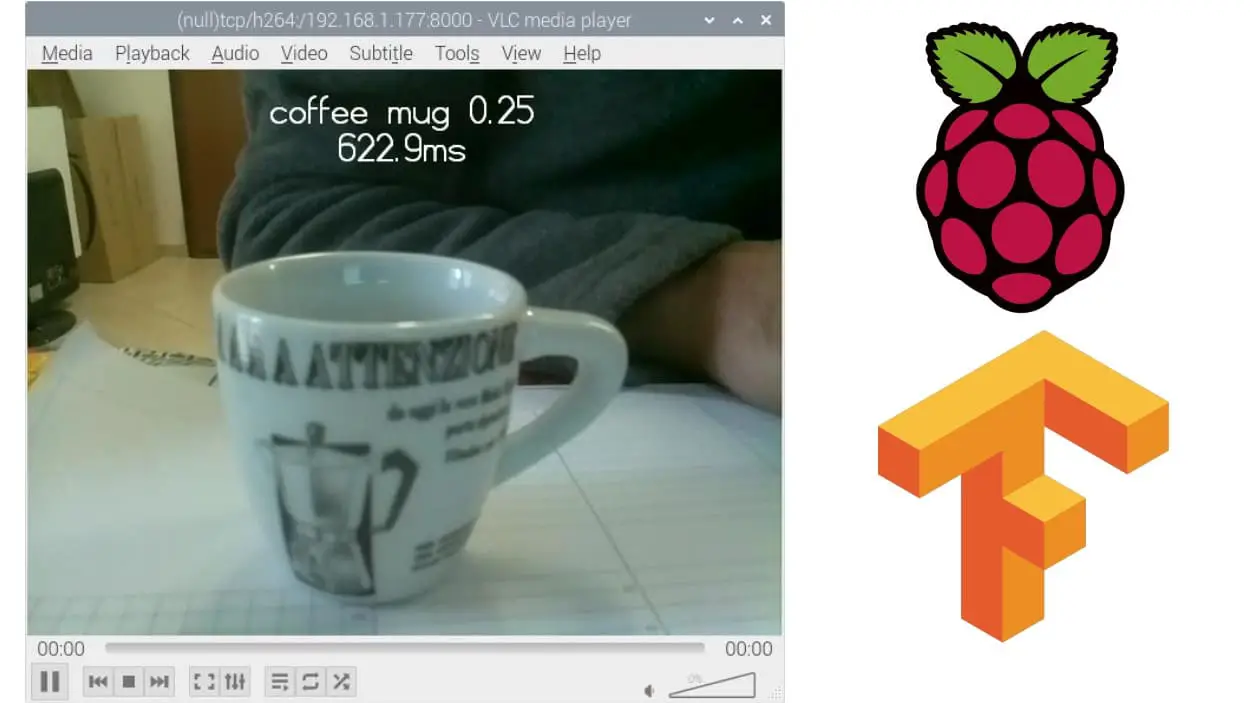
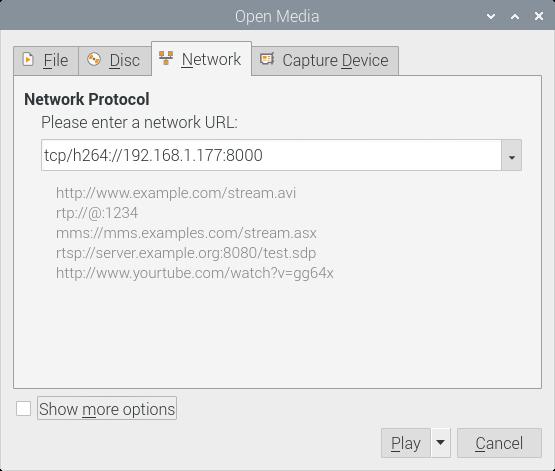
Switch to “Network” tab and use your Raspberry PI IP address (mine is 192.168.1.177) to set the stream connection string. Compose URL with “tcp/h264://” + your RPI address + “:8000”. You should use something similar to the following:
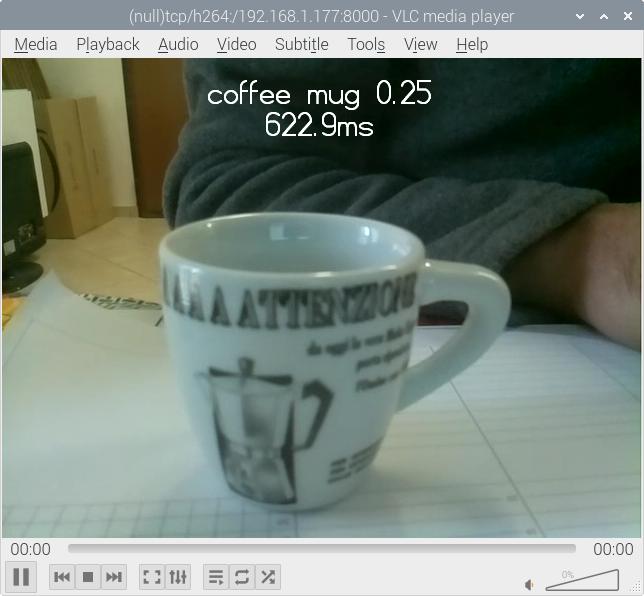
You will get a result similar to the following one:
What’s New Compared to Image Classification Original Code
Compared to the original code, I had to make some changes to the code to stream video flow.
I added a socket library to manage socket connection:
import socketI also added socket management code in the main block. This part opens a socket connection binding for every connection coming to Raspberry PI on port 8000 (please refer to picamera basic recipes page). setsockopt manages script interruption and re-execution after a few times: because of an intended behaviour, the socket library keeps the connection occupied for several seconds after script execution, so giving “address already in use” error if you try before this timeout. With “setsockopt(socket.SOL_SOCKET, socket.SO_REUSEADDR, 1)” you can reuse the address and port without waiting for resources to be free:
server_socket = socket.socket()
server_socket.setsockopt(socket.SOL_SOCKET, socket.SO_REUSEADDR, 1)
server_socket.bind(('0.0.0.0', 8000))
server_socket.listen(0)
connection = server_socket.accept()[0].makefile('wb')
Instead of start_preview function, I use start_recording according to Picamera network streaming docs:
camera.start_recording(connection, format='h264')I prefer managing script interruption with KeyboardInterrup exception instead of “finally”. This block stops the camera and closes the connection socket.
except KeyboardInterrupt:
      camera.stop_recording()
      connection.close()
Final Thoughts
This tutorial uses a pre-trained model from TensorFlow examples. While this can be a good start, you will need to train your own model to get more accurate results.
Next Steps
Interested in more projects with your RPI? Take a look at peppe8o Raspberry PI computers tutorials pages.
Enjoy!
