
Manage your home stocks like a pro with Grocy and Raspberry PI
Last Updated on 12th June 2022 by peppe8o
IMPORTANT NOTE: I just submitted a GitHub bug notification as the default procedure to install Grocy results into a “SQLSTATE[HY000]: General error: 1 no such table: users” error. Stay tuned with this page for news when the bug will be solved.
Managing home stocks is a common need for all people. How many times did you forget to buy something finished at home from your supermarket?
Grocy aims to help people keep track of their stocks and easily plan shopping for required items. With its built-in barcode scan function, it also allows managing the number of your products by simply scanning their barcode with your smartphone/tablet/pc camera.
It also supports a wider number of items and elements, also letting you define your customized ones.
Its main features include:
- Google Home Assistant integration
- Purchases tracking
- Shopping list automation and optimization
- Recipes management
- Meal planning
- Tasks management
- … and many other features and addons
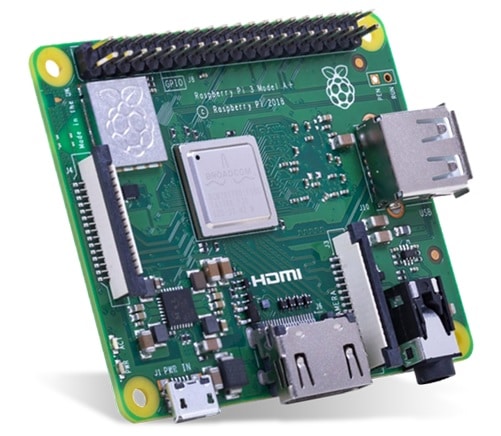
In this guide, Grocy will be installed in a cheap Raspberry PI 3 Model A+, but this applies also to newer Raspberry PI computer boards.
What We Need
As usual, I suggest adding from now to your favourite e-commerce shopping cart all the needed hardware, so that at the end you will be able to evaluate overall costs and decide if to continue with the project or remove them from the shopping cart. So, hardware will be only:
- Raspberry PI 3 Model A+ (including proper power supply or using a smartphone micro USB charger with at least 3A) or newer Raspberry PI Board
- high speed micro SD card (at least 16 GB, at least class 10)
Check hardware prices with the following links:


Step-by-Step Procedure
Prepare Operating System and Required Packages
Please start installing your OS. You can use Raspberry PI OS Lite (for a fast, headless OS), or you can use Raspberry PI OS Desktop (in this case working from its terminal).
Make your OS up to date. From terminal:
sudo apt update -y && sudo apt upgrade -yInstall Apache webserver and SQLite:
sudo apt install apache2 -y
sudo apt install sqlite3 -y
Finally, install the required PHP packages:
sudo apt install php7.4 php7.4-sqlite3 php7.4-gd php7.4-intl php7.4-mbstring -yInstall Grocy in your Raspberry PI
Get a copy of Grocy code:
wget https://releases.grocy.info/latest -O grocy.zipUnzip to the Apache root folder, copy the config file from the template and give correct permission to the folder:
sudo unzip grocy.zip -d /var/www/html/
sudo cp /var/www/html/config-dist.php /var/www/html/data/config.php
sudo chown www-data:www-data -R /var/www/html/
Define the base path in Apache:
sudo nano /etc/apache2/sites-available/000-default.confedit from
DocumentRoot /var/www/html/to:
DocumentRoot /var/www/html/public/Save and close this file.
Enable Override in Apache:
sudo nano /etc/apache2/apache2.confEdit within the “<Directory /var/www>” section:
AllowOverride Noneto
AllowOverride AllSave and close this file.
Enable Rewrite and restart Apache:
sudo a2enmod rewrite
sudo systemctl restart apache2.service
From your favourite browser, use your Raspberry PI url: “http://<<YourRpiIpAddress>>” (my Raspberry PI address is 192.168.1.78). It is important to use the root URL (without adding, for example, the trailing “/login”), as it initializes the database and avoids the “SQLSTATE[HY000]: General error: 1 no such table: users” error.
The login page will appear:

Use default credentials (remember to change the password soon when you will start using Grocy with your info):
- user: admin
- password: admin
You will be logged in to Grocy default home page:

From here, you can use your Grocy installation.
Enabling Barcode Scanner
If you want to use the convenient Barcode Scanner feature, you need to move your Grocy installation to “https”. To enable SSL and make the barcode scan work, please refer following steps.
You will install certificates generated locally, so your browser will surely notify you that this connection is not secure because it cannot verify with a public certification authority.
Enable Apache ssl, create a folder for certificates and generate local certificates. From terminal:
sudo a2enmod ssl
sudo mkdir /etc/apache2/ssl
sudo openssl req -x509 -nodes -days 365 -newkey rsa:2048 -keyout /etc/apache2/ssl/apache.key -out /etc/apache2/ssl/apache.crt
The last command will ask some questions for certificates generation. Answers are free…
Setup Apache SSL configuration file with correct root directory:
sudo nano /etc/apache2/sites-available/default-ssl.confIdentify the row including “DocumentRoot /var/www/html” and change it to “DocumentRoot /var/www/html/public”. Save and close the file.
Enable SSL and restart Apache:
sudo a2ensite default-ssl.conf
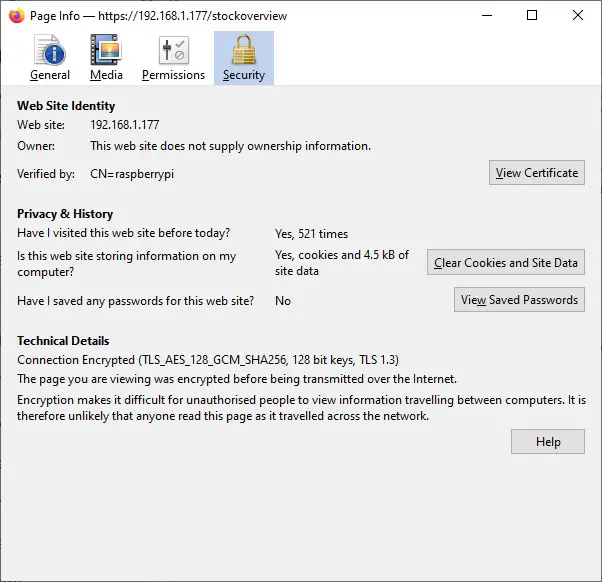
sudo systemctl restart apache2.serviceBack to your browser, you will find the SSL page at “https://<<YourRpiIpAddress>>” (my address is still 192.168.1.78). Your web browser will notify a not verified certificate with a not secure warning:

You are using your local Raspberry Pi, so you can go on by clicking on the “Advanced” button and then “Accept the risk and continue” link.
If you want to get a certificate without warnings, you will need to get it from a Certification Authority (like, for example, using Let’s encrypt with Raspberry PI).
A new login page will appear (identical to the previous one), but on the left side of your URL the “Not Secure” warning will change and after clicking it you will reach the certificate details:
However, you can log in and use your Grocy installation and the Barcode Scanner feature.
Grocy Docs
Please find the Grocy tutorials at https://github.com/grocy/docs/blob/master/tutorial.md.
What’s Next
If you want to discover many other projects for your Raspberry PI, you can take a look at peppe8o Raspberry PI tutorials.
Enjoy!

Hello,
thank you for your guide.
I have two questions:
1. Can the section regarding the ssl certificate also applied to a nginx setup?
2. I’m trying to setup my grocy in a sub folder but I have no success. I read through the guides on the webpage but I’m not able to get this running in a sub-folder. So if would be very useful for me but I think also for others when you could show this step by step
Hi.
Nginx has its own security enablement procedure. Once you get nginx working, you can also refer to http://peppe8o.com/install-free-ssl-certificates-with-nginx/. Certificates can be generated with external free authority. They should be ok also from openssl command in this article, but I’ve not still tried it.
Regarding subfolder, you need also to update config.php file as referred in https://github.com/grocy/grocy/issues/694.
Let me know if this is helpful to you of if more help is needed
Hi,
thanks for the link to the nginx article. In the above article you create a ssl certificate without a real domain just in the terminal. In http://peppe8o.com/install-free-ssl-certificates-with-nginx/ according to the guide I would need a real domain or not? Or can I just choose a random domain name which I don’t own and take the certificate and use it for securing my access to my local grocy service?!?
I’m using grocy just in my home network and with VPN, so I just have a internal home network ip for this service.
The subfolder installation I tried several times. Either I can’t reach the page at all and only see a Nginx error or I see a page with Grocy logo and the text this page doesn’t exist and will reload in 5 seconds. I have already tried all configuration files adjusted to my installation paths but it was one of the two results every time.
Hi
Thanks for this tutorial. However when I run grocy it doesn’t work because the version of php installed is not good (requiered PHP 7.4). Do you plan to update the tutorial? I am a novice and despite my little research to install PHP 7.4 I am unable to make grocy work
Thank you very much for your note, David.
Unlucly, after recent Grocy upgrade it seems that php 7.3 is no more supported. On the other side, Raspberry PI apt sources still include only the obsolete php 7.3. For this reason I updated my tutorial adding a workaround. I tested it and appears to be working now. If you already installed php7.3 before, I suggest to purge these packages with “sudo apt purge php7.3*”
Hi,
Thank you for the tutorial 🙂
I’ve followed it “by the letter” but when I try to connect to grocy the first time I get a 403 error.
I did the chown www-data thing I can’t find a way to connect to grocy 🙁
any idea ?
Thanks
Ed
Hi Ed,
as you correctly investigated, 403 error means permissions issues.
Please enter the /var/www/html/ folder:
cd /var/www/html/and post (or email me at giuseppe@peppe8o.com) result from command:
ls -laThank you!
Hi peppe80
thanks for your quick answer 🙂
first of all, all my websites on the servers are installed directly on /var/www/… (not /var/www/html/…), maybe so grocy is installed at /var/www/grocy.mydomaine.com
might it be the source of the error ?
so concerning your request, ls -la output on the root of grocy folder is following :
total 244
drwxrwxr-x 13 www-data www-data 4096 avril 18 16:07 .
drwxr-xr-x 6 www-data www-data 4096 avril 18 11:06 ..
-rwxrwxr-x 1 www-data www-data 2649 janv. 5 10:51 app.php
drwxrwxr-x 2 www-data www-data 4096 janv. 5 10:52 changelog
-rwxrwxr-x 1 www-data www-data 10077 janv. 5 09:52 config-dist.php
drwxrwxr-x 3 www-data www-data 4096 janv. 5 09:52 controllers
drwxrwxr-x 4 www-data www-data 4096 avril 18 11:03 data
-rwxrwxr-x 1 www-data www-data 128962 janv. 5 09:52 grocy.openapi.json
drwxrwxr-x 2 www-data www-data 4096 janv. 5 09:52 helpers
-rw-r–r– 1 www-data www-data 155 avril 18 16:07 .htaccess
-rwxrwxr-x 1 www-data www-data 1090 mars 6 2019 LICENSE
drwxrwxr-x 28 www-data www-data 4096 janv. 5 10:44 localization
drwxrwxr-x 2 www-data www-data 4096 janv. 5 09:52 middleware
drwxrwxr-x 2 www-data www-data 4096 janv. 5 09:52 migrations
drwxrwxr-x 9 www-data www-data 4096 janv. 5 09:56 public
-rwxrwxr-x 1 www-data www-data 10646 janv. 5 09:52 README.md
-rwxrwxr-x 1 www-data www-data 16446 janv. 5 09:52 routes.php
drwxrwxr-x 2 www-data www-data 4096 janv. 5 09:52 services
-rwxrwxr-x 1 www-data www-data 968 avril 7 2020 update.sh
drwxrwxr-x 23 www-data www-data 4096 janv. 5 09:55 vendor
-rwxrwxr-x 1 www-data www-data 58 janv. 5 10:49 version.json
drwxrwxr-x 5 www-data www-data 4096 janv. 5 09:52 views
Re ^^
I checked further, changing apache root folder from /var/www/html to /var/www
I then clicked down to the grocy/public folder and this page appeared :
Error source:
“`
/var/www/grocy.toto.fr/services/DatabaseService.php:33
“`
Error message:
“`
SQLSTATE[23000]: Integrity constraint violation: 19 UNIQUE constraint failed: migrations.migration
“`
Stack trace:
“`
#0 /var/www/grocy.toto.fr/services/DatabaseService.php(33): PDO->exec()
#1 /var/www/grocy.toto.fr/services/DatabaseMigrationService.php(42): Grocy\Services\DatabaseService->ExecuteDbStatement()
#2 /var/www/grocy.toto.fr/services/DatabaseMigrationService.php(25): Grocy\Services\DatabaseMigrationService->ExecutePhpMigrationWhenNeeded()
#3 /var/www/grocy.toto.fr/controllers/SystemController.php(27): Grocy\Services\DatabaseMigrationService->MigrateDatabase()
#4 /var/www/grocy.toto.fr/vendor/slim/slim/Slim/Handlers/Strategies/RequestResponse.php(43): Grocy\Controllers\SystemController->Root()
#5 /var/www/grocy.toto.fr/vendor/slim/slim/Slim/Routing/Route.php(384): Slim\Handlers\Strategies\RequestResponse->__invoke()
#6 /var/www/grocy.toto.fr/vendor/slim/slim/Slim/MiddlewareDispatcher.php(81): Slim\Routing\Route->handle()
#7 /var/www/grocy.toto.fr/vendor/slim/slim/Slim/MiddlewareDispatcher.php(81): Slim\MiddlewareDispatcher->handle()
#8 /var/www/grocy.toto.fr/vendor/slim/slim/Slim/Routing/Route.php(341): Slim\MiddlewareDispatcher->handle()
#9 /var/www/grocy.toto.fr/vendor/slim/slim/Slim/Routing/RouteRunner.php(84): Slim\Routing\Route->run()
#10 /var/www/grocy.toto.fr/middleware/LocaleMiddleware.php(16): Slim\Routing\RouteRunner->handle()
#11 /var/www/grocy.toto.fr/vendor/slim/slim/Slim/MiddlewareDispatcher.php(313): Grocy\Middleware\LocaleMiddleware->__invoke()
#12 /var/www/grocy.toto.fr/middleware/AuthMiddleware.php(31): class@anonymous->handle()
#13 /var/www/grocy.toto.fr/vendor/slim/slim/Slim/MiddlewareDispatcher.php(313): Grocy\Middleware\AuthMiddleware->__invoke()
#14 /var/www/grocy.toto.fr/vendor/slim/slim/Slim/Middleware/RoutingMiddleware.php(59): class@anonymous->handle()
#15 /var/www/grocy.toto.fr/vendor/slim/slim/Slim/MiddlewareDispatcher.php(147): Slim\Middleware\RoutingMiddleware->process()
#16 /var/www/grocy.toto.fr/vendor/slim/slim/Slim/Middleware/ErrorMiddleware.php(107): class@anonymous->handle()
#17 /var/www/grocy.toto.fr/vendor/slim/slim/Slim/MiddlewareDispatcher.php(147): Slim\Middleware\ErrorMiddleware->process()
#18 /var/www/grocy.toto.fr/middleware/CorsMiddleware.php(30): class@anonymous->handle()
#19 /var/www/grocy.toto.fr/vendor/slim/slim/Slim/MiddlewareDispatcher.php(313): Grocy\Middleware\CorsMiddleware->__invoke()
#20 /var/www/grocy.toto.fr/vendor/slim/slim/Slim/MiddlewareDispatcher.php(81): class@anonymous->handle()
#21 /var/www/grocy.toto.fr/vendor/slim/slim/Slim/App.php(215): Slim\MiddlewareDispatcher->handle()
#22 /var/www/grocy.toto.fr/vendor/slim/slim/Slim/App.php(199): Slim\App->handle()
#23 /var/www/grocy.toto.fr/app.php(94): Slim\App->run()
#24 /var/www/grocy.toto.fr/public/index.php(45): require_once(‘/var/www/grocy….’)
#25 {main}
“`
any idea ? 🙂
You should use /var/www/public as document root in your apache site config. Unless you need to be so, I would recommend to start a new installation with same paths as in my tutorial…
hello peppe8o
thanks, yes i did exactly as in your tutorial and it works fine now 🙂
… except the ssl : i get a error 500 message
in fact i did as you requested except the port number I’ve setup to 44301 (as the 443 is already used for another website).
I updated default-ssl.conf file accordingly …
would you have an idea ?
thanks
https requires and works only with 443 port. Multiple website on same server can stay beside by using virtual hosts in Apache:
https://cwiki.apache.org/confluence/pages/viewpage.action?pageId=115522393
Hi,
After installing php packages and checking version of php installed I get Segmentation fault message:
sudo apt install php7.4 php7.4-sqlite3 php7.4-gd
Reading package lists… Done
Building depedency tree
Reading state information… Done
php7.4 is already the newest version (7.4.21-1+0~20210702.48+debian10~1.gbp9b7c1f).
php7.4-gd is already the newest version (7.4.21-1+0~20210702.48+debian10~1.gbp9b7c1f).
php7.4-sqlite3 is already the newest version (7.4.21-1+0~20210702.48+debian10~1.gbp9b7c1f).
0 upgraded, 0 newly installed, 0 to remove and 92 not upgraded.
php -v
Segmentation fault
How can I troubleshoot this?
Hi Dariusz. A segmentation fault means a memory access problem and is complex to debug. Trying to go simple, I can see that you had already installed php7.4 (0 upgraded, 0 newly installed, 0 to remove and 92 not upgraded), so maybe something conflicting. Please note that you have 92 packages not upgraded, so a “sudo apt upgrade” can be needed. I’ve re-tryed to install these packages and it has been accomplished successfully on my Raspberry PI.
You can move in 2 different directions.
If you don’t have any other programs/data already installed in your Raspberry PI, I suggest to start with a new setup (from OS installation).
If you need to preserve your current OS installation, I suggest to purge/autoclean packages:
sudo apt purge php7.4 php7.4-sqlite3 php7.4-gdsudo apt autocleanand then install again.
Please let me know if one of these ways worked.
Starting from scratch I get these messages at the end after running command to install php packages: sudo apt install php7.4 php7.4-sqlite3 php7.4-gd
Creating config file /etc/php/7.4/apache2/php.ini with new version
Module mpm_event disabled.
Enabling module mpm_prefork.
apache2_switch_mpm Switch to prefork
apache2_invoke: Enable module php7.4
apache2_reload: Your configuration is broken. Not restarting Apache 2
apache2_reload: Illegal instruction
Setting up php7.4 (7.4.21-1+0~20210702.48+debian10~1.gbp9b7c1f) …
Processing triggers for man-db (2.8.5-2) …
Processing triggers for php7.4-cli (7.4.21-1+0~20210702.48+debian10~1.gbp9b7c1f) …
Processing triggers for libapache2-mod-php7.4 (7.4.21-1+0~20210702.48+debian10~1.gbp9b7c1f) …
And after running php -v I get:
Segmentation fault
I will try to complete configuration regardless of these messages and see what I will get. I’ll post it there
Still not working, something is wrong with my Raspberry Pi apparently. I gonna leave it for now.
Sorry for late answer. Please can you let me know what is your RPI model and how are you flashing your OS? (Rpi imagery or Etcher or other?)