Use GitHub with Raspberry PI OS from Terminal
Last Updated on 12th April 2024 by peppe8o
GitHub is a famous portal, widely known by developers around the world to collaborate in code creation and sharing.
Most users know GitHub only for “git clone” commands, which allows you to download and use packages from remote repositories.
In this tutorial I’ll show you how to create your own repository on GitHub and manage files from a terminal in Raspberry PI OS with main git commands.
I’ll use a Raspberry Pi Zero W, but every Raspberry PI board will work same way.
Understanding Git Basic process with GitHub
Before starting in explainig commands to create your repository and aligning files, we need to cover a deeper knowledge in git and GitHub process.
Following picture simplify what is behind their relation:
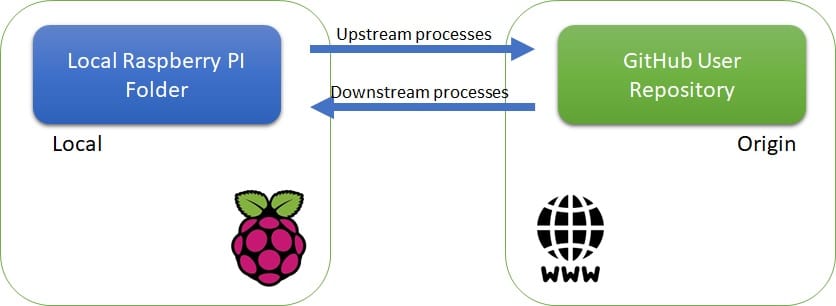
Git manages all processes inside local system (Raspberry PI for us). It initialize folders structure and is responsible for managing communications with GitHub portal. Here are located files you are going to modify with your local version.
GitHub Repository is like a remote folder including files already added to specific version (main version is usually named “master”). GitHub repository also marks all modifications received from remote users, maintaining change trace for possible restore needs.
Local folder will usually be copied from GitHub repository by initial “git copy” process (if you start from existing repository). This is an example of downstream process. Repository can then be sinced with the “git add origin” command if you need to propose changes to original GitHub files.
Once every change is made on local folder/files, it is saved only in your local PC and traced by git. If you want to upload it to GitHub repository, you need first to move changes in a local staging area. After being recorded on staging, then changes can be pushed on GitHub repository with “git push” command. Last one is an example of upstream process.
A simple picture can show the main overall process:

What We Need
As usual, I suggest adding from now to your favourite e-commerce shopping cart all the needed hardware, so that at the end you will be able to evaluate overall costs and decide if to continue with the project or remove them from the shopping cart. So, hardware will be only:
- Raspberry PI Zero 2 W (including proper power supply or using a smartphone micro USB charger with at least 3A) or newer Raspberry PI Board
- high speed micro SD card (at least 16 GB, at least class 10)
This guide is based on Raspberry PI OS Lite installation (headless). With Desktop installation you also will need Monitor and Keyboard/Mouse.
Step-by-Step Procedure
Operating System Preparation
I will use a headless Raspberry PI OS Lite installation. Anyway, you can use this guide also from a Desktop distribution by using the Terminal available inside it.
Once installed, make your OS up to date:
sudo apt update
sudo apt upgrade
Install git package:
sudo apt install gitConfigure Git Environment
One of the most common personalization is about user identity (name and email are required for commit operations):
git config --global user.name "myGitHubUser"
git config --global user.email myEmail@example.com
Check configuration:
pi@raspberrypi:~ $ git config --list
user.name=myGitHubUser
user.email=myEmail@example.com
Basic git configuration is done. Move to GitHub operations.
GitHub User Account and Repository Creation
For a new GitHub repository, you will need to create it from the GitHub portal.
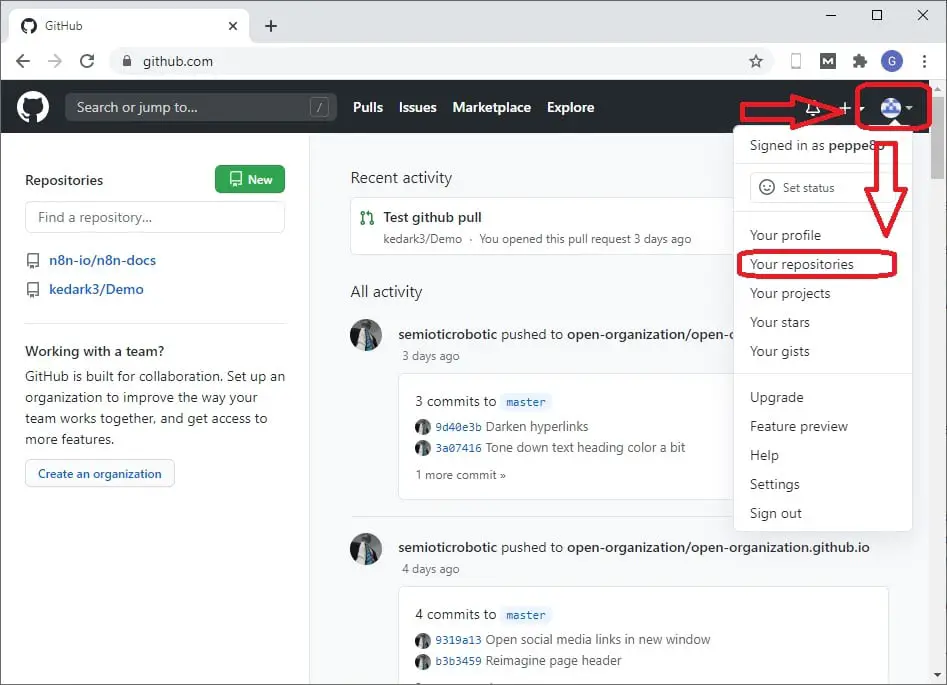
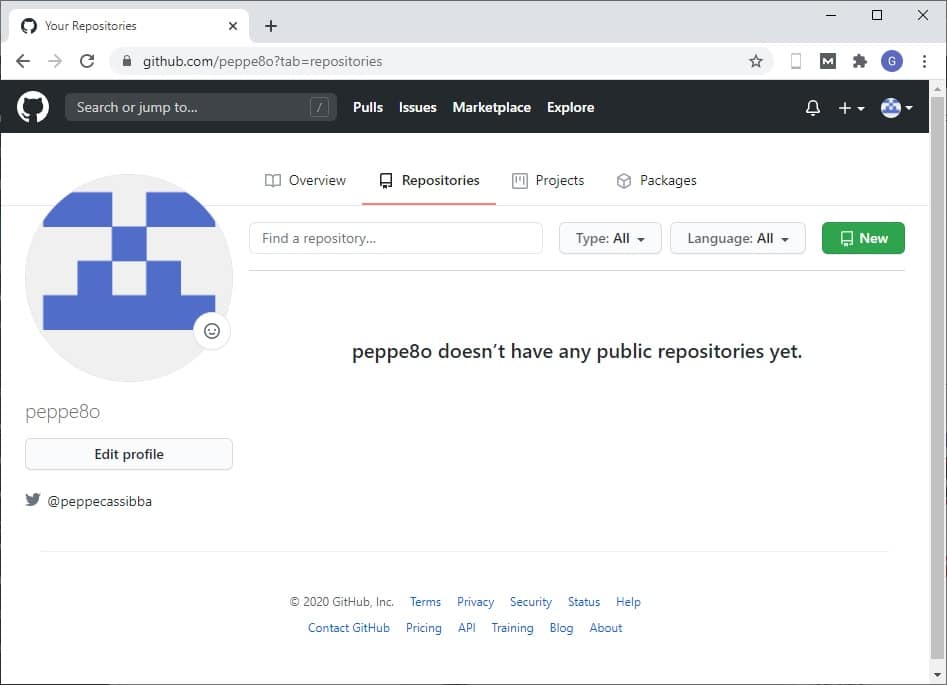
So, go to GitHub Home Page from your favourite browser and create a new free account. Once you account is ready and activated, login and, from the dashboard, use the profile icon to open the drop-down menù and select “Your repositories”:
Your repositories page will be empty:
Use “New” green button to create a new repo. The next page will ask you to set the Repository name and a few settings. The only one field mandatory to create a new repository is its name:
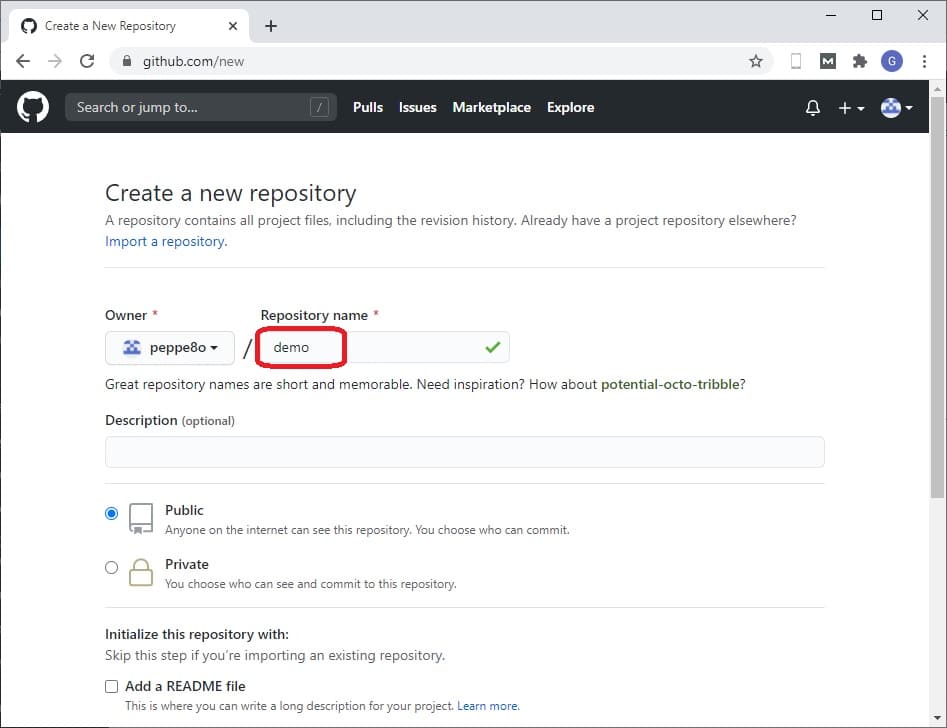
You can then decide to make it public or private. Then you can scroll down to “Create Repository” button leaving all other settings as default (all settings can be changed after Repo creation). The new screen will show a link to synchronize your GitHub Repository:

This URL will be useful in local git commands.
For the moment demo is still empty. Switch on the Raspberry PI terminal for the next steps.
Git Basic Operations for Publishing Changes
From the terminal session, create a new folder (where local files will be stored) and enter it:
mkdir demo
cd demo
To start version control for this folder with Git, you first need initialize it and will have following result:
pi@raspberrypi:~/demo $ git init
Initialized empty Git repository in /home/pi/demo/.git/
After this operation, a new hidden folder named “.git” is created:
pi@raspberrypi:~/demo $ ls -la
total 12
drwxr-xr-x 3 pi pi 4096 Sep 14 18:14 .
drwxr-xr-x 5 pi pi 4096 Sep 14 18:11 ..
drwxr-xr-x 7 pi pi 4096 Sep 14 18:14 .git
Create a simple README.md file with a few text:
nano README.mdMy file will include followin text:
# My Demo Repository
by peppe8o.com
Close and save. “Git status” command will show following result:
pi@raspberrypi:~/demo $ git status
On branch master

No commits yet

Untracked files:
 (use "git add …" to include in what will be committed)

      README.md
nothing added to commit but untracked files present (use "git add" to track)
This message warnings you that a new untracked file is present, but it needs to be moved in staging area before being committed. Your GitHub Repository is still empty. Move README.md in staging area:
git add README.mdand check again current status:
pi@raspberrypi:~/demo $ git status
On branch master

No commits yet

Changes to be committed:
  (use "git rm --cached …" to unstage)
   new file: README.md
A bit better. README.md file is ready to be committed. Remember, your GitHub Repository is still empty. You can also comment this operation with -m option, followed by your comment. Below command and result:
pi@raspberrypi:~/demo $ git commit -m "first commit note"
[master (root-commit) 48e5a48] first commit note
1 file changed, 2 insertions(+)
create mode 100644 README.md
Ok, now your local repository is aligned with workspace.
To upstream your README.md file, you need first to set remote Repository where to push changes. Get back your GitHub repository url and keep with you GitHub username and password (last one will be necessary in a few lines). From terminal (changing “https://github.com/peppe8o/demo.git” with your one):
git remote add origin https://github.com/peppe8o/demo.gitThis will set the new remote. Checking it, will return results similar to following:
pi@raspberrypi:~/demo $ git remote -v
origin https://github.com/peppe8o/demo.git (fetch)
origin https://github.com/peppe8o/demo.git (push)
Push changes from local Repository to GitHub origin (will require your GitHub user and password) and results will be:
pi@raspberrypi:~/demo $ git push origin master
Username for 'https://github.com': peppe8o
Password for 'https://peppe8o@github.com':
Enumerating objects: 3, done.
Counting objects: 100% (3/3), done.
Writing objects: 100% (3/3), 246 bytes | 22.00 KiB/s, done.
Total 3 (delta 0), reused 0 (delta 0)
To https://github.com/peppe8o/demo.git
[new branch] master -> master
Check back in your browser, by refreshing your Demo repository page:
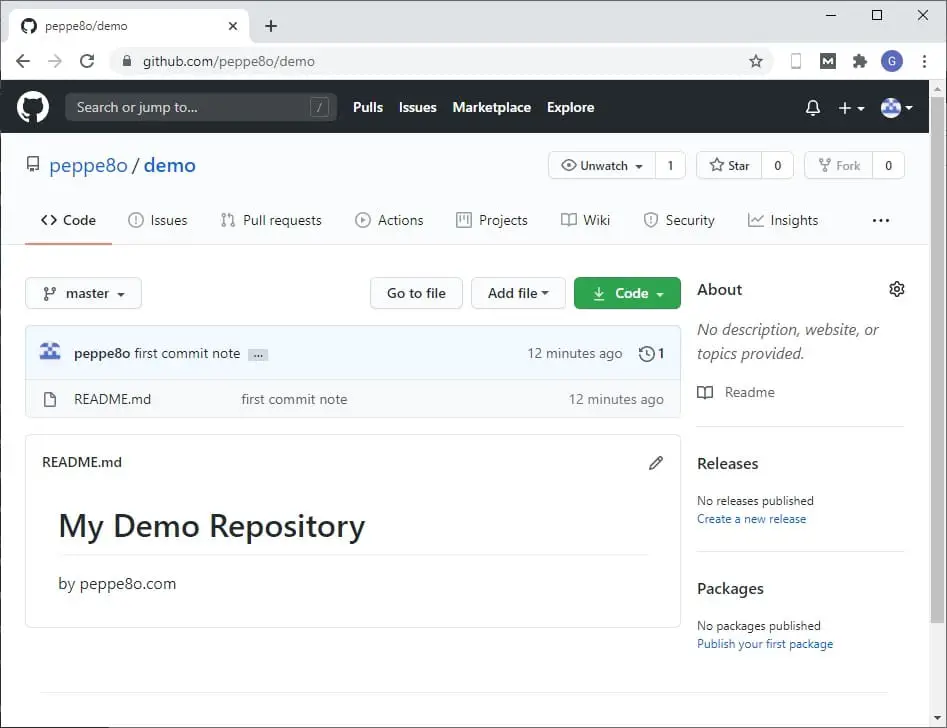
Your README.md file is present and with the text above provided. More info about formatting files can be found in GitHub basic writing guide docs.
More git interfacing commands can be found in general GitHub docs,
For some clarifications, credits go to the useful git-scm.com guide.
Enjoy!
