
Last Updated on 23rd January 2025 by peppe8o
In this tutorial, I will show you a very easy way to use your Raspberry PI as an Access Point with DietPi.
DietPi is an alternative Raspberry PI OS maintained with a very small image size. More info about this OS can be found in my Install DietPi on Raspberry PI for Ultralight Alternative OS guide.
With this project, you will be able to transform a Raspberry Pi into an Access Point and add WiFi connectivity to old routers. There are several ways to accomplish this need, but DietPi has a very user-friendly procedure, so I decided to write it down to make the procedure available for beginners.
The idea is to realize what synthesized in the following picture:

Our router will take internet connectivity from its connection, giving it to all ethernet clients. The Raspberry Pi, on the other side, will share this connectivity in its WiFi Lan created in the following procedure. So, the router will be connected with its WAN port to internet, while Raspberry Pi will be connected to one of router’s Ethernet ports.
Please remember that you will need a Raspberry PI computer model with ethernet ports.
What We Need
As usual, I suggest adding from now to your favourite e-commerce shopping cart all the needed hardware, so that at the end you will be able to evaluate overall costs and decide if to continue with the project or remove them from the shopping cart. So, hardware will be only:
- Raspberry PI Computer Board (including proper power supply or using a smartphone micro USB charger with at least 3A)
- high speed micro SD card (at least 16 GB, at least class 10)

Step-by-Step Guide
OS Installation
We need to start with the Operating System installation in our Raspberry PI. For this task please refer to my install DietPi on Raspberry PI tutorial, which already details all the required steps. Please note that you must skip step 2 (Wifi settings) because, in this case, our Raspberry PI will become an ethernet client and use the WiFi to give access to your home’s devices.
Access Point Software Setup
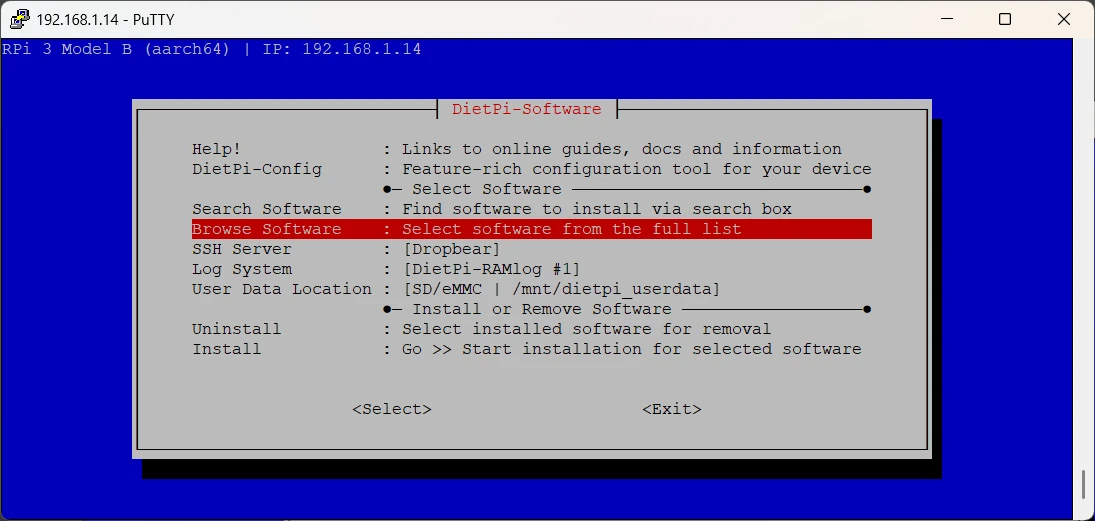
Once the Operating System installation is finished, we can go to the WiFi software setup. Enter the following command:
dietpi-softwarePlease select the “Browse Software” option as in the following picture) and press ENTER:
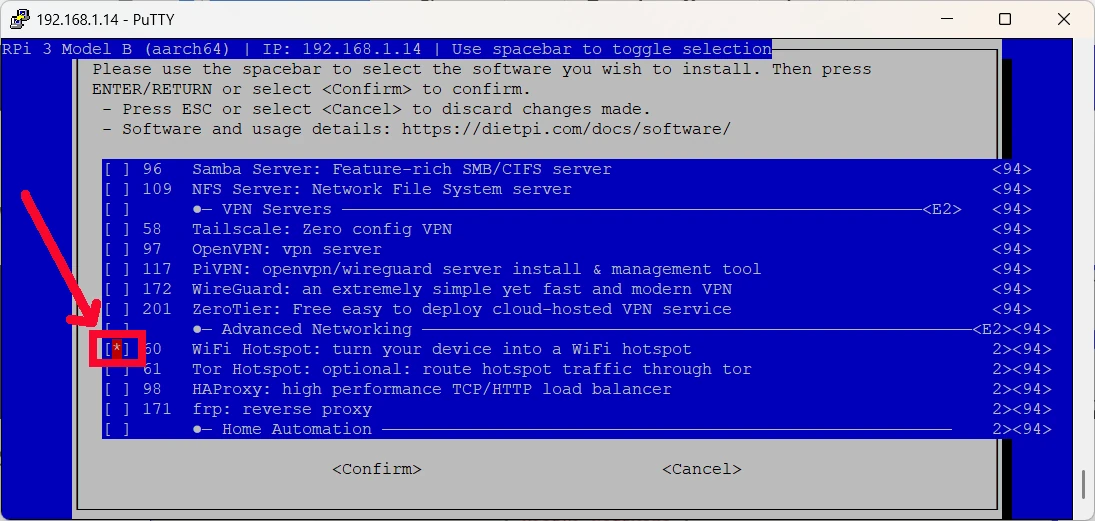
Scroll down the software list until you find the WiFi Hotspot option (as shown in the following picture). Select it with the SPACE bar from your keyboard then press ENTER:
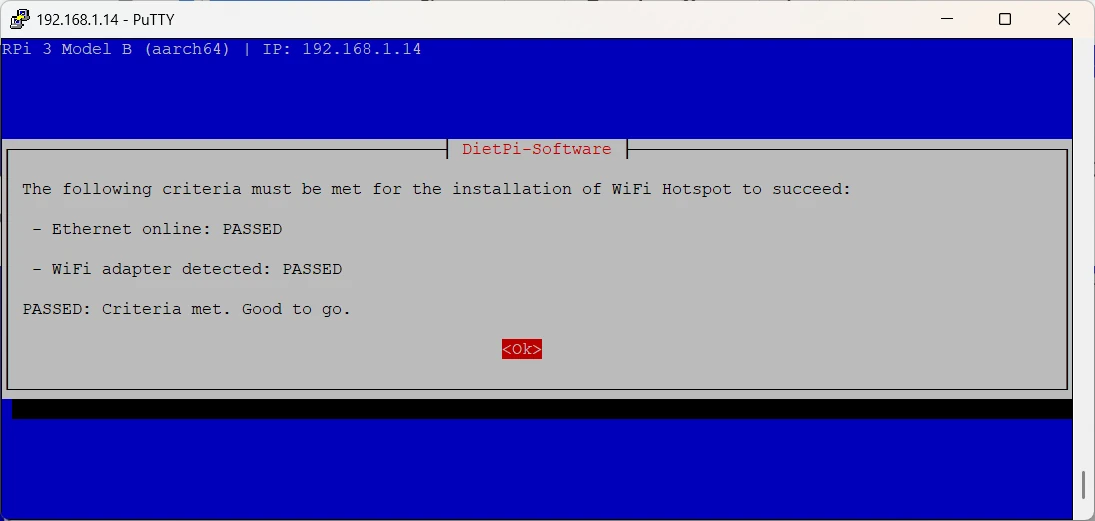
The following screen will confirm that your system meets the requirements. Press ENTER again:
The page will redirect you to the dietpi-software home. Go down to the “Install” option and press ENTER:
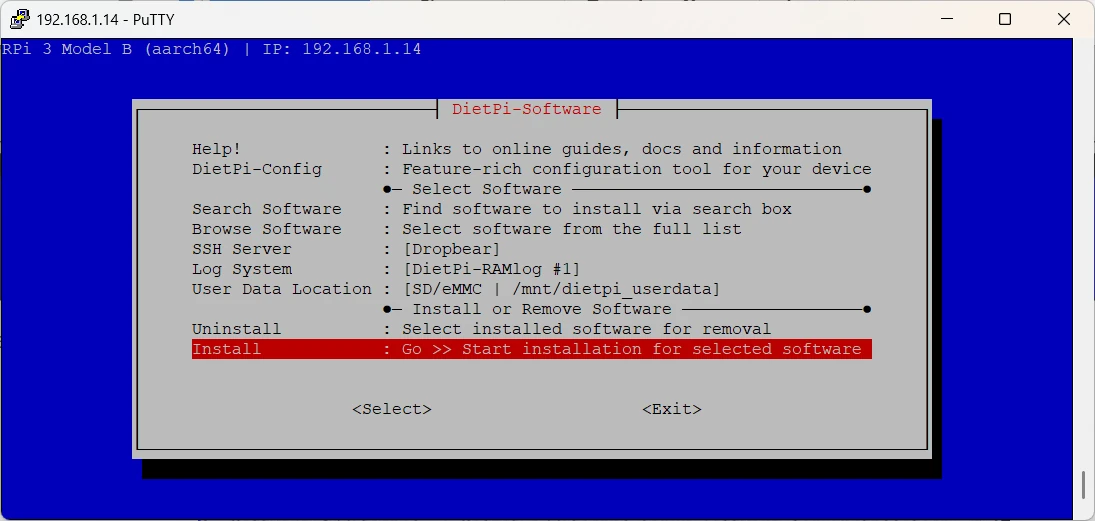
The DietPi will automatically search for the required packages and it will ask you for a final confirmation before applying the installation changes. Move the selector to “Ok” and press enter:
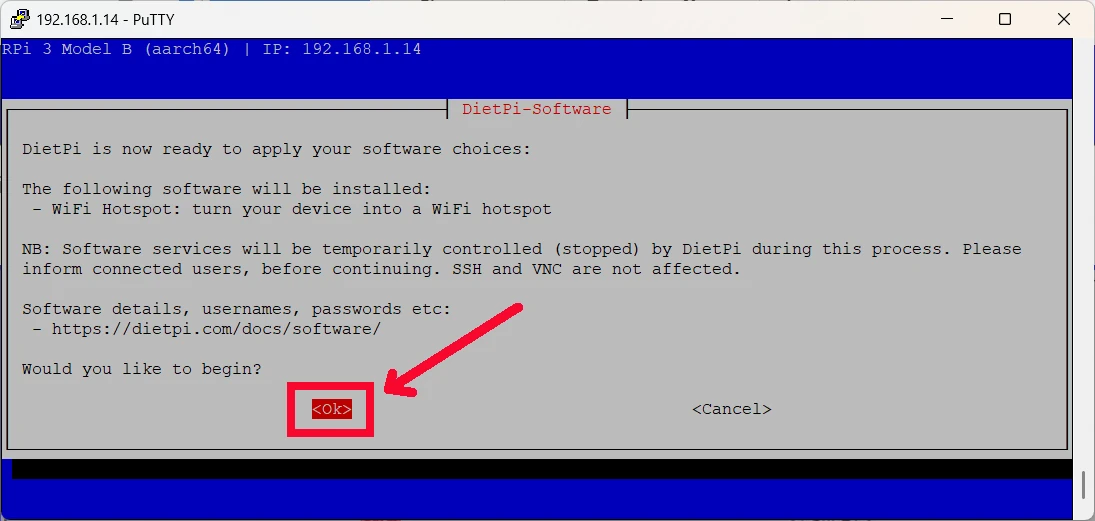
DietPi will start the installation and configuration process, that will end in a few minutes.
After you get back the prompt, you should be able to see the WiFi Hotspot in your home with SSID “DietPi-HotSpot” and password “dietpihotspot”.
Change the SSID and Password for Raspberry PI Access Point with DietPI
At this point, we can fine-tune the Access Point configuration, by customizing the SSID and password.
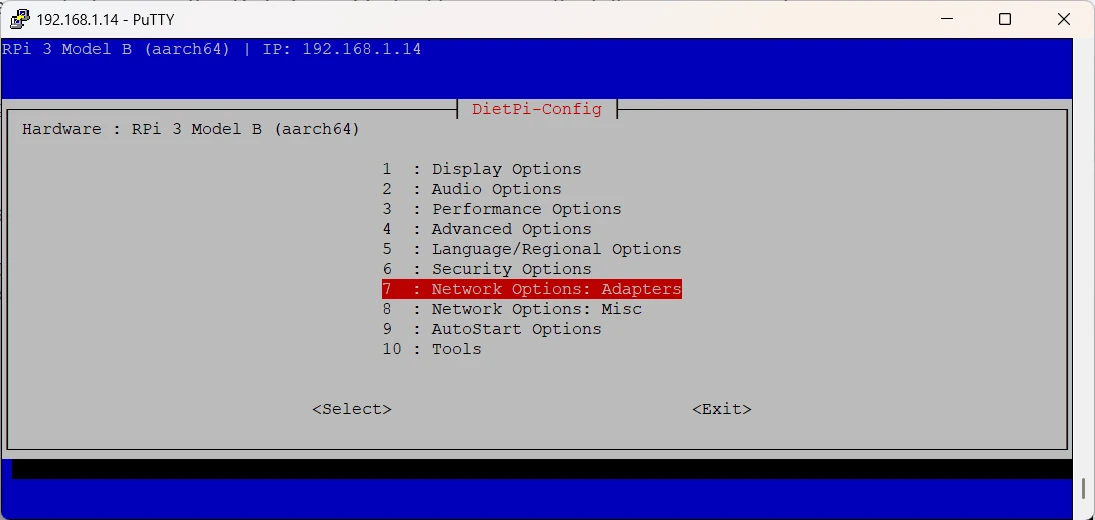
From the DietPi terminal, please run the dietpi-config tool by running the following command:
dietpi-configFrom the home page, please select the “Network Options: Adapters” option and press enter:
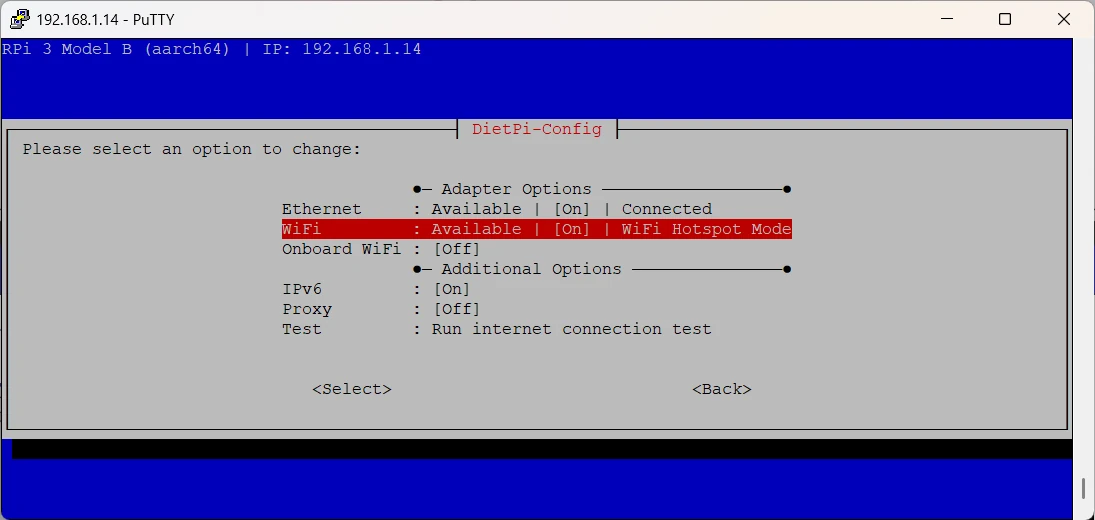
From the Adapters section, please select the WiFi (the line including the “WiFi Hotspot Mode” label) and press ENTER:
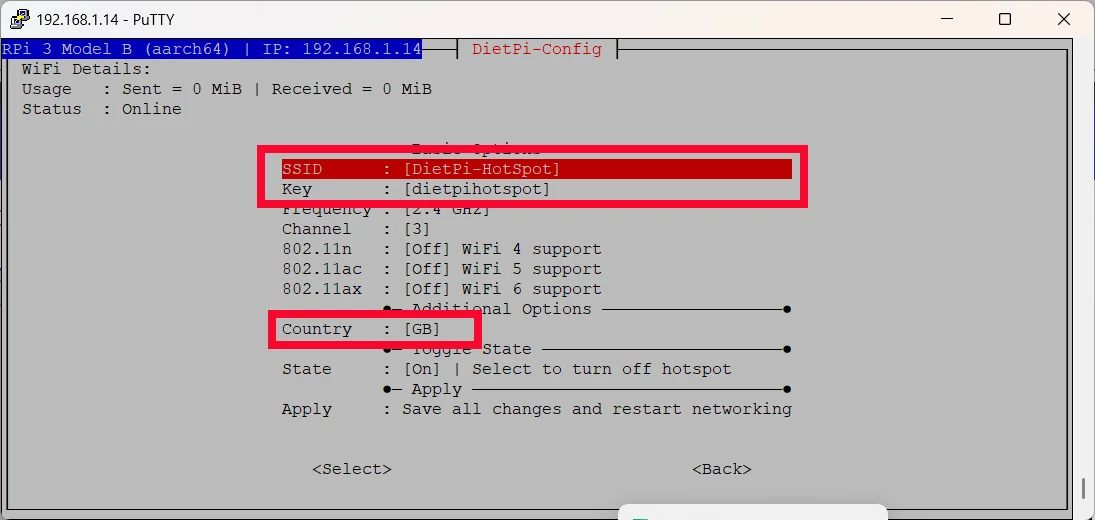
On the resulting page, you can edit some important configurations such as the SSID, Key (WiFi password), and the Country Code according to your Region:
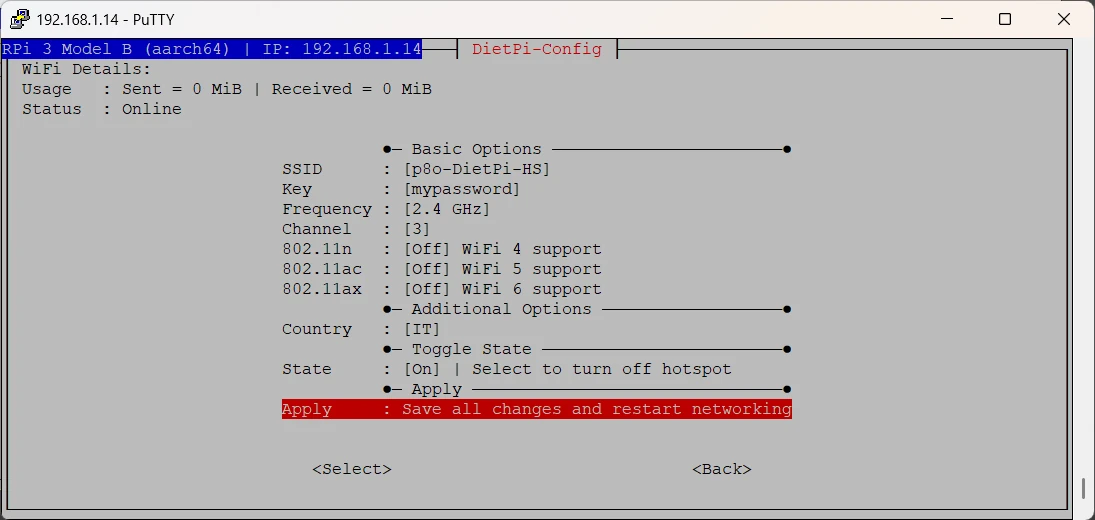
After customizing these settings, please select the “Apply” option and press ENTER:
After these operations, you can exit from the dietpi-config tool by using the “Back” buttons.
Generating a QR Code for Automatic WiFi Configuration
As tip, I will show you how to quickly create a QR code that you can use with any device to automatically configure your WiFi clients.
To do this task, you need to install the qrencode tool:
apt install qrencode -yNow, you can generate the QR code image with your own WiFi settings by using the following terminal command. Please remember to change the SSID and password with yours:
qrencode -o mywifi.png "WIFI:T:WPA;S:p8o-DietPi-HS;P:mypassword;;"Now you will have a “mywifi.png” image file with the code, similar to the following:

You can download the file from DietPi in different ways, for example by installing the “OpenSSH” server in DietPi and reaching it from a remote PC with free SFTP clients like Filezilla.
What’s Next
Interested in what you can do with your Raspberry PI? Take a look at my Raspberry PI tutorials and subscribe to my newsletter!
Enjoy!

Open source and Raspberry PI lover, writes tutorials for beginners since 2019. He's an ICT expert, with a strong experience in supporting medium to big companies and public administrations to manage their ICT infrastructures. He's supporting the Italian public administration in digital transformation projects.
![]()
![]()
![]()
![]()
![]()
![]()
![]()


Hi,
This sets an AP full mode, or an AP in bridge mode? I ask since i didn’t see you dealing with DHCP servers, DNSMasq, and all the other details that usually are delt with a full AP installation in Linux.
Hi Dan. Honestly I don’t remember if DietPi Wifi Hotspot creates a new DHCP range valid inside the its new Wireless network. If so, it automatically installs all needed networking tools. I’m going to check next week because this one I’m in holidays far from home 🙂
Hi Dan. It is AP full mode: DietPi does all the DHCP and IP routing automatically during installation (see here https://github.com/MichaIng/DietPi/blob/70586d247d3c27b3852dbcbe52b11c2e69b22619/dietpi/dietpi-software#L9671-L9759). Thank you
Hi, thanks for the tutorial! I have to ask, does this make a private network broadcast from the Pi or is it like a bridged/extended AP? For instance would it make a secure AP in a public Wifi like OpenWRT?
Hi Mohamed,
DietPI creates a new network for your devices and routes it from its WAN addess (your router wired interface) adding NAT service. You can add services to make your PI network secure and expand your services by simply installing them.
Hi, is there a way to check if my wifi usb dongle is connected and working because I followed all instructions but I cant see the new network !!! Thanks a lot!
Hi cagapiou,
USB dongle issues are strictly connected to devices and their manufacturers… however, you can try with this Raspberry PI USB dongle troubleshooting guide:
https://www.raspberrypi.org/forums/viewtopic.php?t=44044
Hope this can help