In this summer, the Raspberry PI company announced a new release of the Raspberry PI Pico series: the Raspberry PI Pico 2.
From a visual point of view, the new microcontroller may appear the same as the previous one. Still, some changes happened inside, which should bring more power and flexibility to this microcontroller. In the following chapters, I will go deep into the main changes.
I still don’t have this board for tests (as the Raspberry PI company doesn’t send me the boards for preview and tests), so I will show you my insights from the documentation released. By the way, the Raspberry PI states that the new board is software- and hardware-compatible with Raspberry Pi Pico. So you can use the existing projects for Rapsberry PI Pico also with this board.
In this article, I will consider the Raspberry PI Pico W similar to the Raspberry PI Pico, except for some minor notes, as it mounts the same hardware plus the connectivity chip.
The two boards have the same sizes and internal dimensions, so if you have a case or an enclosure with the old Raspberry PI Pico that you want to re-use for the new Raspberry PI Pico 2, you should be able to change the microcontroller without difficulties:
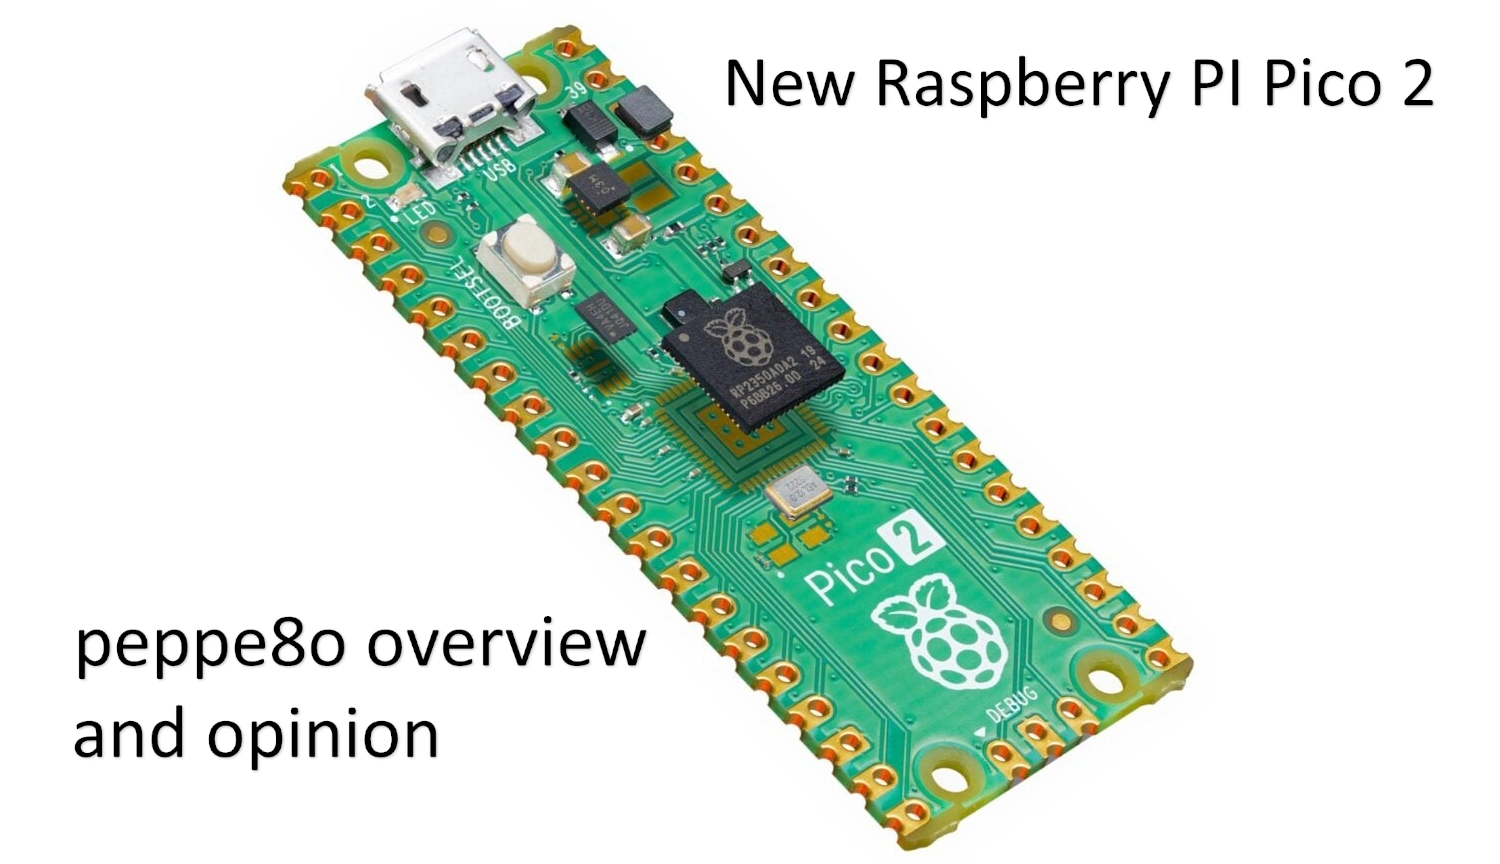
As you can see from the picture, the overall board size remained in the 51mm x 21mm. The PIN holes remained with the same size, as well as the mounting holes. From this point of view, nothing changed.
As we’ll see in the following chapter, compared to the Raspberry PI Pico W, the 3 debugging holes have been moved back again to the lower border of the microcontroller.
Also, the PIN numbering and functions remained unchanged. This will enable you to use the same PIN connections from Raspberry PI Pico’s projects with the new Raspberry PI Pico 2 board. For a detailed description of the PINs functions, you can refer to my Raspberry PI Pico Pinout (including Pico W version) article.
Here’s the small difference I’ve previously talked about, compared with the Raspberry PI Pico W. This board mounts the 3 debugging PINs (SWCLK, GND, and SWDIO) between the CPU and the connectivity chips:
Also the operating conditions remained unchanged. Please note that the Raspberry PI Pico W supports a lower max temperature (probably because of the constraints coming from the connectivity board:
| variable | RPI Pico | RPI Pico W | RPI Pico 2 |
|---|---|---|---|
| Operating Temp Max (including self-heating) | 85°C | 70°C | 85°C |
| Operating Temp Min | -20°C | -20°C | -20°C |
| VBUS | 5V ± 10% | 5V ± 10% | 5V ± 10% |
| VSYS Min | 1.8V | 1.8V | 1.8V |
| VSYS Max | 5.5V | 5.5V | 5.5V |
With all the boards, the recommended maximum ambient temperature of operation is 70°C.
Here there are the main, radical improvements with the new Raspberry PI Pico 2 board. It uses the new RP2350 chip, compared to the RP2040 from the previous Raspberry PI Pico boards.
The meaning of the RP2350 naming is explained in the following picture:
Where:
Moreover, the RP2350 has 520 kB of main system SRAM.
The new Raspberry PI Pico 2 CPU brings performance improvements, togheter with a RAM increase of the board. The following table summarizes the main differences with the Raspberry PI Pico:
| variable | RPI Pico | RPI Pico 2 |
|---|---|---|
| on-board flash | 2 MB | 4 MB |
| core clock speed | 133MHz | 150MHz |
| on-chip SRAM | 264 kB | 520 kB |
| Arm cores | Dual-core cortex M0+ | Dual Cortex-M33 |
| RISC-V cores | n/a | Hazard3 |
Besides the performance improvements, here’s a curoius entry in the RP2350: the Hazard3 cores, based on RISC-V architecture. This is an open-standard instruction set introduced about 10 years ago, where many CPU industries are looking with interest to find open-hardware alternatives to the current market movers. You can find more info about this standard in the Wikipedia RISC-V page.
To say the truth, I still can’t realize how to use these RISK-V cores, as well as they are not mentioned in the Raspberry PI official starting guide. So I bet there will be news in the near future.
The new RP2350 includes security improvements, including Arm TrustZone for Cortex-M, signed boot, 8 kB of antifuse OTP for key storage, SHA-256 acceleration, a hardware TRNG, and fast glitch detectors. Also upgraded interfacing capabilities are available, increasing from 2 PIO blocks (8 state machines total), to 3 PIO blocks (12
state machines total).
The Raspberry PI Pico 2 doesn’t have any WiFi or Bluetooth connectivity. Eben Upton (the founder of Raspberry PI Foundation) declared that “before the end of the year, we expect to ship a wireless-enabled Pico 2 W, using the same Infineon 43439 modem as Pico W”.
This feature is more important for industries using the Raspberry Pi Pico 2 in their products. The Raspberry PI company assures that the new board will remain in production until at least January 2040.
The Raspberry PI claims that the new microcontroller is availabel for $5 (plus shipping expenses, that sometimes are higher that the board price). At the date of this post, you probably can buy it only from the Raspberry PI approved resellers.
The new Pico 2 board introduces some performance improvements that could interest more the industries working with it than the DIY hobbists. Anyway, as the price is comparable with the old board (and t is fully compatible with that), it’s worth going to the new version. The only suggestion I can give is to wait for the W version (with WiFi), because having a connected microcontroller will make your projects reachable from remote, so smart.
References:
Raspberry Pi and Docker project: creating a videosurveillance system based on opernsource software motionEye
In this tutorial I will show you how to connect and use a Traffic Light…
In this tutorial, I will show you my review of the Elecrow Advanced Kit for…
In this tutorial, we will use a Barometric pressure/temperature sensor BMP180 with Arduino Uno. This…
In this tutorial, I will show you how to send smartphone notifications from Raspberry PI…
This tutorial will show you how to install OSMC on Raspberry PI computer boards. The…


