In this tutorial, I’m going to show you how to install OpenSource Social Network in a Raspberry PI.
Social networks spread everywhere, covering everyone’s life. But they are owned by companies, so you can be concerned about your privacy. With OpenSource Social Network (OSSN) you can create your own private one with a Raspberry PI and keep your data ownership.
Social Networks revolutionized people’s lives in the last few years. Everyone uses its social channels every day to stay connected with friends and family. But a common question regards the privacy and data security, which are shared with all world. Even if Social Networks created complex privacy policies to protect users, maintaining your data in your server is always the best option if you don’t want to make them available to the public.
Again, Raspberry PI with its Lite OS distribution can be very versatile to put in place a number of home useful services (see also my Raspberry Pi projects article). Some addicting features can be achieved by searching open source software and testing it with this fantastic device. An interesting example is installing OpenSource Social Network in your Raspberry PI.
For this project, I’m going to use a Raspberry PI 3 Model B, but this will work also on other Raspberry PI boards.
OpenSource Social Network is “a rapid development social networking software written in PHP. It allows you to make a social networking website.
OSSN can be used to build different types of social apps.
Supports:
It runs on a LAMP server. Has very poor hardware requirements and an amazing user interface. Its interface is also mobile-friendly.
As usual, I suggest adding from now to your favourite e-commerce shopping cart all the needed hardware, so that at the end you will be able to evaluate overall costs and decide if to continue with the project or remove them from the shopping cart. So, hardware will be only:
You will also need a Desktop PC with SFTP software (like, for example, the free Filezilla) to transfer installation packages into your RPI.
Check hardware prices with the following links:
We’ll start by setting up a classic LAMP server. We’ll then set up the database user and install OpenSource Social Network.
Start from your operating system. I suggest to install Raspberry PI OS Lite (for a fast, headless environment), as done for this article. You can also use Raspberry PI OS Desktop, in this case using its internal terminal.
Make sure that your system is up to date. Connect via ssh terminal and type the following command:
sudo apt update -y && sudo apt upgrade -yLAMP (Linux – Apache – Mysql – Php) servers usually come with a MySQL database. In our project, we’ll use instead MariaDB because it is lighter and work fine with Raspberry Pi.
For the complete LAMP installation, please refer to my LAMP server on Raspberry PI tutorial.
We need to prepare our system for Open Source Social Network first setup wizard. Required packages are:
So we’ll install them with the following terminal commands:
sudo apt install php-curl php-gd php-zip php-json php-xml php-mbstring -yEnable MOD_REWRITE:
sudo a2enmod rewriteEdit default Apache config to use mod_rewrite:
sudo nano /etc/apache2/sites-available/000-default.confAdd the <Directory> section, so that your 000-default.conf file appears like the following (excluding comments):
<VirtualHost *:80>
    ServerAdmin webmaster@localhost
    DocumentRoot /var/www/html
    ErrorLog ${APACHE_LOG_DIR}/error.log
    CustomLog ${APACHE_LOG_DIR}/access.log combined
    # SECTION TO ADD --------------------------------
        <Directory /var/www/html>
            Options Indexes FollowSymLinks MultiViews
            AllowOverride All
            Require all granted
        </Directory>
    # END SECTION TO ADD --------------------------------
</VirtualHost>
allow_url_fopen should be already enabled in “/etc/php/7.4/apache2/php.ini”. OpenSSL should be already installed.
Another setting that I suggest is editing php max upload file size up to 16 MB:
sudo nano /etc/php/7.4/apache2/php.iniLook for the row with upload_max_filesize parameter and set it as the following:
upload_max_filesize = 16MSave and exit. Restart again Apache:
sudo systemctl restart apache2.serviceLog into MariaDB shell as root:
sudo mariadb -u rootCreate a database for OSSN (I called it “ossndb”, but you can name it as you prefer):
create database ossndb;grant all privileges of OSSNdatabase to the user (with password) that you will configure in OSSN in the next steps. Please use your favourite database name, DB user and DB password instead of red ones (respectively ossndb, ossnuser and ossnpwd):
grant all privileges on ossndb.* to ossnuser@localhost identified by 'ossnpwd';Flush the privileges table for the changes to take effect and then exit
flush privileges;
exit;Get the link for OSSN zip file from OSSN download page: in the “basic version” area, right click with the mouse on “download OSSN” button and then select “Copy link address”. Then get the file directly in your Raspberry PI with the wget utility (the address link should be the same also for you):
wget https://www.opensource-socialnetwork.org/download_ossn/latest/build.zipNow let’s extract the installation data directly in our
sudo unzip build.zip -d /var/www/html/ #Extracts from zip directly in Apache root folder
sudo rm /var/www/html/index.html #Removes Apache default page - we'll use OSSN one
sudo chown -R www-data:www-data /var/www/html/ #Grants apache permissions
OSSN requires a folder to store data. OSSN suggests, for security reasons, to create this folder outside of the published document root. So, we’ll create this in opt folder and give grants:
sudo mkdir /opt/ossn_data
sudo chown -R www-data:www-data /opt/ossn_data/
As the default installation files include a 1st level directory, in order to avoid the need to use “/ossn/” in your browser URL we can move all the installation files in Apache root and remove the /ossn/ folder:
sudo mv /var/www/html/ossn/{.*,*} /var/www/html/This command will warn you wit the following message:
mv: cannot move '/var/www/html/ossn/.' to '/var/www/html/.': Device or resource busy
mv: cannot move '/var/www/html/ossn/..' to '/var/www/html/..': Device or resource busy
It is correct as it can’t move the parent folder, but this remains the most effective as it moves also the hidden files. We can also remove the ossn folder, now empty:
sudo rmdir /var/www/html/ossn/Now, you can browse http://<<YourRpiIPAddress>> (mine one is 192.168.1.177) from a remote browser to start the installation wizard. The first stage validates that all the prerequisites are installed:
All checks should be fine. Please scroll down the page and click the “Next” button at the end. The next step proposes you the license:
Read License validation and click the Next button (at the end of page) to accept. The next page requires setting up the database credentials (please use the ones created at the previous MariaDB configuration step)
Enter Database user, password, db name you chose. Remember also to insert OSSN data folder.
Finally press Install. The next page will allow you to create your Admin account:
Then press Create button.
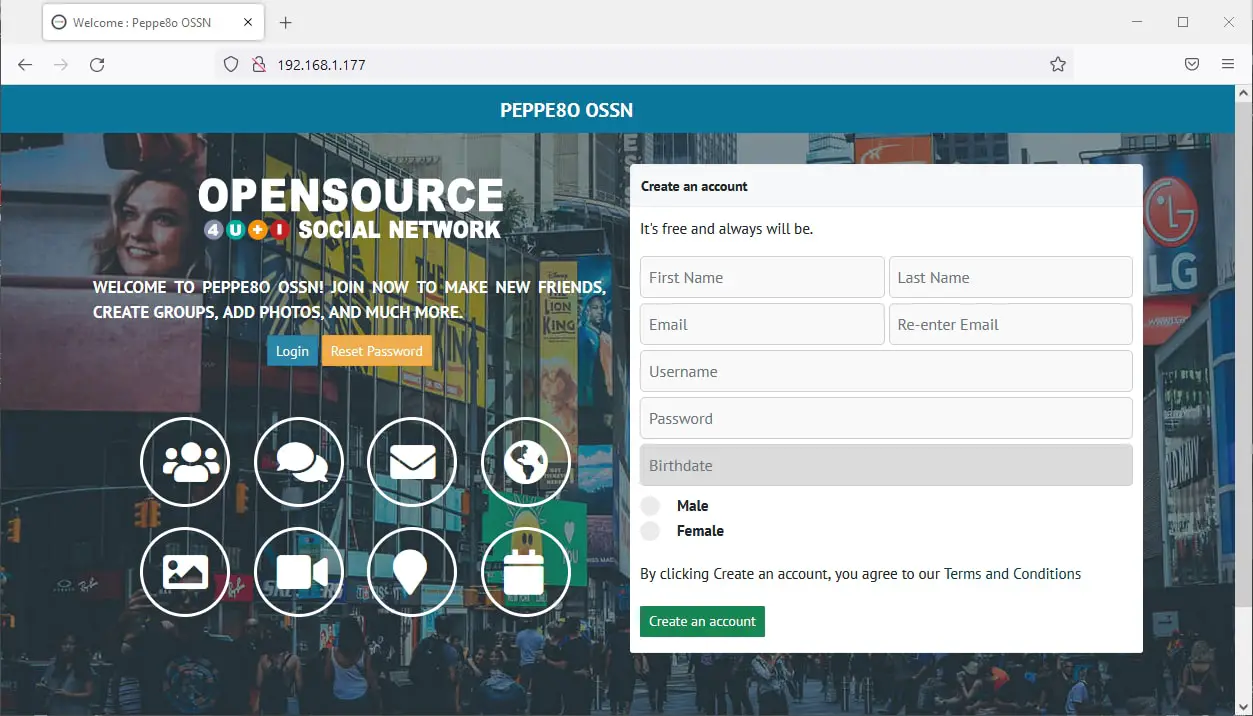
Everything should be fine now. Press Finish. You will be prompted for Admin credentials:
Please fill the username and password set during the installation wizard to get the OSSN dashboard:
So, administration panel can be reached with URL “http://<<YourRpiIPAddress>>/administrator” while user link will be “http://<<YourRpiIPAddress>>”
Interested in more cool ways to use your RPI? Take a look at peppe8o Raspberry PI computer tutorials!
Enjoy your OpenSource Social Network in your Raspberry PI!
In this tutorial, we will use two Arduino Uno to demonstrate the Serial Peripheral Interface…
In this tutorial, we will be making an automatic irrigation system (AIS) with Arduino and…
This tutorial will show you how to use Python Virtual Environment with Raspberry PI computer…
This tutorial will show you how to get betting odds with Raspberry PI by using…
This tutorial will show you how to perform the backup of Raspberry PI (computer board)…
This tutorial will show you how to install Honeygain on a Raspberry PI computer board…


View Comments
Hi. all works fine until the last step when I get nothing from my IP address or my IP address/administrator
Just blank screens :/
Hi Adam.
Blank screen, differently from ERR_CONNECTION_TIMED_OUT page, means that your Apache server should be answering. So, if you ping your Raspberry PI IP address it should also answer. Before all, be sure you are using a proper power supply (not less than 2.5 A).
Please try again to access (to generate logs) and send following: "/var/log/apache2/error.log", "/var/log/apache2/access.log".
Also a copy of "/etc/apache2/sites-available/000-default.conf" would be useful.
Finally, please install tree (sudo apt install tree) and give me the result for following command:
tree /var/www/
Thank you
I get to the last step, creating an administrator account, and it will not create it. I get "account:create:error:admin" and another that says "field"