Some links in this post may be affiliate links. We may get paid if you buy something or take an action after clicking one of these, but without addictional costs for you compared to direct buying.
Last Updated on 10th January 2025 by peppe8o
Rocket.chat
In this tutorial, I will show you how to create a self-hosted chat service with Rocket.chat and Raspberry PI computer board. This article shows how to install Rocket.chat for usage in internal LAN environments (home, office, and so on). If you want to share it with your friends you will need to check if your Internet Service Provider gives you a public IP and a public domain, like those available for free from No-IP.
Chats were born immediately after internet birth. Today these chat services are quite all free, but many people have concerns about their data security and privacy respect. Using Rocket chat with Raspberry PI creates a self-hosted chat service that is able to assure that your data remains yours. In the next paragraphs, we are going to determine what steps are required to install a private chat and messaging server with a Raspberry PI and Rocket.chat.
What Is Rocket.Chat
Rocket.chat is an Open Source solution capable of providing an enhanced chat service. It includes collaboration tools like media sharing, screen sharing and video/audio call support.
You can use it both via a web browser or from smartphone apps available in all the main app stores (Google Play, App Store, etc).
Besides the community version, it also offers Enterprise and Professional versions (including support and additional features).
What We Need
As usual, I suggest adding from now to your favourite e-commerce shopping cart all the needed hardware, so that at the end you will be able to evaluate overall costs and decide if to continue with the project or remove them from the shopping cart. So, hardware will be only:
- Raspberry PI Computer Board (including proper power supply or using a smartphone micro USB charger with at least 3A)
- high speed micro SD card (at least 16 GB, at least class 10)
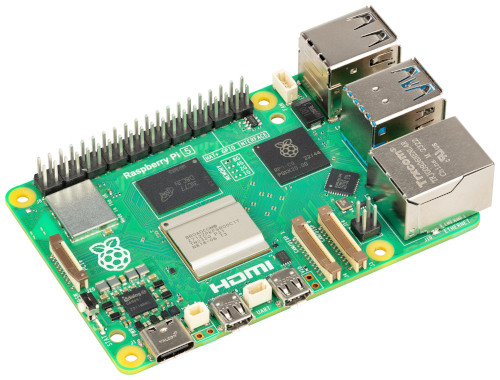
For this project, I’m going to use a Raspberry Pi 5 Model B, but this should work with any Raspberry PI computer boards compatible with the 64-bit Raspberry PI OS.
Step-By-Step Procedure
Preparing the Raspberry PI Operating System
The first step is installing the Raspberry PI OS Lite (please note that we need the 64-bit version) to get a fast and light operating system (headless). In this case, you will need to work from a remote SSH terminal. If you need a desktop environment, you can also use the Raspberry PI OS Desktop, in this case working from its terminal app. Please find the differences between the 2 OS versions in my Raspberry PI OS Lite vs Desktop article. NOTE: if you’re working with a low capabilities Raspberry PI (like a Raspberry PI Zero 2 W) you should use the OS Lite version.
Make sure that your system is up to date. Connect via SSH terminal and type the following command:
sudo apt update -y && sudo apt upgrade -yWe’ll simplify Rocket.Chat installation by using Snap. From the terminal, we can install Snap and its core packages with the following command line:
sudo apt install snapd -yAfter this step, we must reboot our Raspberry PI:
sudo rebootNow, we can finalize the Snap installation:
sudo snap install snapdWe’re ready to install Rocket.chat.
Install Rocket.chat on Raspberry PI
With Snap, installing Rocket.chat server requires only the following command:
sudo snap install rocketchat-server --channel=latest/stableThis command will install all the required packages, including a MongoDB database to store the chat data. At any time you will be able to check the status of the main services (rocketchat-server and rocketchat-mongo) with the following two commands:
sudo systemctl status snap.rocketchat-server.rocketchat-server.service
sudo systemctl status snap.rocketchat-server.rocketchat-mongo.service
You will need to wait for both services to appear as active and running.
Setup Rocket.chat
After the installation’s end from the terminal side, please wait a while for Rocket.Chat to initialize the database and the services.
With your Raspberry PI’s IP address, please browse it from a remote PC by using the “3000” port. So, your URL address will be something like “http://<<YOUR_RPI_IP_ADDRESS>>:3000” (in my case “HTTP://192.168.1.218:3000”) and you should be automatically redirected to the Rocket.chat setup wizard. If this doesn’t happen, please wait a few more times for the installation to finish. The page will be like the following:
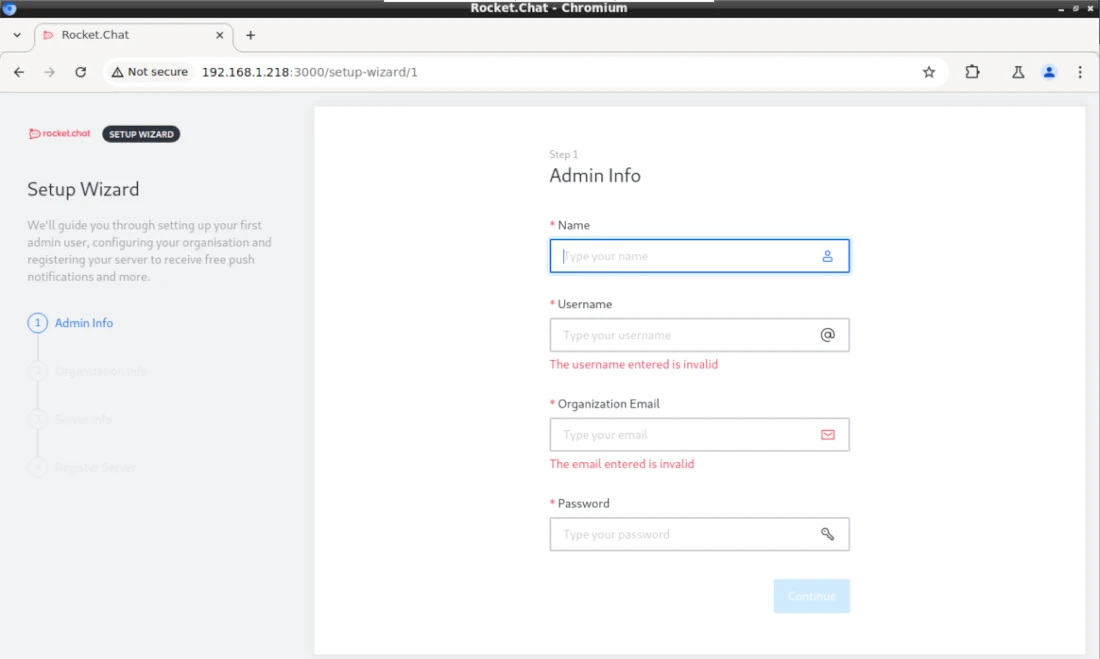
Please compile the required forms with your favourite Name, Username, Email and password and press the “Continue” button.
The following page will popup you a warning about the configured site URL mismatching with the current access:

As you will probably need to access your Rocket.chat from remote devices, you should click the “Yes” button to confirm it.
After this step, you will be able to provide more (optional) info about your organization:
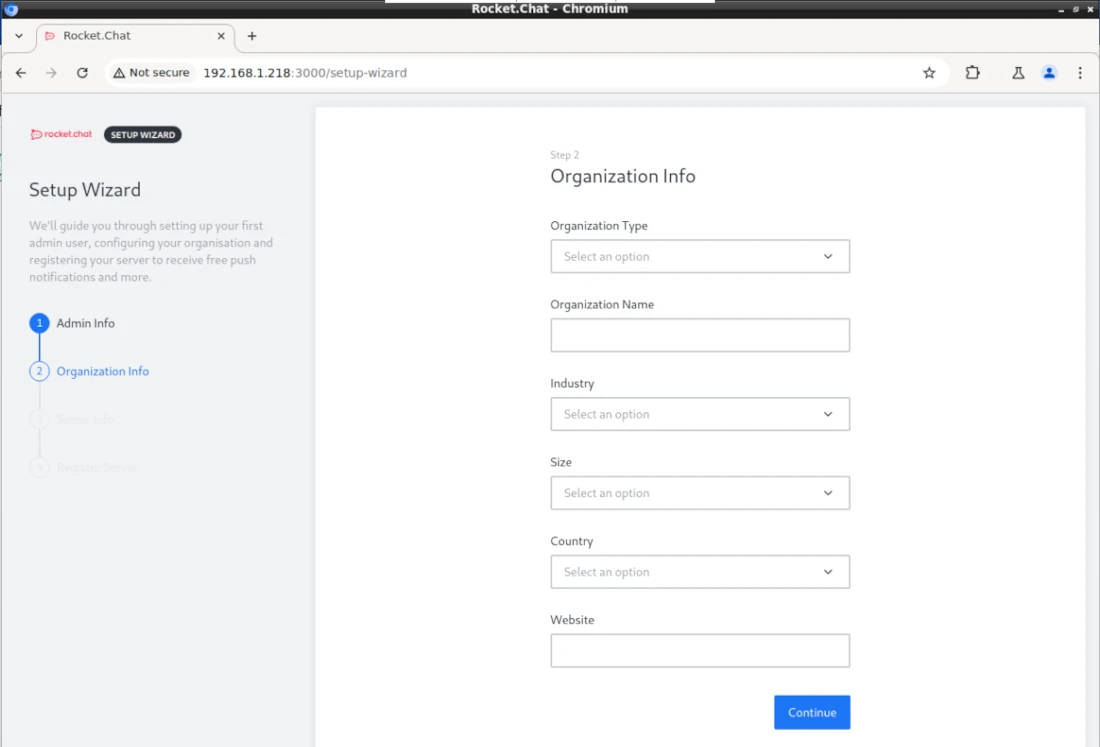
After filling the form with your favourite info, please click the “Continue” button.
The following page will allow you to setup some additional server info, will optional:
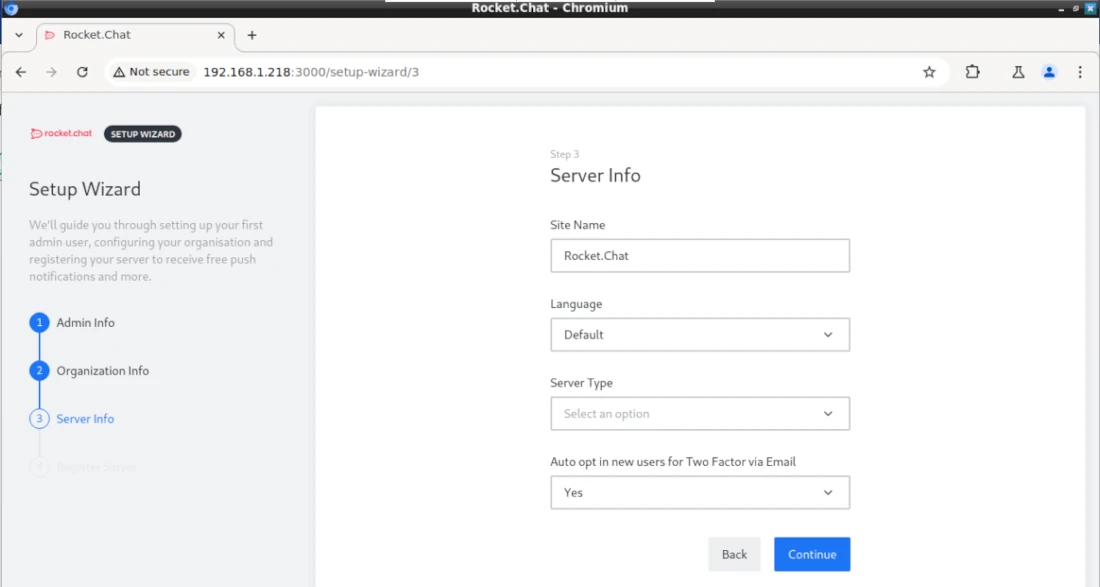
Again, please fill them according to your preferences and click “Continue”.
The following page allows you to register your server to Rocket.chat services for integrations:
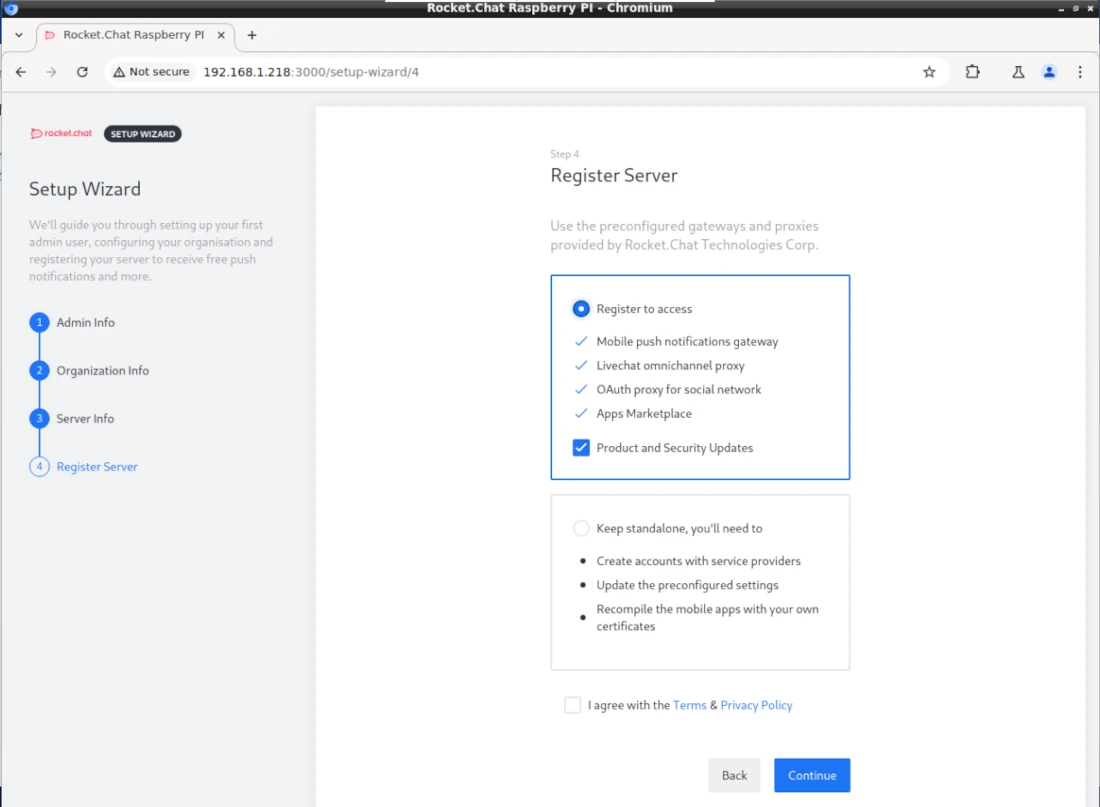
For this article, I will go on with a standalone installation, but you can choose to register your server.
Finally, please press “Continue” and you should get a confirmation page that your server is ready for use, including the link to access your server:
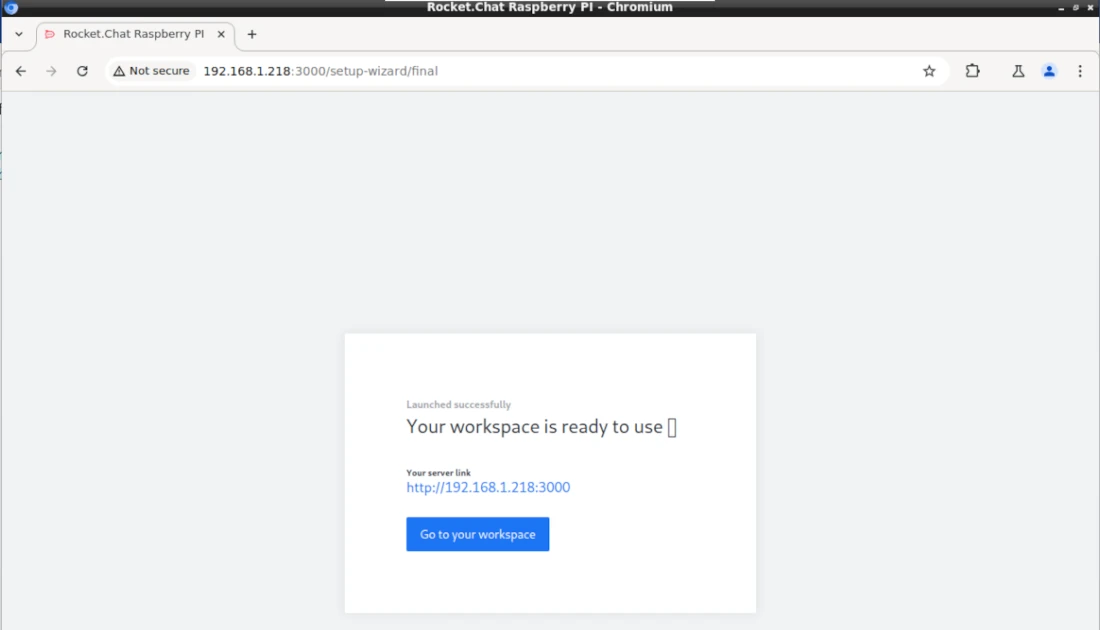
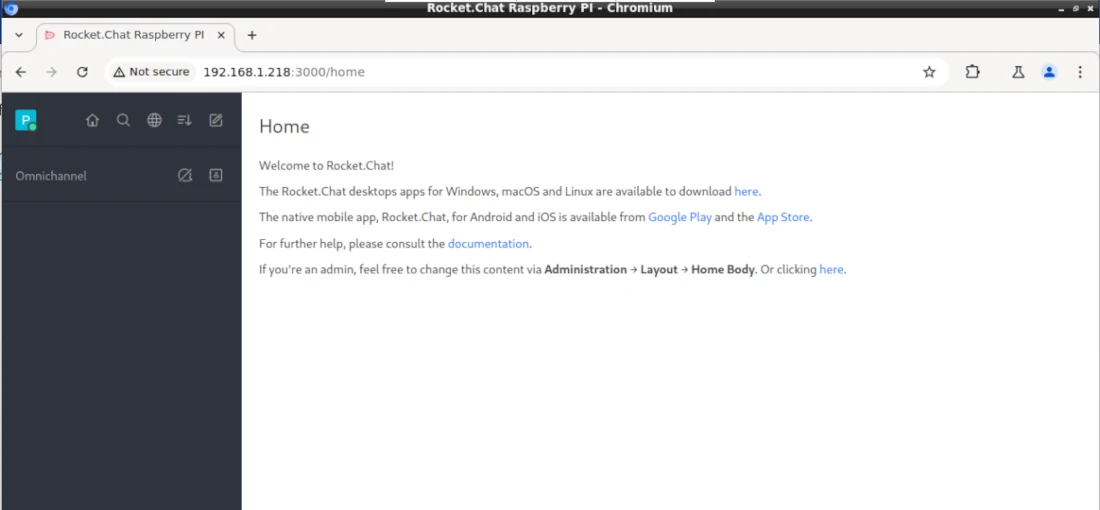
Please use the “Go to your workspace” button to reach the Rocket.chat home page:
Administrating Rocket.chat in Raspberry PI
As administrator of Rochet.chat, you will be able to control your server configuration. All the settings are available from the link shown in the following picture:
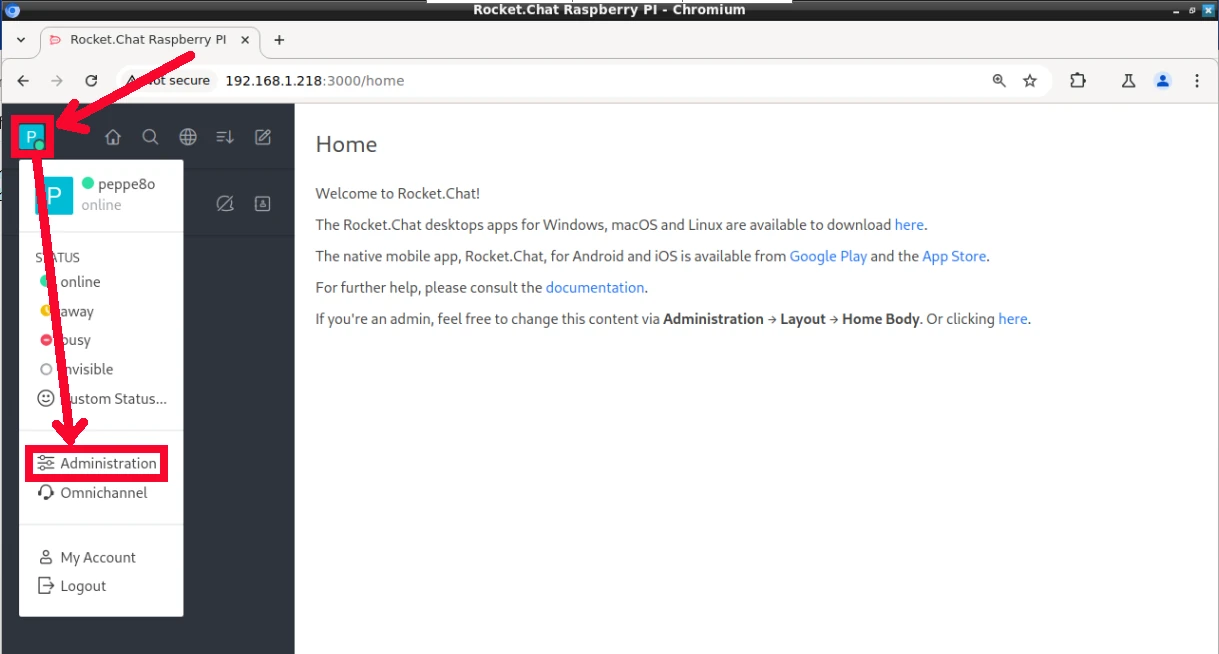
On the following page, you will find on the left menu all the configurations, grouped by subject.
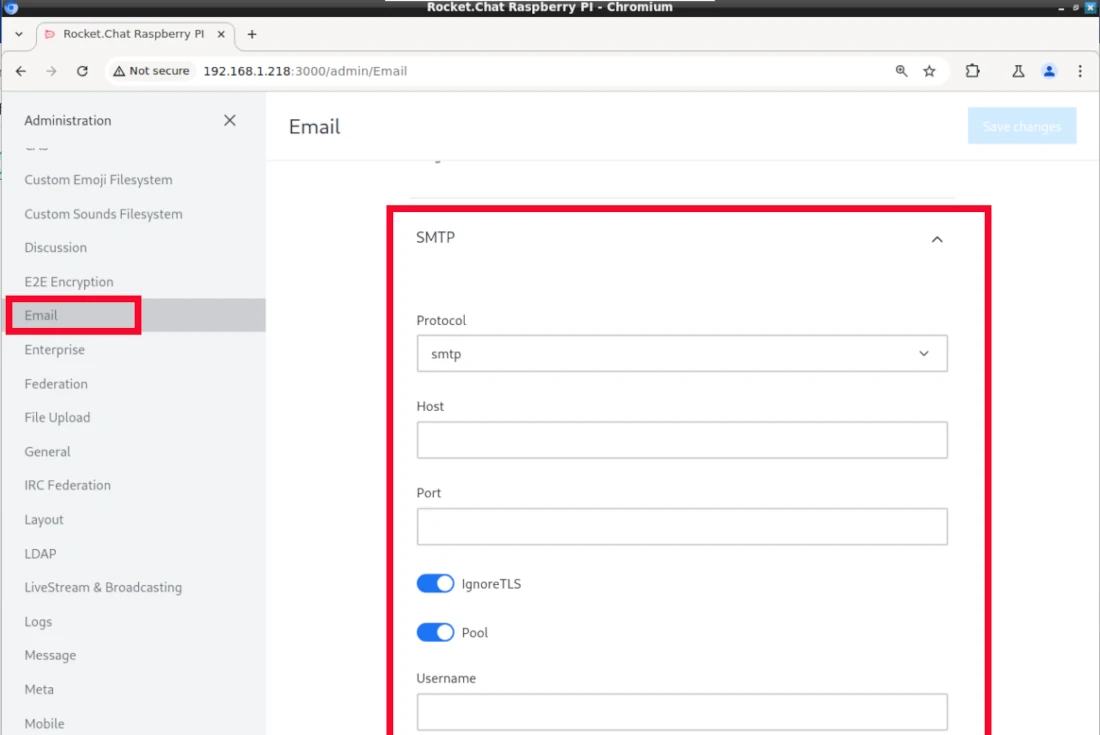
One of the first things to setup will be probably the SMTP settings in the email section: this will allow your Rocket.chat installation to send email invites and notifications:
Add new Users
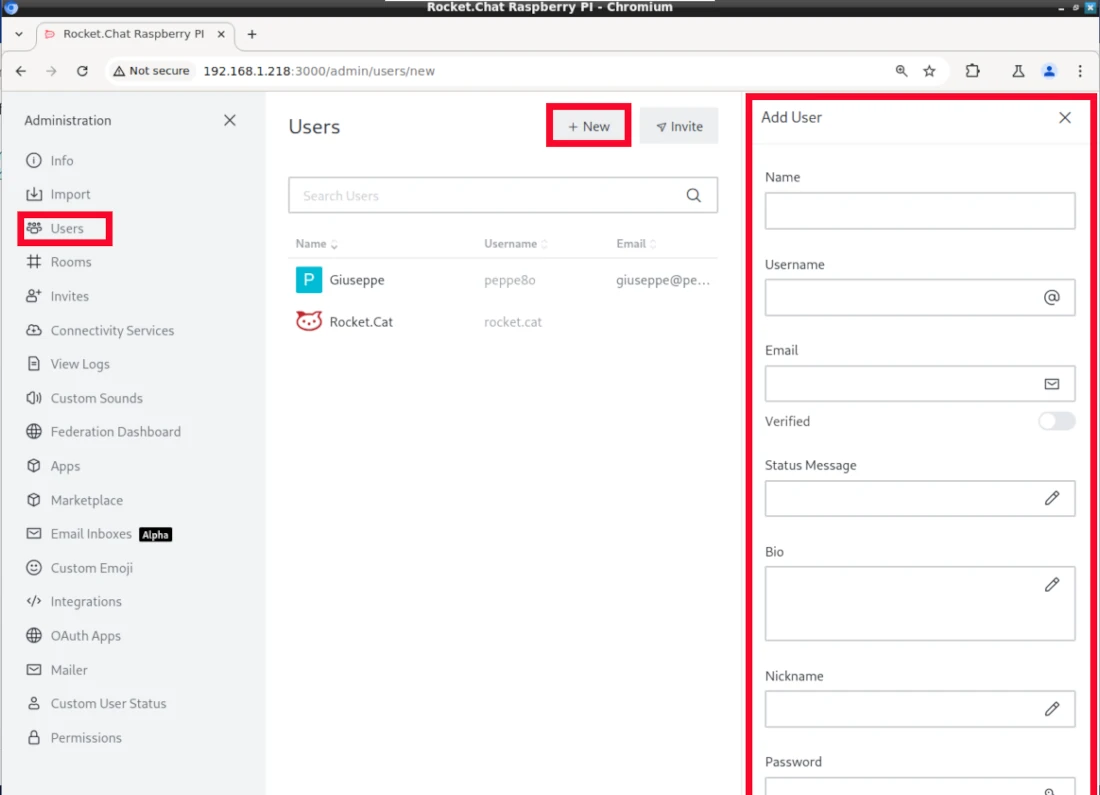
Still from the Administration area of your Rocket.chat, you can also add new users to join your messaging server. This can be done from the Users menu:
Create a new Channel / Team / Message / Discussion
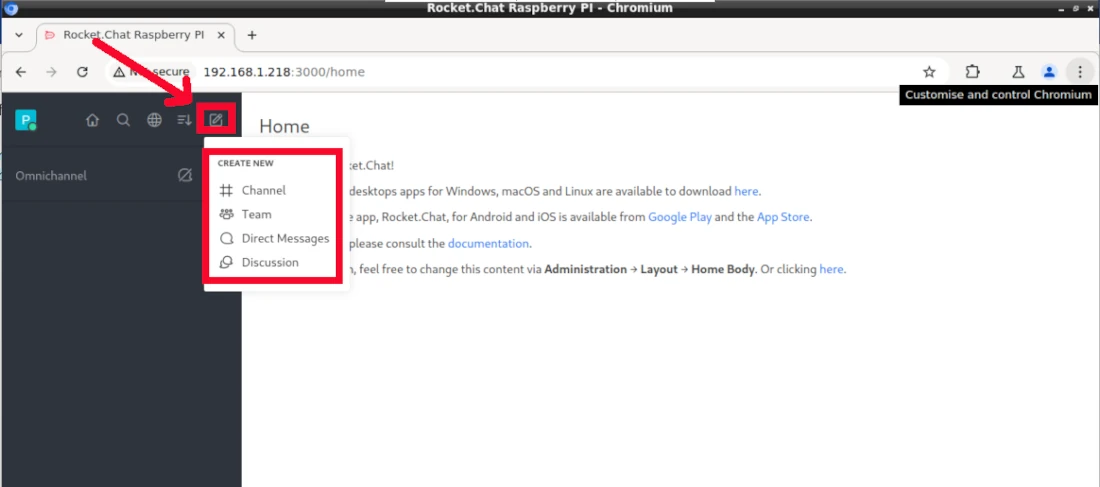
With Rocket.chat installed in your Raspberry PI, you can create new communication media similar to the most known messaging service. For example, you can create new channels, direct messages and discussions with the proper button on the top menu:
What’s Next
Interested in what you can do with your Raspberry PI? Take a look at my Raspberry PI tutorials and subscribe to my newsletter!
Enjoy

Open source and Raspberry PI lover, writes tutorials for beginners since 2019. He's an ICT expert, with a strong experience in supporting medium to big companies and public administrations to manage their ICT infrastructures. He's supporting the Italian public administration in digital transformation projects.

This does not work it does NOT support ARM64
Hi. I just tested it with my Raspberry PI 4 Model B and the steps are working for me. Please can you share what Raspberry PI model are you using and what is the error message?