This tutorial will show you how to use Raspberry PI with Cosmos Cloud to create your self-hosted, private cloud server, and get cloud services in your home.
Basically, Cosmos Cloud is an open-source container management solution, including a clear web GUI. Moreover, it adds a security layer to your containers, so your data can be protected from unwanted access. In this sense, it also offers a VPN solution (Constellation VPN), making your remote access even more secure.
Its web GUI is easy to use and well organized, enabling you to install services with one click and monitor/manage your host (Raspberry PI computers, in this tutorial) with a few pages.
If your favourite App isn’t available from the Cosmos Marketplace, you can anyway create your docker compose file, so that even the most advanced people can take advantage of this great orchestrator.
In this tutorial, I will use a Raspberry PI 5 model B computer board with Raspberry PI OS Lite 64-bit, but the same steps should also work for the other 64-bit Raspberry PI computer boards. Moreover, I will use only local access to my Cosmos Cloud (reaching it in my local network by my Raspberry PI’s local IP), but you can even use a public domain if you have a public IP with No-IP and Raspberry PI.
As usual, I suggest adding from now to your favourite e-commerce shopping cart all the needed hardware, so that at the end you will be able to evaluate overall costs and decide if to continue with the project or remove them from the shopping cart. So, hardware will be only:
Please start installing the Raspberry PI Operating System. I suggest installing Raspberry PI OS Lite (64-bit), as you can install it with a headless mode so that you won’t waste resources with a Desktop environment if you don’t need it. If you need the desktop, maybe you may need to use your Raspberry PI with a monitor, you can anyway choose the Raspberry PI OS Desktop (still 64-bit), in this case working from its terminal. For the main differences between the 2 OS, please refer to my Raspberry PI OS Lite vs Desktop article.
Please make your OS up to date. From terminal, please issue the following command:
sudo apt update -y && sudo apt upgrade -yMoreover, we need to install Docker in Raspberry PI (also for this, please refer to the linked article).
The Cosmos Cloud installation is really simple with docker. Please use the following command (all in one line) in your terminal:
docker run -d --network host --privileged --name cosmos-server -h cosmos-server --restart=always -v /var/run/docker.sock:/var/run/docker.sock -v /:/mnt/host -v /var/lib/cosmos:/config azukaar/cosmos-server:latestIt will start downloading the required packages. In the meanwhile, please find below the option descriptions:
At the end, your terminal will give you back the prompt without any message. The following first setup will be made from a browser.
There are a few steps to setup Cosmos Cloud in your Raspberry PI. These steps will happen only the very first time you install it. Please use your PC browser to reach the Raspberry PI address. In my case, my Raspberry PI’s IP is 192.168.1.218, so I will browse the address “http://192.168.1.218“. You will be redirected to the welcome page:
You can leave the setting as default and press the button “Start”.
The following page will check Docker settings:
Please click the “Next” button.
The following page will allow you which database to use. You can use an existing database or let Cosmos create a new one, based on MongoDB.
You can leave the “Automatically create a secure database” option as default to let Cosmos do the job, and click “Connect”. In this case, Cosmos Cloud will show you the installation progress:
At the end, you will get a confirmation page:
Please click the “Next” button.
The following page will allow you to declare how you will reach the Cosmos Cloud dashboard. If you have a public domain name, you can set it in the “Hostname” field, otherwise you can even give it your Raspberry PI local IP address (if you want to manage it from your LAN). Please note that, in this second case, you must avoid adding the “http://” string before the IP address. In any case, you can change these settings from your Raspberry PI terminal by editing the /var/lib/cosmos/cosmos.config.json file.
Moreover, you can select how to generate the connection certificate. Here’s my settings for this test:
Once done, please click the “Update” button.
The following page will enable you to choose your administrator username and password. Please fill out the form with your favourite info. Please note that the password must adhere to the Cosmos Cloud minimum requirements (Password must contain 9 characters: at least 1 lowercase, 1 uppercase, 1 number, and 1 special character):
Once done, please click the “Create” button.
The following page will confirm the installation and allow you to restart the Cosmos Cloud container to apply the setting:
Please click the “Apply and Restart” button.
The following page will probably warn you that the certificate is not secure. Every browser warns about this in different ways. With Chrome/Chromium, you will need to click the “Advanced” button to find the “Proceed to 192.168.1.218” link to skip the certificate error. Please note that we’ll skip this security test only because we’re aware that the 192.168.1.218 address is our Raspberry PI and you shouldn’t make this in unknown internet pages.
The following page will be the login. Please note that you may receive an error page, in this case please wait a few minutes and then do a page refresh.
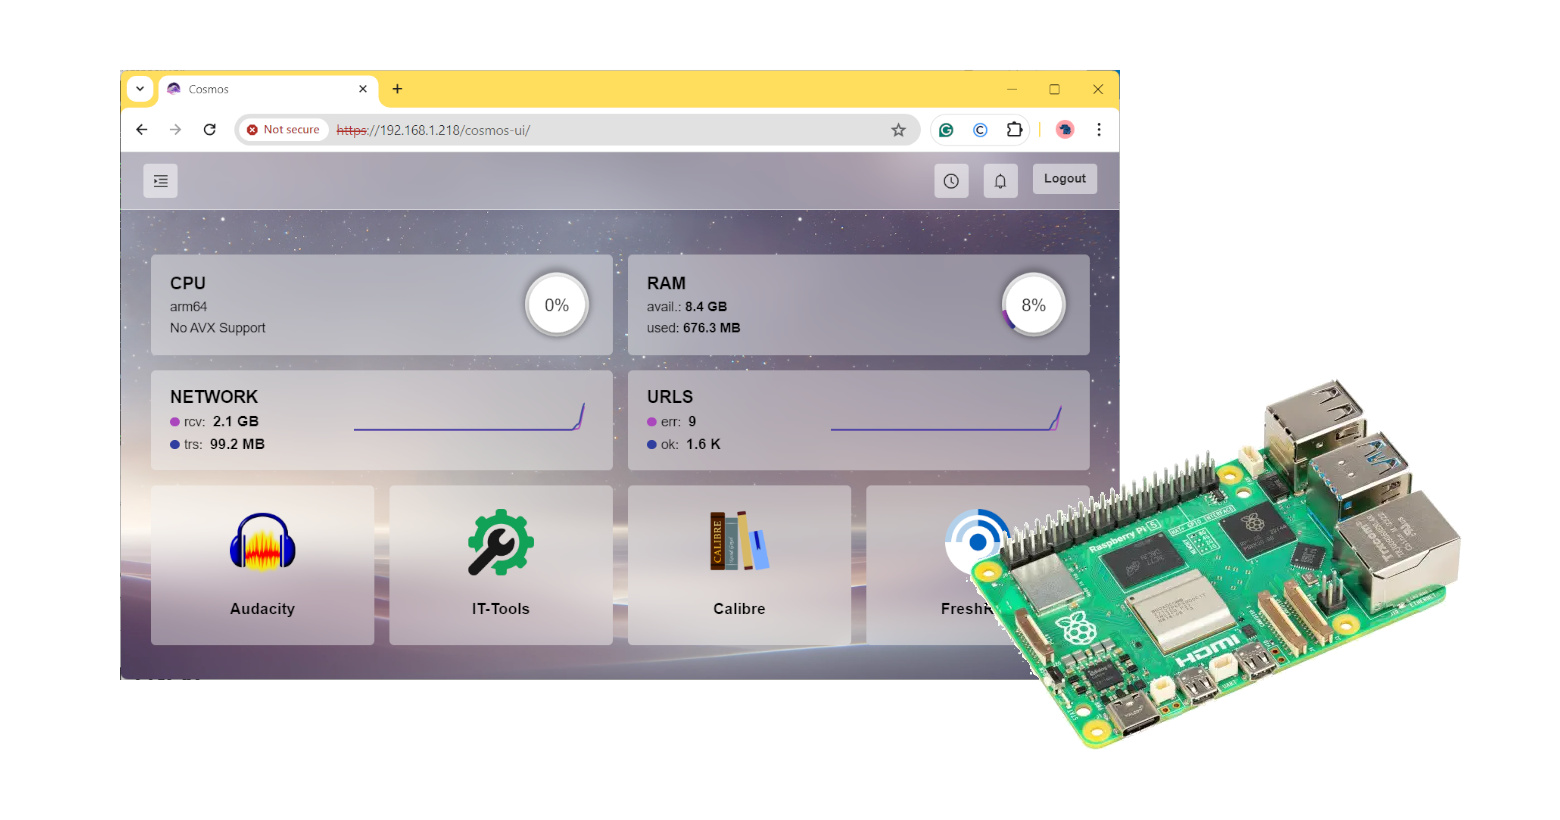
After filling in your login credentials set at the installation stage, please click the “Login” button. You will reach the Cosmos Cloud dashboard:
If you can’t see some parts of this dashboard, please resize your browser window.
At any time, you can check the Cosmos Cloud logs by using the Docker logs command from your Raspberry PI’s terminal:
docker logs cosmos-serverThis will show you what’s happening in the background.
From the Cosmos Cloud home, in the left side menu please click the Market link to reach the market page:
This page will show you a large number of apps that you can install with about one click:
For every app, once you click the icon you can see the supported architecture (please use only these supporting ARM64), links and details. For example, I will show you how to install FreshRSS, an open-source link aggregator:
By scrolling down the description page, you will find the “Install” button:
Once you click the install button, you will get a window where you can customize your application. Some apps may require mandatory fields (like username and password), depending on the app itself:
With Lemmy, you can go on with the default values without the strict need to edit anything. Anyway, at the end of your customization, you can click the “Next” button at the bottom-right side of this window. the following page will show you the resulting docker compose file:
At this point, you can click the “Create” button (at the top of the window) and Cosmos Cloud will do all the jobs for you.
There will be just a refresh page request:
Back to the Cosmos Cloud home, you will find the FreshRSS icon ready:
With some applications, for the first time, this icon may redirect you to the app setup. In the following times, you will be redirected to the app page.
Cosmos Cloud is a great tool which makes it very easy to get your personal cloud orchestrator, with apps running in a very few clicks.
On the other hand, I suggest the Cosmos Cloud team keep the compose files updated as I’ve noticed that some compose files are a bit dated (for example the Lemmy app brings a dated Postfix release). In any case, you can create your own docker compose file and import it, fixing these issues in this way.
Moreover, it happened to me that installing multiple applications will use always the same port if their installation is run in parallel, making it impossible to access all of them. The issue is that Cosmos Cloud seems to use the same port for all these applications. The fix is installing them one by one or going to the ServApps page from the left menu and setting a different port for each service (for example 7200, 7201, 7202, and so on) with the gear icon near the container IP address:
Want to know more about cool projects to do with Raspberry PI computer boards? In this case, the right resource for you is my Raspberry PI tutorials pages.
Enjoy!
Raspberry Pi and Docker project: creating a videosurveillance system based on opernsource software motionEye
In this tutorial I will show you how to connect and use a Traffic Light…
In this tutorial, I will show you my review of the Elecrow Advanced Kit for…
In this summer, the Raspberry PI company announced a new release of the Raspberry PI…
In this tutorial, we will use a Barometric pressure/temperature sensor BMP180 with Arduino Uno. This…
In this tutorial, I will show you how to send smartphone notifications from Raspberry PI…


