
Last Updated on 17th May 2025 by peppe8o
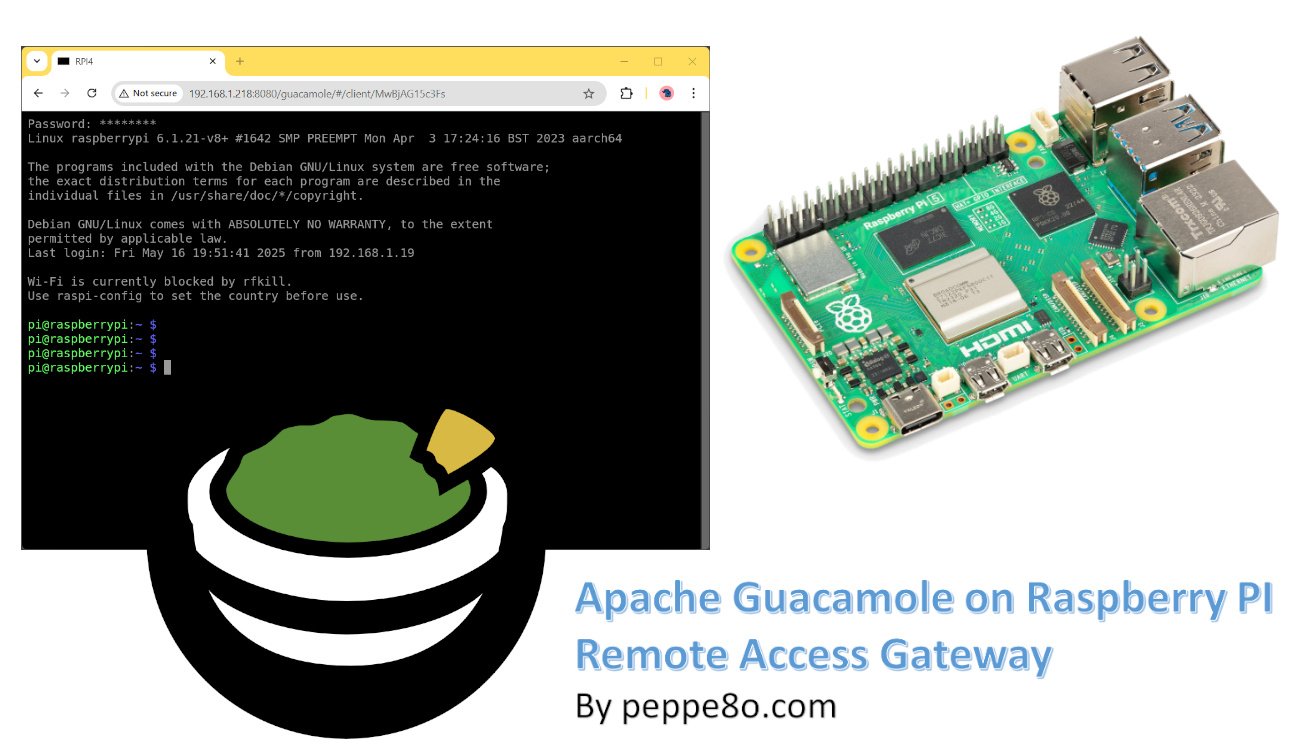
This tutorial will show you how to install Apache Guacamole with a Raspberry PI computer board, to create your self-hosted remoting proxy.
Smart Working stresses the need to have external access to your Personal Computer from a remote station. This remote station can be whatever device, with whatever OS (and different versions). So, many people need to remotely access their desktops to access their documents and apps.
A flexible solution comes with Apache Guacamole™, an open-source software able to give a clientless remote desktop access (via VNC, RDP, SSH, etc). This solution differs from common ones because it can be used from a simple Web Browser, helping to overcome client installation issues.
Please note that this guide works only on Raspberry PI computer boards compatible with the 64-bit OS, so you must check your Raspberry PI’s CPU before moving on the following steps or you must buy a Raspberry PI 3 or newer model. I tested this with my Raspberry PI 5 model B (8GB).
Network Diagram
First, let me show a simple diagram to better understand what we are going to build.

This solution requires that:
- Your Raspberry PI can be reached from your laptop from where you want to see the remote desktop
- Your remote PC have RDP configured, or a VNC server active, or SSH remote connection enabled
What We Need
As usual, I suggest adding from now to your favourite e-commerce shopping cart all the needed hardware, so that at the end you will be able to evaluate overall costs and decide if to continue with the project or remove them from the shopping cart. So, hardware will be only:
- Raspberry PI Computer Board (including proper power supply or using a smartphone micro USB charger with at least 3A)
- high-speed micro SD card (at least 16 GB, at least class 10)
- A common computer (maybe with Windows, Linux or Mac). It can also be a Raspberry PI Computer board

Step-by-Step Procedure
Enable Remote Access on the Remote PC
For this task, you must refer to the procedure according to the OS of the remote computer you want to reach via Guacamole. For example, for MS Windows computers, you can refer to the following guide:
With Apple computers, you can refer to their procedure:
https://support.apple.com/guide/mac-help/allow-apple-remote-desktop-to-access-your-mac-mh11851/mac
With Linux devices (like the Raspberry PI), you have many options and should be similar to those I already listed in my Raspberry PI Remote Management and Access Tools tutorial.
Install Raspberry PI OS Lite Operating System
The first step is installing the Raspberry PI OS Lite (we need the 64-bit version) to get a fast and light operating system (headless). In this case, you will need to work from a remote SSH terminal. If you need a desktop environment, you can also use the Raspberry PI OS Desktop, in this case working from its terminal app. Please find the differences between the 2 OS versions in my Raspberry PI OS Lite vs Desktop article.
Make sure that your system is up to date. Connect via SSH terminal and type the following command:
sudo apt update -y && sudo apt full-upgrade -yWe also need to install Docker. For this step, please refer to my Docker on Raspberry PI tutorial.
Install Guacamole on Raspberry PI
With Docker, running the Guacamole service is particularly easy.
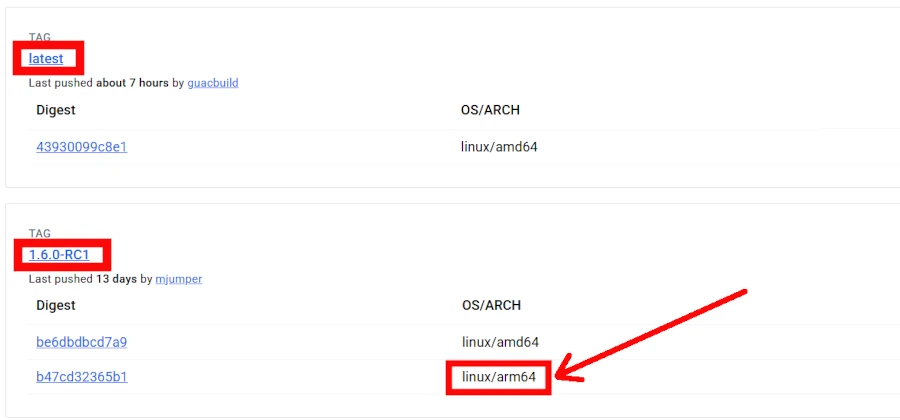
From the release 1.6.0, the official Docker images for Guacamole are starting to be available also for ARM64 architectures (like the one in our Raspberry PI). At the date of this tutorial, the 1.6.0 is still in Release Candidate (this means that it could be affected by some bugs), but it turned out to be working in my tests.
So, before starting with the installation procedure, please check if the “latest” release for guacamole and guacd services in Docker Hub already supports the ARM64 architecture (the provided links will show you the pages where to check). As said, at the date of this tutorial, only the “1.6.0-RC1” tag has the support for “linux/arm64” and the “latest” tag doesn’t have it, as shown in the following picture:
Please remind this for the following step.
We’ll install Apache Guacamole in our Raspberry PI together with the required “guacd” service and a MariaDB database.
To make all the files ordered, I suggest you to create a folder for Guacamole and enter it:
mkdir guacamole
cd guacamole/
Prepare the SQL Initialisation Script
The first step is creating the script, which will initialise the MariaDB database. We can run this task with a simple, single command. Please note the release tag in the command (highlighted in red) and change it with the latest tag available at the time you’re setting up the service:
docker run --rm guacamole/guacamole:1.6.0-RC1 /opt/guacamole/bin/initdb.sh --mysql > initdb.sqlThis task will download the Guacamole image to your Raspberry PI storage and then will give you back the prompt. After this, you will find an initdb.sql file in your folder:
pi@raspberrypi:~/guacamole $ ls
initdb.sql
Install Apache Guacamole on Raspberry PI
Please create a new file named docker-compose.yml:
nano docker-compose.ymlFill the file with the following content. Again, please remember to change the highlighted version to the latest supporting the ARM64 architecture as of the date of your project. You should also change the MYSQL user, password (both in the “db” and “service” sections), and root password according to your preferences:
services:
  db:
    image: mariadb:latest
    restart: unless-stopped
    environment:
      MYSQL_ROOT_PASSWORD: 'MariaDBRootPass'
      MYSQL_DATABASE: 'guacamole_db'
      MYSQL_USER: 'guacamole_user'
      MYSQL_PASSWORD: 'MariaDBUserPass'
    volumes:
      - './db-data:/var/lib/mysql'
      - './initdb.sql:/docker-entrypoint-initdb.d/initdb.sql'
  guacd:
    image: guacamole/guacd:1.6.0-RC1
    restart: unless-stopped
  guacamole:
    image: guacamole/guacamole:1.6.0-RC1
    restart: unless-stopped
    ports:
      - 8080:8080
    environment:
      GUACD_HOSTNAME: "guacd"
      MYSQL_HOSTNAME: "db"
      MYSQL_DATABASE: "guacamole_db"
      MYSQL_USER: "guacamole_user"
      MYSQL_PASSWORD: "MariaDBUserPass"
      TOTP_ENABLED: "true"
    depends_on:
      - db
      - guacd
volumes:
  db-data:
Save and close the file. The guacamole folder should now contain the following files:
pi@raspberrypi:~/guacamole $ ls
docker-compose.yml  initdb.sql
After this, from the guacamole folder, you can install Guacamole on Raspberry PI with the following command:
docker compose up -dAgain, this command will start downloading the required Docker images. After this, Docker will create the services and give you back the prompt. You can check the created containers with the following command:
docker ps -aBefore looking for the web interface, please check the database logs with the following command:
docker logs guacamole-db-1Here, please wait to get something like the following lines for the MariaDB service to be really up and running:
2025-05-16 10:32:48 0 [Note] Server socket created on IP: '0.0.0.0'.
2025-05-16 10:32:48 0 [Note] Server socket created on IP: '::'.
2025-05-16 10:32:48 0 [Note] mariadbd: Event Scheduler: Loaded 0 events
2025-05-16 10:32:48 0 [Note] mariadbd: ready for connections.
At this point, you can reach Guacamole from your favourite browser by using the http://<<YourRpiIpAddress>>:8080/guacamole. As my Raspberry PI’s IP is 192.168.1.218, in my case it will be http://192.168.1.218:8080/guacamole.
First Login for Guacamole Service
The first page you will get is the login page:

You can use the default login credentials:
- username: guacadmin
- password: guacadmin
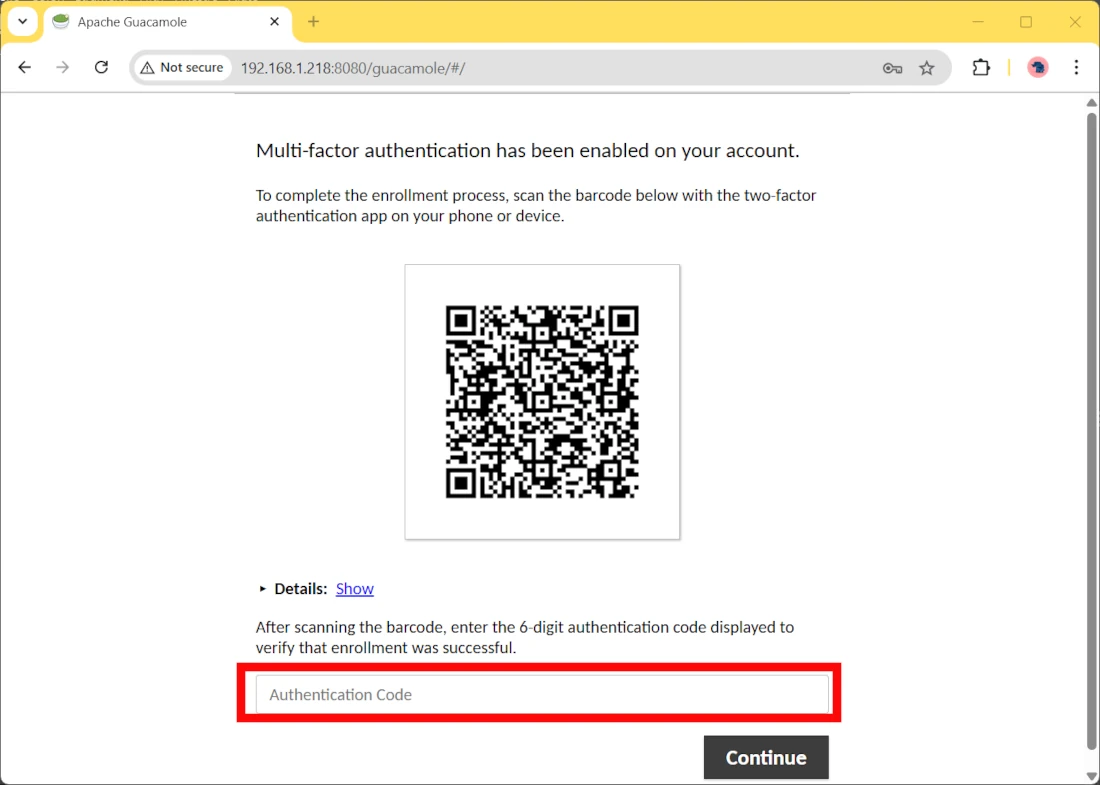
At the very first access, you must associate a 2FA (2 Factor Authentication) application to login to Guacamore (in order to get better security). You can use a free application like the Google Authenticator available both from the Play Store (for Android) and from the Apple Store (for iOS).
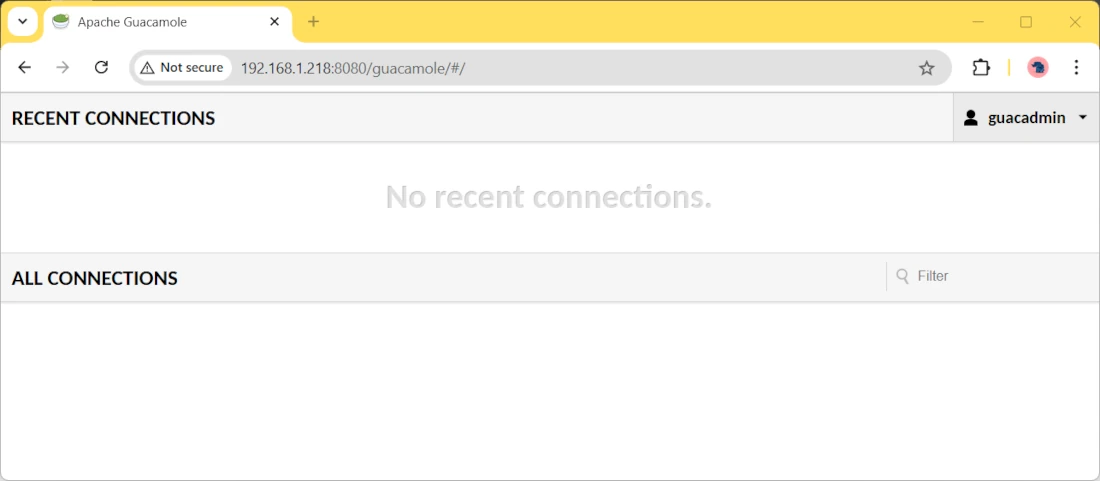
After associating the user with the authentication code, you will reach the Guacamole dashboard, which will be empty at the moment:
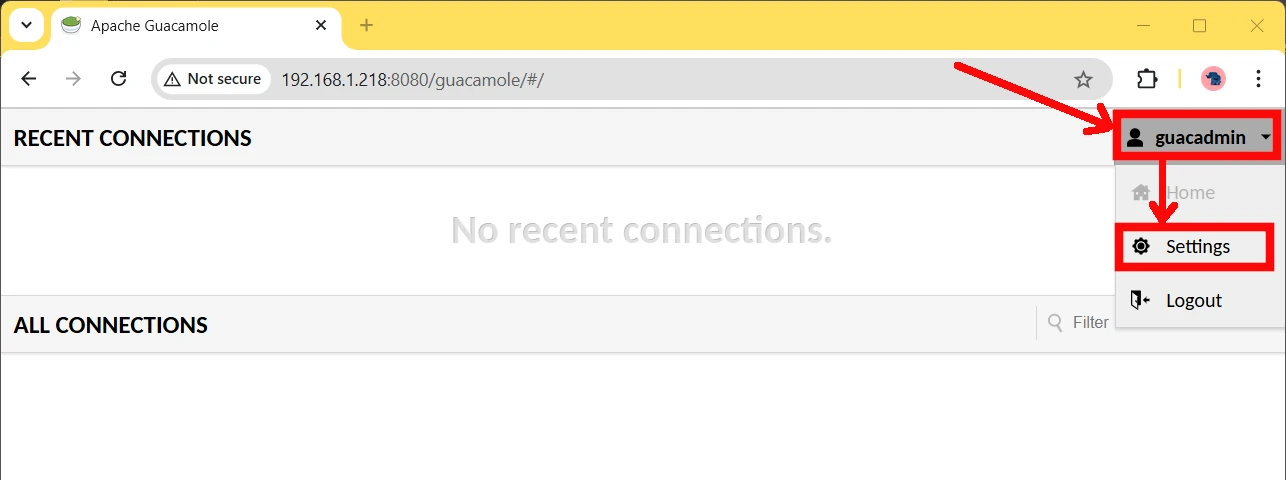
Keeping the default password, even if protected by a 2FA, is an insecure practice. So, please select the Settings from your user’s menu:
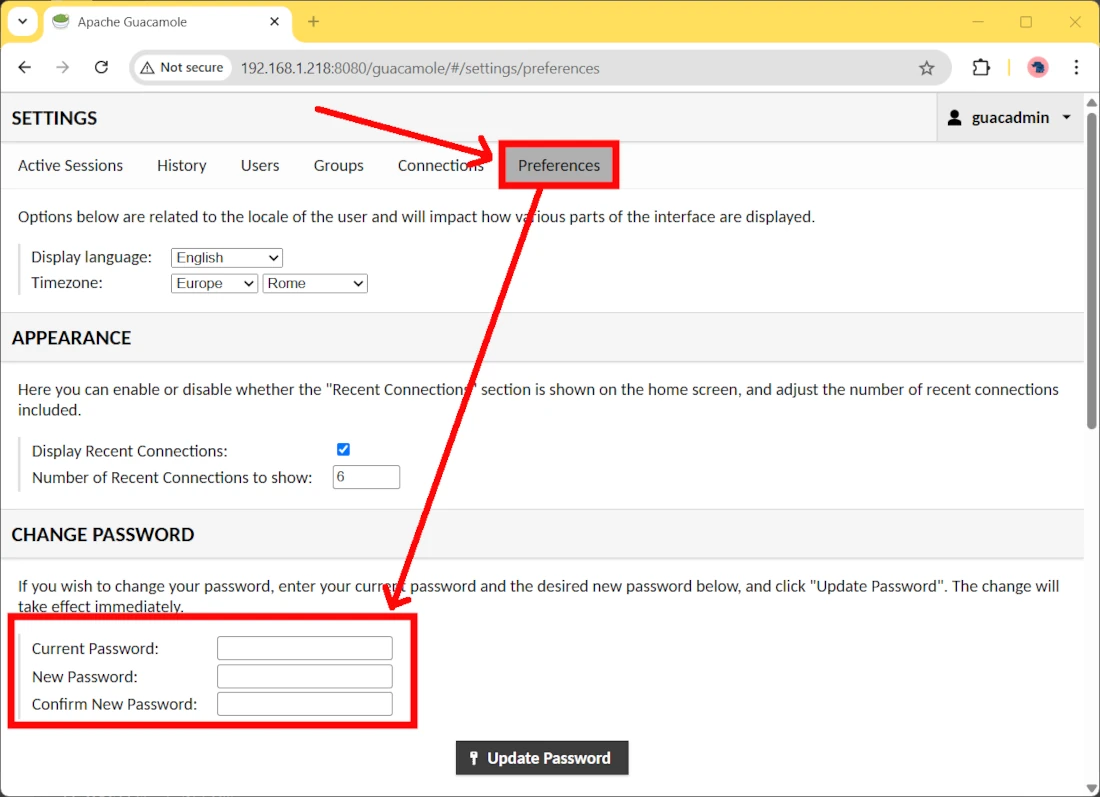
Now, please select the “Preferences” tab, where you can set a new password for your user:
Now, we’re ready to setup the computers we want to remotely manage from Apache Guacamole. I’ll provide you with 2 examples, with the settings for a Windows RDP (desktop) and a Linux SSH (terminal) connection.
Configure Guacamole for RDP Connections
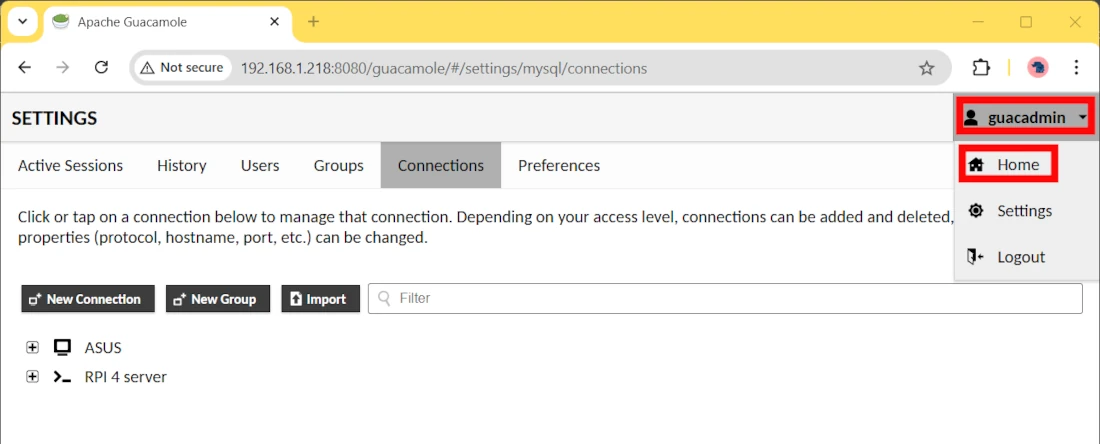
From the user settings, you can identify the “Connections” tab. Please click on it:
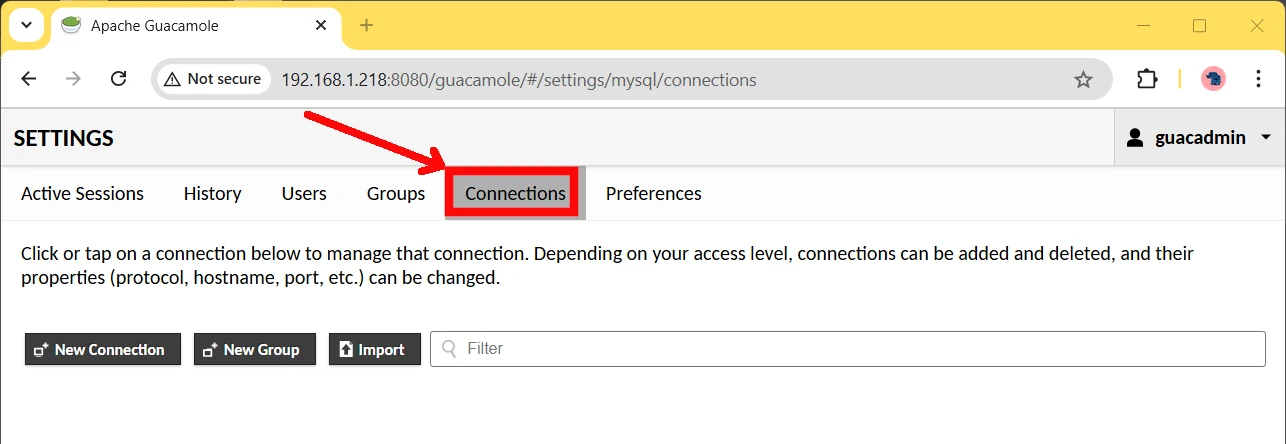
The resulting page will allow you to configure all the needed connections to all of your remote computers. Please use the “New Connection” button to enter the form to configure it. You will find a lot of options available, but not all of them are required to make the connection work.
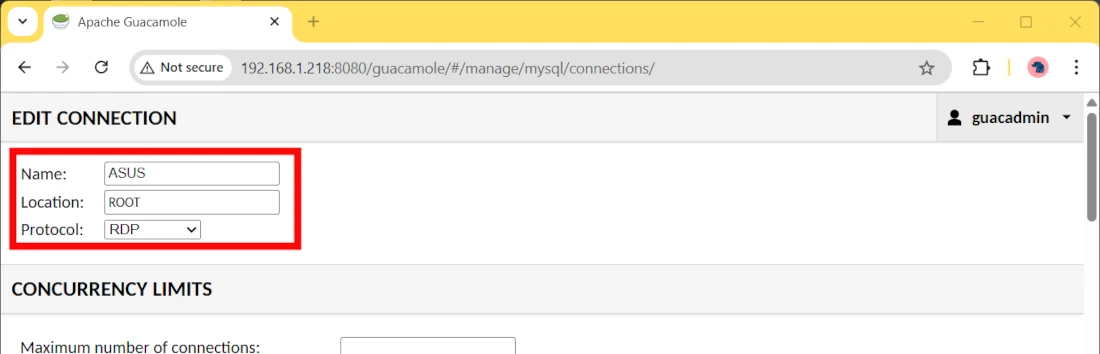
In the “EDIT CONNECTION” section, please enter the name used to refer to this connection in your Guacamole Home page (in my example “ASUS”). You can leave Location as ROOT. Please modify the Protocol to “RDP”:
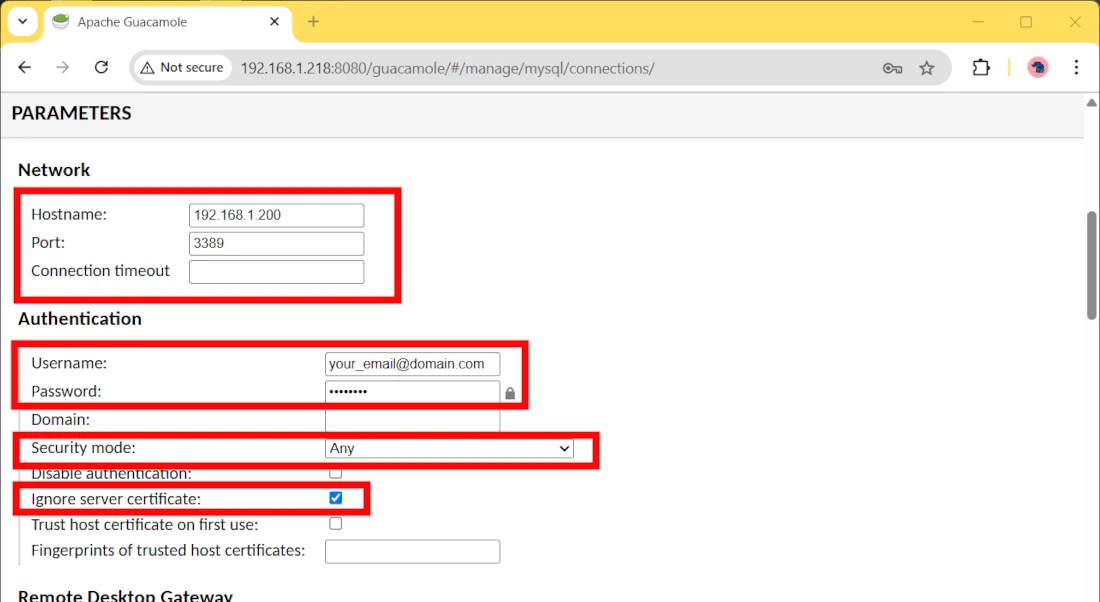
In the “NETWORK” block, add the Hostname parameter with your remote PC IP Address (“192.168.1.200” for my example). Port must be set to 3389 (default Windows RDP port).
In “AUTHENTICATION” section, you must enter user and password configured in your remote PC as enabled Remote Users. With Windows 10 and newer, the username is usually given by an email address with the entire email domain (for example, “name.surname@maildomain.com”). In this case, what is after @ becomes also the Domain (and it is not required to editthe “Domain” parameter). If you have a local user, you should also include the domain (for example WORKGROUP of whatever is your).
“Security mode” must be set to “Any”. You must also set “Ignore server certificate” flag.
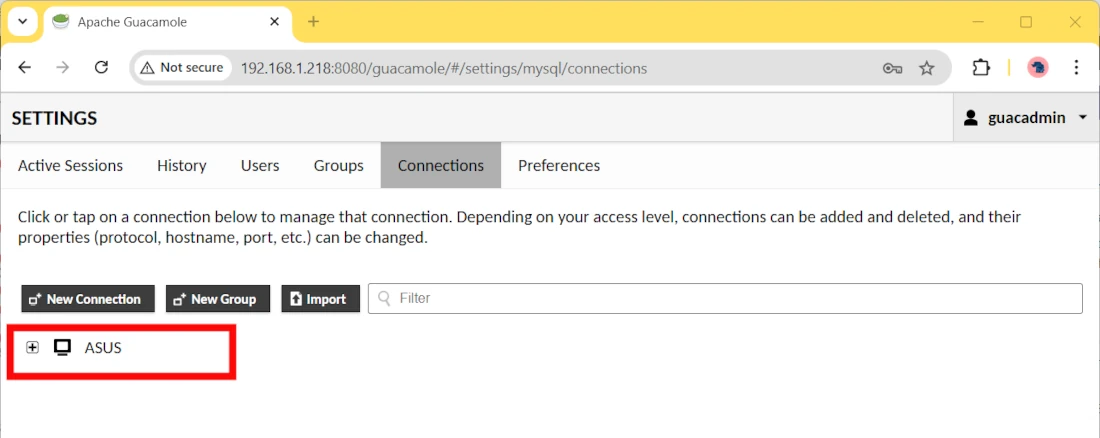
Scroll down this page to the bottom and click the Save button. Our new connection now appears in Connections list. Use this page only to edit the available connections or to create new ones.
Configure Guacamole for SSH Connections
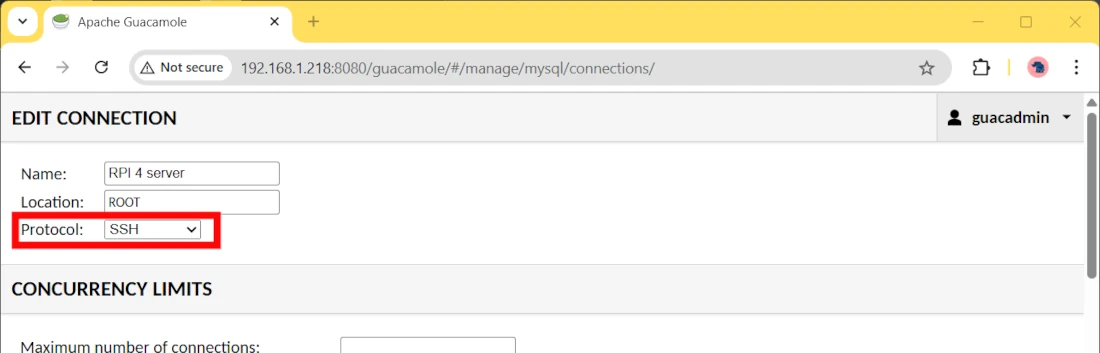
Similarly, from the “Connections” page, please click the New Connection button to configure a new connection. In this case, I will create a new SSH (terminal) connection from my Raspberry PI 4 server. Please note that the Protocol is set to “SSH”:
Then, please add the IP address (as hostname) and the port (22) for your remote SSH server in the network section (maybe also another Raspberry PI computer or any Linux). Please pay attention to avoid inserting the wrong hostname field within the Guacamole Proxy Parameters, as the rows has the same labels but the section are different!
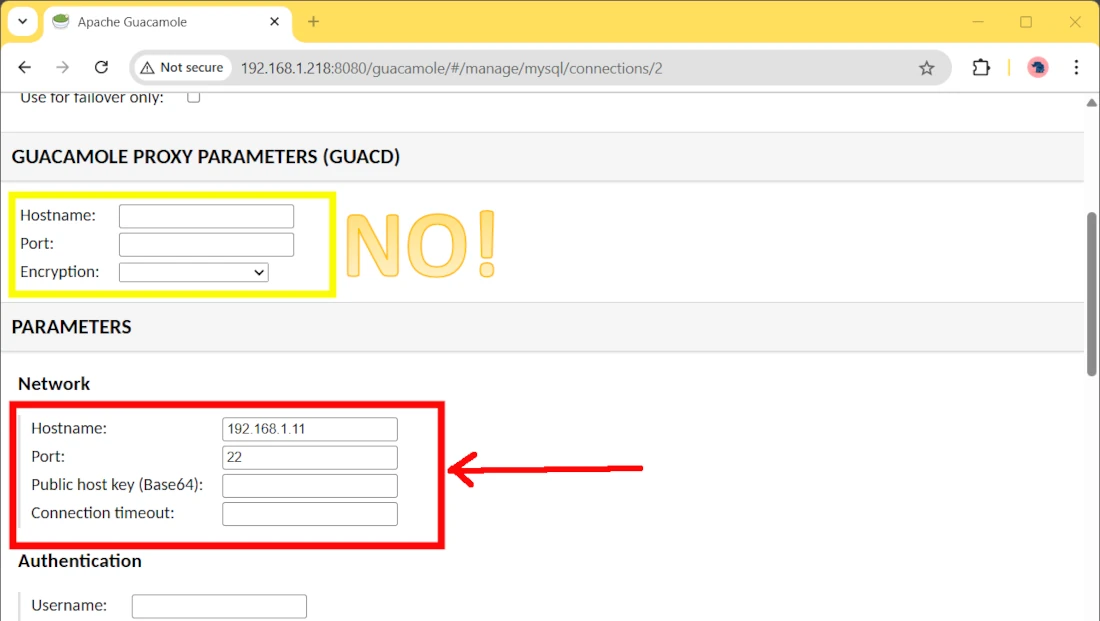
You can also save this connection.
Remote Connection with Apache Guacamole on Raspberry PI
At this point, we can test the remote connection by using Guacamole.
Go back to your Guacamole home with the related link:
Now, you should find the links for your created connections:

By clicking one of them, you should be able to reach the related computer.
Final Notes About Apache Guacamole on Raspberry PI
Remote Desktop to a Windows PC will automatically logout people using Remote PC. In the same way, if you try to launch Remote Desktop to the same PC where you are working, you will be logged out.
Apache Guacamole has plenty of interesting features; try them to find the solution that best fits your needs.
With older Raspberry PI computer boards (having less RAM), you may experience some performance issues in terms of latency. Probably, you can deal with them by using the advanced settings for your connection.
Finally, Apache Guacamole for ARM64 is still working on a release candidate (at the date of this tutorial): some bugs may appear to you. In these cases, you can notify the bugs (or contribute to the project) as described in the Guacamole contributing page.
What’s Next
If you want to discover many other projects for your Raspberry PI, you can look at peppe8o Raspberry PI tutorials.
Enjoy!

Open source and Raspberry PI lover, writes tutorials for beginners since 2019. He's an ICT expert, with a strong experience in supporting medium to big companies and public administrations to manage their ICT infrastructures. He's supporting the Italian public administration in digital transformation projects.
![]()
![]()
![]()
![]()
![]()
![]()
![]()


Is the image no longer available? I looked at the project and its archived in github.
Hi Mike. Yes, the project has been recently declared as archived, but image is available. This means that this project on github will be read only and any need of changes or support will not be assured by project owner. I’m thinking if I’ll change tutorial to follow Guacamole installation from sources (far more complex than docker installation) or if I’ll look for a different, similar image. In the menawhile, you can still use oznu image.
Hello,
i found your project and installed it on my rspi3. At the beginning you wrote about https ? but i still missing the part to make it as https interface.
Best regards Wolfgang
Thank you for your feedback. That was a refuse on diagram picture, just corrected.
How do I move a thread to a different topic?
hi all 🙂
Hi,
sorry, this is not a forum, this is a blog. For this reason you can’t move comments to different topics.
If you feel the need of a forum and we have a number of people interested on, I can try creating a forum section.
Please let me know and feel free to email me (my address is available in http://peppe8o.com/info/ page).
Thank you
Como se llamo esto i am from SPAIN
Hola killHaini, puedes especificar mejor la pregunta? Cuál es el nombre de qué? [translated with Google Translate]
Hi! Thanks for your guide, I managed to install guacamole and I would like to access to a local ip address (web server), is it possible? It’s a tasmota server I need to access remotely. Thanks!
Hi José. Why you don’t use a simple VPN server to access your local network remotely and get your webserver available from remote browser? In my blog you can find a guide to install Raspberry PI VPN Server with PiVPN
Thanks Peppe8o. I’ll take a look.!!
Hello,
Very usefull site.
For Guacamole, do you find another docker image with updates ?
I try the following one : flcontainers/guacamole but I have some PostegreSQL error when container start.
Hi. Yes, the flcontainers/guacamole should work, but you must use the 64-bit Raspberry PI OS. Did you test this image with this OS version?