
This tutorial will show you how to install OctoPrint on Raspberry PI computer boards using Docker.
In my opinion, if someone has a Raspberry PI and a 3D printer, they can do everything their imagination can suggest (robotics, home applications, and so on). But you can also use your Raspberry PI to control the progress of your printing jobs as well as manage the 3D printer in any setting, even during the printing jobs. It is useful in tuning operations, because it allows you to easily control your printer motors, so quickly getting the correct positioning to improve bed and extruder accessibility and levelling.
What Is OctoPrint
OctoPrint is an open-source project which enables an improved web interface to control 3D printers and printing jobs. It allows:
- Access the embedded webcam feed and watch remotely how your printer is creating your newest thing.
- Get constant feedback regarding the current progress of your print job.
- Take a look at the integrated GCODE visualizer to see a rendition of the GCODE you are currently printing.
- Keep an eye on the temperatures of your hotends and print bed, and adapt them on the fly.
- Move the print head along all axes, extrude, retract or just define your custom controls.
- Start, stop or just pause your current print job, you are in full control at any time.
You can install OctoPrint in your Raspberry PI as an operating system with the Raspberry PI Imager, but this solution will force you to use the full OS for just one job.
Alternatively, you can install OctoPi in a Docker container inside your Raspberry PI OS Lite. This solution allows you to use the same Raspberry PI board for multiple services alongside controlling your 3D printer. Currently, the OctoPrint docker image supports arm v7 and newer CPU architecture, so please use a Raspberry PI computer board compatible with this CPU architecture for this tutorial. I will use my Raspberry PI 5 model B, but this should work with any Raspberry PI computer board from Raspberry PI 2 model B (and Raspberry PI Zero 2 W).
OctoPrint and Docker
Everyone knows my love for Docker. While in the past there were’n any official images for OctoPrint (with the OctoPi released as an unofficial image filling the gap), today we can use the OctoPrint official docker image from the Docker Hub.
What We Need
As usual, I suggest adding from now to your favourite e-commerce shopping cart all the needed hardware, so that at the end you will be able to evaluate overall costs and decide if to continue with the project or remove them from the shopping cart. So, hardware will be only:
- Raspberry PI Computer Board (including proper power supply or using a smartphone micro USB charger with at least 3A)
- high-speed micro SD card (at least 16 GB, at least class 10)
- a Raspberry PI Camera (optional)
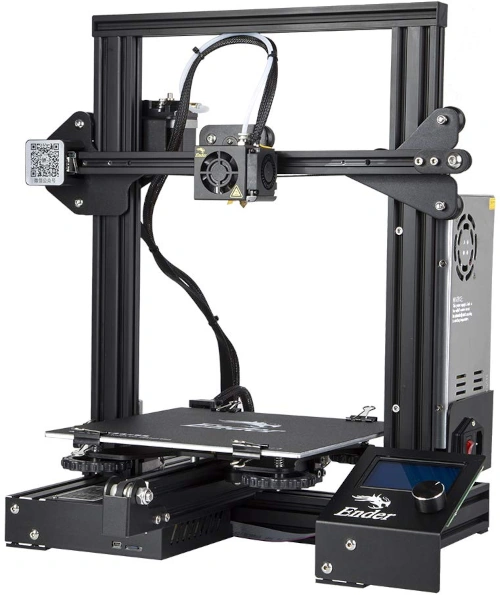
- a 3D printer (I will use my old Anet A6)
Step-by-Step Procedure
Preparing the Raspberry PI Operating System
The first step is installing the Raspberry PI OS Lite (please note that we need the 64-bit version) to get a fast and light operating system (headless). In this case, you will need to work from a remote SSH terminal.
If you need a desktop environment, you can also use the Raspberry PI OS Desktop, in this case working from its terminal app. Please find the differences between the 2 OS versions in my Raspberry PI OS Lite vs Desktop article. NOTE: if you’re working with a low capabilities Raspberry PI (like a Raspberry PI Zero 2 W) you should use the OS Lite version.
Make sure that your system is up to date. Connect via SSH terminal and type the following command:
sudo apt update -y && sudo apt full-upgrade -yWe also need to install Docker. For this step, please refer to my Docker on Raspberry PI tutorial.
Install OctoPrint
Power on the printer
Before starting, we need to identify the port related to USB. For this, you can run (before connecting the USB cable from the printer to the USB port in your Raspberry PI) the following terminal command:
ls /dev | grep ttyThis will show all the current devices mapped in your Raspberry PI.
Now, please plug the USB cable from the printer to the USB port in your Raspberry PI and run again the same terminal command. You will get a new port, in my case named:
ttyUSB0Now, we can run the following docker command:
docker run -d -v octoprint:/octoprint --device /dev/ttyUSB0:/dev/ttyUSB0 -p 8080:80 --restart unless-stopped --name octoprint octoprint/octoprint:latestThis command will download (at the very first run) the required container and run it on the Raspberry PI’s port 8080. Before proceeding with the following steps, let’s look at the options of this command:
- run -d: this command makes the container running in “detached” mode (this means that the program will continue running even if you logout from the Raspberry PI terminal console
- -v octoprint:/octoprint: this option will create a persistent storage volume, including the octoprint configuration files, in your Raspberry PI storage, so that you will keep your configuration saved even after th container remotion
- –device /dev/ttyUSB0:/dev/ttyUSB0: this option will map the USB port (connected to the printer) in your OctoPrint container
- -p 8080:80: this option will publish the OctoPrint interface, available at the port 80 (inside the container), to the port 8080 of the Raspberry PI. This solution allows you to run multiple web services in your Raspberry PI
- –restart unless-stopped: this option allows the container to automatically start even after raspberry PI’s reboots
- –name octoprint: this option gives a mnemonic name to the OctoPrint container
- octoprint/octoprint:latest: this last string identified the container image to use
At the end of the command execution, you will get back your prompt signal from the terminal, without any notification. You can check that the container is running correctly with the docker ps -a terminal command, which should give you something similar to the following:
pi@raspberrypi:~ $ docker ps -a
CONTAINER ID   IMAGE                        COMMAND   CREATED         STATUS         PORTS                                     NAMES
1fe6d9886550   octoprint/octoprint:latest   "/init"   4 seconds ago   Up 3 seconds   0.0.0.0:8080->80/tcp, [::]:8080->80/tcp   octoprint
Now, you will be able to connect your OctoPi setup wizard page from a remote browser by using the URL http://<<YOUR_RPI_IP_ADDRESS>>:8080. For example, in my case, my Raspberry PI’s IP address is 192.168.1.15, and my URL will be http://192.168.1.15:8080/
The OctoPrint Wizard
At the very first connection, OctoPrint will require multiple settings to configure for your printer.
The first page is a Welcome message:
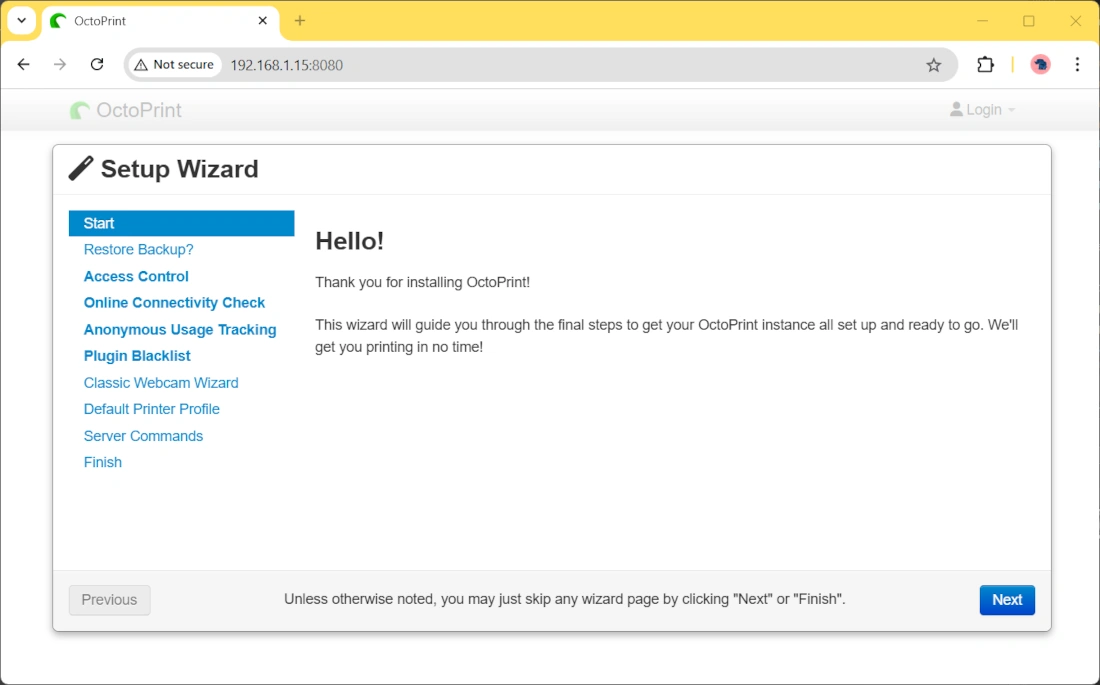
Please click the “Next” button.
The following page allows you to restore your configurations from a backup file (only if you need it):
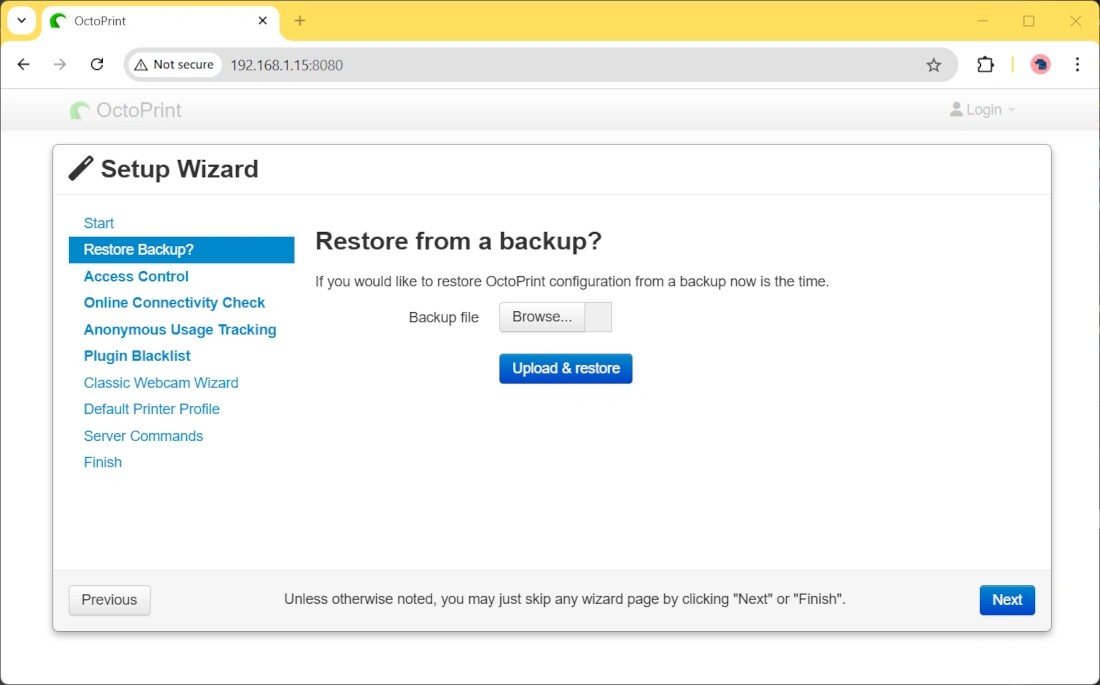
Please click the “Next” button.
The following will require the credentials to create a new user for remote access. Please fill username and password:
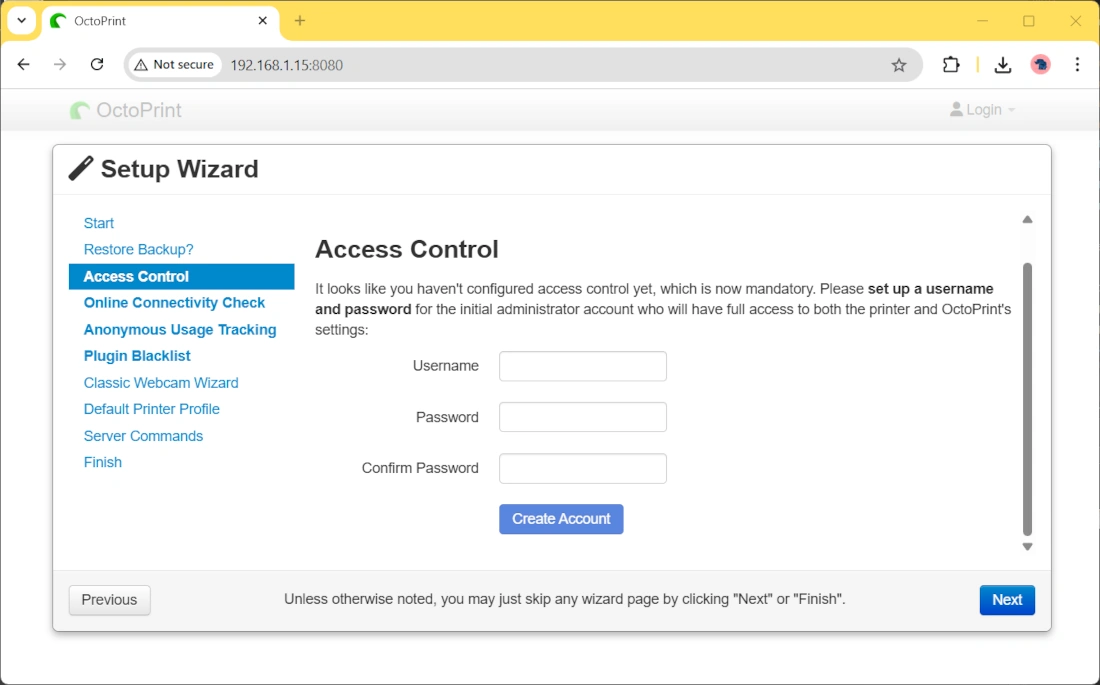
Click the “Create Account” button and then the “Next” button.
OctoPrint uses the internet to search, for example, for updates. The following page will ask you if you prefer to use a custom internet service to check that the internet connectivity is working. You can leave the default values. Befor moving to the following page, please scroll down the page and click the “Enable Connectivity Check” (if you want this task running) or “Disable Connectivity Check” (if you don’t want it):
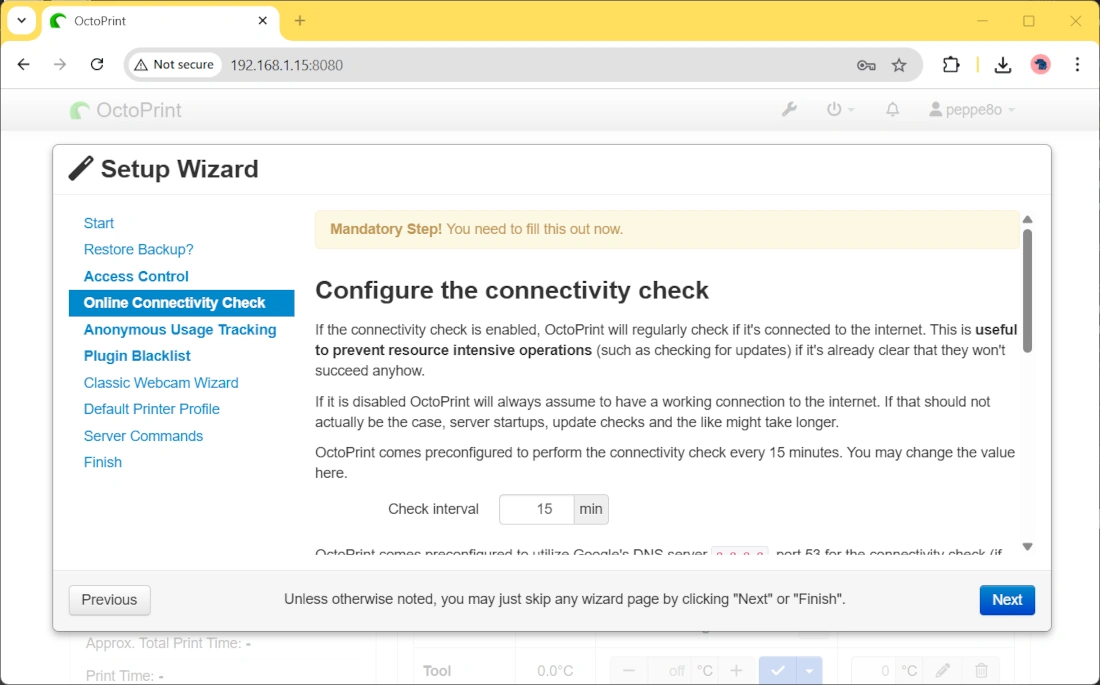
Then, please click the “Next” button.
The following page will ask your permission to track (anonymous) usage stats. You can decide to enable or disable it:
After this, please click the “next” button.
The following page will ask you to enable or disable the plugin blacklist processing, protecting you from some insecure plugins. I suggest you to enable it:
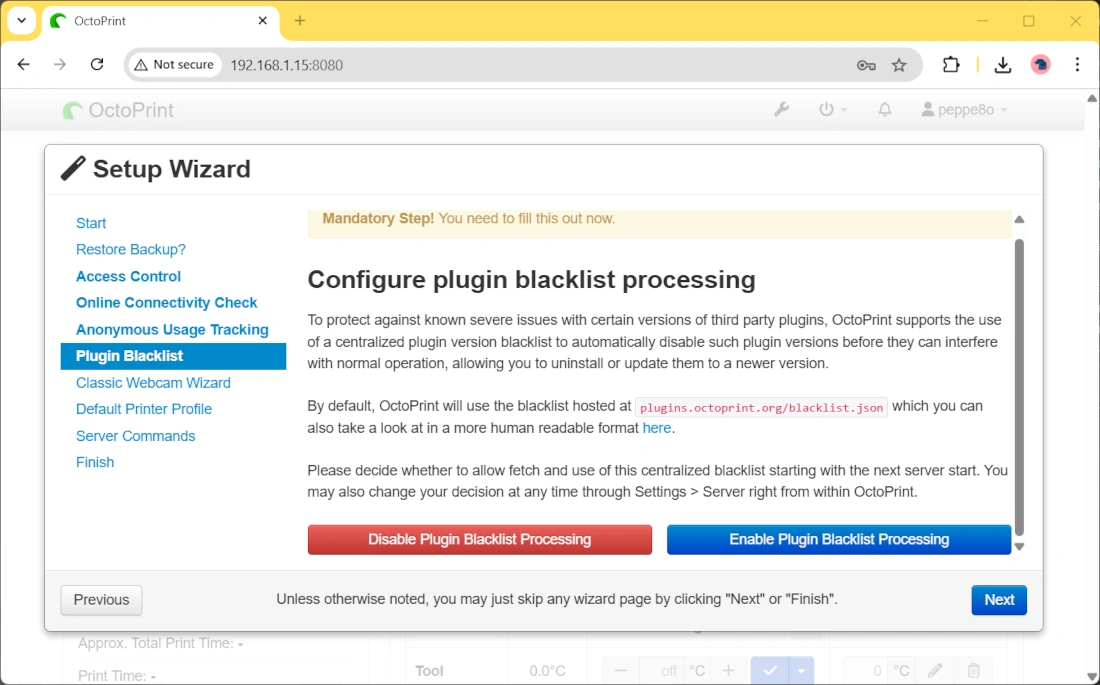
Then, please click “Next”.
This page will ask you to configure a webcam for getting the images shown in the OctoPrint dashboard. You can leave it as is, as we’ll see it later.
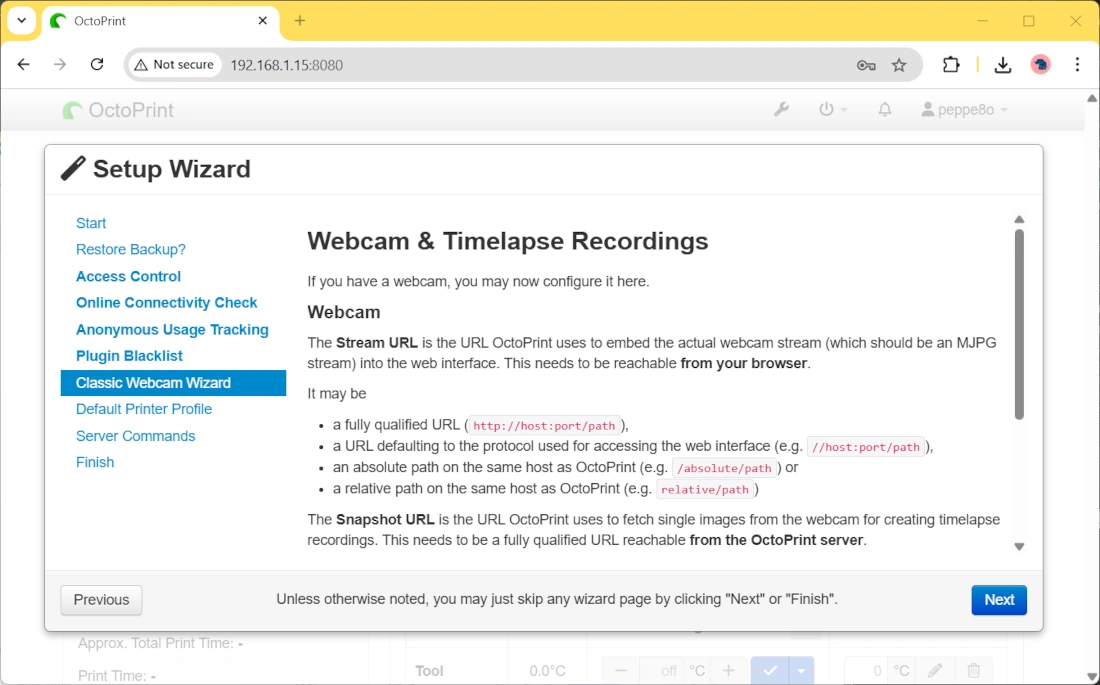
Please click the “Next” button.
The following screen shows you one of the most important configuration pages of the wizard. Here you must enter the settings of your printer, so creating a profile for it. This part depends on your printer, and you can identify the values from your printer’s specs. Later, from the OctoPrint dashboard, you can also create additional profiles for the printer, as well as editing them and giving them a mnemonic name. The settings are available by navigating the highlighted tabs:
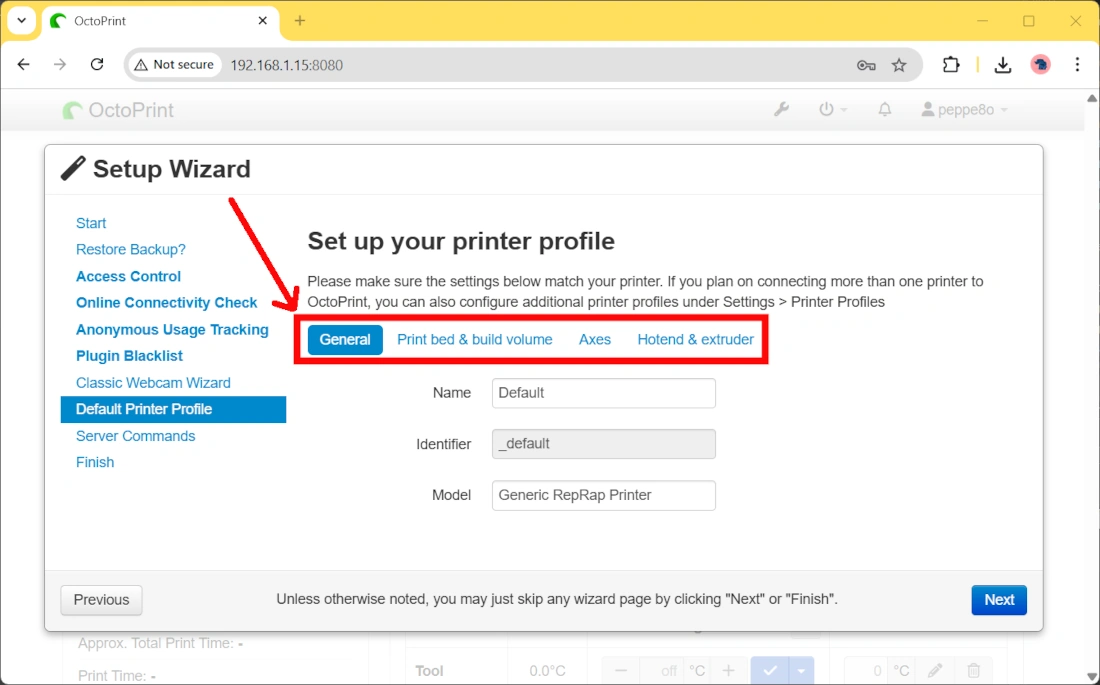
After adding this data, please click the “Next” button.
If you need it, you can also setup server commands for OctoPrint. In many cases, you can just skip this part.
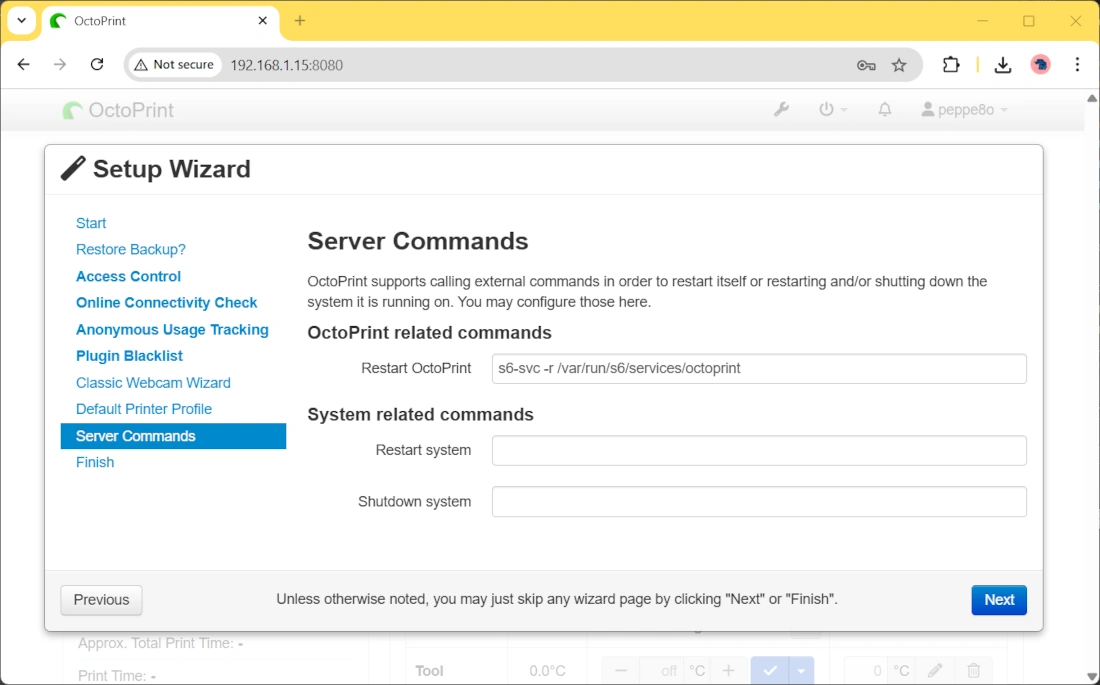
Please click the “Next” button.
The latest page shows you some safety recommendations and OctoPrint’s info. You must acknowledge them by clicking the related boxes, before proceeding.
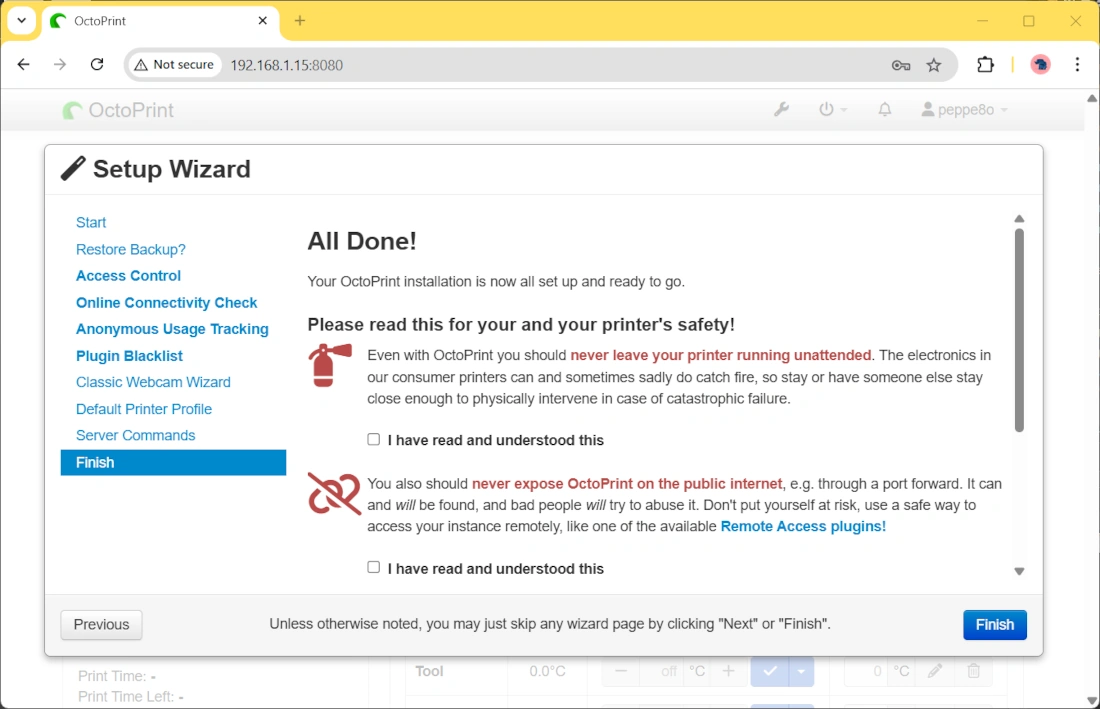
Please click the “Next” button to complete the wizard.
The last page will warn you that a reload is required:
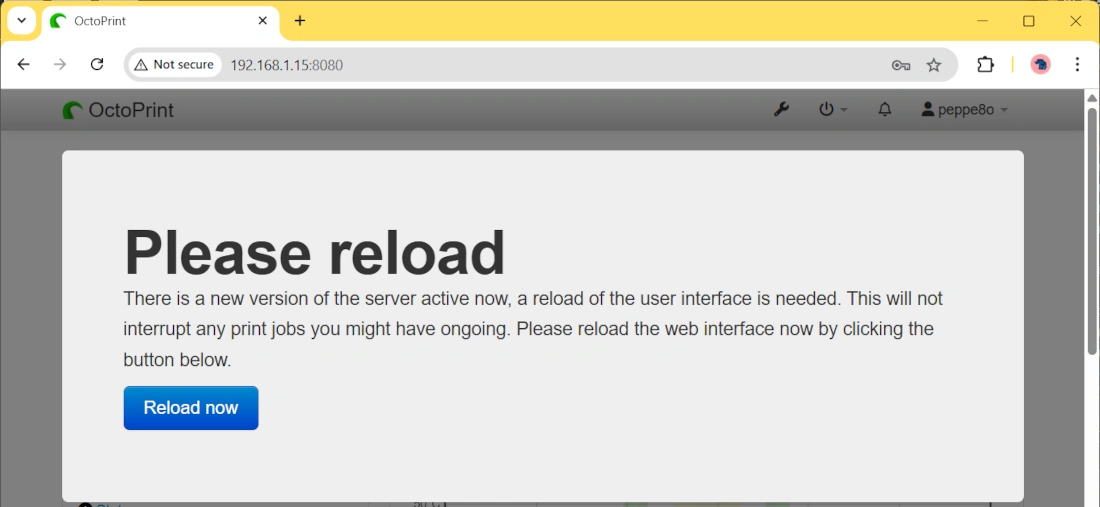
Please click the “Reload now” button. After this fast reload, you will get the dashboard of Octoprint on Raspberry PI:
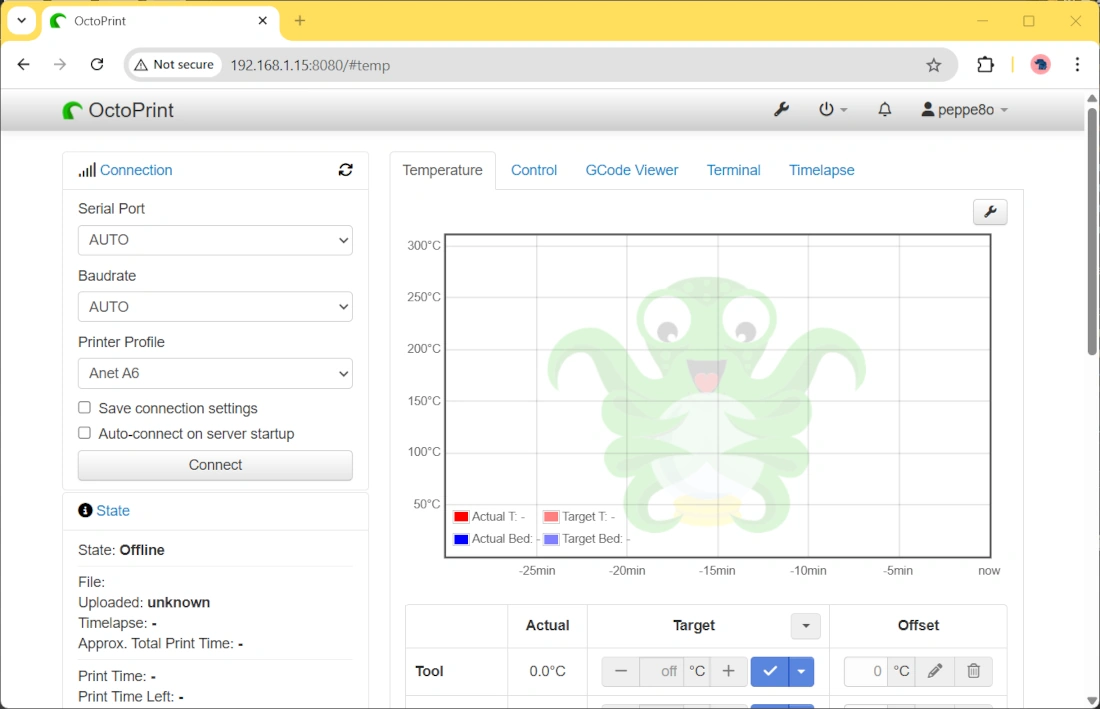
Connecting the 3D Printer from OctoPrint on Raspberry PI
At this point, you’re ready to control your printer.
You have only to select the correct serial port from the proper menù and, then, click the “Connect” button:
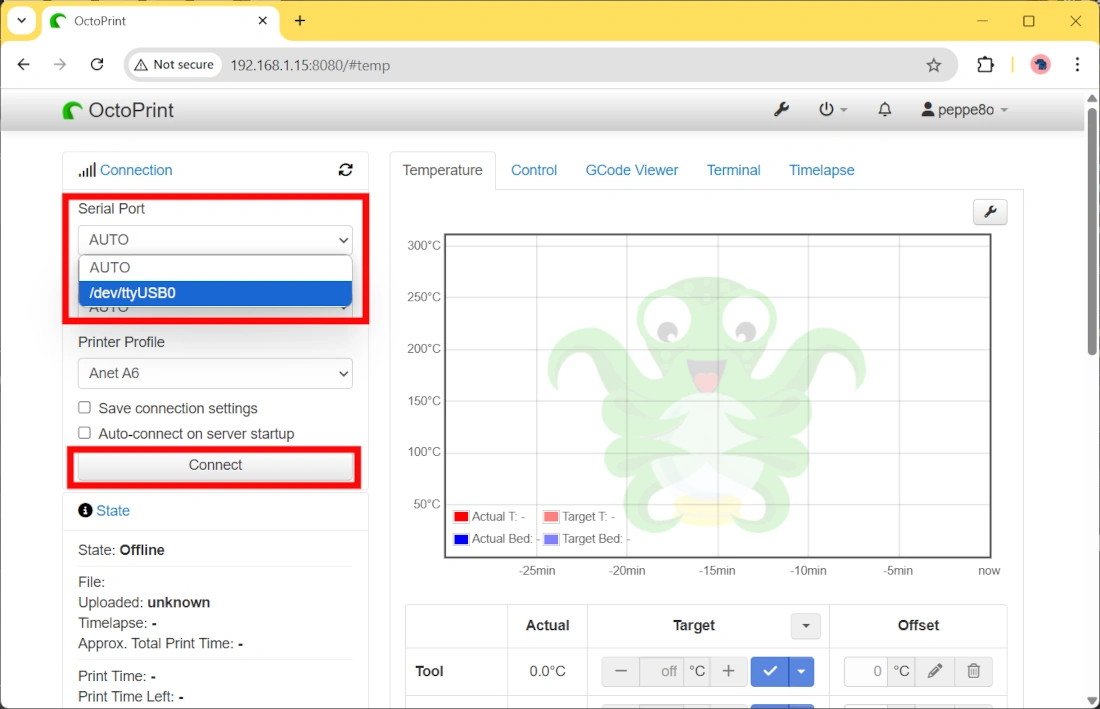
Your OctoPrint dashboard will start to get data from the printer and show, for example, the bed and extruder temperature.
Adding a Camera
OctoPrint supports integrating a camera view in its dashboard (“Control” tab). According to the OctoPrint documentation, you should be able to get the Raspberry PI camera working by simply adding the --device /dev/video0:/dev/video0 -e ENABLE_MJPG_STREAMER=true options in the Docker command. But I found it not working in my case.
A simpler solution can be implementing a small streaming server (in Python) with the picamera2 library and getting images from this server. To use this solution, we must install the picamera2 package:
sudo apt -y install python3-picamera2 -yThen, you can download the streaming server script from the official GitHub page of Picamera with the following command:
wget https://raw.githubusercontent.com/raspberrypi/picamera2/refs/heads/main/examples/mjpeg_server.pyAlternatively, a copy of this script is also available from my download area:
wget https://peppe8o.com/download/python/mjpeg_server.pyOnce you have downloaded the script, you can run the server with the following command:
nohup python mjpeg_server.py &The nohup command will run the Python script in the background. Anyway, you should add it to a running service or job (like adding an entry in your crontab) to make it running after every Raspberry PI reboot.
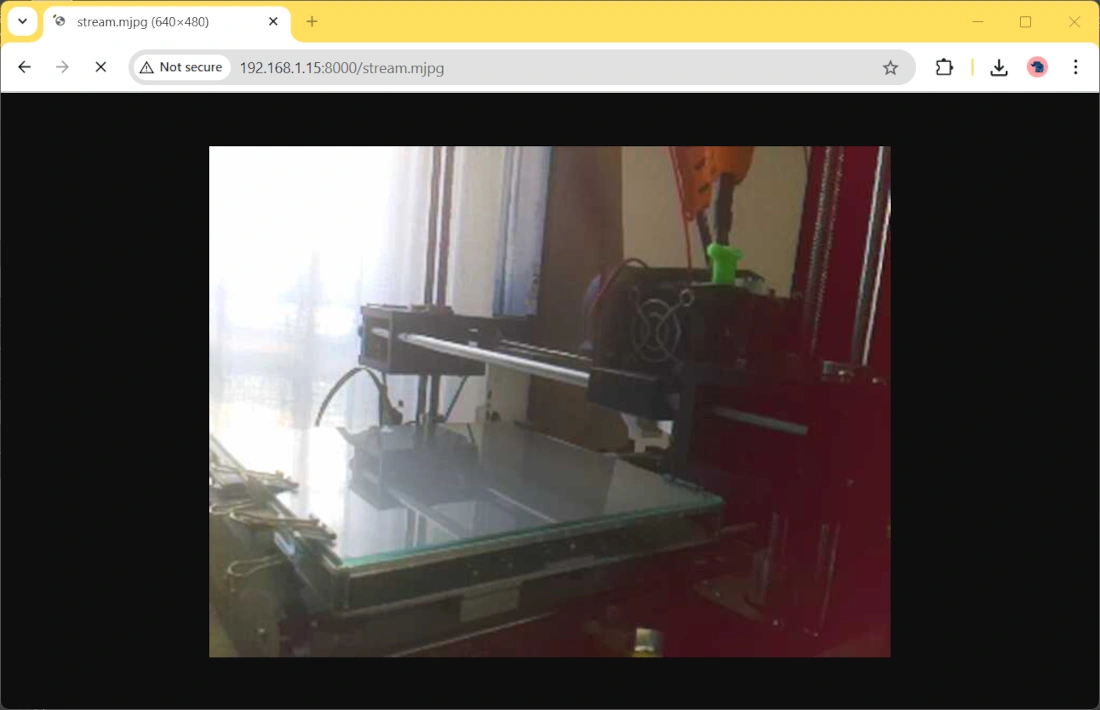
You can now see the camera streaming from a remote browser by using the URL http://<<Your_RPI_IP>>:8000/stream.mjpg. In my case: http://192.168.1.15:8000/stream.mjpg. You will get the video streaming from your Raspberry PI:
Back to the OctoPrint dashboard, please click the settings button:

On the following page, please scroll down the left-side menu to click the “Classic Webcam” item. Here, you will find the “Stream URL” field, where you can add the streaming URL already tested from the browser:
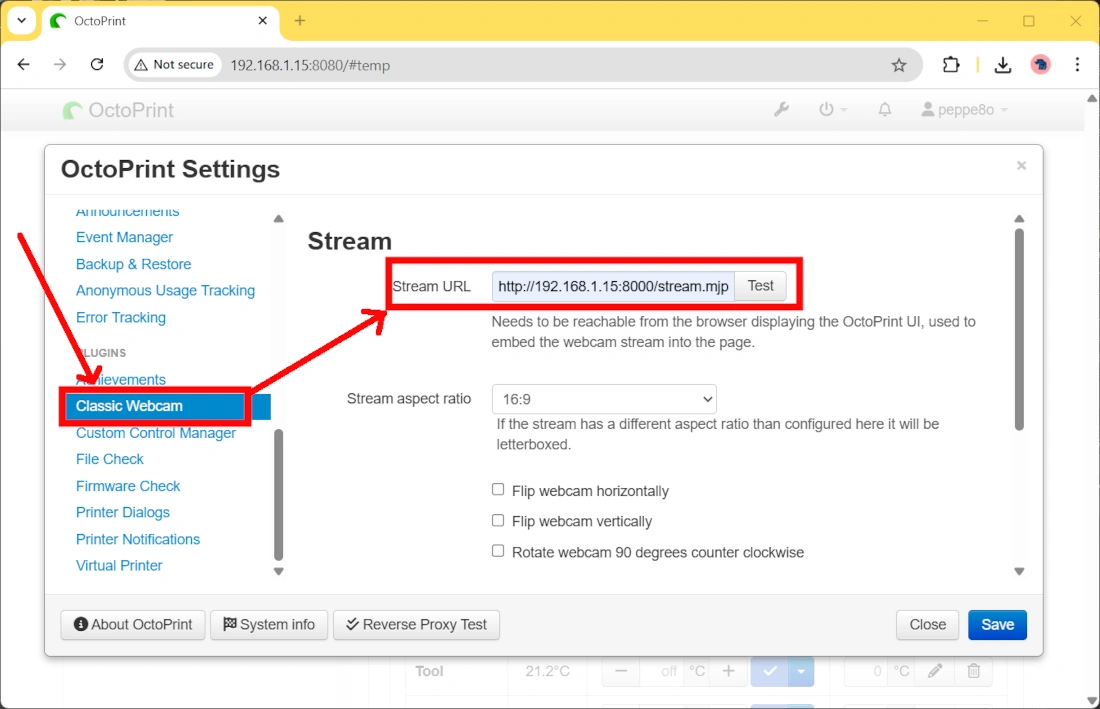
Please use the “Test” button here to double-check your settings:
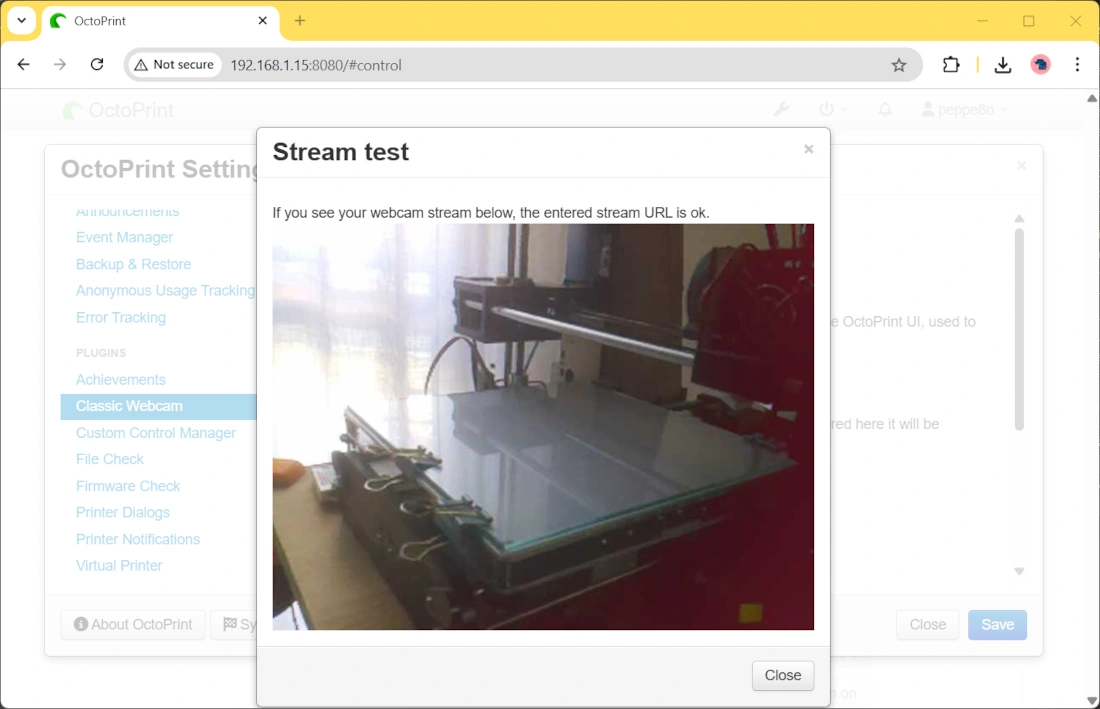
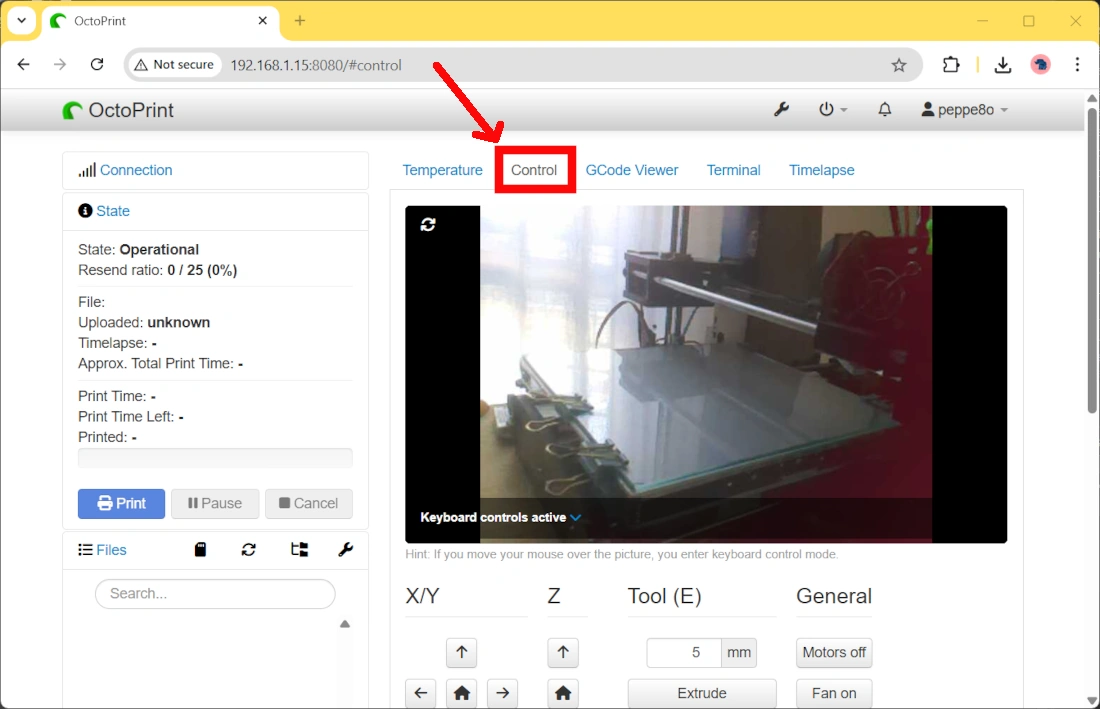
You can close this preview and click the “Save” button in the “Classic Webcam” settings page. Back to the OctoPrint dashboard, you will find the camera output from the “Control” tab:
What’s Next
If you want to discover many other projects for your Raspberry PI, you can take a look at peppe8o Raspberry PI tutorials.
Enjoy!

Open source and Raspberry PI lover, writes tutorials for beginners since 2019. He's an ICT expert, with a strong experience in supporting medium to big companies and public administrations to manage their ICT infrastructures. He's supporting the Italian public administration in digital transformation projects.
![]()
![]()
![]()
![]()
![]()
![]()
![]()


