

Last Updated on 16th November 2025 by peppe8o
In this tutorial, I will show you how to install Rocky Linux on Raspberry PI computer boards. This article will cover the steps to flash the OS image on a microSD card, as well as configure the WiFi connection and install a desktop environment.
About Rocky Linux
Rocky Linux is an open-source Operating System, designed for enterprise environments, compatible with Red Hat Enterprise Linux (RHEL). It is built on the source code of RHEL, which assures stability and support when publishing services.
The Rocky Linux project started at the end of 2020 by Gregory Kurtzer (the original founder of CentOS), in response to the decision of the Red Hat team to discontinue its support for the original CentOS project. This new project aims to keep the same principles based on the origin of CentOS.
This project has been so successful in the community that it soon became the best alternative to CentOS as well as an open-source, enterprise-ready solution, as well as a great alternative to Red Hat Enterprise Linux.
What We Need
As usual, I suggest adding from now to your favourite e-commerce shopping cart all the needed hardware, so that at the end you will be able to evaluate overall costs and decide if to continue with the project or remove them from the shopping cart. So, hardware will be only:
- Raspberry PI Computer Board (including proper power supply or using a smartphone micro USB charger with at least 3A). Rocky Linux supports only Raspberry PI models from 4. A minimum of 4GB RAM model is suggested if you need a desktop environment
- high speed micro SD card (at least 16 GB, at least class 10). I suggest at least 32GB of storage space to get enough room for packages, updates, and so on.
- An HDMI monitor, compatible with your Raspberry PI model
- USB keyboard/mouse

Step-by-Step Procedure
Install the Operating System
For this step, you can download the OS image from the Rocky Linux download page from your computer. Here, please take care to select the ARM (aarch64) option as shown in the following picture:

Then, scroll down the page to download the OS image for Raspberry PI boards:
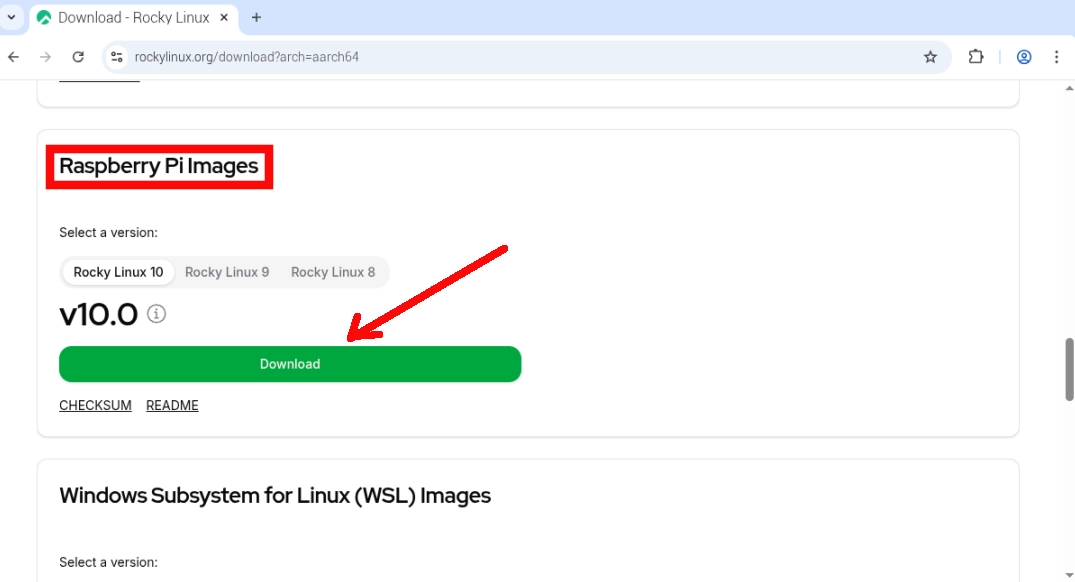
This will download a “.raw.xz” file.
Now, please flash the OS to your microSD card by using the Raspberry PI Imager. In the Operating System menu, select the “Use Custom” option to open the downloaded image file. If the imager prompts you to choose whether to apply OS customisation settings, please answer NO.
First Boot for Rocky Linux on Raspberry PI
At the end of the image flashing process, you can remove the microSD card from your computer and insert it in your Raspberry PI. Connect it to the monitor and the USB keyboard/mouse, and power on.
The Rocky Linux OS for Raspberry PI installs a minimal version, without any desktop environment. Moreover, if you don’t use an Ethernet cable, you will probably need to setup the WiFi connection. We’ll see these steps in this chapter.
At the end of the boot process, you will get something like the following:
Rocky Linux 10.0 (Red Quartz)
Kernel 6.6.77-8.el10.altarch.aarch64+16k on aarch64

localhost login:
The default credentials to login on Rocky Linux for Raspberry PI are:
- username:
rocky - password:
rockylinux
The very first task to accomplish (only in your first login) is to let the OS use the whole microSD card. You can do this by issuing the following terminal command:
sudo rootfs-expandThis will probably require you to confirm your password.
Connect to a WiFi Network
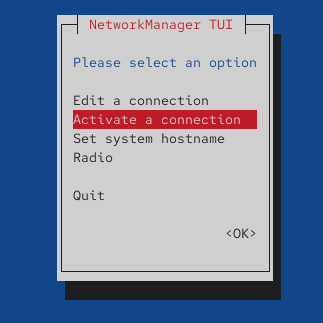
Any modern computer or server is useless without an internet connection. If you want to use a WiFi connection, Rocky Linux allows you to get it working without the need to work on configuration files, as it offers you a network management user interface for the terminal. You can use it with the following terminal command:
sudo nmtuiIt will open a simple tool (as shown in the following picture), where you can use the “Activate a connection” option to easily connect to your WiFi network.
Please note that, by default, OpenSSH is installed in Rocky Linux. So, after connecting to your home network, you can access the Raspberry PI from a remote SSH connection.
Install and Enable the Desktop Environment
Rocky Linux allows you to easily install its default Desktop Environment (based on GNOME).
Please update the DNF (Dandified YUM) package manager database:
sudo dnf upgradeNow, you can list some presets you can install in group with the following terminal command:
sudo dnf grouplistIn this list, you should be able to identify the “Server with GUI” option. You can use it with the following command:
dnf groupinstall "Server with GUI"This command will download and install all the required packages. Also, during the installation process you will be prompted to confirm some of the steps. Please answer “y” (yes).
After this process ends, we would expect that we’ll be able to reboot the Raspberry PI and get the desktop environment ready to use. This part isn’t well explained in the Rocky Linux documentation, as we also need to add a small configuration piece in our configuration file. Please open the config.txt file in your terminal for editing:
sudo nano /boot/efi/config.txtAppend the following line to the file:
dtoverlay=vc4-kms-v3dNow, you can reboot your Raspberry PI:
sudo rebootAt the new boot, you will find the desktop login, which will enable you to access the Desktop Environment.
Use the Rocky Linux Desktop Environment
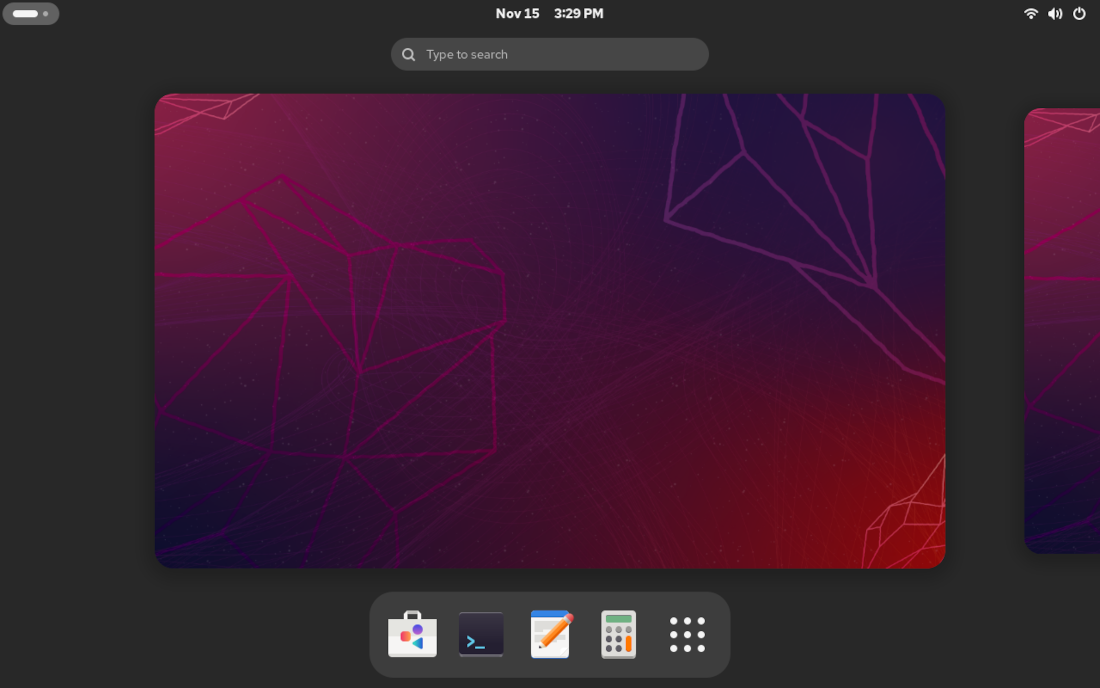
The desktop should be familiar to anyone already tested the GNOME environment. By clicking the top-left corner, you will enter the main desktop menu. You can also reach this menu with the “Super” button from your keyboard (this is sometimes known as Windows button):
Here, you will easily identify the Store icon, from where you can install more applications from a graphical user interface:
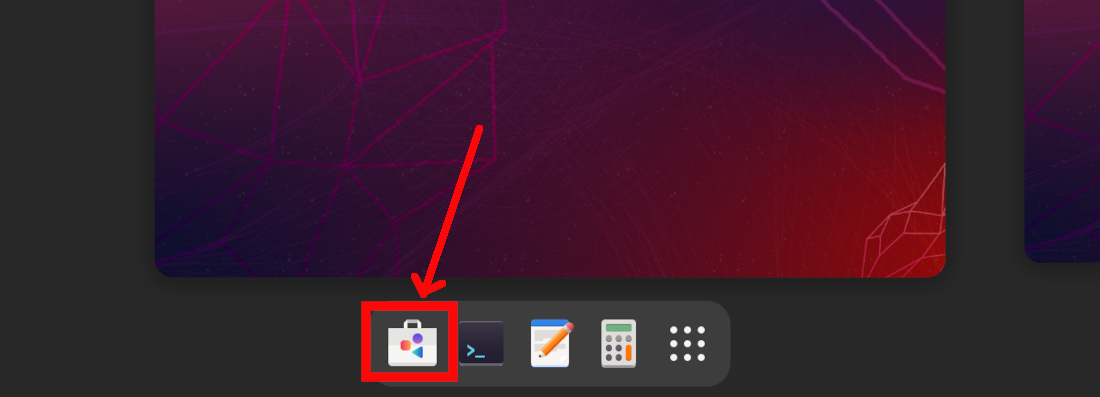
At the beginning, there will be a few applications available to install. You can get more options by enabling Rocky Linux repositories.
Another important item is the app button:
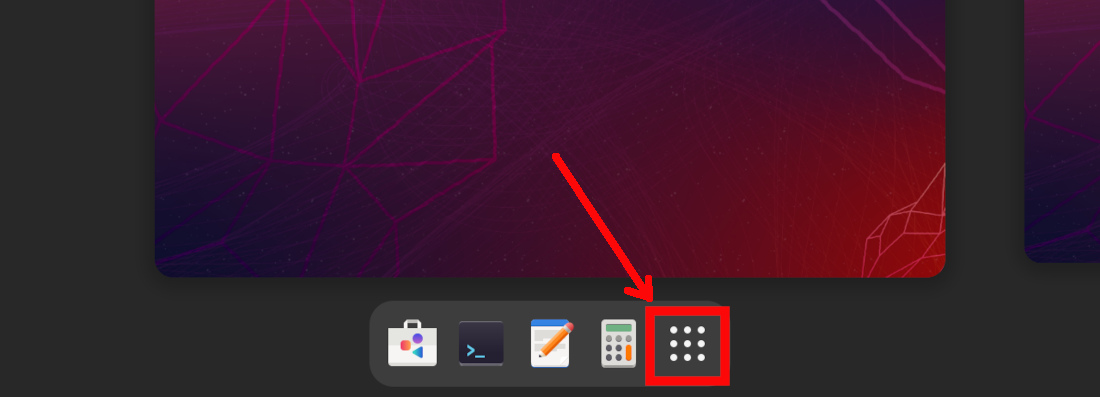
You can use it to access the GNOME app grid, so looking at and launching all the installed applications:

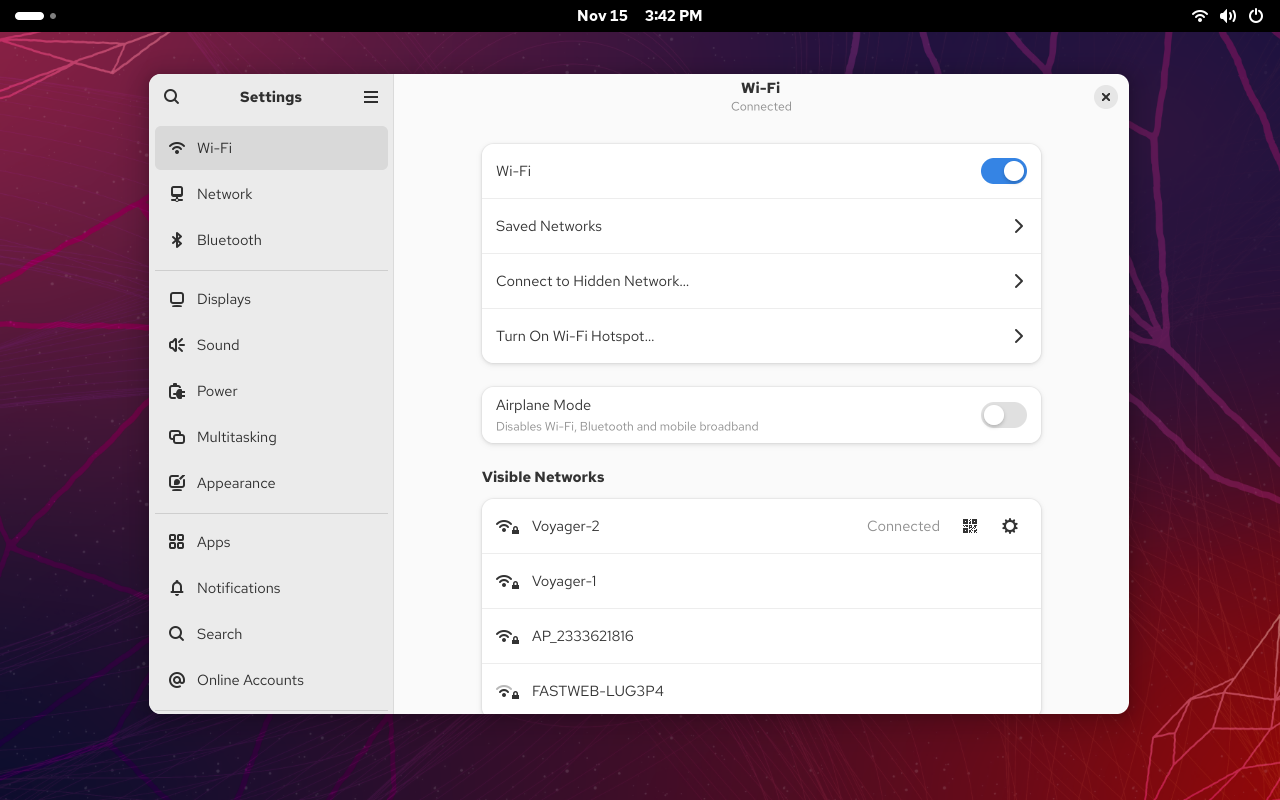
Here you will also find the Settings button, which will open the Settings menu. Also this will appear familiar to GNOME (and smartphone) users:
Next Steps
Interested in more projects with your Raspberry PI? Take a look at peppe8o Raspberry PI computers tutorials pages.
Enjoy!

Open source and Raspberry PI lover, writes tutorials for beginners since 2019. He's an ICT expert, with a strong experience in supporting medium to big companies and public administrations to manage their ICT infrastructures. He's supporting the Italian public administration in digital transformation projects.
![]()
![]()
![]()
![]()
![]()
![]()
![]()


