
Last Updated on 2nd September 2023 by peppe8o
In this tutorial I’m going to show you how to install libraries with Arduino IDE, listing different methods to achieve this result.
Installing libraries with Arduino IDE is important to enhance your code to support external devices with the help of pre-built software defining communication protocols
What are Arduino Libraries
Arduino libraries are files written in C or C++ (. c, . cpp) which enrich your sketches with additional functionalities (e.g. the ability to control an LED matrix, or read an encoder, etc.) without the need to write every line of code, so reusing an existing one.
There are three types of Arduino Libraries:
Standard Libraries: Those libraries come with the Arduino IDE to help beginners with the most common project examples. Standard libraries enable basic communication the most common external devices and sensors like LCD display, motors and the very first “blink” project. Standard Libraries are located in the “Libraries” folder, usually available in Documents > Arduino > libraries on Windows installation.
Library Manager Libraries: Arduino IDE also has a Library Manager to search and install third-party libraries submitted to Arduino for use.
User Installed Libraries: There are libraries available from other external sources like Arduino Playground and Github.
Libraries enable PIN constraints and communication methods. The libraries are basically software short commands, stored to make the code user-friendly. Usually libraries define PIN numbers, communication protocol, and working methodology. This thing makes the user utilize the commands easily and get the results with a simplified code.
- Build-in commands make it easy to use
- Communication protocols enabled
- Pins Defined
Here are the methods to add the library in the Arduino IDE.
Methods to add library in Arduino IDE
Note: Arduino software is not responsible for the check that library is good or bad for your work.
There are three methods to add a library in Arduino IDE.
Method 1: Search and install Library from Arduino IDE Software
Here is the method by IDE, as Arduino software give the facility to add the library by its own search. These libraries are supported by different websites and are authentic as provided by the software. Here are the steps for this techniques.
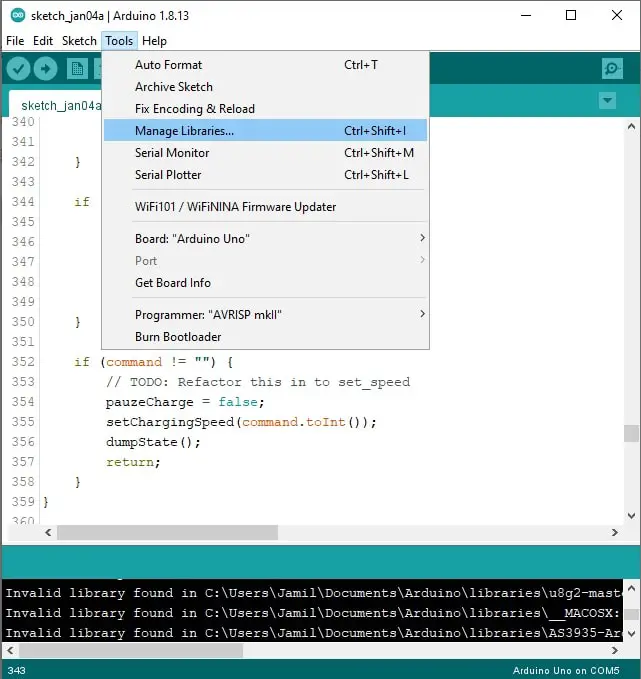
Open the Manage Libraries Menu
Open the Arduino software, go to tools on top left corner, as seen in the picture Tools > Manage Libraries. Here you can search for required library:
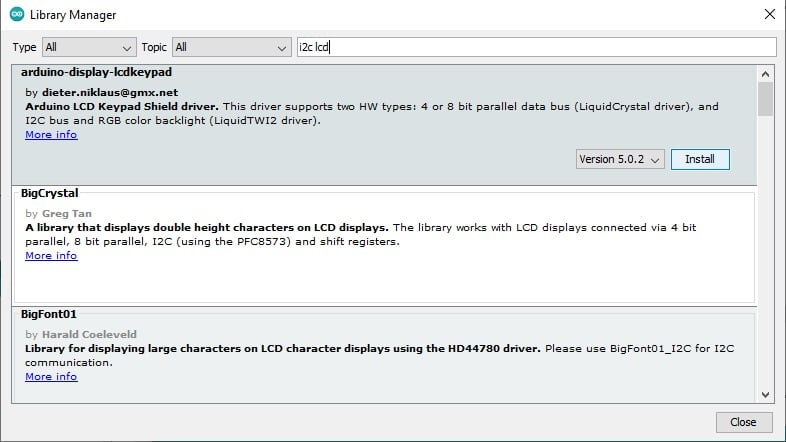
Search the Library
Search for the library and add press install, after which have to press the close. This will add the library. Figure shows the library addition from the software of Arduino:
Mostly the libraries for Arduino are in .zip file which can be available in GitHub (an example is link https://github.com/fdebrabander/Arduino-LiquidCrystal-I2C-library), Arduino official website (Link: https://www.arduino.cc/en/Tutorial/LibraryExamples). Here are two methods to add the .zip file in the Arduino.
Method 2: Manual Addition of Library (Extract and Drop)
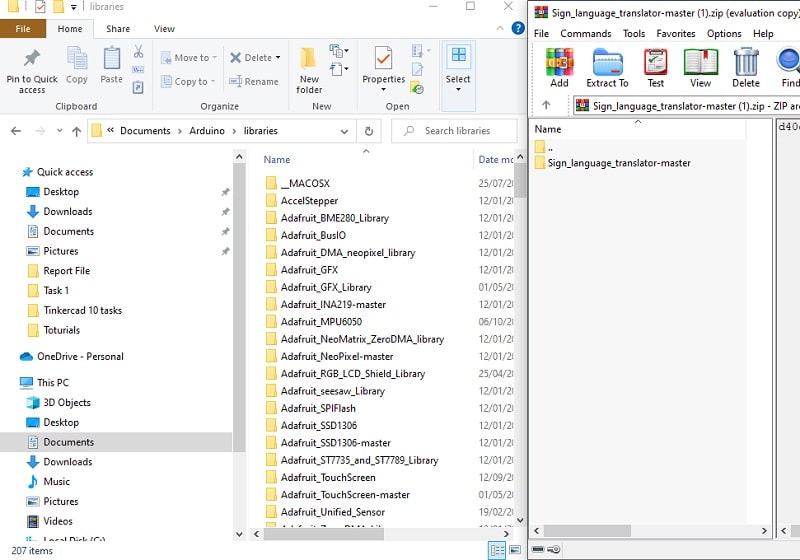
In this method, the copy and paste technique is used, have to open the .zip file by using WinRAR and drag the library file in the Documents > arduino > libraries folder. Commonly, we use this method for pasting outsourced library in the software:
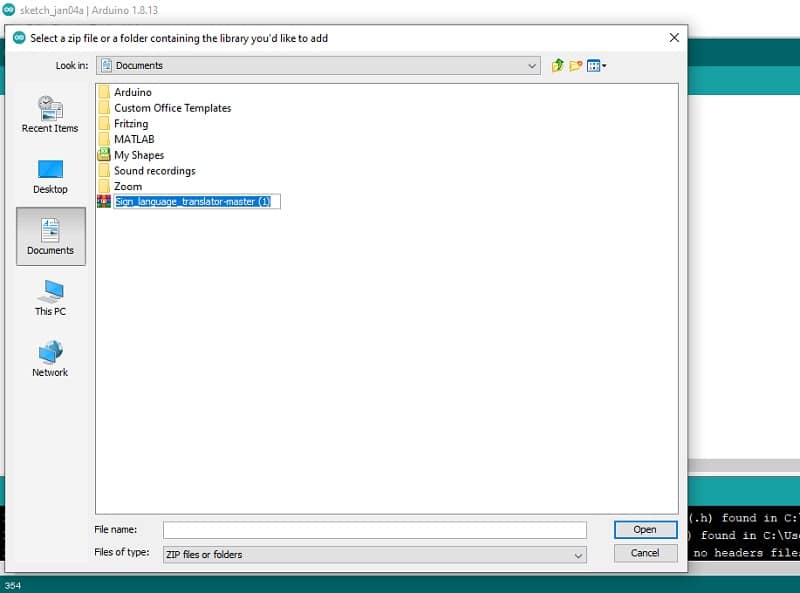
Method 3: Zip File addition method through Software
In this method have to add the library by Arduino software.
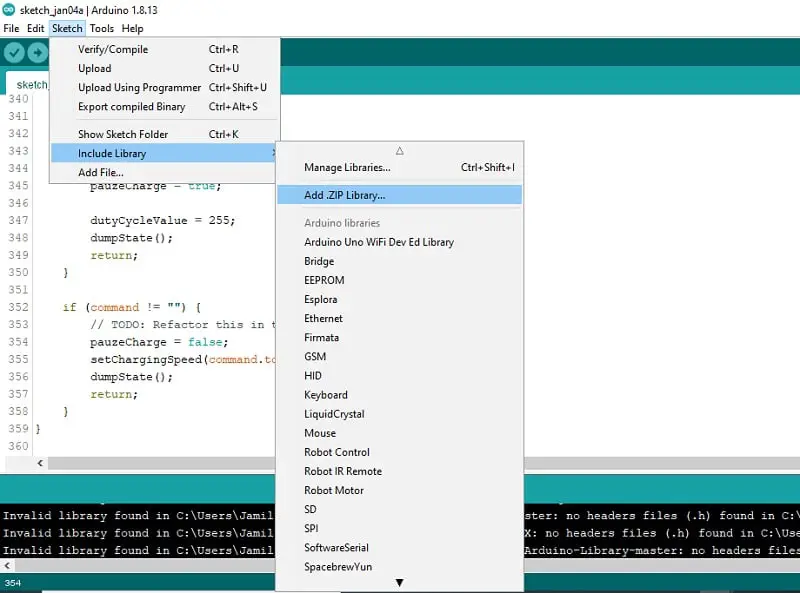
Open Arduino Software, Sketch > Include > Add. Zip Library:
Select the compressed package and press open to add the library.
Enjoy!
Umar Jamil
For any queries and help for work, please contact me at:
Whatsapp:+92-346-661-7017
Email: umarjamil0007@gmail.com

I'm an Electronic Engineer, well-skilled to solve the issues of hardware and software. I do have laboratory which contains unlimited sensors and modules for testing the working. Also, I am experienced in Arduino programming, Android mobile application, microcontroller programming, IOTs and embedded projects. I provide services to control, realize the sensor data in the Mobile Application. For any queries and help for work Contact: Whatsapp:+92-346-661-7017 Email: umarjamil0007@gmail.com
![]()