Last Updated on 12th February 2023 by peppe8o
In this tutorial, we’ll see how to install DietPi, an ultra-light Debian-based OS, on Raspberry Pi with a simple step-by-step guide.
Raspberry Pi comes with the most famous OS, directly developed by the Foundation to fit perfectly with it: Raspberry PI OS Lite and Raspberry PI OS Desktop.
Similarly to any other Computer, you have the power of choosing your preferred Raspberry PI OS and trying different flavours of open-source systems. DietPi is a Raspberry PI OS that gives you an interesting alternative.
Even if Raspberry PI OS performs fine, there are also many other Linux distributions able to open new perspectives. In my opinion, one of the most fascinating is DietPi. As the same name says, DietPi comes with a very small default image: about 140MB (compressed). However, this comes with a few feature-rich programs and all of the needed tools to get the best of your Raspberry Pi.
What is DietPi?
DietPi is one of the lightest OS available for Raspberry PI, based on Debian. It can also be used with a number of alternative Single Board Computers, making available for download about 30 hardware-based images.
DietPi is compatible with armv7l, armv6l, aarch64 and x86_64 architectures. It has very low resource needs, so you can test it also with very old hardware.
As said, one of the key features of DietPi is its small footprint, which means it requires less storage space and runs faster. This makes it ideal for use on Raspberry Pi devices with limited storage capacity or low-end hardware specifications, like the older Raspberry PI models. In addition to its small size, DietPi is also highly customizable, allowing users to configure the operating system to meet their specific needs and preferences.
Another important aspect of DietPi is its user-friendly interface, which makes it easy for even the most inexperienced users to navigate and utilize its features. The operating system includes a simple, text-based menu system that allows users to easily install, configure and manage a variety of applications and services. This includes popular tools such as web servers, media players, and programming environments, making it a versatile platform for a wide range of projects and applications.
In terms of security, DietPi is designed to be highly secure, making it ideal for use in IoT and other connected devices. The operating system is regularly updated to ensure that all security vulnerabilities are patched, and users can easily install and configure firewalls and other security features to further protect their devices.
Last but not least, it has a useful installation procedure able to automatize and simplify first boot settings.
For this tutorial, I’m going to use my Raspberry PI 3 model A+, but the same procedure will work with any Raspberry PI computer board.
What We Need
As usual, I suggest adding from now to your favourite e-commerce shopping cart all the needed hardware, so that at the end you will be able to evaluate overall costs and decide if to continue with the project or remove them from the shopping cart. So, hardware will be only:
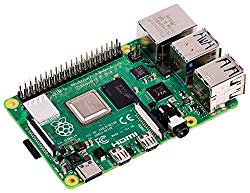
- Raspberry PI 3 Model A+ (including proper power supply or using a smartphone micro USB charger with at least 3A) or newer Raspberry PI Board
- high speed micro SD card (at least 16 GB, at least class 10)
You can use the DietPI also with older Raspberry PI computer boards, by taking care to download the proper OS image from the following page.
You will also need a computer with installed a flashing software like the official (and free) Raspberry PI Imager or Balena Etcher. In this tutorial, I will use the Raspberry PI Imager (run as administrator on Windows PC).
Step-by-Step Procedure
Step 1: flash OS image to SD card
Download the DietPi image for your Raspberry PI model from the official download page and uncompress it. You should get the “.img” image file that you will use in the following.
Insert your microSD card into your PC/SD card reader.
Open the Raspberry PI Imager and use the “Choose OS” button to scroll down and select the “Use Custom” option:
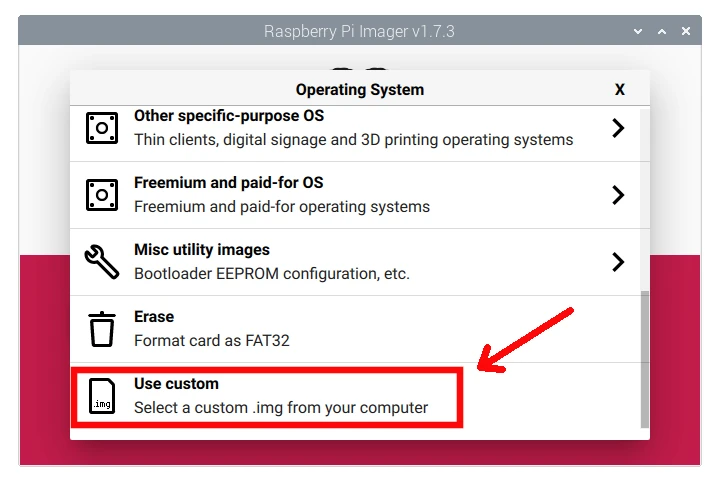
From here, you will be able to select the extracted “.img” file just downloaded from DietPi download page.
After selecting the Storage (your microSD card), take care that all the Raspberry PI settings available from the Advanced Options (the button with a gear icon) are unselected.
You can now flash the microSD storage with the Write button:
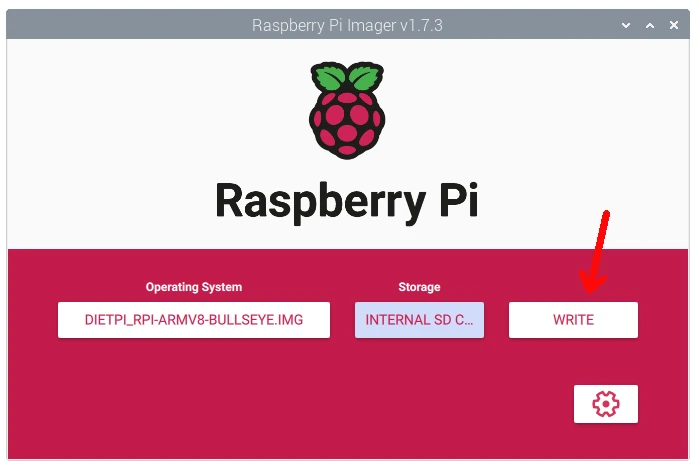
Once the flashing completes successfully, please wait before ejecting the microSD card, if you want to proceed with a headless configuration (Step 2).
If you don’t need a headless setup, you can eject the microSD and proceed with the Step 3.
Step 2: preconfigure WiFi for headless setup
If you are going to use a headless setup (without a monitor/keyboard), a preconfigured WiFi could be useful to have it ready at the first boot with the WiFi connection already up. DietPi allows getting this goal by opening the boot partition (from the computer where the flashing has been performed) and editing the following 2 files.
In the dietpi.txt, identify the following line:
AUTO_SETUP_NET_WIFI_ENABLED=0and configure it to “1” to enable WiFi:
AUTO_SETUP_NET_WIFI_ENABLED=1In the dietpi-wifi.txt file, configure and save your WiFi connection by setting the correct parameters in:
aWIFI_SSID[0]='yuor-wifi-ssid'
aWIFI_KEY[0]='your-wifi-password'
You can now safely eject your SD card.
Please note that the dietpi.txt file offers more options than the simple WiFi settings. Here you can set a more detailed network configuration, System options (like hostname or locale), pre-configuring software and packages or even execute a custom script. The guide for these configurations is available at DietPi usage docs-> How to do an automatic base installation at first boot.
Step 3: boot the DietPi on Raspberry PI
Insert the flashed SD Card into your Raspberry and boot it. Identify the IP assigned, by checking your router access or How to find Raspberry PI’s IP.
Also, consider that the very first DietPi boot could last a bit more than usual time because of the pre-setting tasks like filesystem expansion (that will automatically reboot your device).
Connect via SSH to your Raspberry PI. The default credentials for DietPI on Raspberry PI will be:
user: root
password: dietpi
Moreover, the default hostname will be DietPi.
At the first login, after the process checks and automatic system update/upgrade, DietPi will suggest changing the password that will be used for software management:
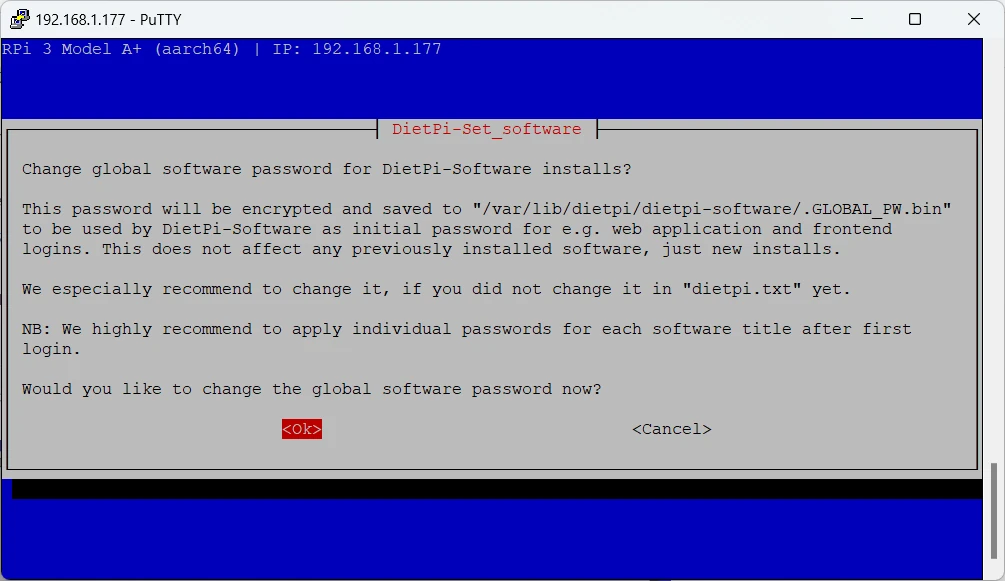
I strongly suggest selecting “OK” to change it (in this and the following terminal wizard, you can move between options with the “TAB” or arrows keys and select with RETURN key from your remote PC). Confirming to change the password, it will ask for the new one:
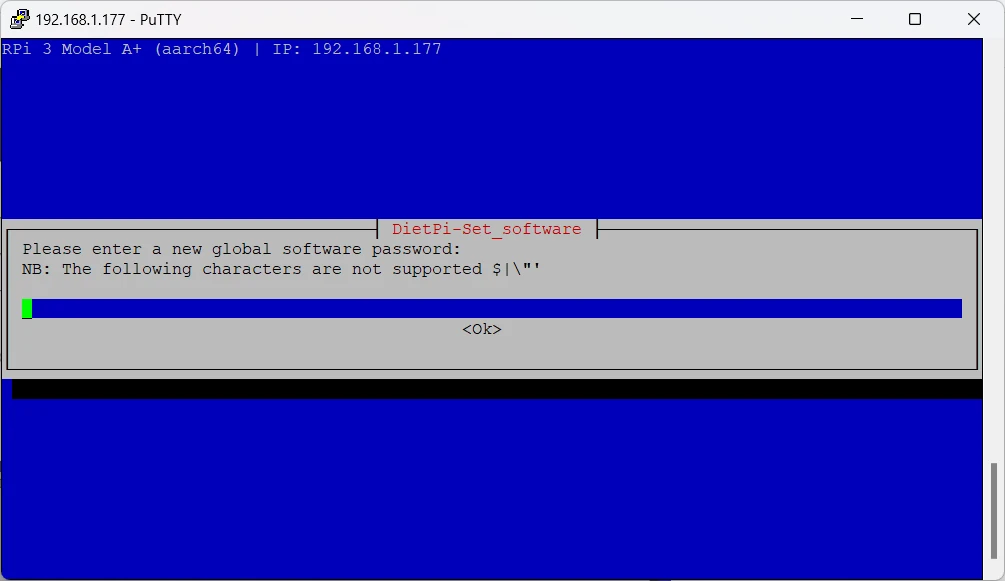
Enter the new password and press RETURN. The following screen will ask for password confirmation:
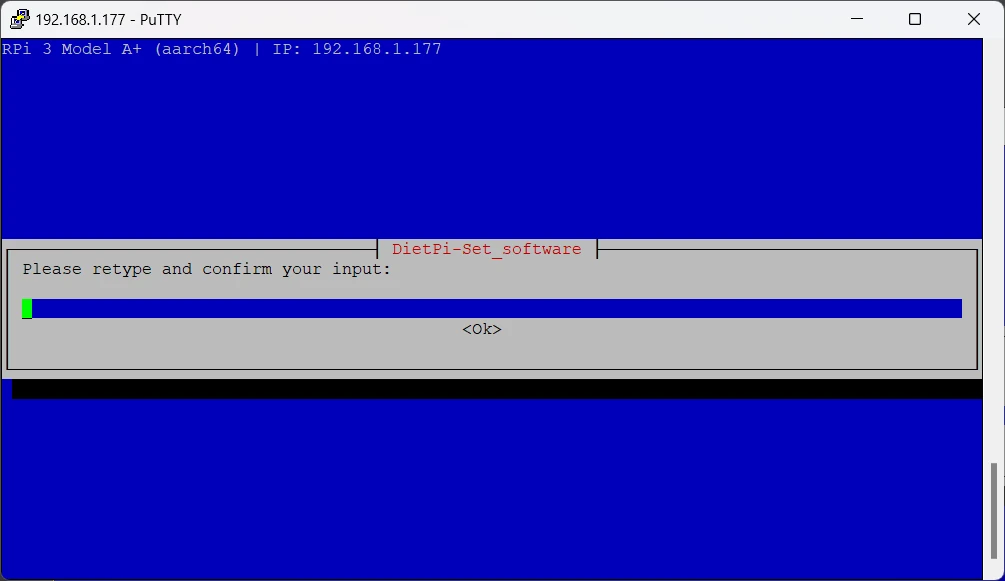
Then, the same question comes also for the default users: the “root” user and the “dietpi” users:
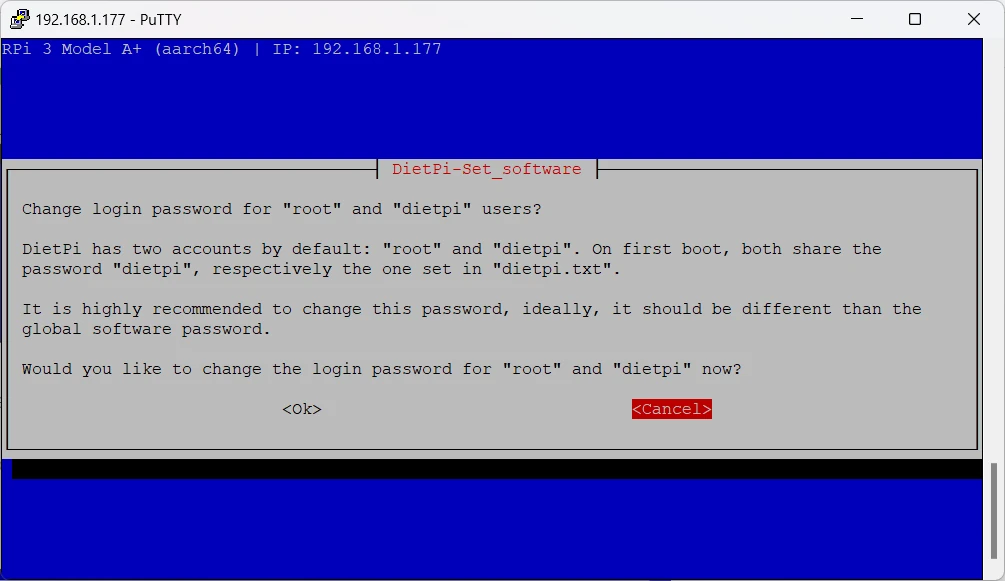
Again, changing it will assure better security for your Raspberry PI. Follow the password prompt to change it and give the following confirmation.
The following page will ask for another security setting, that regards disabling the UART port.
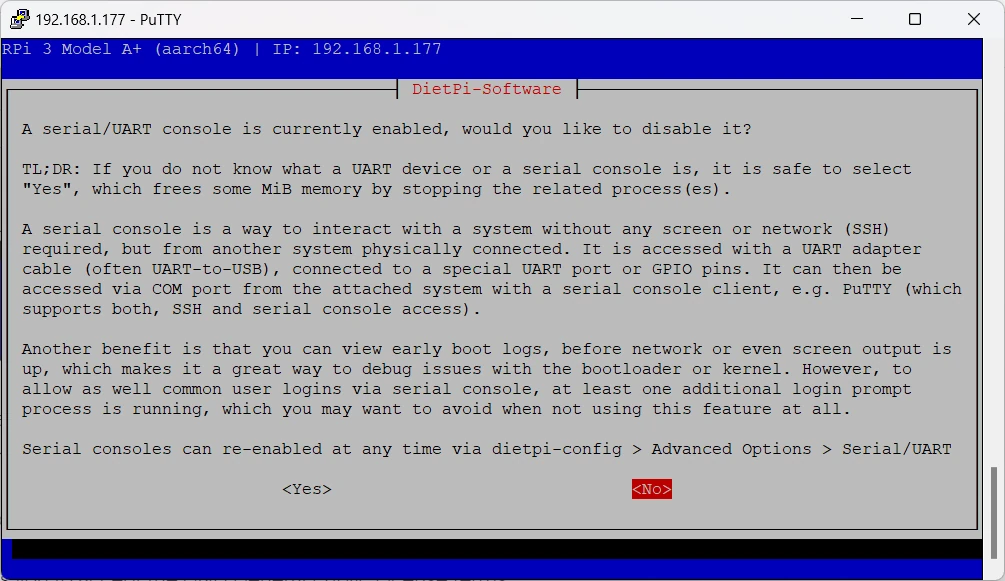
Unless you have a specific need for this communication protocol, you can disable it by selecting the “OK” button.
The following page will propose you the DietPi-Software tool:
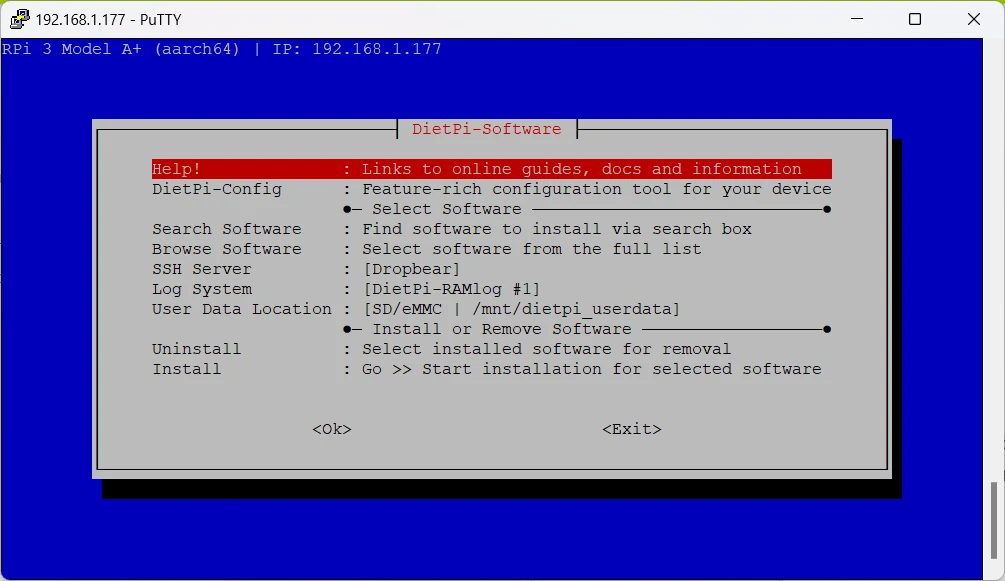
The next step is a bit tricky, if you want to proceed with a minimal installation, as I would click “OK” or “Exit” expecting to complete the setup. I would suggest the friends from DietPi team make this part of the terminal wizard a bit more clear.
To complete your DietPi installation with this minimal set, you have to use the “Install” button:
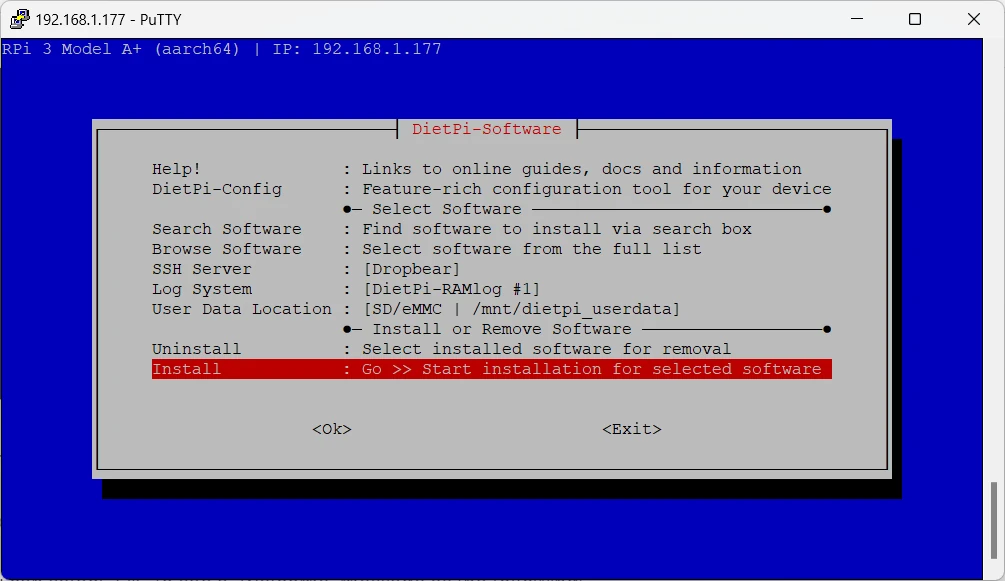
That will ask for a confirmation
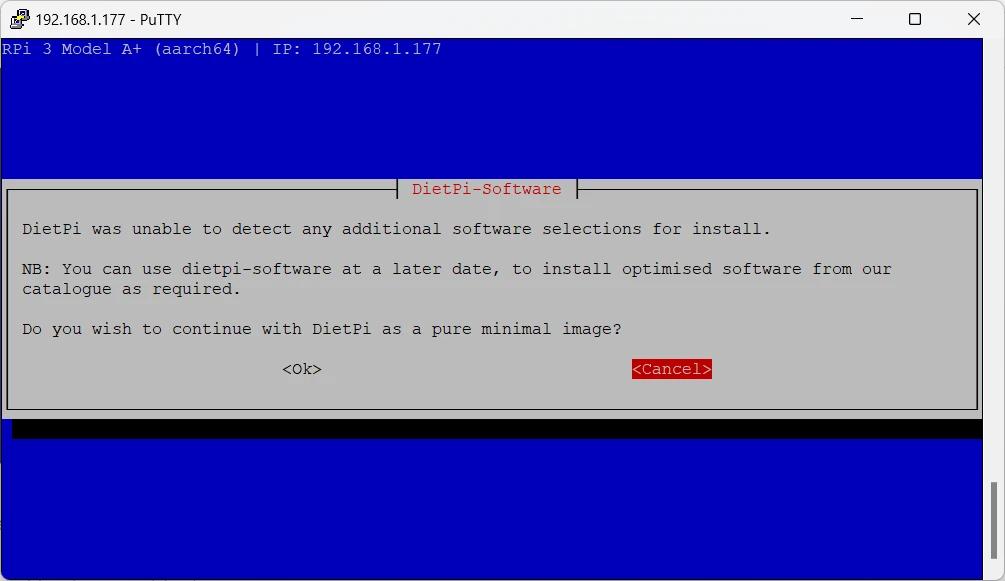
Please confirm with the “OK” button.
The final wizard part will ask you if you want anonymous data to the DietPi team for statistics:
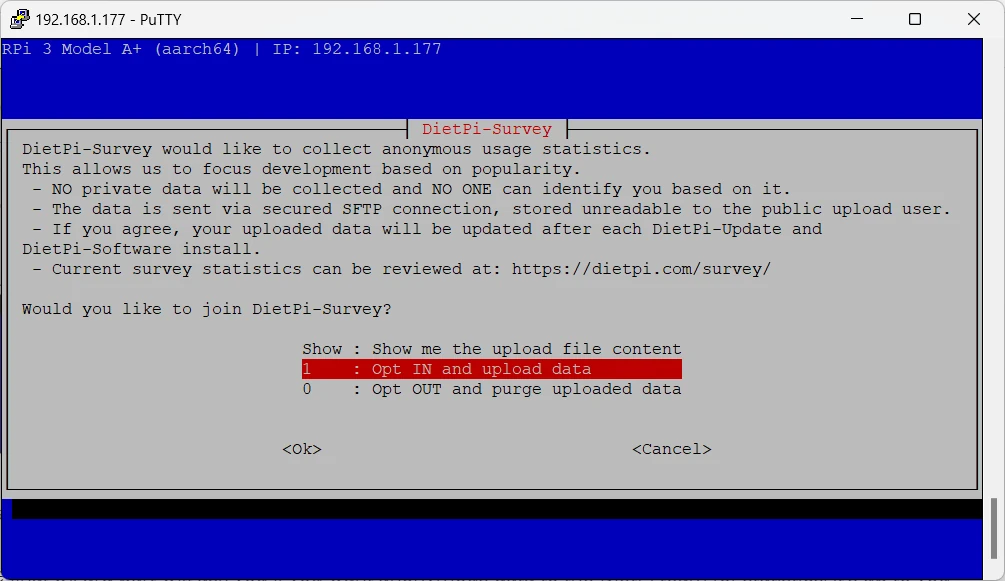
It’s up to you to confirm or not, as it will not affect the technical installation.
After this step, you will finally reach the terminal prompt, as the installation has completed:
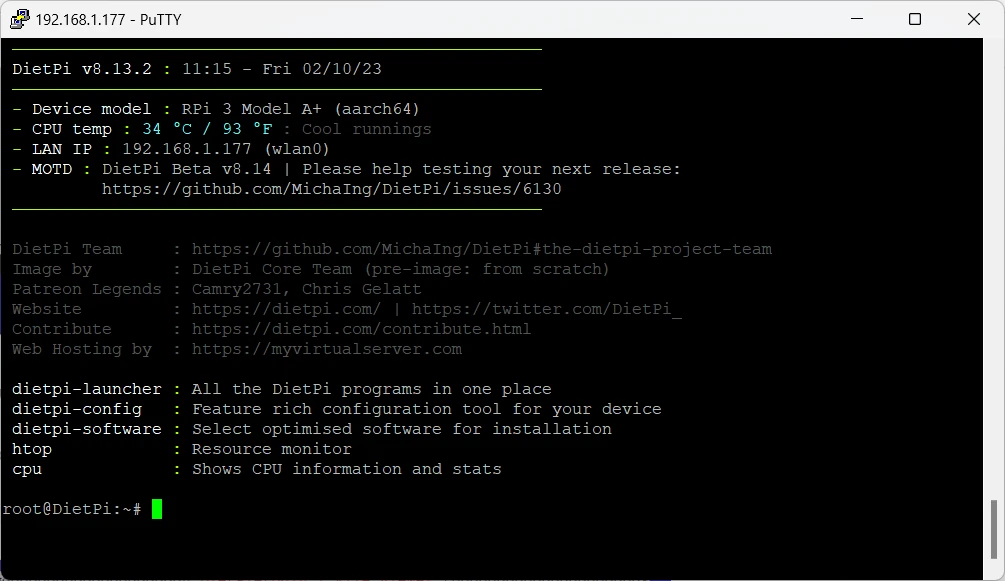
Step 4: setup automount
As many usages of the Raspberry PI computer boards require disk space and as running on a micro SD card may not assure enough disk space, you will probably need to attach and use USB storage.
Like the Raspberry PI OS Lite, DietPi doesn’t is so minimal that the automatic mount of USB storage devices isn’t performed. To accomplish this task, you can refer to my Automount USB storage with Raspberry PI OS Lite: fstab and autofs, which will assure the automatic mount of your external hard disk or pen drive at every boot.
Step 5: fine-tune DietPi on Raspberry PI
For those that already used the Raspberry PI OS Lite, in DietPi there’s a tool which will look similar to the raspi-config: the dietpi-config.
This terminal tool allows tuning your Raspberry PI board according to your preferences and will be useful also to improve performances. You can open it from the terminal with the command:
root@DietPi:~# dietpi-configThis will open a new menù:
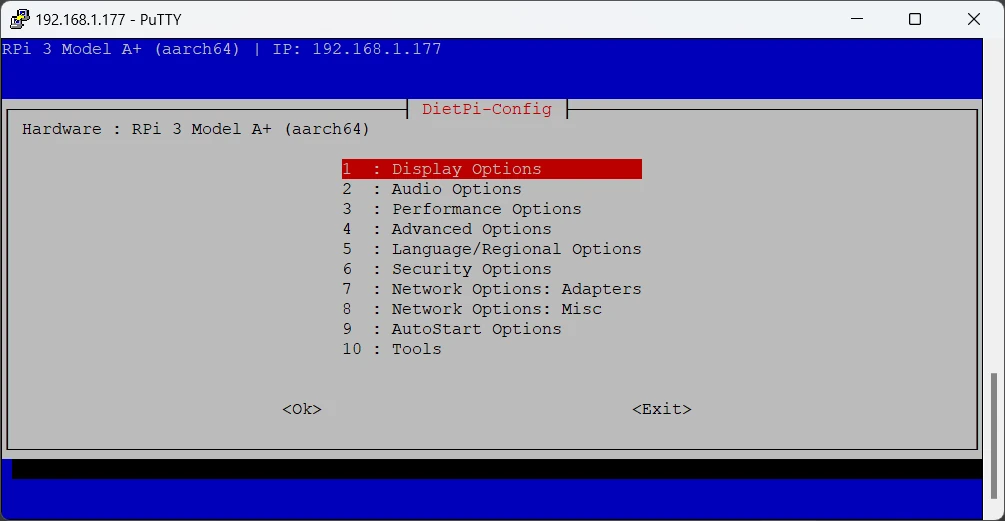
From here you can access all the advanced settings to manage your DietPi on Raspberry PI.
For example, here you can set:
- your SWAP file size (from the “Advanced Options” menu)
- the locale, timezone, and keyboard layout (from the “Language/Regional Options” menu)
- the network settings (from the “Network Options” menu)
- or you can even manage the overclocking from the “Performance Options” menu (take care of this as it can break your Raspberry PI computer board)
Step 6: add software to DietPi on Raspberry PI
The dietpi-software tool is something unique on DietPi compared to Raspberry PI. It helps beginners to get easily installed a wide number of pre-defined software tools. The complete list of available software can be found at https://dietpi.com/docs/software/.
To open the dietpi-software tools, you can run the following command from your terminal:
root@DietPi:~# dietpi-softwareWe have already met the interface at the previous installation step:

Here you can both look for a specific software with the “Search Software” function, or you can just “Browse Software” to scroll the complete list and select what is interesting for your project. With this second approach, we’ll get the software list in our terminal:
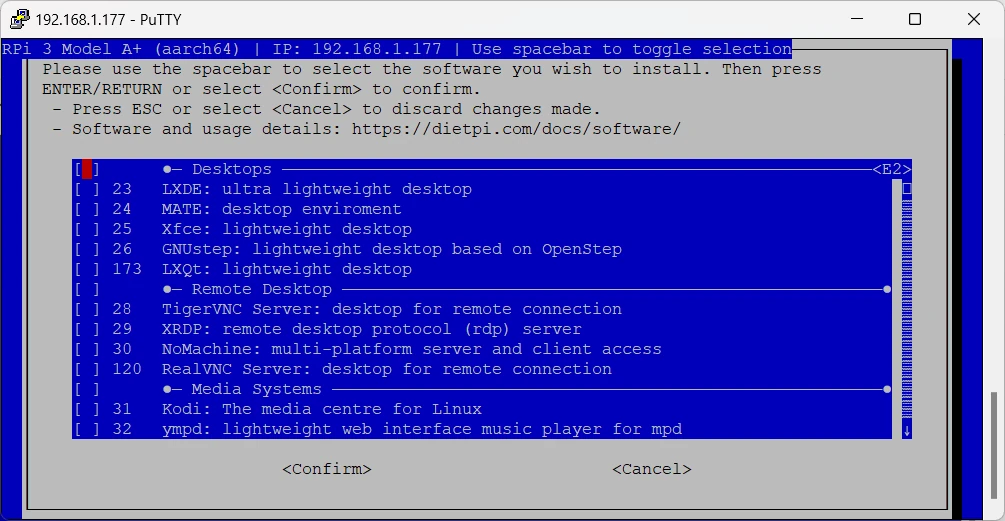
Let’s test, for example, an e-book library: one of the available software is Ubooquity.
Scroll down the list until you reach the related row. Here, please select the software with the space bar:
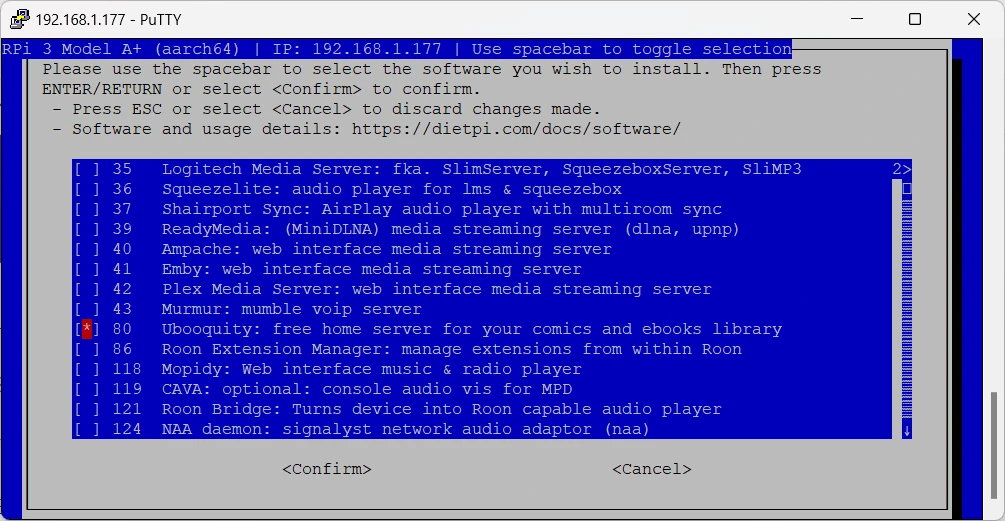
Move to the “Confirm” button and press RETURN. This will bring back to dietpi-software home, but the software isn’t still installed. You have to select the “Install” option:
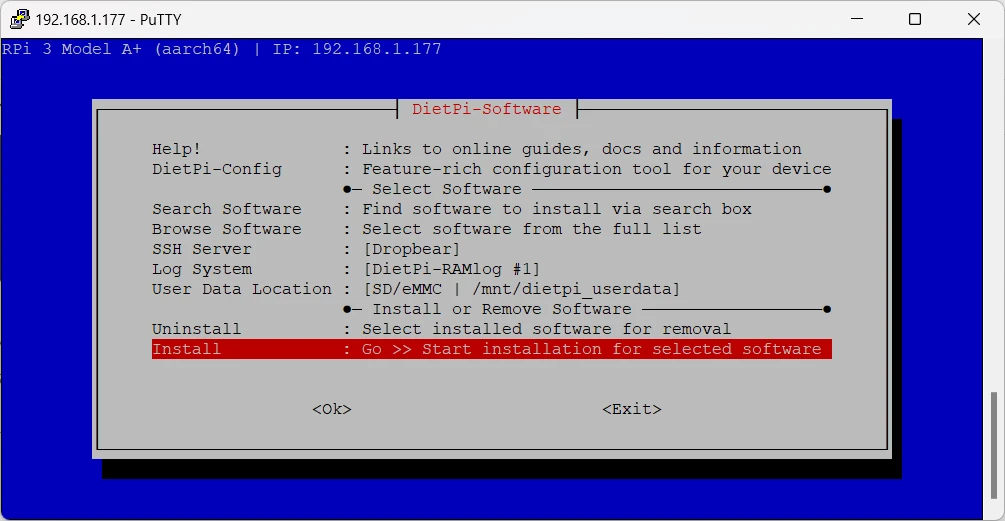
When you press RETURN on it, you will get the operations summary with a request for confirmation:
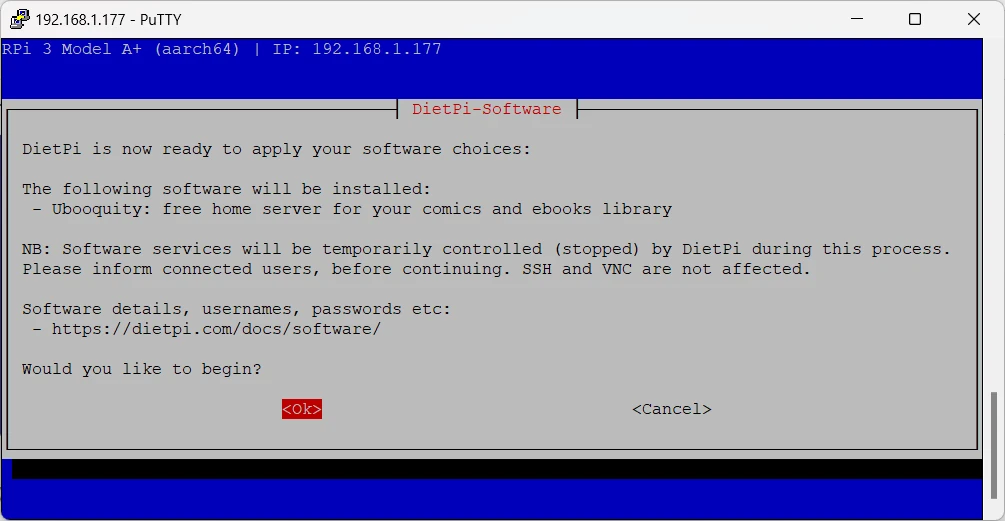
DietPi will execute all the required jobs to make the software installed and working. At the end, your software will be available on the related web page, by using your DietPi Raspberry PI’s IP address (and the port defined by your selected software) in your favourite browser. Software ports and URLs are also available from the DietPi software webpage. In our case: DietPi docs – Ubooquity.
By accessing the http://<<YouRapsberryPiAddress>>:2039/admin you will reach the Ubooquity admin console, after setting the admin password:
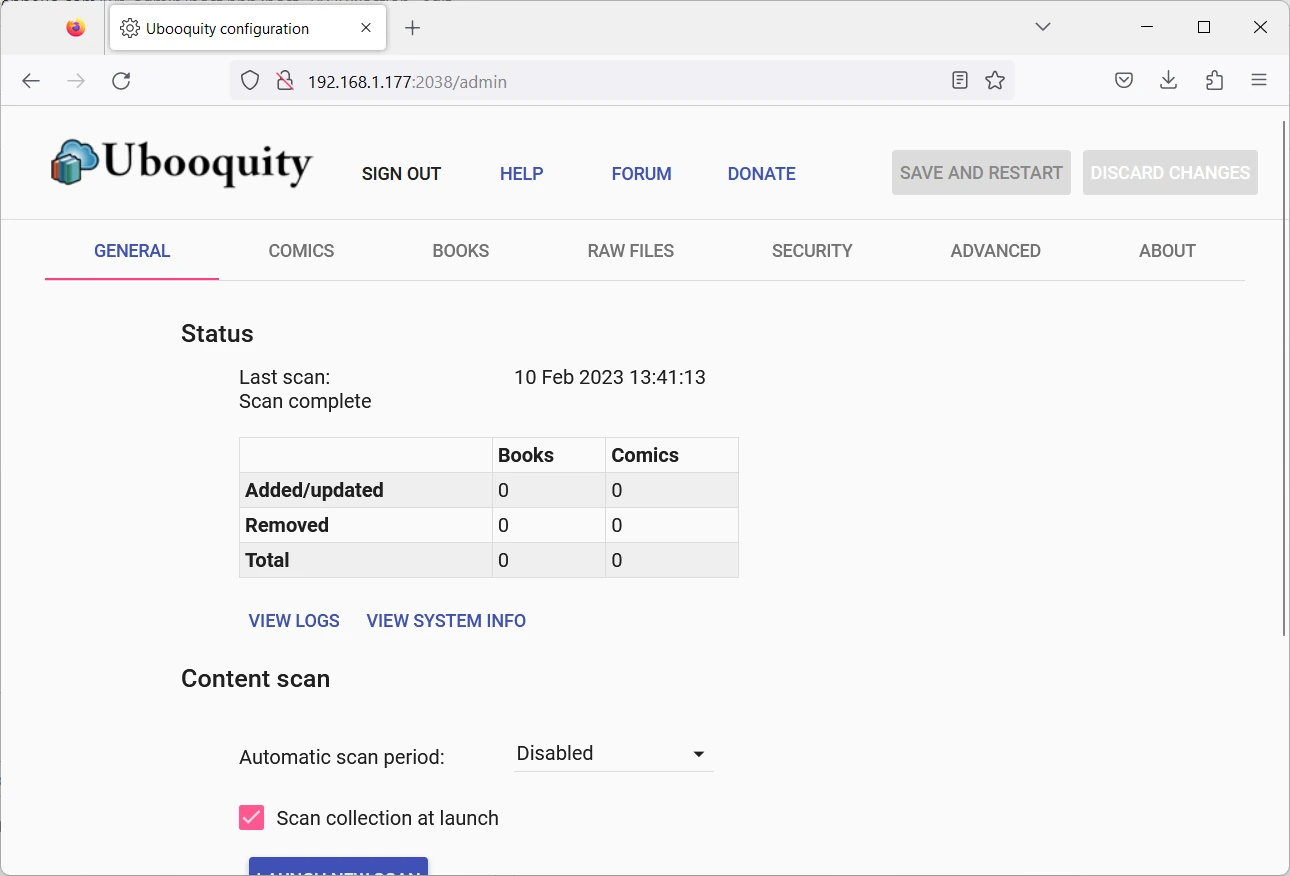
By setting it according to the Ubooquity manual and adding your ebooks, you will get your ebook available also from your smartphone at the http://<<YouRapsberryPiAddress>>:2038 page:

What’s Next
If you want to discover many other projects for your Raspberry PI computer board, you can take a look at peppe8o Raspberry PI tutorials.
Enjoy DietPi on Raspberry PI!

Open source and Raspberry PI lover, writes tutorials for beginners since 2019. He's an ICT expert, with a strong experience in supporting medium to big companies and public administrations to manage their ICT infrastructures. He's supporting the Italian public administration in digital transformation projects.

This great chart compares DietPi with Raspbian Jessie Lite, illustrating everything from image size to system response times. Whereas Raspbian Jessie Lite (and the later Stretch Lite) requires a minimum 2 GB microSD card, Diet Pi can fit on a 1 GB card. Obviously bigger cards offer more storage, but with such a lightweight OS, that storage can be maximized for your project.