Last Updated on 26th September 2025 by peppe8o
In this tutorial, I will show you how to install and use Label Studio with Raspberry PI computer boards. This will enable you to self-host an open-source solution for keeping annotations and preparing your custom data to train AI custom solutions.
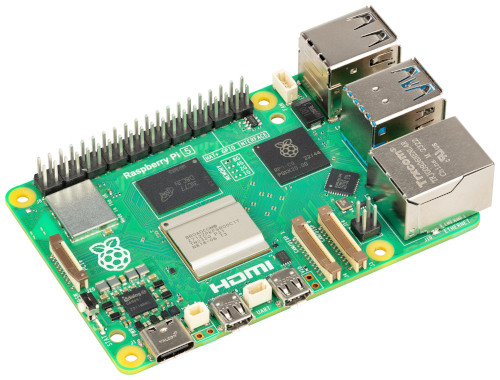
For this project, I will use my Raspberry PI 5 Model B computer board. You can run this software on any Raspberry PI computer board supporting the 64-bit OS, but I suggest using at least the Raspberry PI 5 2GB if you want to work with the output of this software to perform inference tasks (which are not covered in this tutorial).
About Label Studio
Label Studio is an open-source data labelling platform allowing you to prepare your data for custom AI models. It gives you an easy-to-use web-based GUI, where you can mark data with your annotations so that you can easily train your personal AI applications.
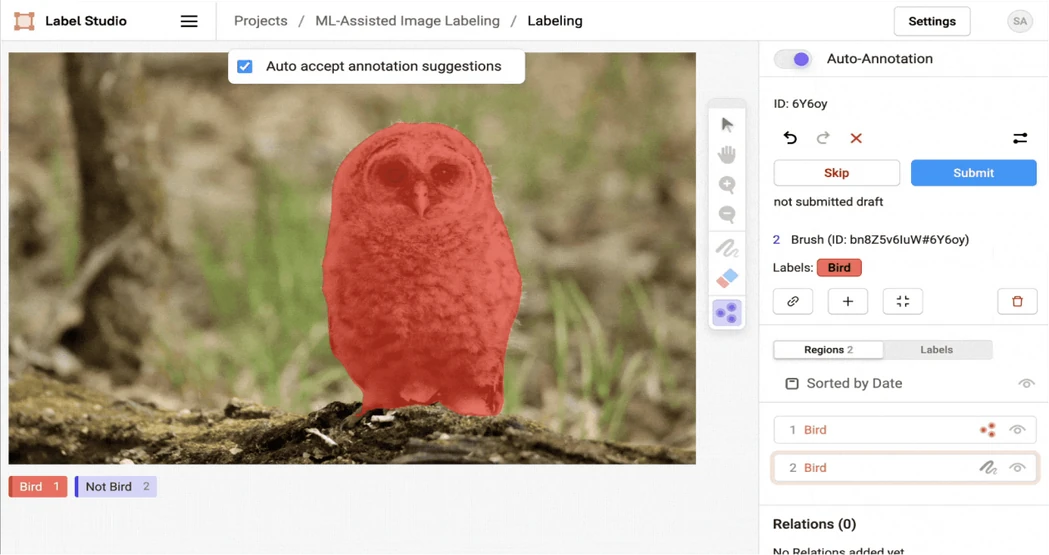
Label Studio supports a wide number of data types for annotation: images, audio, text, video, time series, and even mixed data types.
It is released under the Apache-2.0 license, which means that you can use, modify, and distribute the software.
Label Studio can be installed both via Python as well as with Docker. I will show you this second method as it allows you to run the software in a very few commands, without overcomplicating the installation process.
What We Need
As usual, I suggest adding from now to your favourite e-commerce shopping cart all the needed hardware, so that at the end you will be able to evaluate overall costs and decide if to continue with the project or remove them from the shopping cart. So, hardware will be only:
- Raspberry PI Computer Board (including proper power supply or using a smartphone micro USB charger with at least 3A)
- high speed micro SD card (at least 16 GB, at least class 10)
I also suggest you to buy a Raspberry PI active cooling system if you want to perform the inference tasks on it. You can read my Active Cooling for Raspberry PI: What is, Why You Need It, and How to Use article to check out the advantages.
Step-by-Step Procedure
Preparing the Raspberry PI Operating System
The first step is installing the Operating System. You can install the Raspberry PI OS Lite to get a fast and light operating system (headless). In this case, you will need to work from a remote SSH terminal.
If you need a desktop environment, you can also use the Raspberry PI OS Desktop, in this case working from its terminal app. The links provide you the procedures for both the OSs. Please find the differences between the 2 OS versions in my Raspberry PI OS Lite vs Desktop article.
Make sure that your system is up to date. Connect via SSH terminal and type the following command:
sudo apt update -y && sudo apt full-upgrade -yTo install Label Studio on Raspberry PI we also need to get Docker in it. For this step please refer to my Beginner’s Guide to Install and Use Docker with Raspberry PI tutorial.
Install Label Studio on Raspberry PI
With Docker, the installation process requires only one command line. Please change the “/home/pi/lsdata” folder with whatever folder you prefer in your Raspberry PI storage, as it will contain all the persistent files of your services. Please also note that if you have a different username, the home folder could be different.
docker run -d --user root -p 8080:8080 --restart unless-stopped -v /home/pi/lsdata:/label-studio/data --name label-studio heartexlabs/label-studio:latestHere’s the meaning of the used options:
- -d: runs the container as a detached process (when you exit from the terminal, the service continues running)
- –user root: uses the root privileges in your Raspberry PI to create folders and files
- -p 8080:8080: publishes on the port 8080 of the host the port 8080 of the container
- –restart unless-stopped: keep the service running even after your Raspberry PI reboots, unless you manually stop it
- -v /home/pi/lsdata:/label-studio/data: maps a folder in your Raspberry PI’s storage into the container. In this case, all the data will be saved into a folder created in my “pi” user home
- –name label-studio: names the container as “label-studio”
- heartexlabs/label-studio:latest: tells Docker what is the container image to use
At any time, you can check the service status with the following docker command in your terminal:
docker logs label-studioThe Label Studio service will be up and running when you see the following final lines from the logs:
https://pypi.org:443 "GET /pypi/label-studio/json HTTP/1.1" 200 34002
/label-studio/label_studio/projects/models.py:1041: SyntaxWarning: invalid escape sequence '\o'
  """
Initializing database..
April 04, 2025 - 11:56:43
Django version 5.1.5, using settings 'core.settings.label_studio'
Starting development server at http://0.0.0.0:8080/
Quit the server with CONTROL-C.
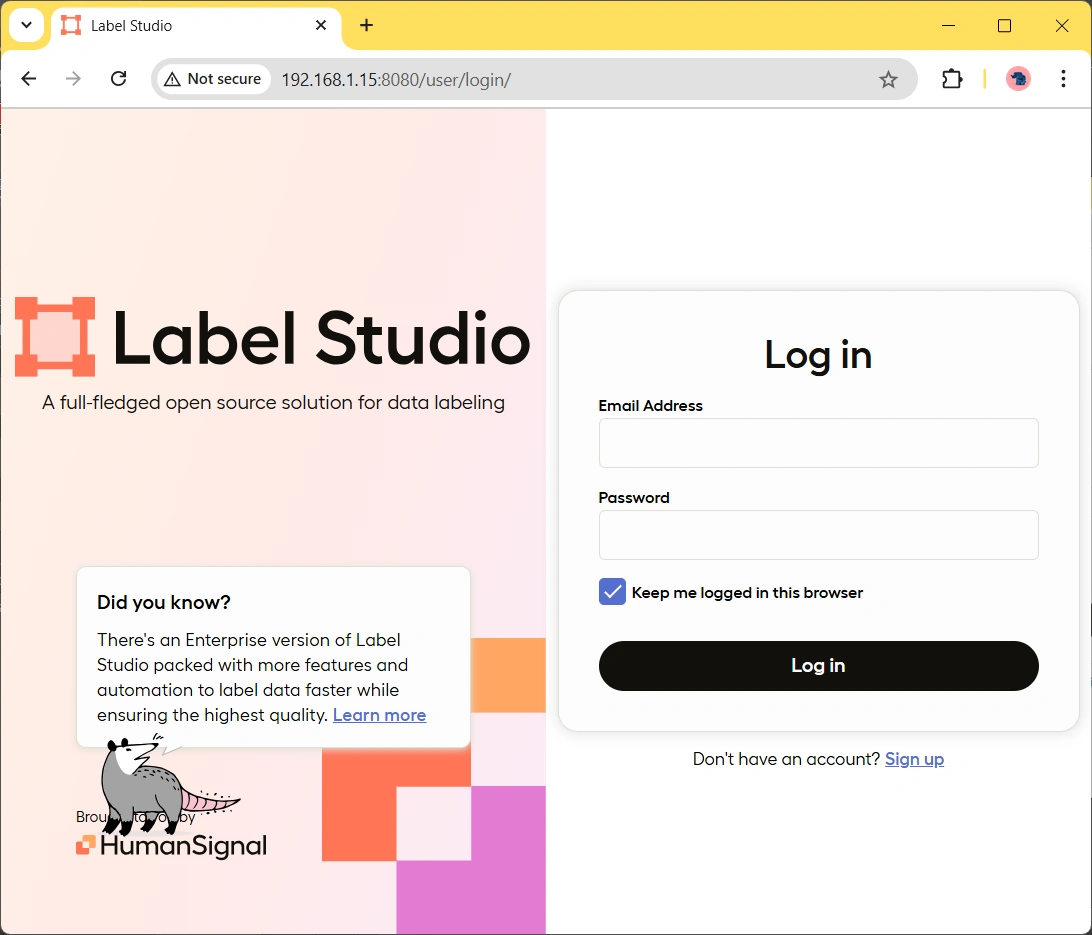
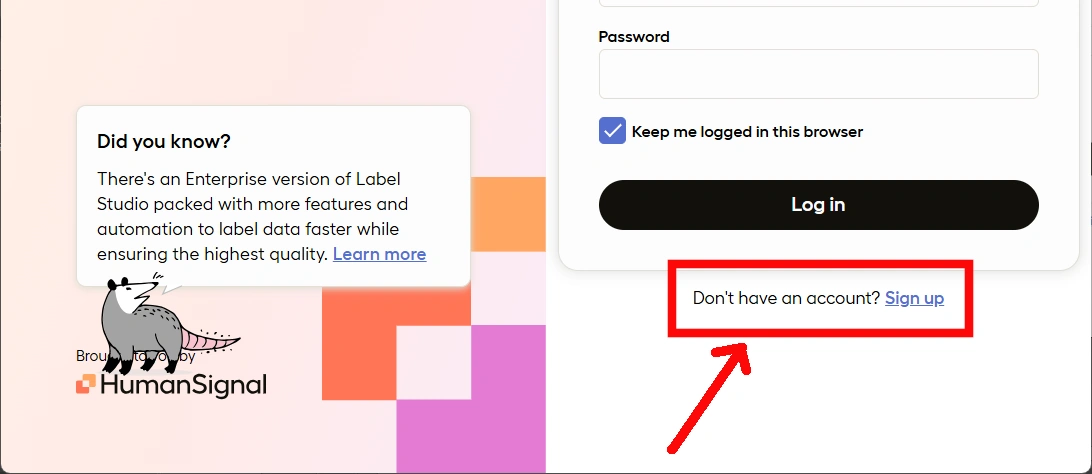
At this point, you can reach the Label Studio on Raspberry PI by using its IP address and port from a browser by composing the URL as http://YourRpiIpAddress:8080, where you must change the “YourRpiIpAddress” string with your real IP address. In my case, as my Raspberry PI has the IP address 192.168.1.15, my URL will be http://192.168.1.15:8080. You will reach the Label Studio login page:
Label Studio Dashboard
At the beginning, you don’t have an email address/password to log in to your Label Studio service. For this reason, you will need to “Sign up” with the related link available after the “Log in” button:
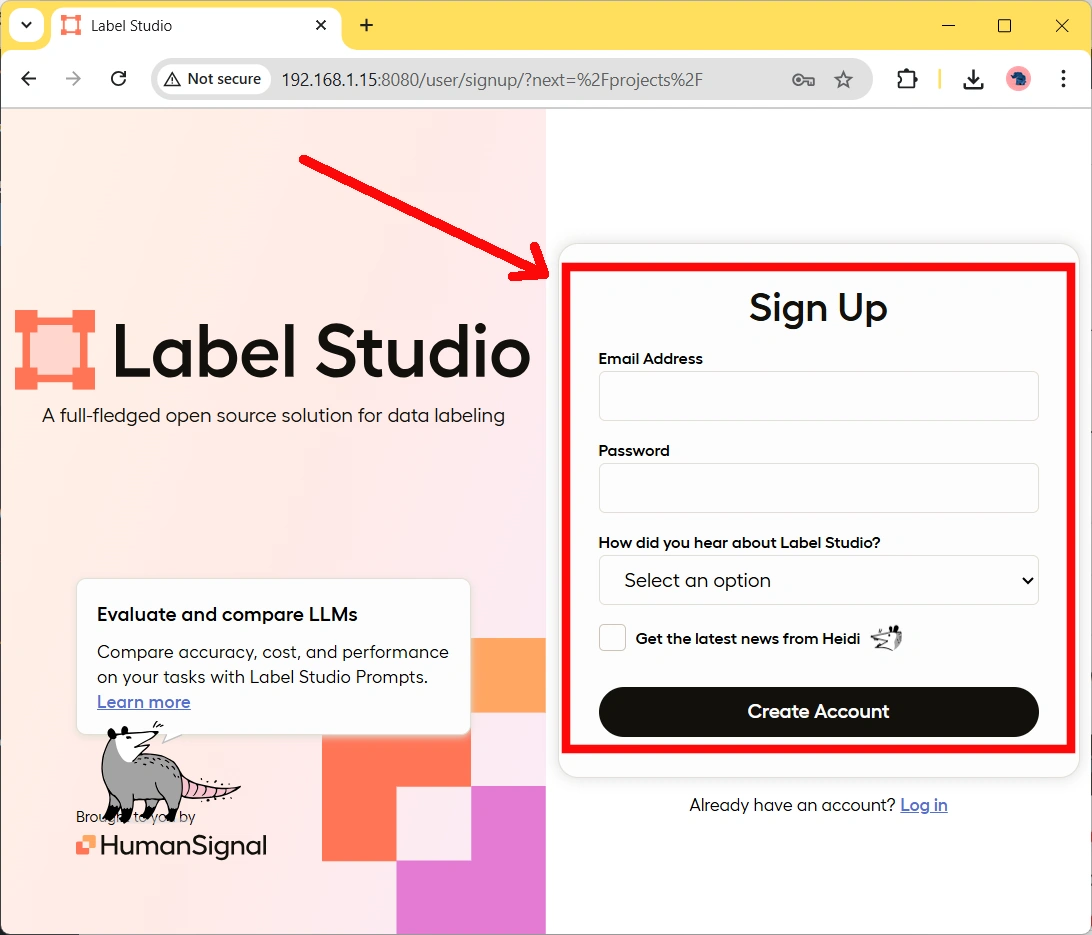
In the sign-up form you can fill the classic email and password to create an account in your local installation:
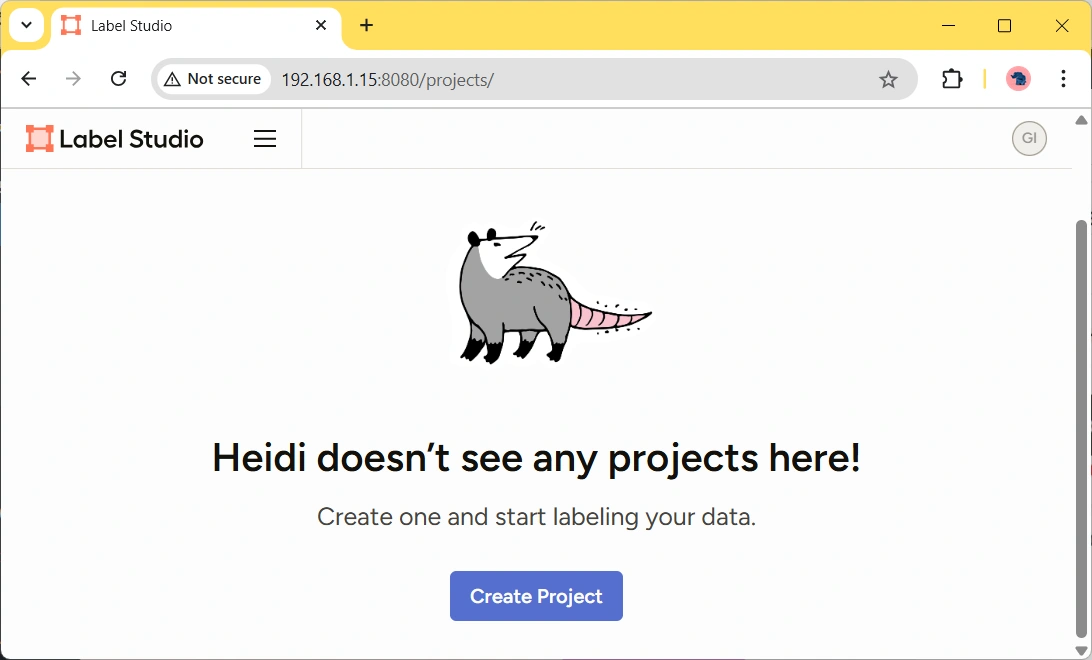
Then, you will be logged in and you will find your new dashboard. With a new installation, you don’t have any existing project, so the only available button will be to create a new one:
Create your First Project with Label Studio
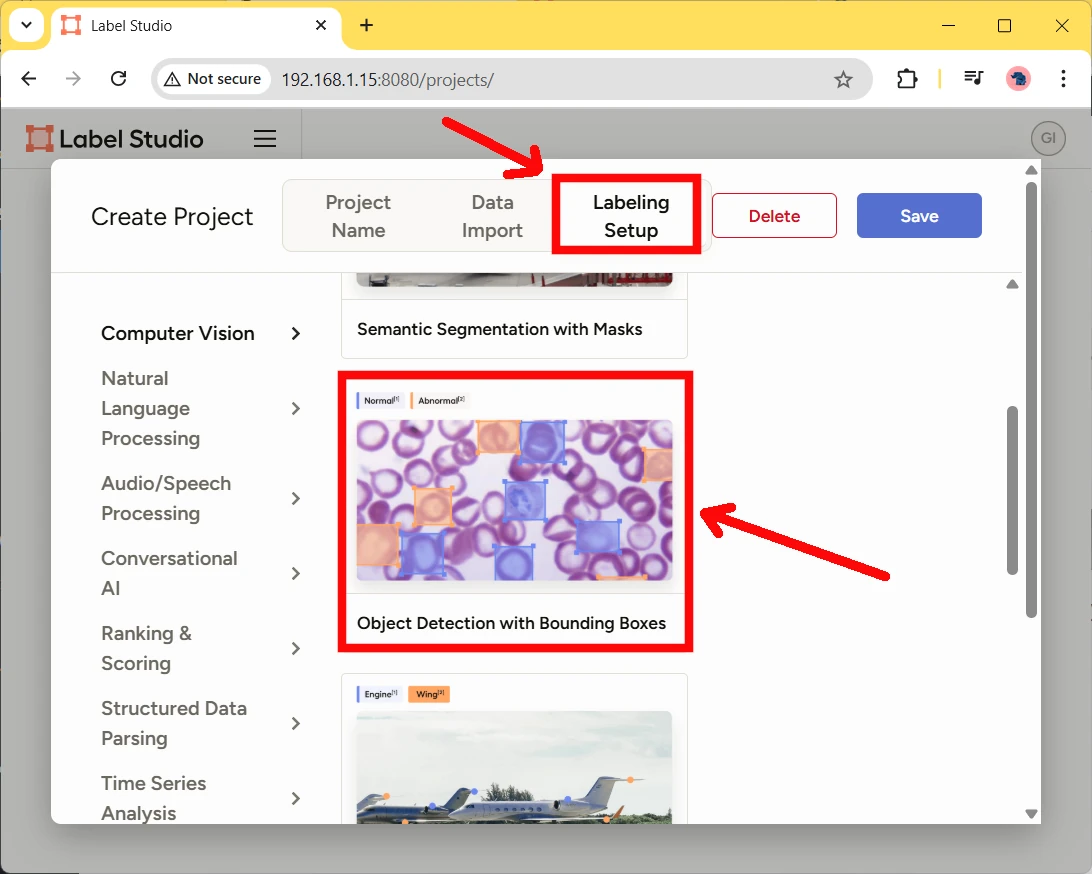
When you click “Create Project”, you will start preparing your working area. You will get a window with different tabs:
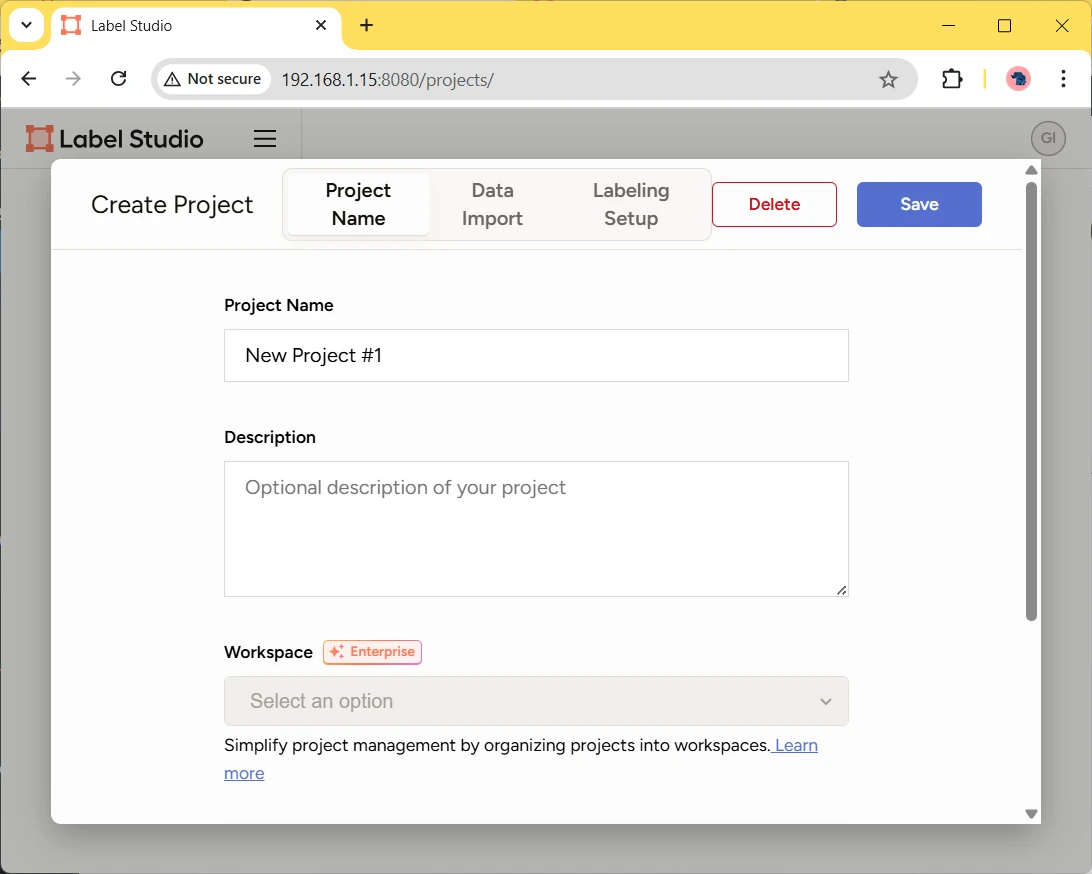
Besides defining the project name and description, there’s an important TAB (“Labeling Setup”) where you can choose the kind of project you’re working on. For example, I will use the “Object Detection” template here highlighted:
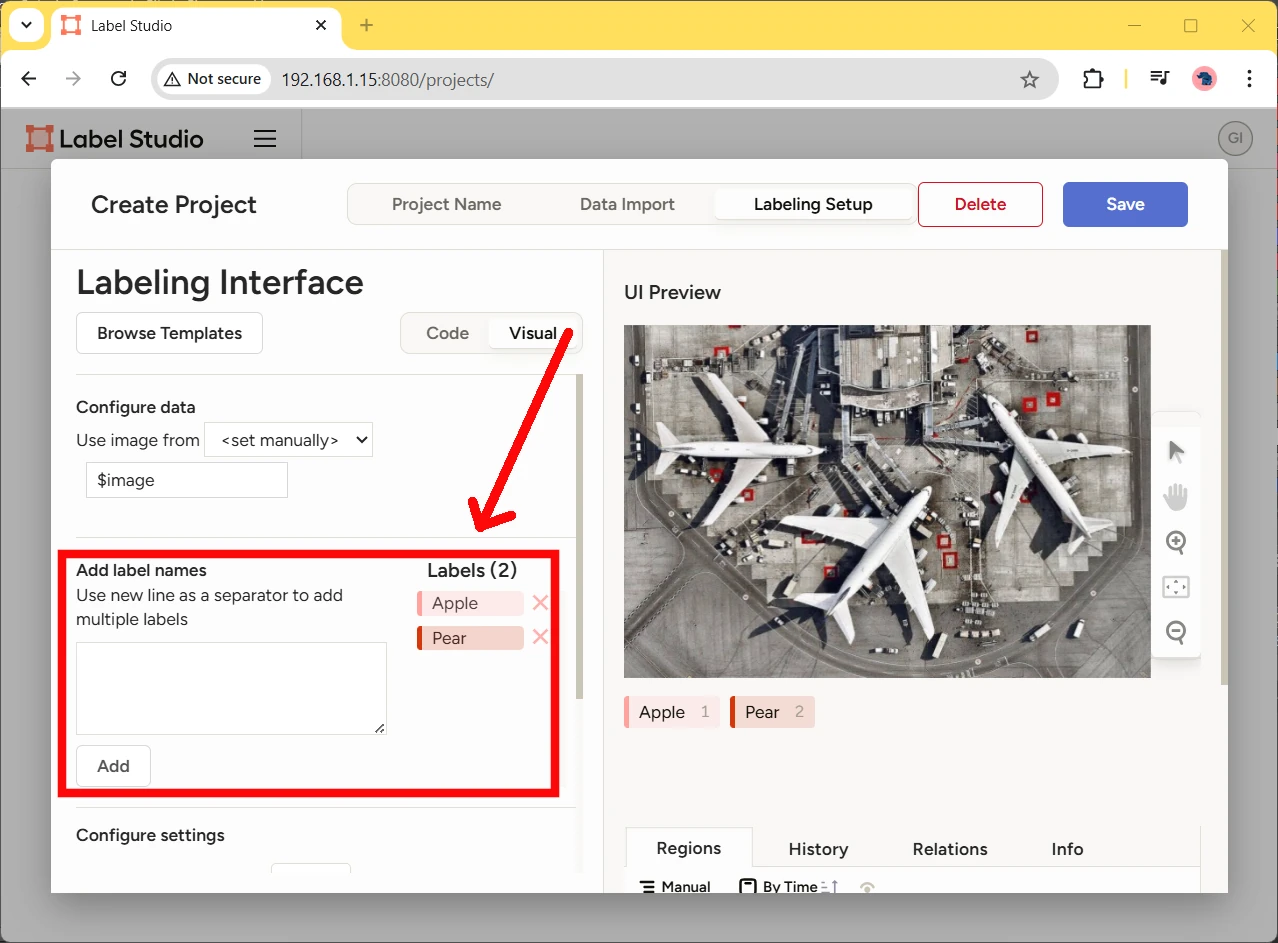
After clicking the template, this will propose you to define the labels to use. You can delete the pre-defined ones (Airplane and Car) and use your ones. For example, I will use the “Apple” and “Pear” labels:
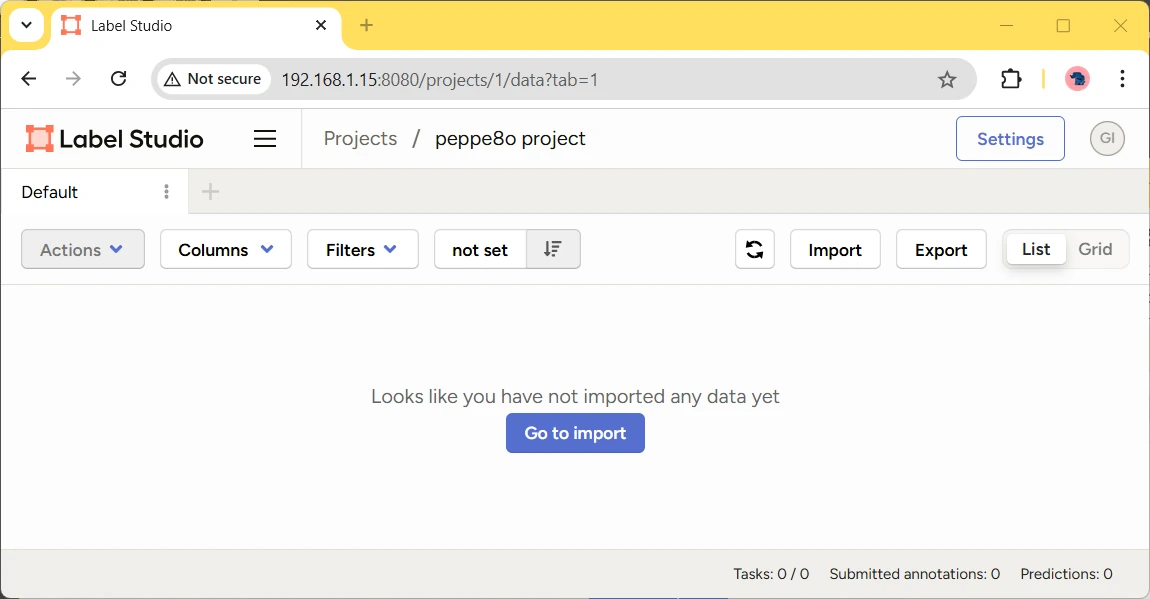
You can click the “Save” button now. This will create the new project and bring you to the related page:
Annotate Images
The following action is to upload images and create annotations on them.
By clicking the “Go to import” button from the previous page, you will reach the upload form, which you can use in different ways:
- using a URL for a public image from the web;
- uploading files with your browser’s upload form (“Upload Files” button);
- dragging and dropping files in the central area.
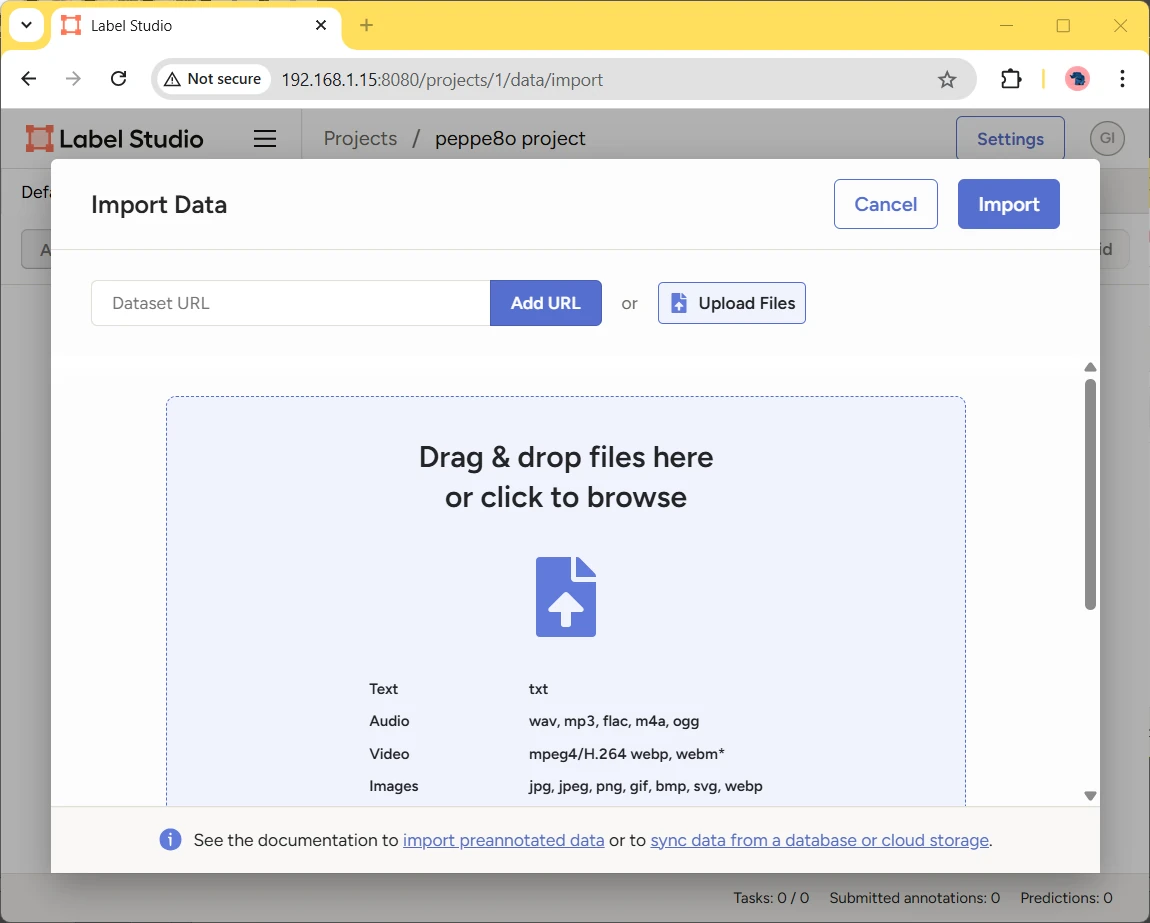
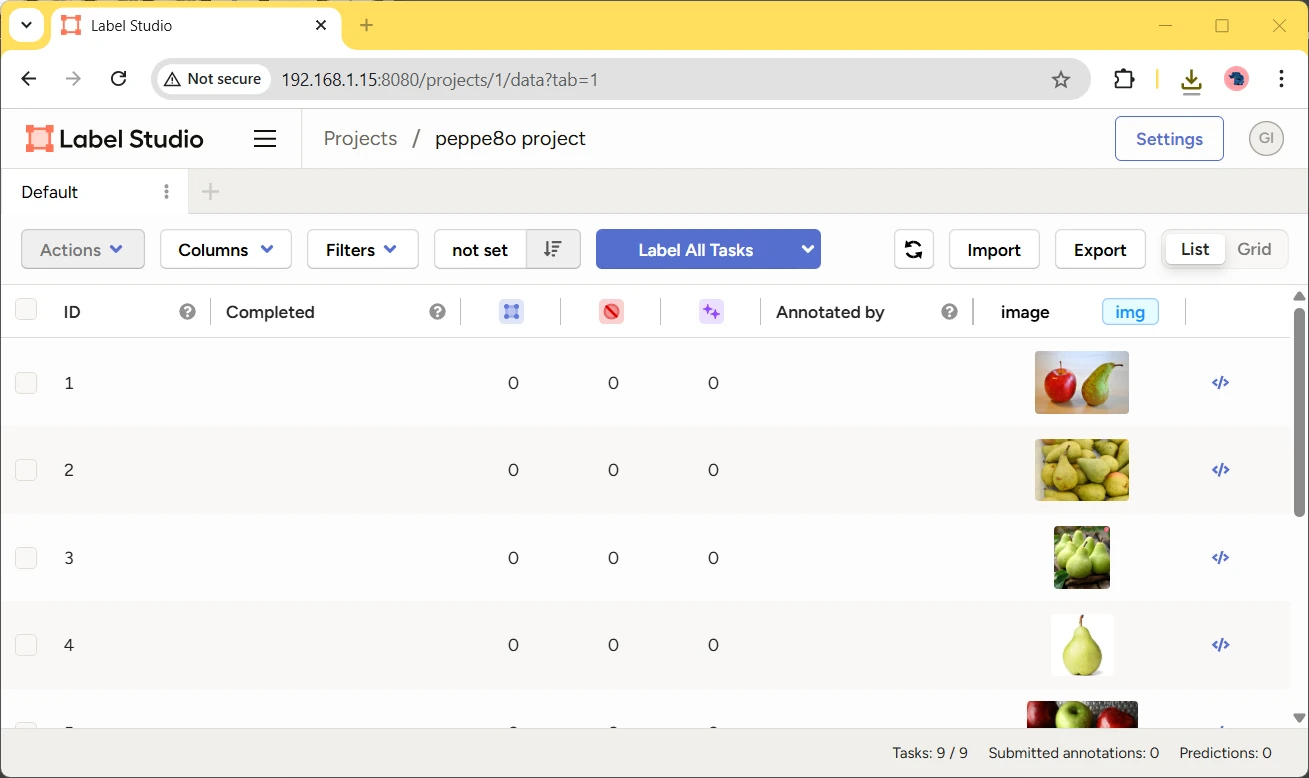
For this test I uploaded some files to Label Studio on Raspberry PI about the related with the labels I want to annotate. You can use as many files as you want. After this action, the files will be listed on your project page:
By clicking one of the images, you will reach the annotation page. Here, you can add annotations to your images by clicking the label name and then marking the image part to link with the annotation, getting something like the following page. After you have added your annotations, please remember to click the “Submit” button to save them.
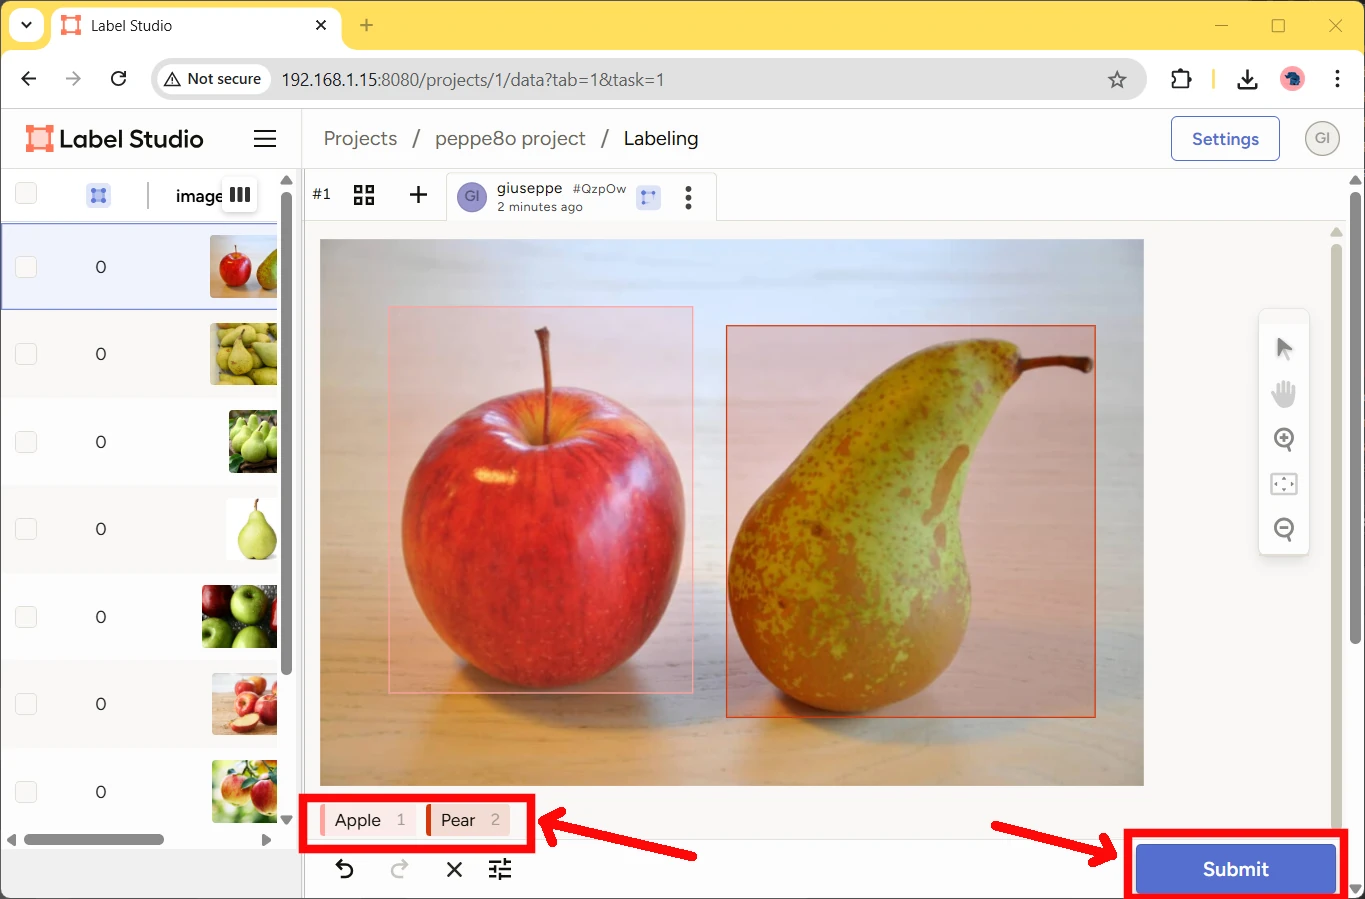
Please repeat this task for each image you uploaded.
Exporting Images with Annotations
Once you have finished annotating all of your images, you will have your list with the complete state and marked in your project’s dashboard:
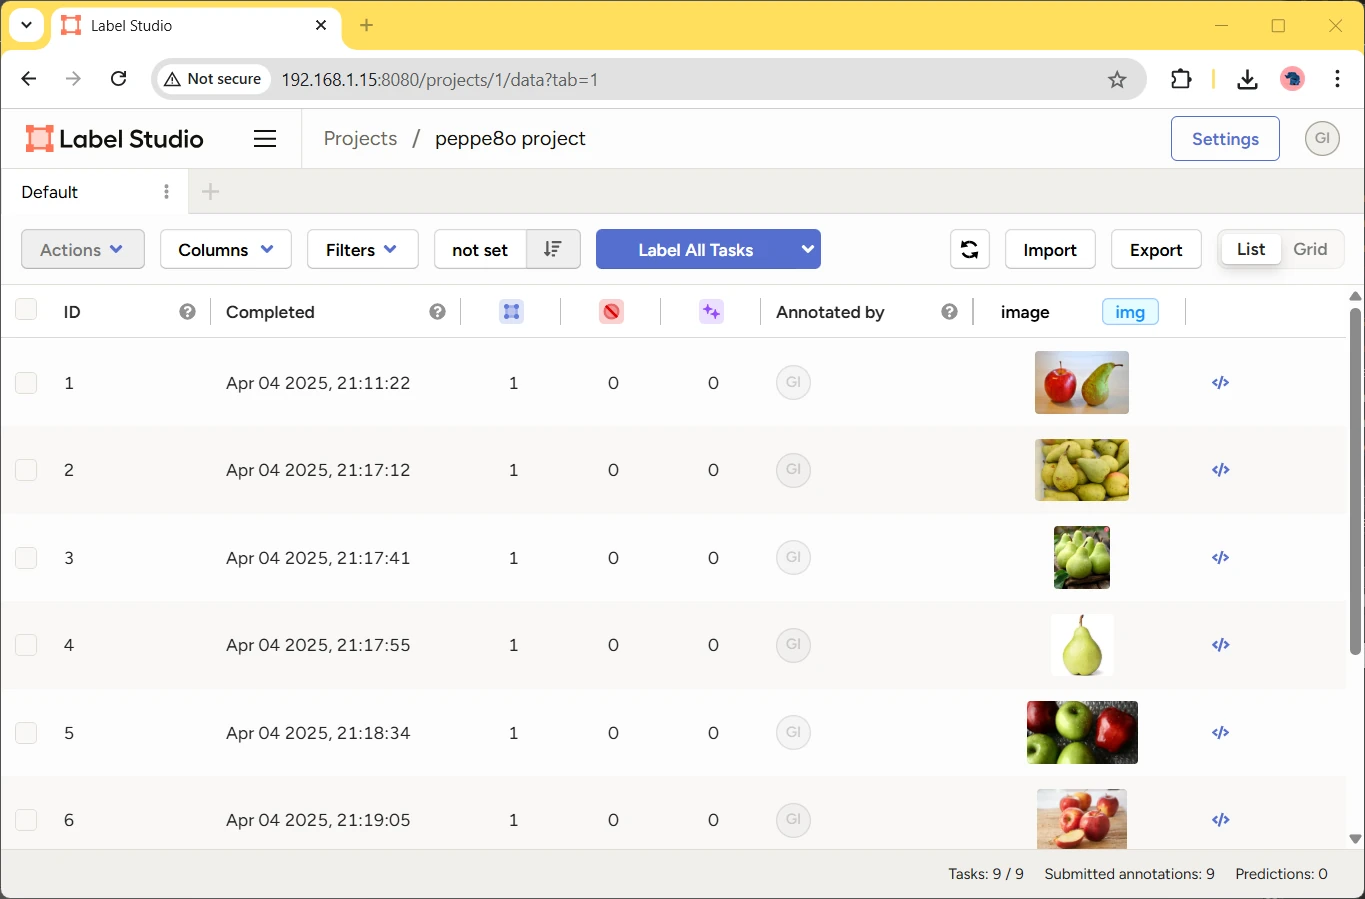
On the top-right side of this page, you can use the “Export” button to view all the export options:
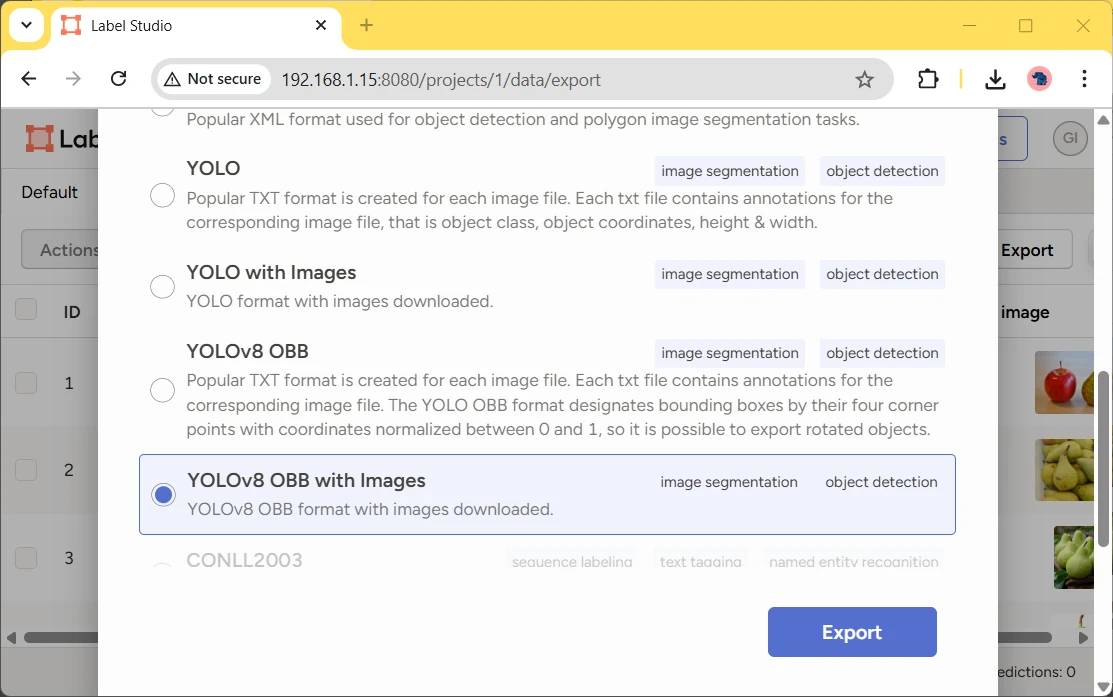
By choosing one of the available options, you can export your images and annotations. This will allow you to download in your remote computer the annotated data according to the export format. For example, with the “YOLOv8 OBB with Images” will give you a zip file including the images, labels (for each image), classes and a notes.json file.
What’s Next
If you want to discover many other projects for your Raspberry PI, you can take a look at peppe8o Raspberry PI tutorials.
Enjoy!

Open source and Raspberry PI lover, writes tutorials for beginners since 2019. He's an ICT expert, with a strong experience in supporting medium to big companies and public administrations to manage their ICT infrastructures. He's supporting the Italian public administration in digital transformation projects.

