
Last Updated on 11th May 2025 by peppe8o
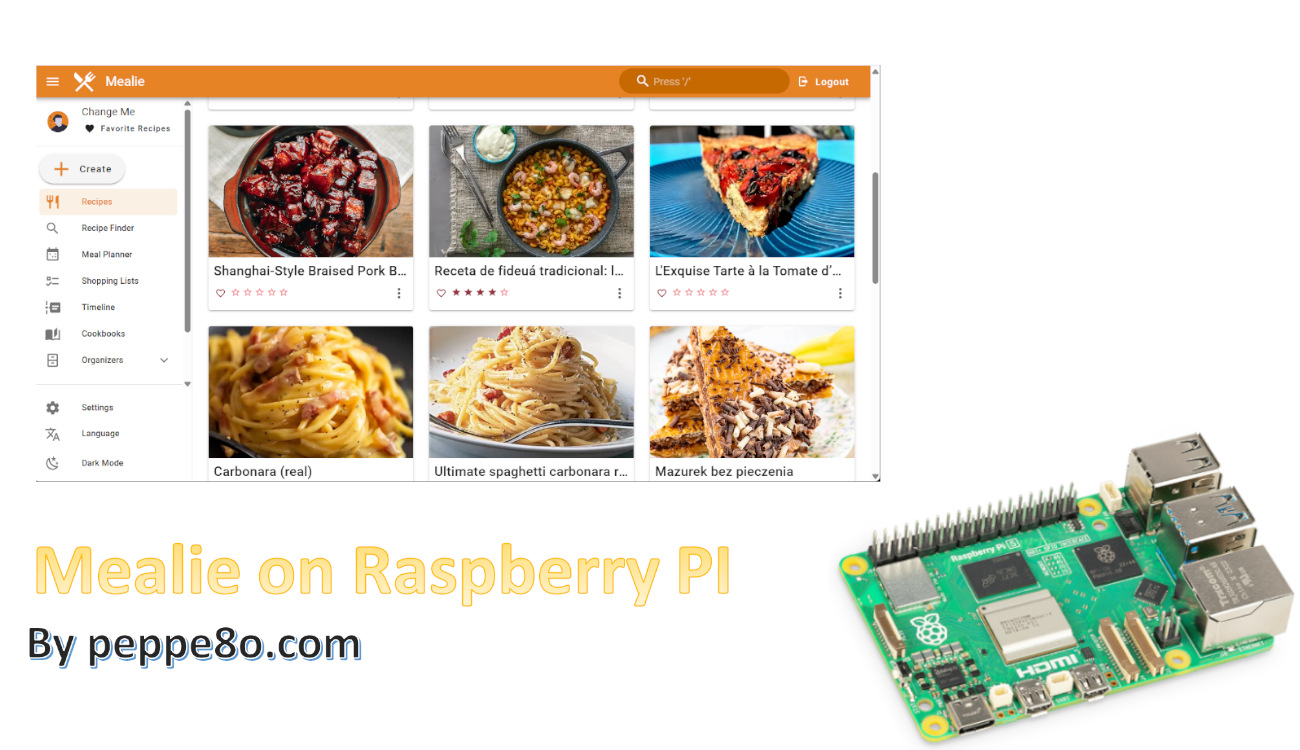
This tutorial will show you how to install Mealie on a Raspberry PI computer board with Docker.
For this post, I’ve used my Raspberry PI 5 Model B board, but this should work with any Raspberry PI computer board with a CPU compatible with a 64-bit OS.
About Mealie
Mealie is an open-source platform that helps people organise and manage meals and recipes.
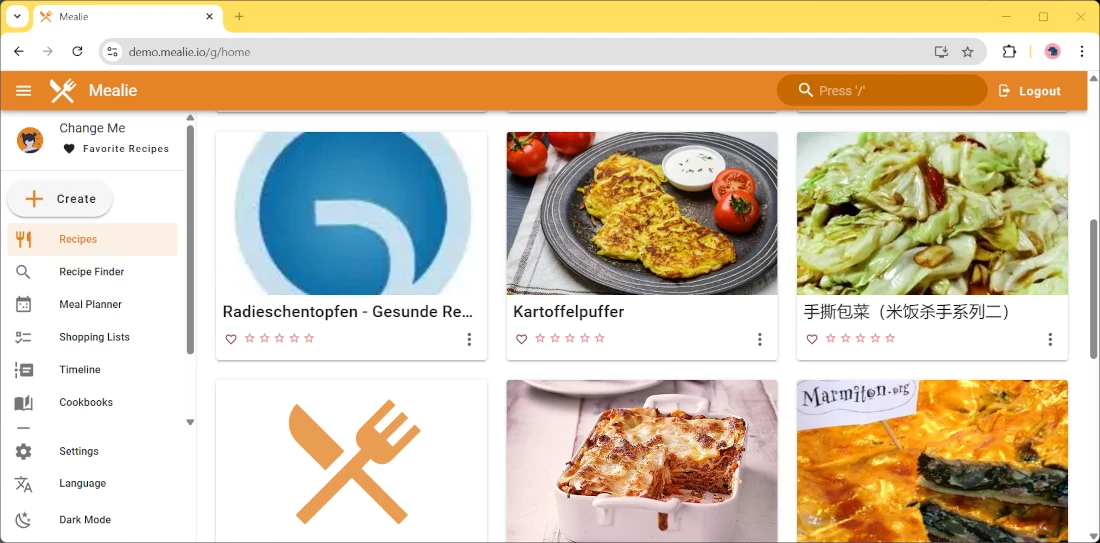
It offers a web user interface where you can manage the platform. Here, you can add your recipes (or import them from a URL, even from any online page), plan your meals, create your shopping lists, and so on.
Moreover, you can even copy the ingredients from a recipe directly into your shopping list, which I find useful when looking for what I should buy to prepare a specific meal.
You can share your Mealie with friends and your family, so that this platform will become a complete cookbook for all of them.
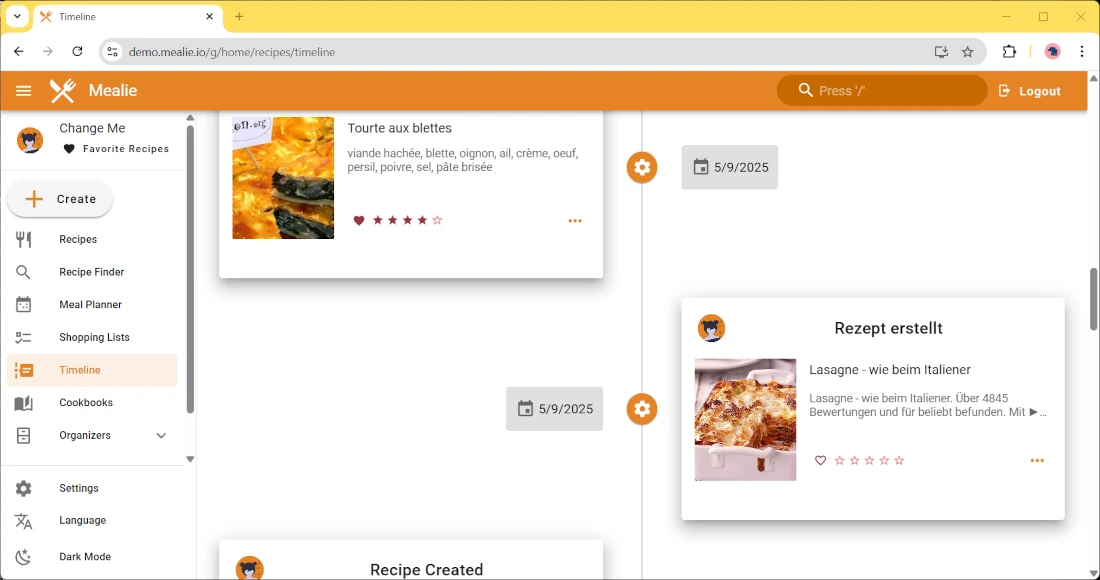
Here are some screenshots from its live demo page:

What We Need
As usual, I suggest adding from now to your favourite e-commerce shopping cart all the needed hardware, so that at the end you will be able to evaluate overall costs and decide if to continue with the project or remove them from the shopping cart. So, hardware will be only:
- Raspberry PI Computer Board (including proper power supply or using a smartphone micro USB charger with at least 3A)
- high speed micro SD card (at least 16 GB, at least class 10)

Step-by-Step Procedure
Preparing the Raspberry PI Operating System
The first step is installing the Raspberry PI OS Lite (we need the 64-bit version) to get a fast and light operating system (headless). In this case, you will need to work from a remote SSH terminal. If you need a desktop environment, you can also use the Raspberry PI OS Desktop, in this case working from its terminal app. Please find the differences between the 2 OS versions in my Raspberry PI OS Lite vs Desktop article.
Make sure that your system is up to date. Connect via SSH terminal and type the following command:
sudo apt update -y && sudo apt full-upgrade -yWe also need to install Docker. For this step, please refer to my Docker on Raspberry PI tutorial.
Install Mealie on Raspberry PI with Docker
Please create a folder in your Raspberry PI storage and enter it:
mkdir mealie && cd mealieHere, we’ll create a “docker compose” file which includes all the configuration items we need for Mealie. This file is based on that available from Mealie’s GitHub docker-compose.yml, with some changes to make it run directly.
Let’s create the required file:
nano docker-compose.ymlPlease fill in the file with the following lines:
services:
  mealie:
    container_name: mealie
    image: ghcr.io/mealie-recipes/mealie:latest
    restart: unless-stopped
    volumes:
      - mealie-data:/app/data/
    ports:
      - 9091:9000
    environment:
      ALLOW_SIGNUP: "false"
      LOG_LEVEL: "DEBUG"

      DB_ENGINE: sqlite # Optional: 'sqlite', 'postgres'
      # =====================================
      # Postgres Config
      # POSTGRES_USER: mealie
      # POSTGRES_PASSWORD: mealie
      # POSTGRES_SERVER: postgres
      # POSTGRES_PORT: 5432
      # POSTGRES_DB: mealie
      # =====================================
      # Email Configuration
      # SMTP_HOST=
      # SMTP_PORT=587
      # SMTP_FROM_NAME=Mealie
      # SMTP_AUTH_STRATEGY=TLS # Options: 'TLS', 'SSL', 'NONE'
      # SMTP_FROM_EMAIL=
      # SMTP_USER=
      # SMTP_PASSWORD=

volumes:
  mealie-data:
    driver: local
Save and close the file.
As you may see, there are some differences with the original one.
The first difference is in the container image: with the option provided in this post, you don’t need to build it in your Raspberry PI, resulting in an easier installation process.
Another difference is in the restart policy: I always prefer the “unless-stopped” option instead of “always”, as the first allows me to manually stop the container if I want this offline for any reason.
Finally, I removed the Postgres settings from the environment variables by commenting them out: when using SQLite, you don’t need to configure these variables.
By default, the email environment variables are also commented out. If you need to send email notifications from Mealie, you can set them there by using the SMTP configuration from your email service provider. Please note that some providers (like Google) require setting a Secure password for Apps to make it work.
With the provided docker-compose.yml file, you can make Mealie run on your Raspberry PI with the following command inside the “mealie” folder:
docker compose up -dFor the first run, Docker will detect that the image isn’t available locally and will start downloading it (this step may vary depending on your internet speed). After this, Docker will start the Mealie service. After you get back the prompt, you can check if there are any errors with the terminal command:
docker logs mealieAt this point, you can use your favourite web browser to reach the Mealie service by using the URL http://<<YourLocalRpiIPAddress>>:9091. In my case, as my Raspberry PI’s IP address is 192.168.1.218, my URL will be http://192.168.1.218:9091
Setup Wizard for Mealie
At the first boot, you will find in your browser a login page. The default credentials for Mealie are:
- Username: changeme@example.com
- Password: MyPassword
Please use them for login:
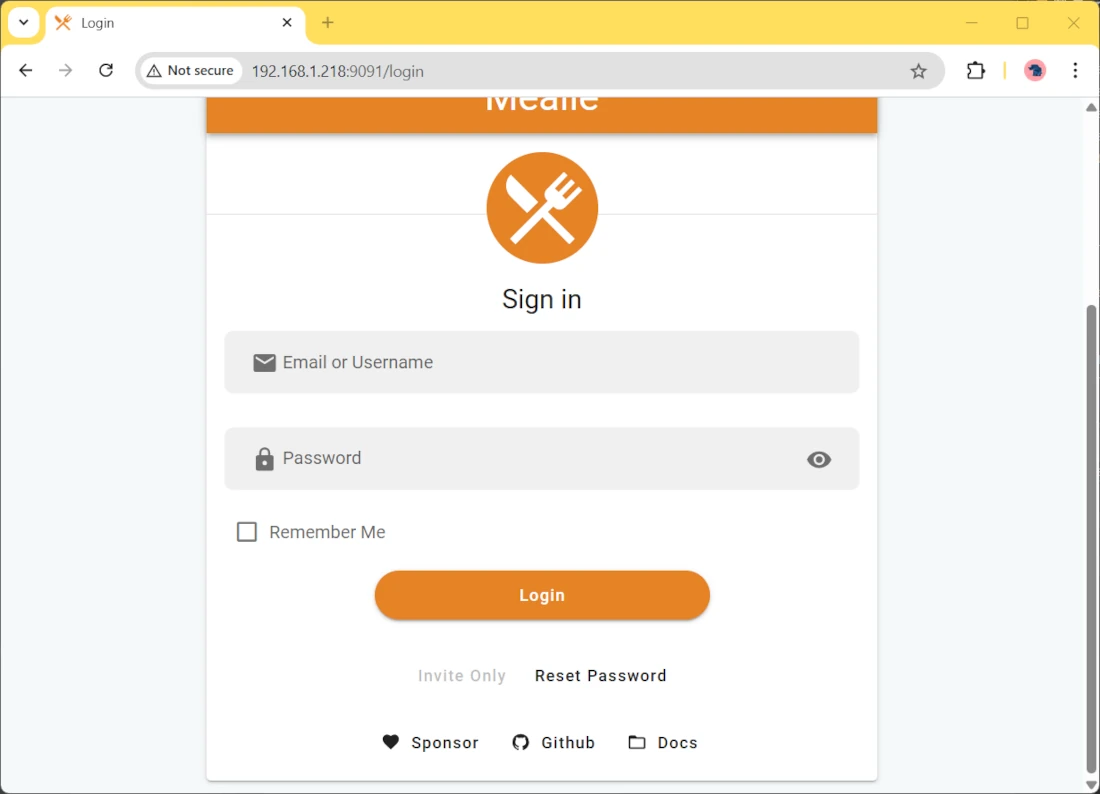
Click the “Login” button to move to the next page.
On the following page, you can change the Mealie language with the related button. Please select it according to your needs, if required:
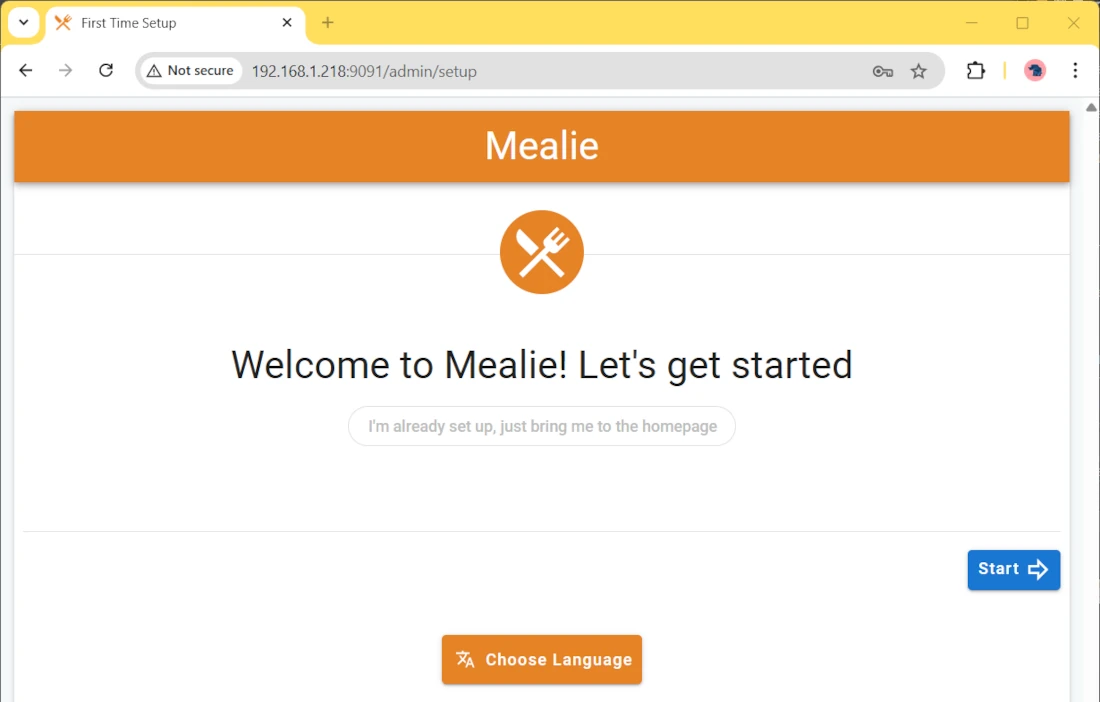
Then, please click the “Start” button.
The following page will require you to create a new user, which will overwrite the default one (for security purposes). Please fill the form with the required details, according to your preferences:
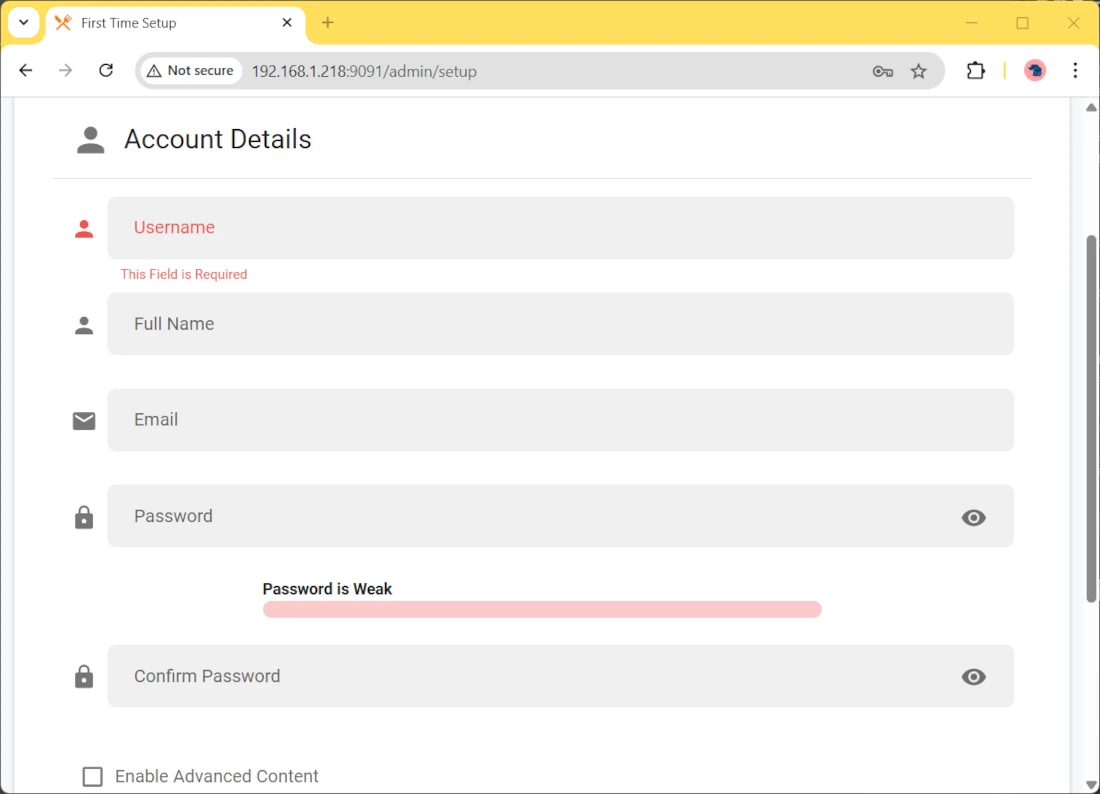
Then, please scroll down the page and click the “Next” button.
In the following window, you can choose if you want to make your recipes public (which means that anyone able to reach your Raspberry PI will be able to see your recipes without the need to login) and if you want to use Mealie data to create food units and similar. You can set both options according to your preferences:
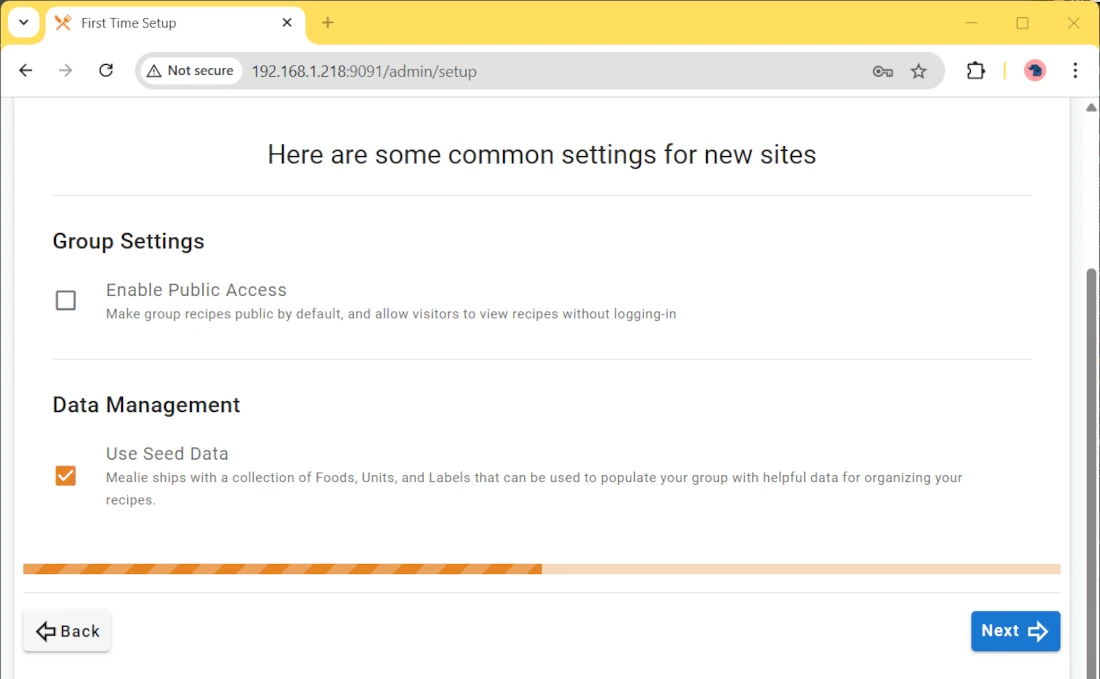
Then, please click the “Next” button.
The following page will summarise the settings:
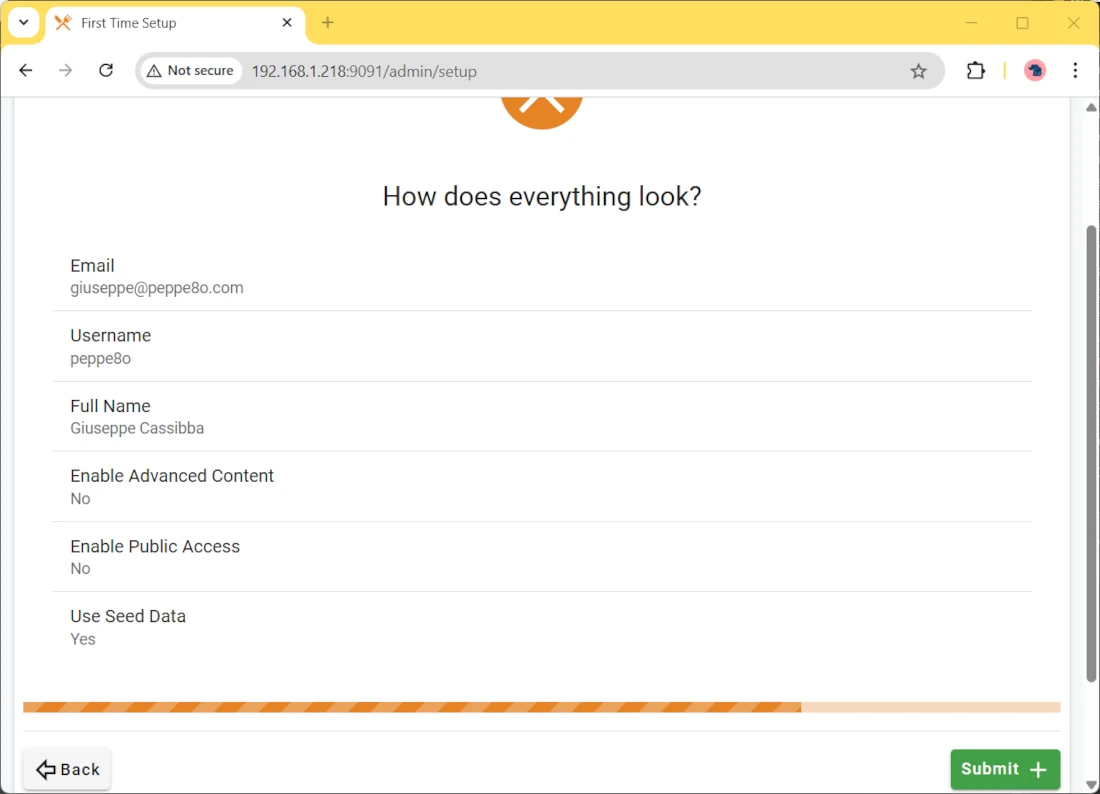
Please click the “Submit” button to confirm and let Mealie prepare its database.
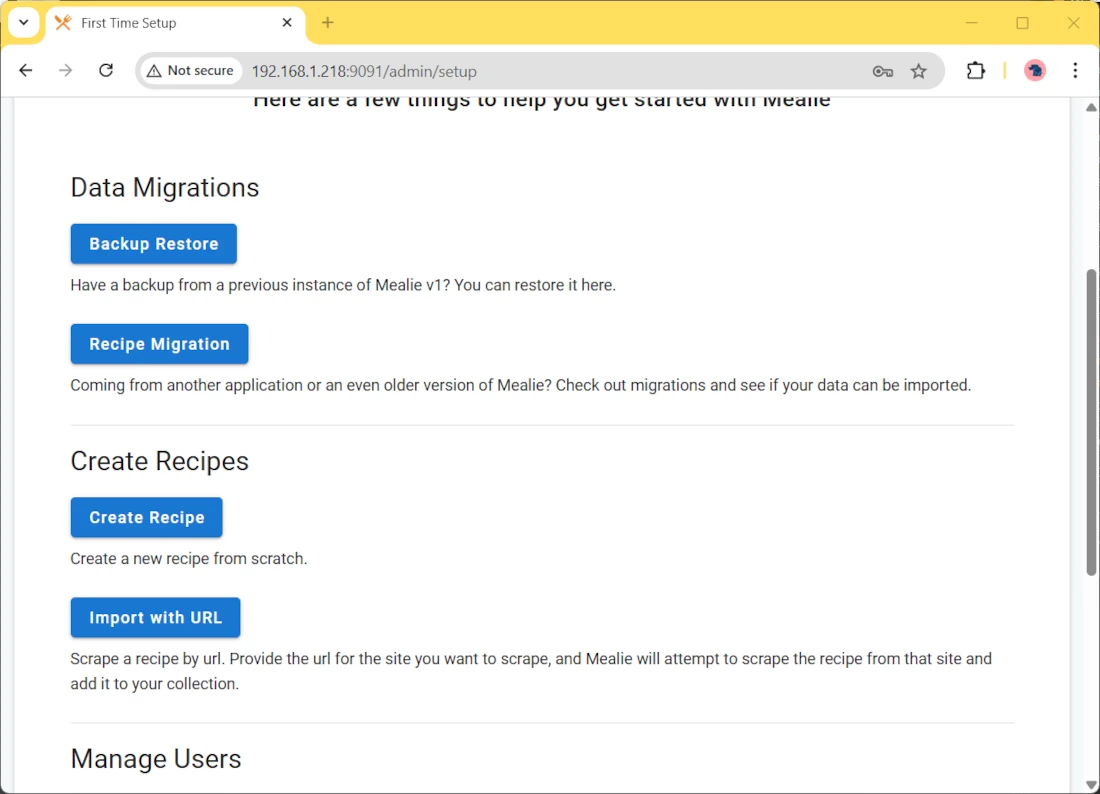
In the last wizard screen, you can perform some actions like managing backup/restore operations, importing or creating recipes, and managing your users. You can also do these actions from the user dashboard in the Mealie homepage:
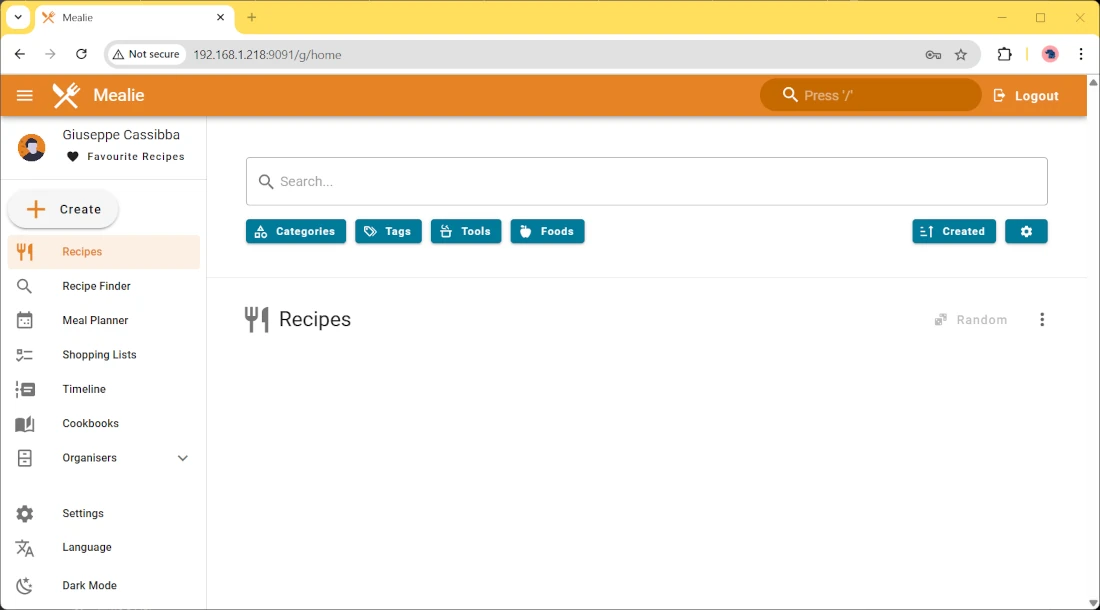
Please scroll down and click the “Home” button.
At this point, you should reach the Mealie home page:
Create a Recipe with Mealie on Raspberry PI
There are 2 different ways to create recipes with Mealie. You can create them from scratch, by adding all the steps and the ingredients required for the recipe, or you can import them from a web page. It is important to note that with the second method, you don’t need to get the recipe from a specific web format: you can link to whatever recipe page on the web, and Mealie will try to import it in the right way. Then, you can adjust it if there are some steps not imported correctly.
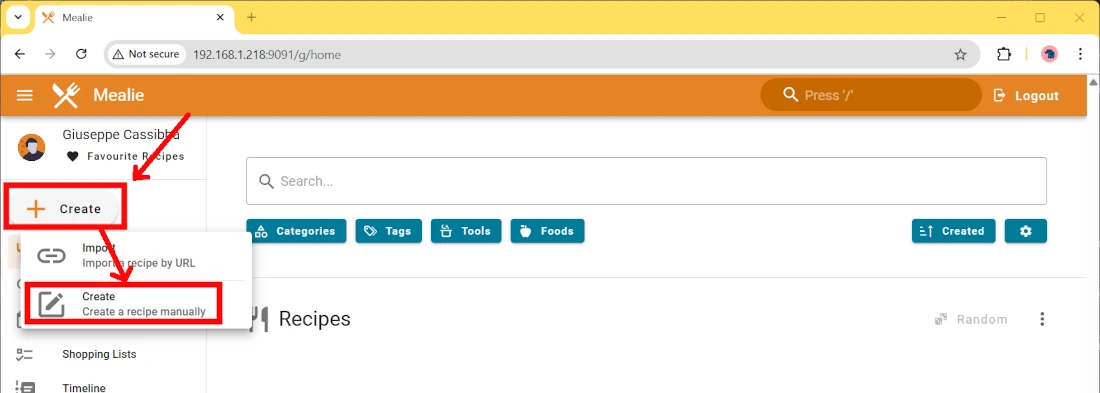
Create a Recipe Manually from Scratch
For this method, you need to click the “Create” button, then “Create” as shown in the following screenshot:
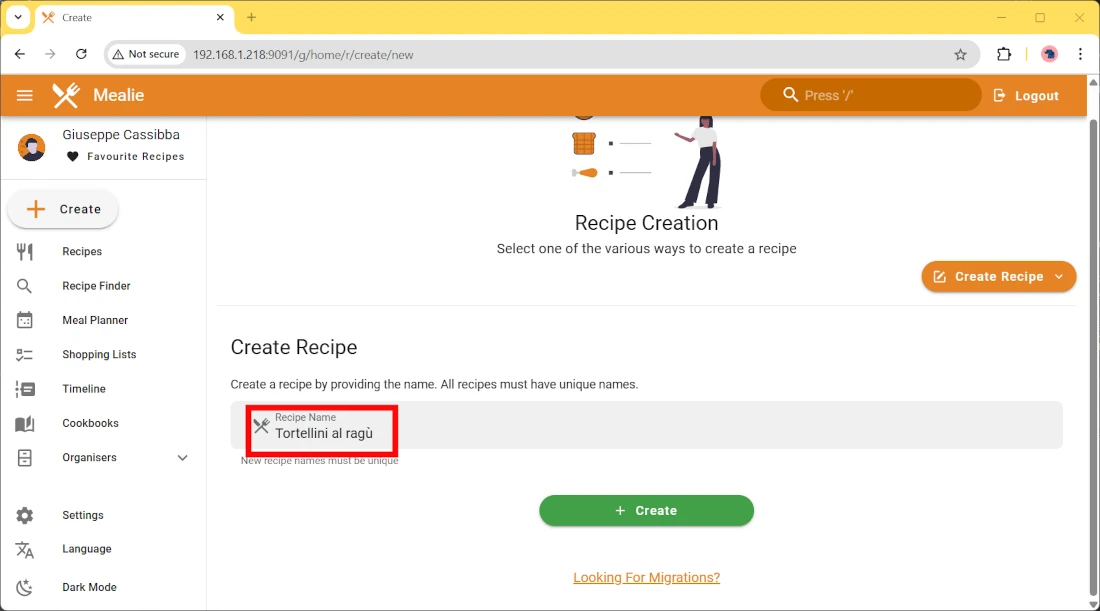
In the following window, please give your recipe a name, then click the green “Create” button at the bottom section of the page:
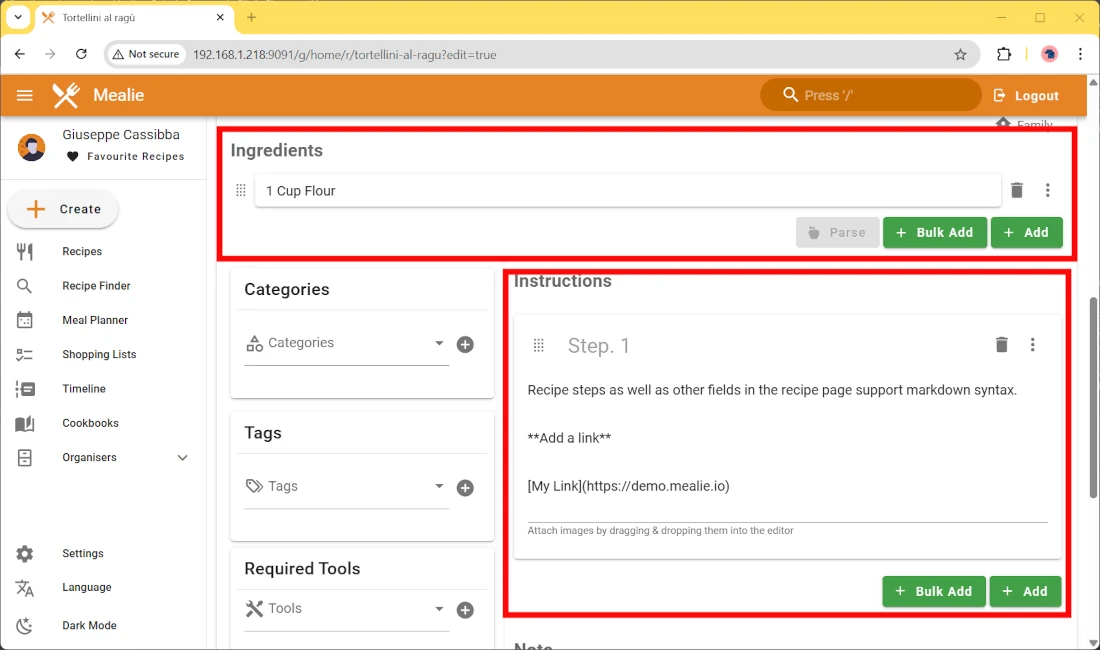
At this point, you will be able to add all the ingredients and the instructions to your recipe, as well as you can add images, tools, and so on:
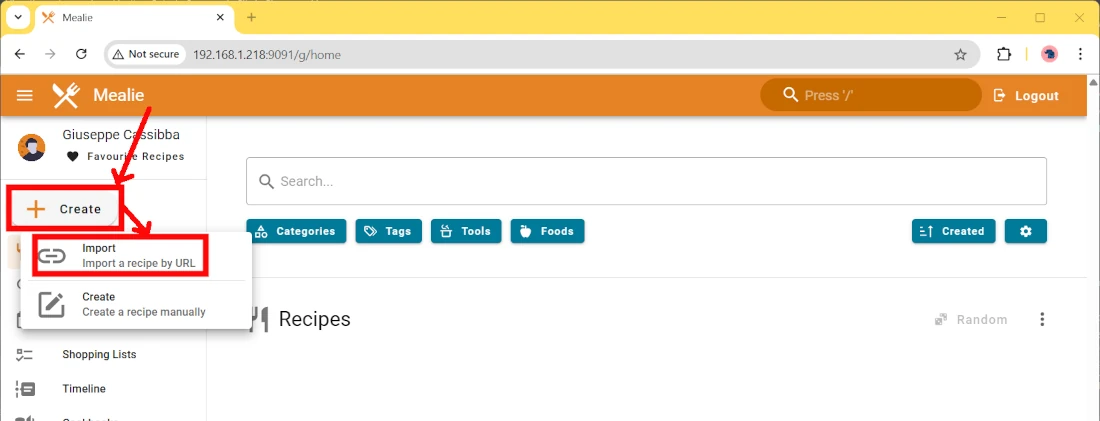
Import a Recipe
The most impressive feature of Mealie is in importing an existing recipe. For this method, you must use the “Import” option from the “Create” menu:
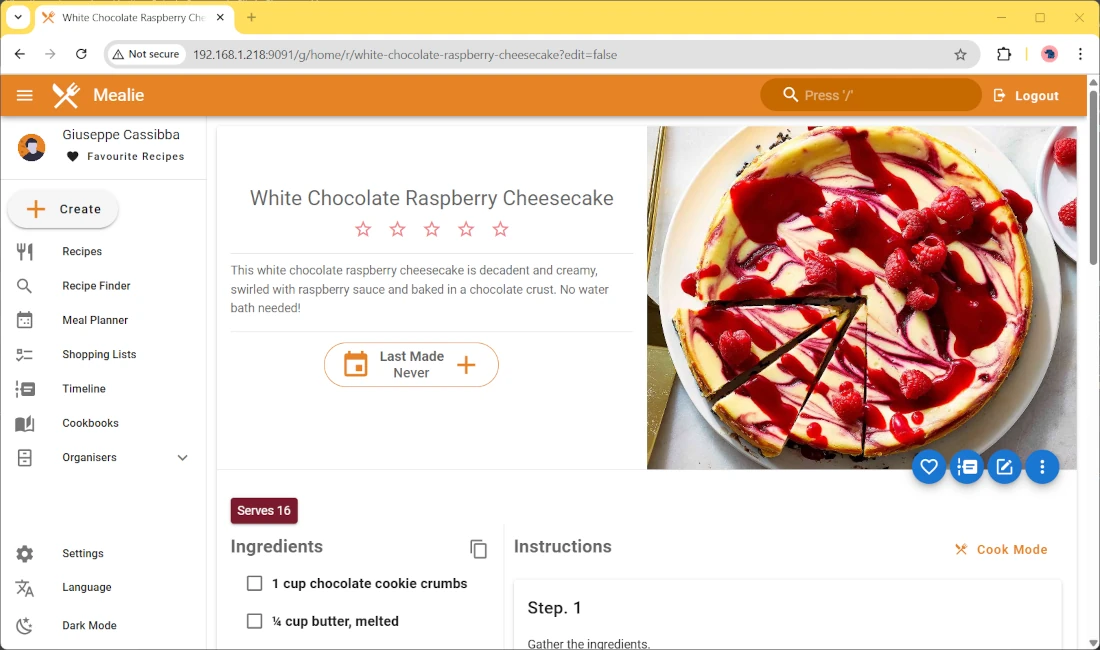
On the following page, you can just add a link to your favourite recipe in the highlighted field. For example, I’m going to link a cheesecake recipe from the “allrecipes.com” free online portal and import it from the related URL. After this, please click the green “Create” button at the end of this page:

In a few seconds, Mealie will import the recipe, including the featured image, the ingredients, and the steps:
What’s Next
If you want to discover many other projects for your Raspberry PI, you can take a look at peppe8o Raspberry PI tutorials.
Enjoy!

Open source and Raspberry PI lover, writes tutorials for beginners since 2019. He's an ICT expert, with a strong experience in supporting medium to big companies and public administrations to manage their ICT infrastructures. He's supporting the Italian public administration in digital transformation projects.
![]()
![]()
![]()
![]()
![]()
![]()
![]()