Last Updated on 17th January 2025 by peppe8o
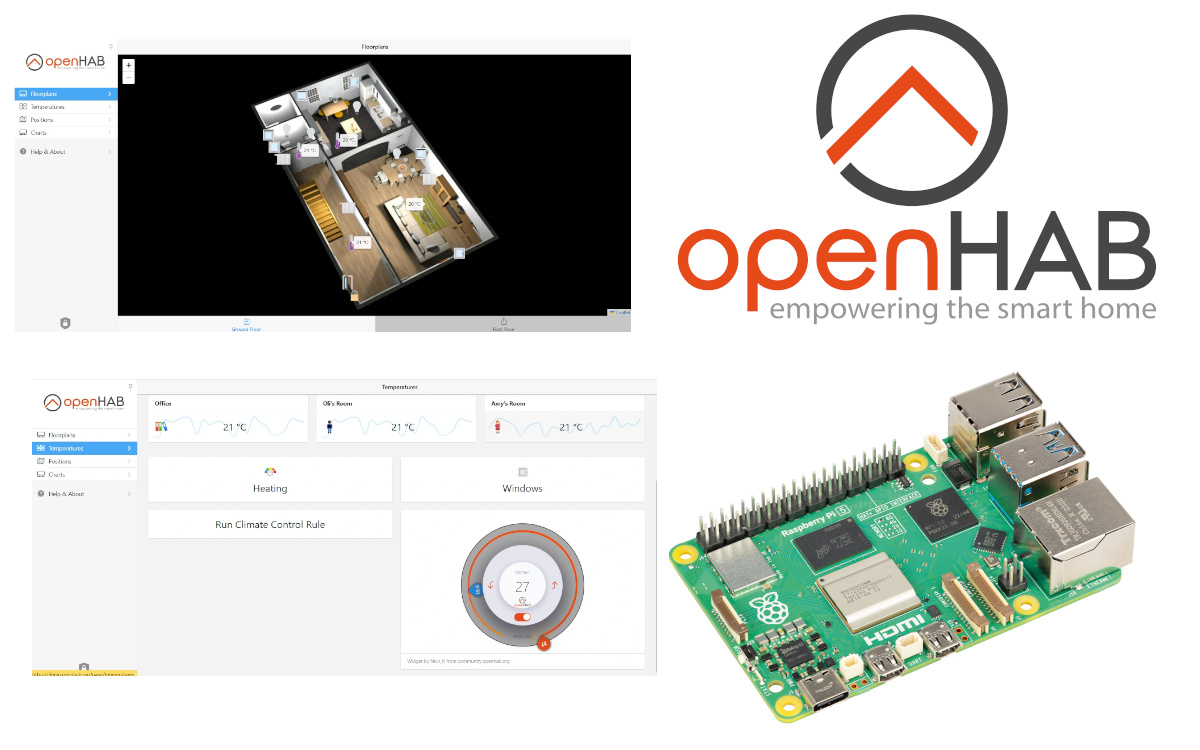
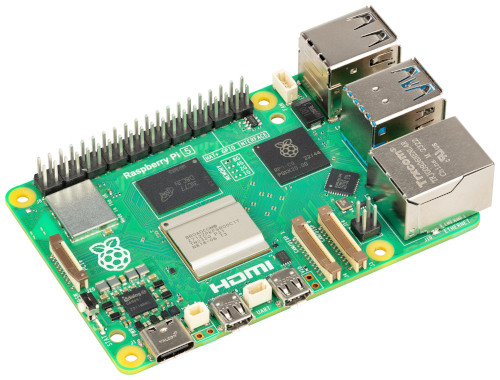
In this tutorial, I will show you how to install OpenHAB on Raspberry PI computer boards by using Docker. For this project, I’m going to use a Raspberry PI 5 Model B, but this guide can be used with any Raspberry PI computer board capable of running the 64-bit Raspberry PI OS.
About OpenHAB
The Open Home Automation Bus (openHAB) is an open-source home automation platform. It allows you to connect all your smart devices with a self-hosted, centralized orchestrator to control and monitor them.
OpenHAB is built on a modular platform where you can install addons to easily integrate your smart devices, besides the capabilities of openHAB to auto-discover some of them.
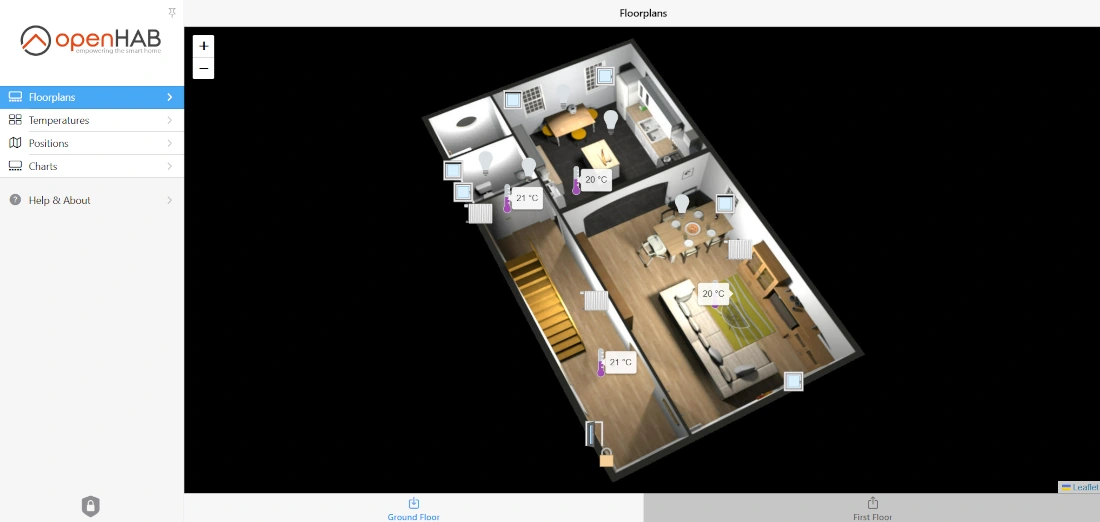
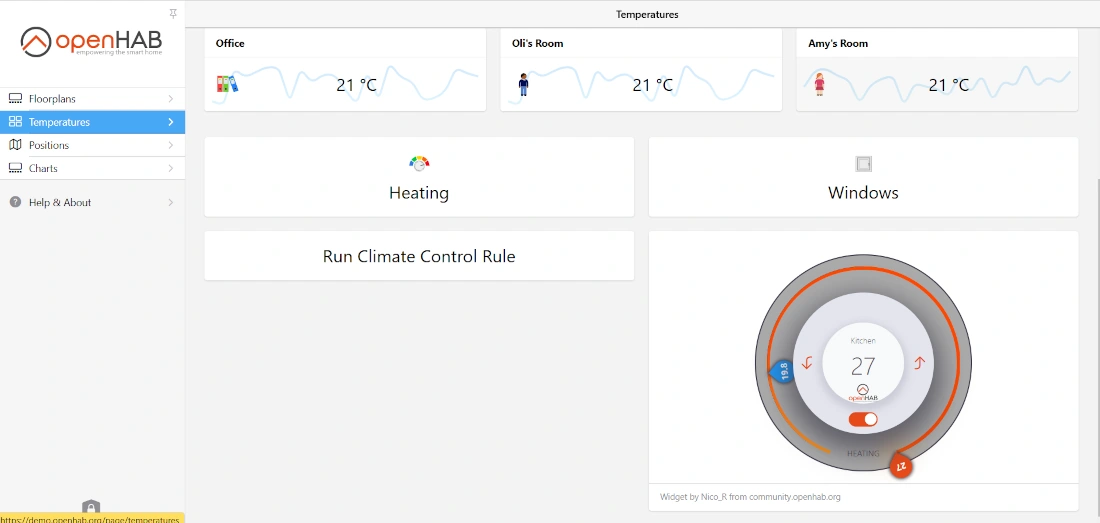
It also allows you to create cool dashboards (pages) where you can organize your smart devices at your preference. The following images are obtained from the live openHAB demo page:
Finally, openHAB also gives you apps for your smartphone (available both from Google Play and App Store), so that you can control your home automation scenes from your mobile device.
Main OpenHAB Concepts
Before starting with the installation process, we should have clear the openHAB terms.
Things: these are the physical devices connected to openHAB. It can be, for example, a smart power switch
Bindings: These are software connectors that allow your openHAB to connect to your physical device. You can find them in openHAB as add-ons and you can install them from the add-on marketplace available in your openHAB dashboard.
Channels: these are the inputs and outputs of your devices. It depends on the binding, which allows you to access to the device’s settings and values. It can be, for example, the command to put on the smart power switch, the command to put off it, the current value reading, and so on
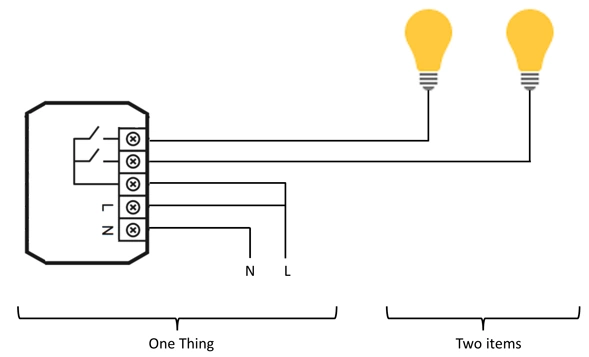
Items: these are the logical view of your smart device, as they represent the capabilities of the Things. For example, if you have a smart switch which powers on and off a lamp, the Thing is the smart switch while the Item is the lamp
Links: are the connections between Things and Items. When you create an item, you just create a logical object with a link to one or more channels of a specific thing.
The following picture, from the https://www.openhab.org/docs/concepts, visually explains the Item and Thing concepts:
Installation Methods for OpenHAB on Raspberry PI
You can install openHAB on Raspberry PI in 2 different, alternative ways.
The first one is by using the official openHAB image for Raspberry PI (openhabian), which you can install according to the official procedure available from the openhab official docs for openhabian.
The second way is the one I’m adopting, with Docker. I prefer this way as Docker allows us to run multiple services and makes far simpler to update and/or migrate the services when needed.
What We Need
As usual, I suggest adding from now to your favourite e-commerce shopping cart all the needed hardware, so that at the end you will be able to evaluate overall costs and decide if to continue with the project or remove them from the shopping cart. So, hardware will be only:
- Raspberry PI Computer Board (including proper power supply or using a smartphone micro USB charger with at least 3A)
- high speed micro SD card (at least 16 GB, at least class 10)
Step-by-Step Procedure
Preparing the Raspberry PI Operating System
The first step is installing the Raspberry PI OS Lite (please note that we need the 64-bit version) to get a fast and light operating system (headless). In this case, you will need to work from a remote SSH terminal. If you need a desktop environment, you can also use the Raspberry PI OS Desktop, in this case working from its terminal app. Please find the differences between the 2 OS versions in my Raspberry PI OS Lite vs Desktop article. NOTE: if you’re working with a low capabilities Raspberry PI (like a Raspberry PI Zero 2 W) you should use the OS Lite version.
Make sure that your system is up to date. Connect via SSH terminal and type the following command:
sudo apt update -y && sudo apt upgrade -yWe also need to install Docker. For this step please refer to my Docker on Raspberry PI tutorial.
Install OpenHAB on Raspberry PI with Docker
Please create a specific folder where we’ll make openHAB start and where we’ll save our Docker services file, then enter it:
mkdir openhab
cd openhab
Now, please create the docker-compose file:
nano docker-compose.ymlFill it with the following content:
services:
  openhab:
    image: "openhab/openhab:latest"
    restart: unless-stopped
    network_mode: host
    volumes:
      - "/etc/localtime:/etc/localtime:ro"
      - "/etc/timezone:/etc/timezone:ro"
      - "openhab_addons:/openhab/addons"
      - "openhab_conf:/openhab/conf"
      - "openhab_userdata:/openhab/userdata"
    environment:
      CRYPTO_POLICY: "unlimited"
      EXTRA_JAVA_OPTS: "-Duser.timezone=Europe/Berlin"
      OPENHAB_HTTP_PORT: "8080"
      OPENHAB_HTTPS_PORT: "8443"

volumes:
  openhab_addons:
    driver: local
  openhab_conf:
    driver: local
  openhab_userdata:
    driver: local
Save and close. Now, we can get openHAB running in our Raspberry PI with the following command:
docker compose up -dThis will download the latest openHAB image and install it. After you get the prompt back, you can check at any time if there’re still on-going processes running with the following command:
docker logs openhab-openhab-1You should see the latest row showing a Launching the openHAB runtime… message.
Run the OpenHAB Setup Wizard (Only on Very First Access)
Now that we have openHAB installed, we can access it for the setup wizard, which will appear only at the very first start.
From a browser (it can also be from a remote PC), please use your Raspberry PI’s IP address as URL and the “8080” port. For example, as my Raspberry PI has IP 192.168.1.218, my URL will be http://192.168.1.218:8080. If the result is an error page or empty page, please give it more time to finalize the software preparation. It can be a bit slower for the very first boot.
You should get the following page:
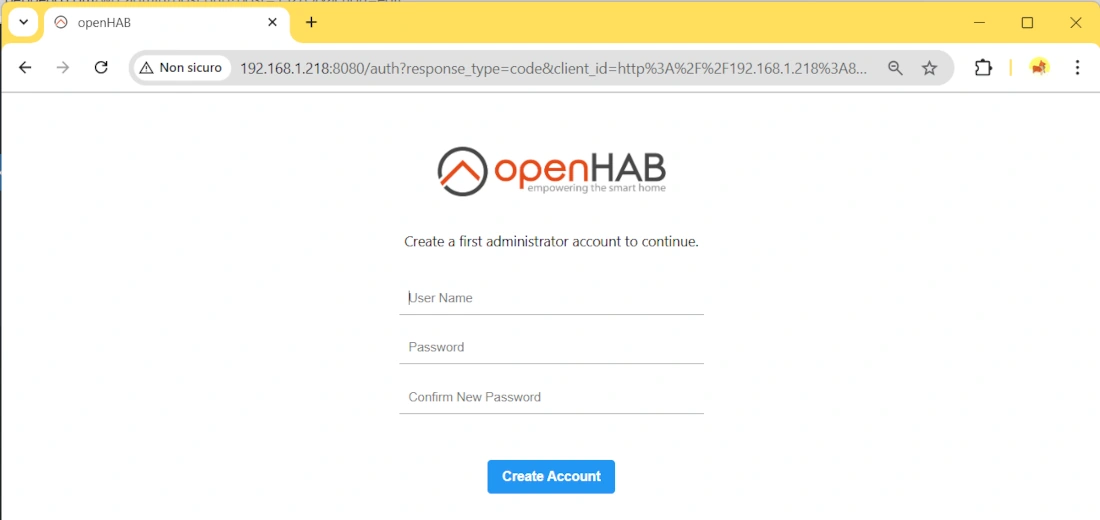
Please fill the form with your preferred username and password to create the first user, which will have administrative (full) control of your openHAB on Raspberry PI and click the “Create Account” button.
The following page will ask you to select your favourite language, region, and timezone:
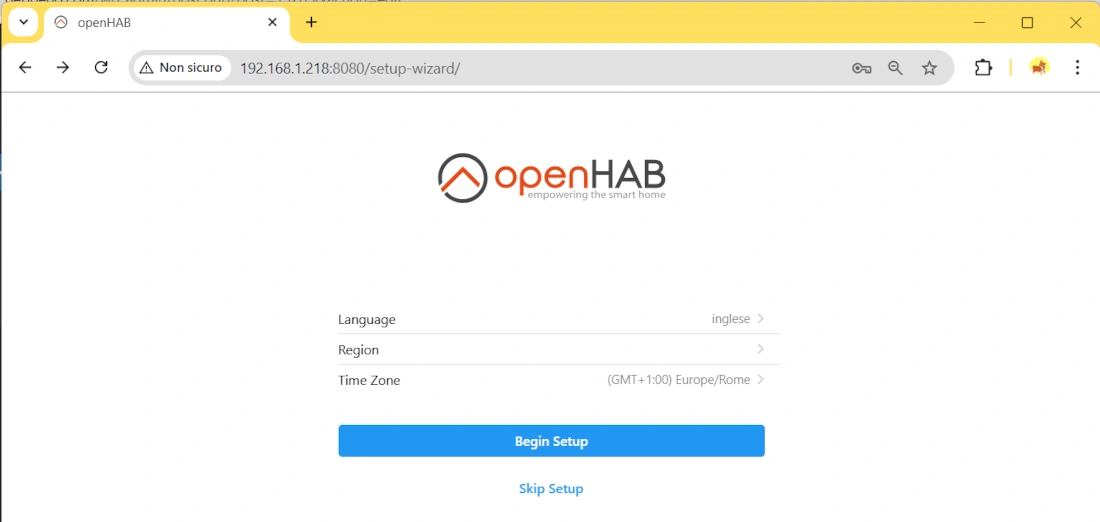
By default, it should use those get from your current browser, but you can customize them there. Then please click the “Begin Setup” button.
The following page will allow you to set your home’s location:
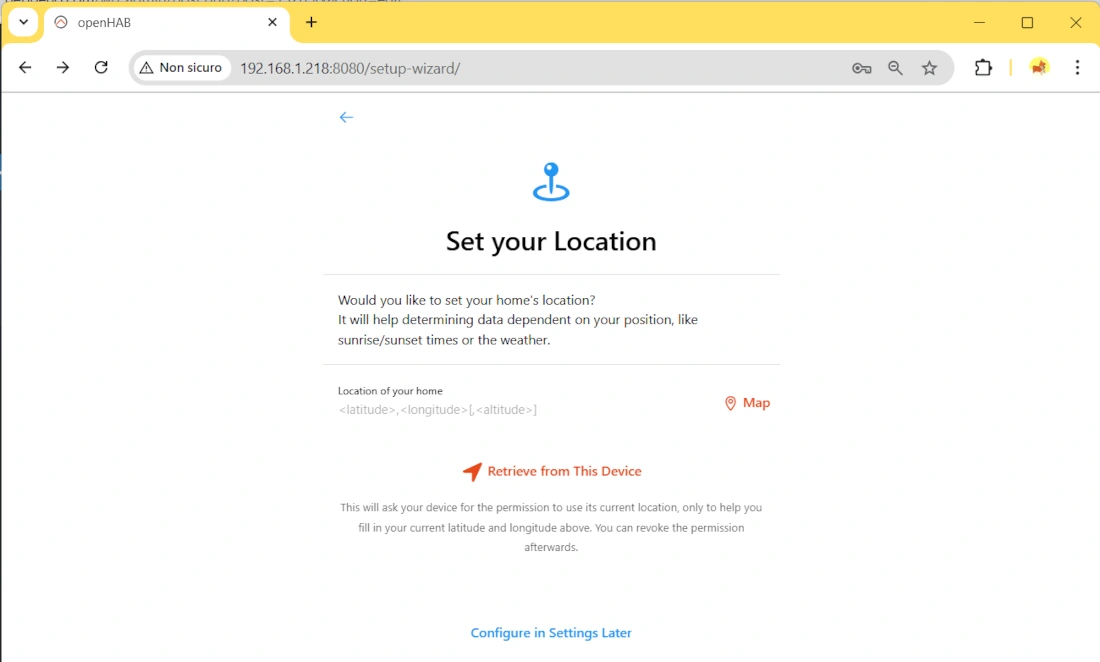
You can set it by clicking the “Map” button, which will show you a map where you can select your home’s exact position. After this action, you can click the “Set Location” button which will appear in this page.
The following page will allow you to install addons required to save your historical data:
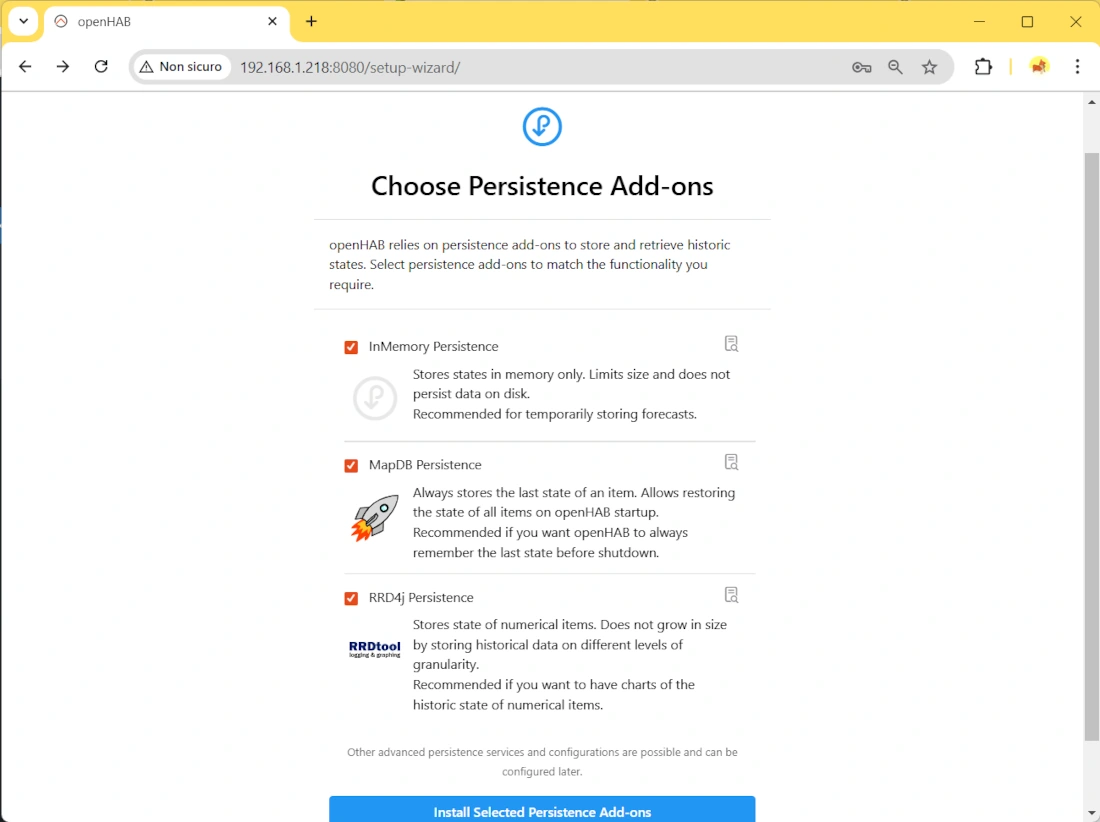
You can confirm the selected one by clicking the related button at the end of the page.
The following page will ask you if you want to install some useful addons, that should address the basic needs for the average user:
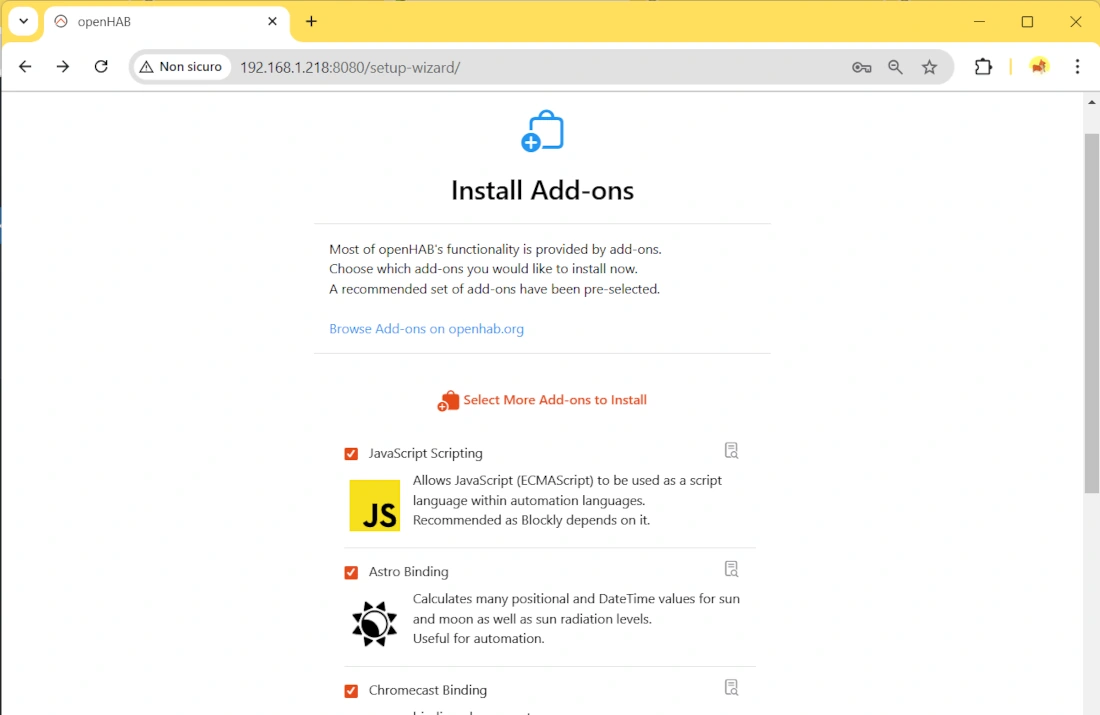
You can customize the selection at your choice. Then please click the “Install add-ons” button at the end of the page.
OpenHAB will start the add-on installation. In a few minutes you should have a page confirming that everything is ready to start with openHAB:
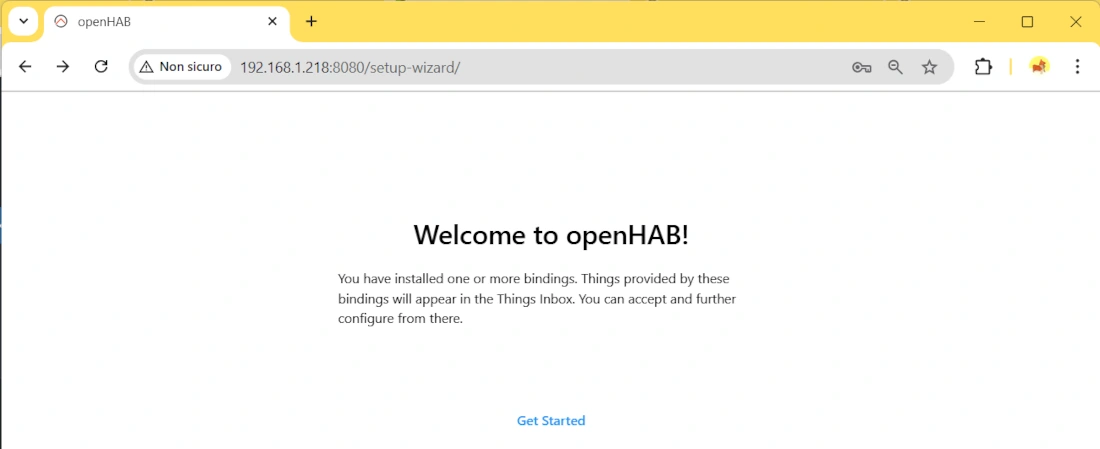
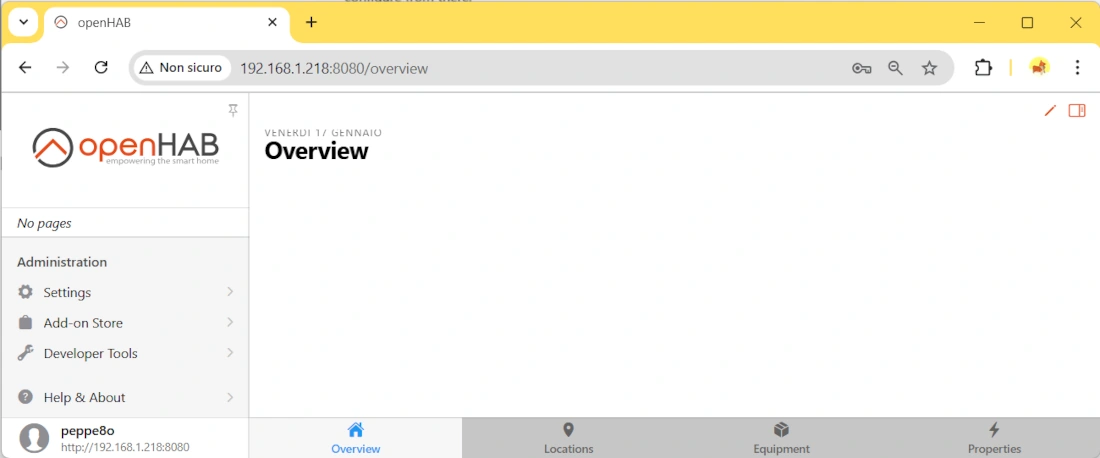
By clicking the “Get Started” link you will reach the openHAB administration page, by default showing the “Overview”:
Main Menus for OpenHAB
An important administration page for openHAB is the Settings page:
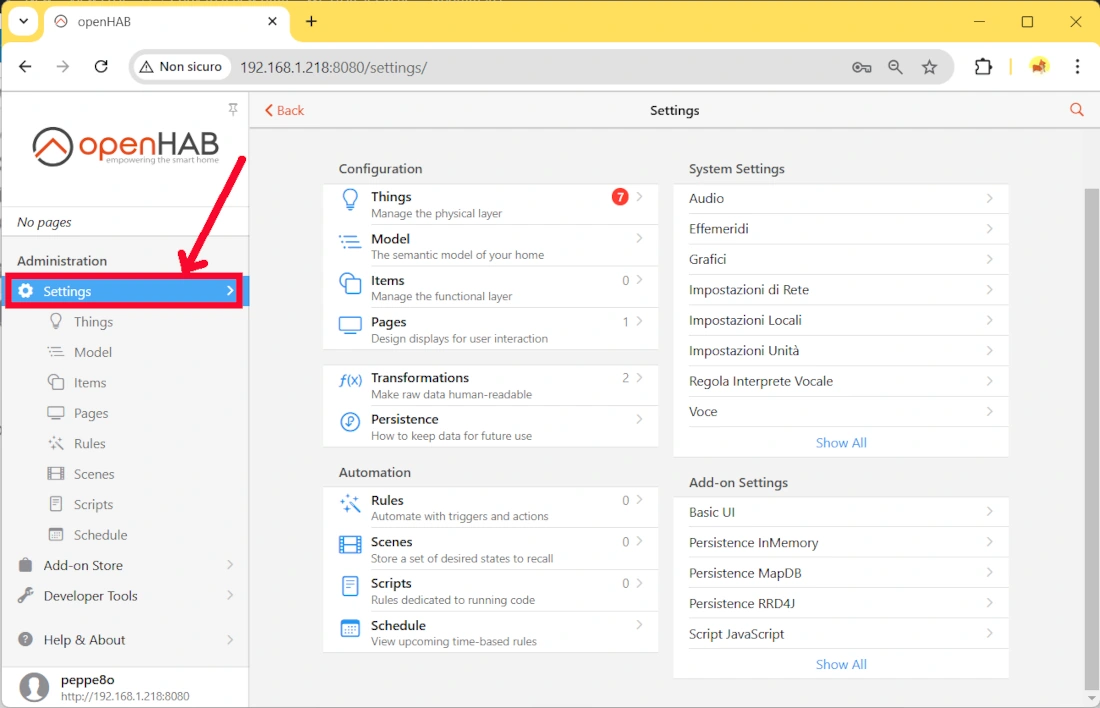
Here you can add and view your “Things“. As you will see, openHAB will propose you some devices automatically discovered in your local network.
Another important section in the settings page is the “Pages“, where you can create amazing dashboards by adding and organizing widgets and tables.
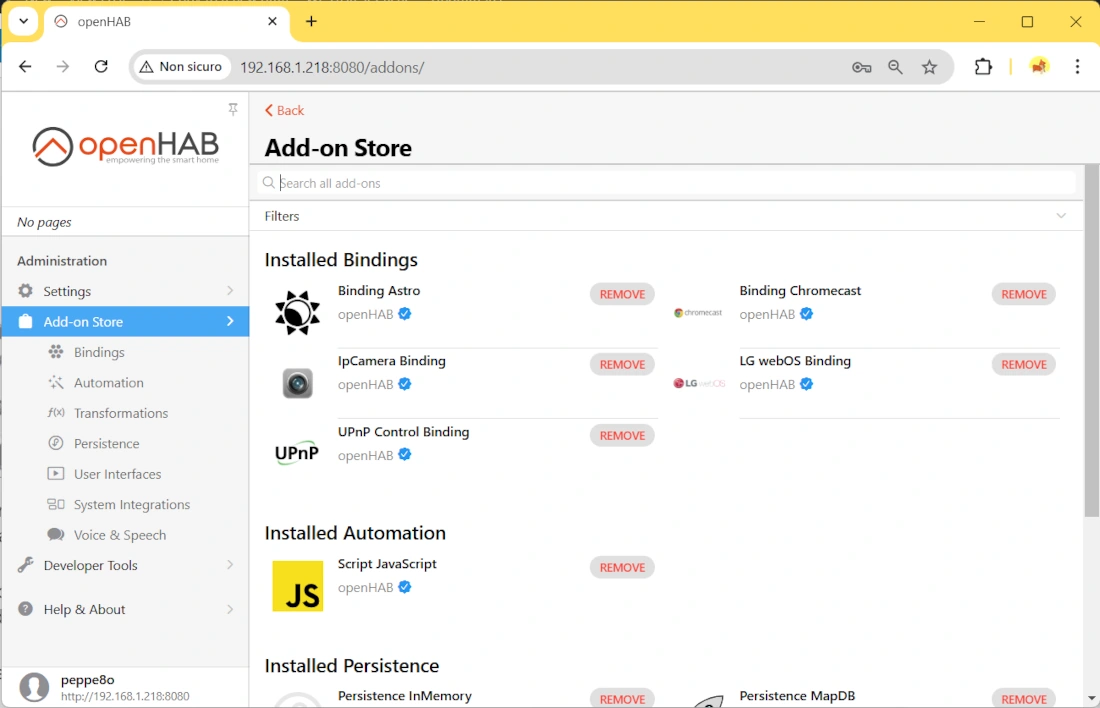
The Add-on Store will show you all the installed ass-ons and enables you to install many free add-ons:
Getting Started with OpenHAB Customization
The full official documentation of openHAB is available at https://www.openhab.org/docs/. They also offer a Community Forum to help users.
What’s Next
Interested in what you can do with your Raspberry PI? Take a look at my Raspberry PI tutorials and subscribe to my newsletter!
Enjoy

Open source and Raspberry PI lover, writes tutorials for beginners since 2019. He's an ICT expert, with a strong experience in supporting medium to big companies and public administrations to manage their ICT infrastructures. He's supporting the Italian public administration in digital transformation projects.

