
This guide will show you how to create a personal media streaming server with Raspberry PI and Emby.
We’ll use also a USB device to collect our media files to be streamed. This device will be simply a flash disk in my test, but the procedure is the same for a USD Drive. An alternative option could be using a NAS. To have a working configuration, we’ll erase the USB disk, to take care to have an empty one or you could lose all existing data inside it.
What Is Emby
Today’s smart homes are plenty with a lot of connected devices that make your life easier. Your media files are often hosted in online services that make privacy concerns when listening about security. Raspberry PI and Emby can give you an alternative solution to host your files locally at home and get them streamed to your devices
As described on its official website, Emby aims to bring together personal videos, music, photos and live television. It is installed as a server and can be accessed from an app or web browser. It also allows streaming your media to DLNA devices or Chromecast to simplify connection. Emby is also compatible with a number of apps.
Within Emby’s main features, we can find the following (ref. emby features list):
- Stream Live TV to any device, manage your DVR, and enjoy your library of recordings
- Sync your personal media to smartphones and tablets for easy offline access
- Emby organizes your content into easy and elegant presentations
- Easy web-based tools help you edit metadata and images, search for subtitles, and more.
It has also parental control so that you can easily control what your children are watching and filter content.
Emby also owns apps for Android and iOS. Usually installing apps on smartphones may require from you permissions on your device and files, of course. If your main concern is getting the less as possible data on cloud/third-party apps, you can use Emby from your browser. Otherwise, if you can accept installing apps on your devices, you can also try this software that surely adds offline capabilities to your private streaming service.
For this tutorial, I’m also going to show you how to setup and external USB storage for your Emby. This will allow you getting more space at a cheaper price compared to getting a very large micro SD card.
What We Need

As usual, I suggest adding from now to your favourite e-commerce shopping cart all the needed hardware, so that at the end you will be able to evaluate overall costs and decide if to continue with the project or remove them from the shopping cart. So, hardware will be only:
- Raspberry PI computer Board (including proper power supply or using a smartphone micro USB charger with at least 3A)
- high speed micro SD card (at least 16 GB, at least class 10)
- a USB Storage (I suggest avoiding those with Jmicron adapters as they had a lot of compatibility problems with Raspberry PI OS)
Step By Step Guide
Prepare OS environment
Please start installing the Operating System for your Raspberry PI Emby server. You can use Raspberry PI OS Lite, for a fast, headless OS. You can also use the Raspberry PI OS Desktop (in this case working from its terminal). Please take note if you are going to install the 64-bit or the 32-bit OS. For newer Raspberry PI models, I suggest using the 64-bit OS, while some older Raspberry PI boards may support only the 32-bit.
If not done, make your OS up to date. From terminal:
sudo apt update -y && sudo apt upgrade -yThe easiest way to install Emby on Raspberry PI is using Docker. For this reason, please refer my Setup a Docker environment with Raspberry PI OS Lite post. From that tutorial, the Portainer and docker-compose installation are not required for Emby.
Now, we must make sure that on every Raspberry PI reboot the USB storage will always mount automatically at the same system path. For this scope, please refer to my Automount USB storage with Raspberry PI OS Lite: fstab and autofs tutorial, showing how to do it. Please note that for this tutorial I’m going to mount an external USB storage at /media/myUSB with FSTAB.
Install Emby on Raspberry PI with Docker
Create the required folders:
mkdir /media/myUSB/config
mkdir /media/myUSB/share1
The first one will contain all the configuration files, while the “share1” folder will contain all the files and folders that will store your media.
Installing Emby Server via Docker is simple and fast. The only thing to care about is in using the right package according to your OS version.
If you have the 64-bit Raspberry PI OS version, the docker command will be:
docker run -d --name emby-server --restart unless-stopped \
-v /media/myUSB/config:/config \
-v /media/myUSB/share1:/mnt/share1 \
-p 8096:8096 \
-p 8920:8920 \
-p 1900:1900/udp \
--env UID=1000 \
--env GID=100 \
--env GIDLIST=100 \
emby/embyserver_arm64v8:latest
On the other hand, for Armv7 (32-bit) the docker command will change only the appropriate container image:
docker run -d --name emby-server --restart unless-stopped \
-v /media/myUSB/config:/config \
-v /media/myUSB/share1:/mnt/share1 \
-p 8096:8096 \
-p 8920:8920 \
-p 1900:1900/udp \
--env UID=1000 \
--env GID=100 \
--env GIDLIST=100 \
emby/embyserver_arm32v7:latest
From this docker run command, it is important to note that the “–restart unless-stopped” will allow your container to reboot automatically when the Raspberry PI will reboot. The container name is set to “emby-server” to make it easy to be identified with the docker ps command:
pi@raspberrypi:~ $ docker ps
CONTAINER ID   IMAGE                            COMMAND   CREATED         STATUS         PORTS                                                                                                                                       NAMES
b69d258ac8de   emby/embyserver_arm64v8:latest   "/init"   2 minutes ago   Up 2 minutes   0.0.0.0:8096->8096/tcp, :::8096->8096/tcp, 0.0.0.0:1900->1900/udp, :::1900->1900/udp, 7359/udp, 0.0.0.0:8920->8920/tcp, :::8920->8920/tcp   emby-server
At any time, you can check if there are issues from the docker logs:
docker logs emby-serverRemotely Access Emby
At this point, you should be able to access in your favourite web browser with the address http://<<YOUR_RPI_IP_ADDRESS>>:8096. My Raspberry PI internal IP address is 192.168.1.177 so, in my case, the URL http://192.168.1.177:8096 will connect to my Emby instance.
The first page will welcome, giving the ability to select the favourite language:

Set it according to your preferences and press the “Next” button.
The following page asks for the first user and the related password. Fill the form according to your preferences:
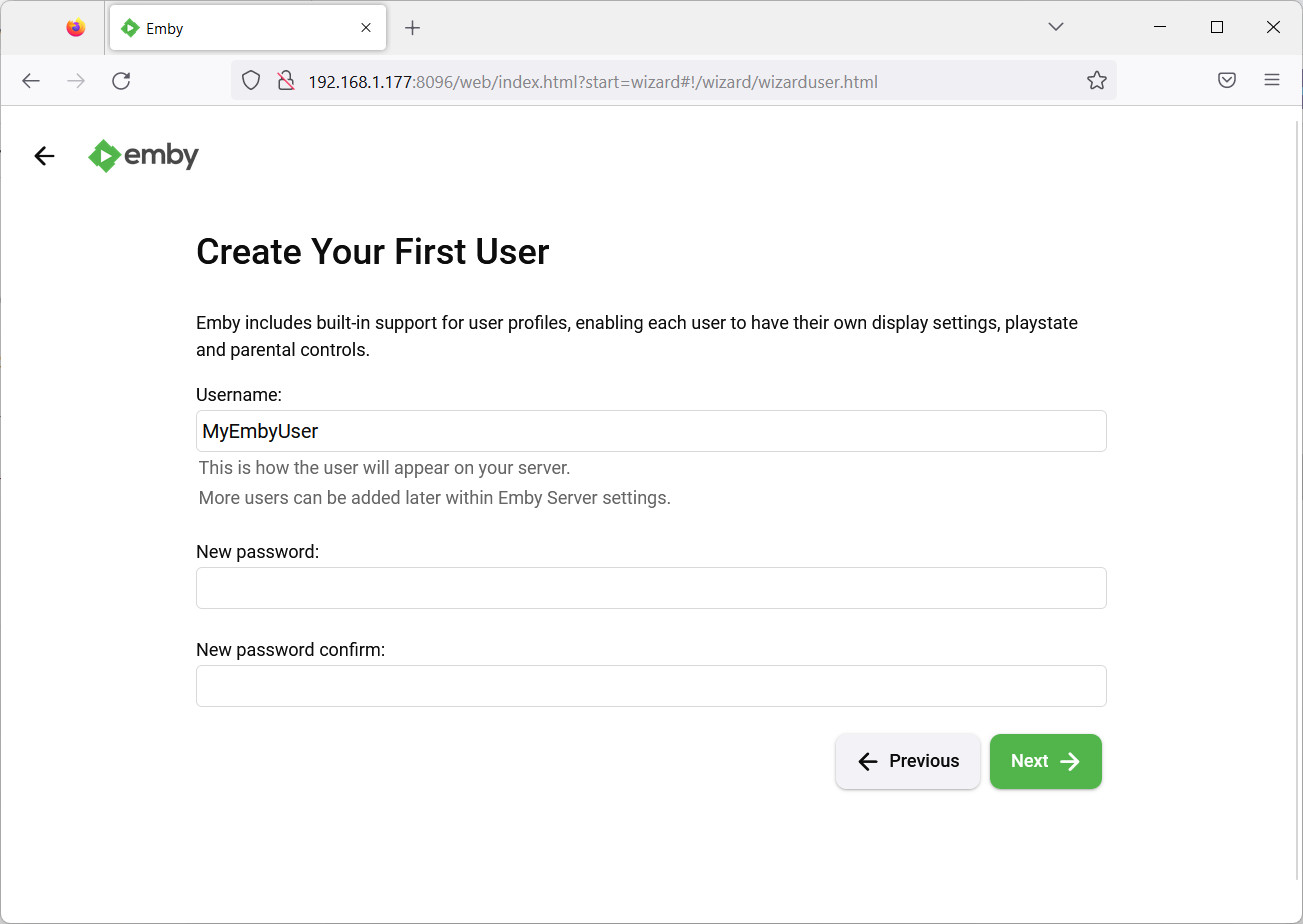
Then, press the “Next” button.
The first run wizard allows now to setup media folders:
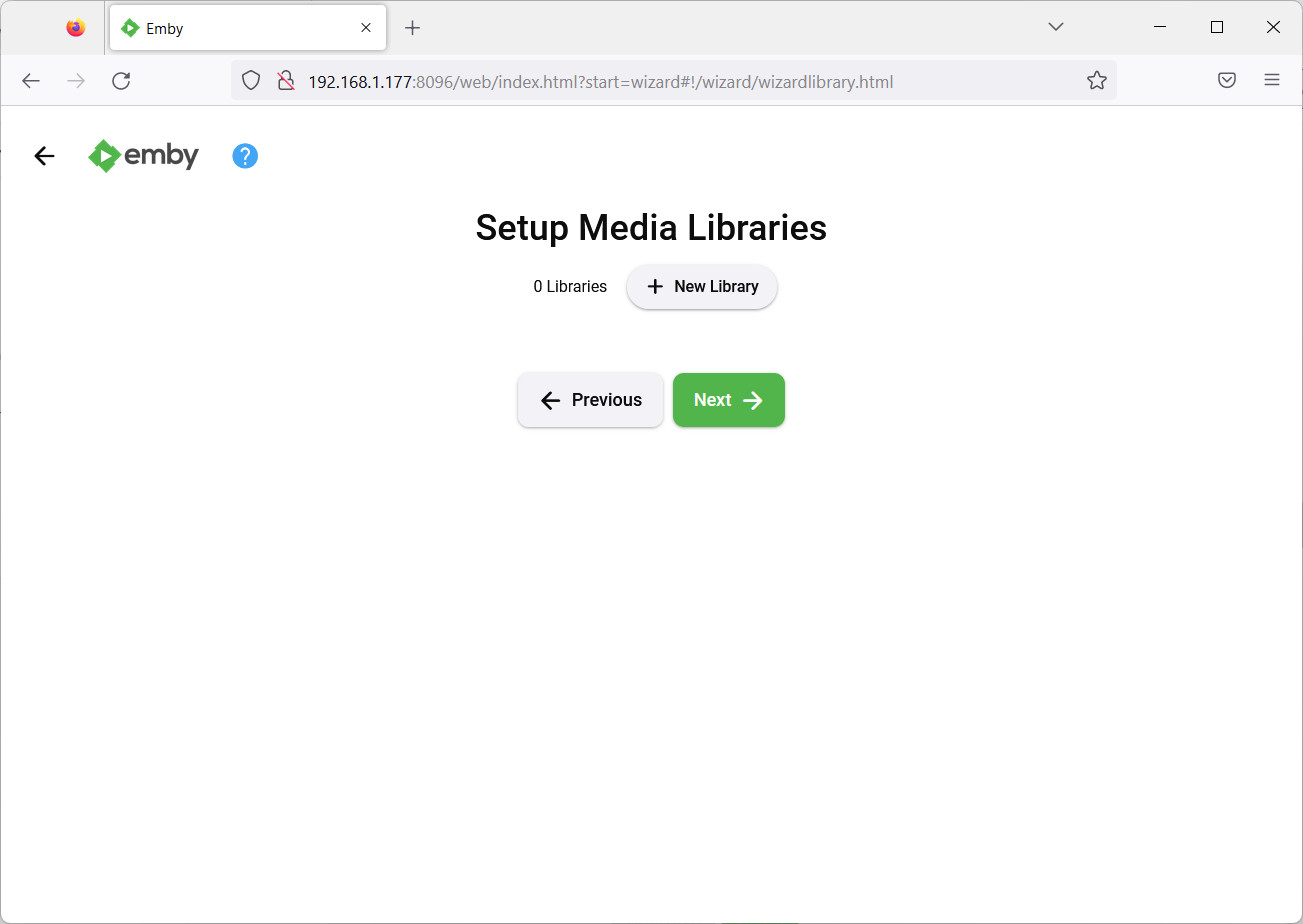
Please note that you can specify all the media libraries also at a later stage from the Emby dashboard but, for this example, I will create a “pictures” folder on the fly. Note that the media library folder must be already created on the Raspberry PI file system in order to use it on Emby. And these folders must stay in the /media/myUSB/share1 directory (or the one you created with the automount procedure). For this reason, let’s create a generic music folder. From the Raspberry PI terminal:
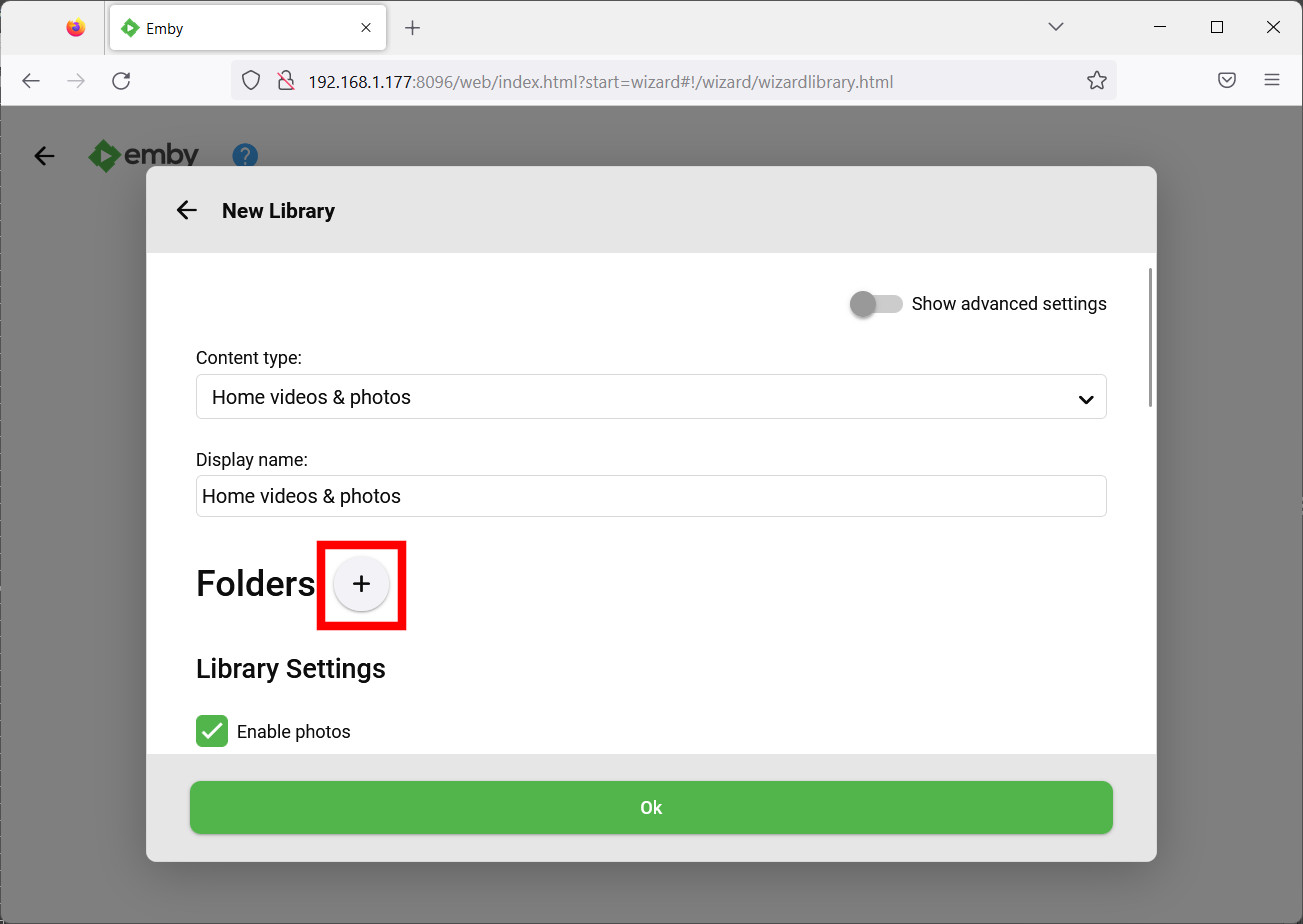
mkdir /media/myUSB/share1/picturesBack to the Emby wizard, the “+ New Library” button will open the related form:
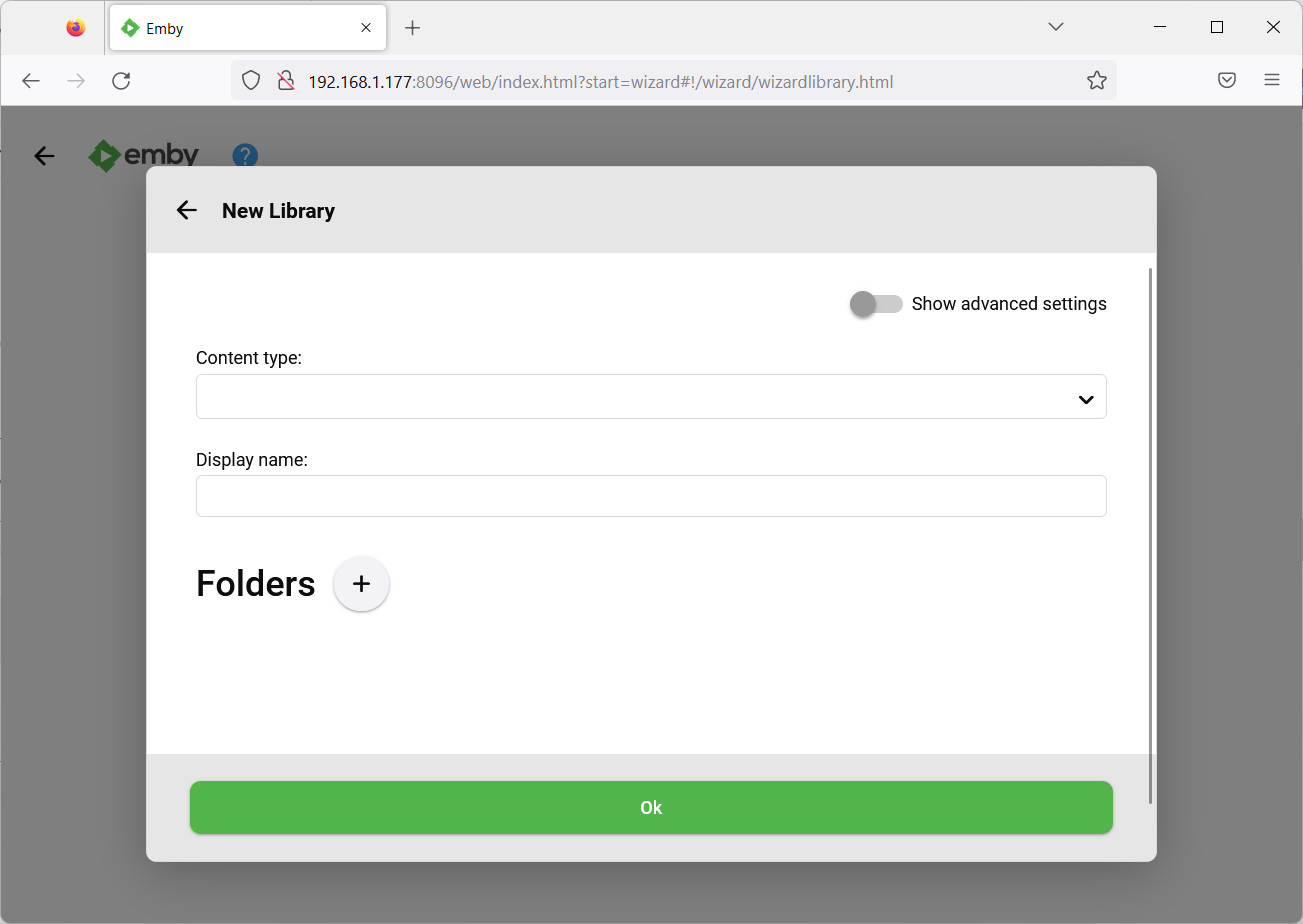
When you will set the “Content type” to any value from its drill-down menu, a list of options will appear below. You can also set only the Content Type, Display Name and Folders and leave all the remaining to their default values. In my case, “Home videos & photos” is the most appropriate content type.
Before confirming with the “Ok”, we must tell Emby where to take this kind of media, by properly setting the “Folders”. Before this, please remember how we made the volumes mapping, with the colon separating the host path (on left side) from the container internal path (on right side):
-v /media/myUSB/config:/config \
-v /media/myUSB/share1:/mnt/share1 \
So, the container will look at the share folder as mounted on /mnt/share1, even if physically it is available on Raspberry PI host at /media/myUSB/share1.
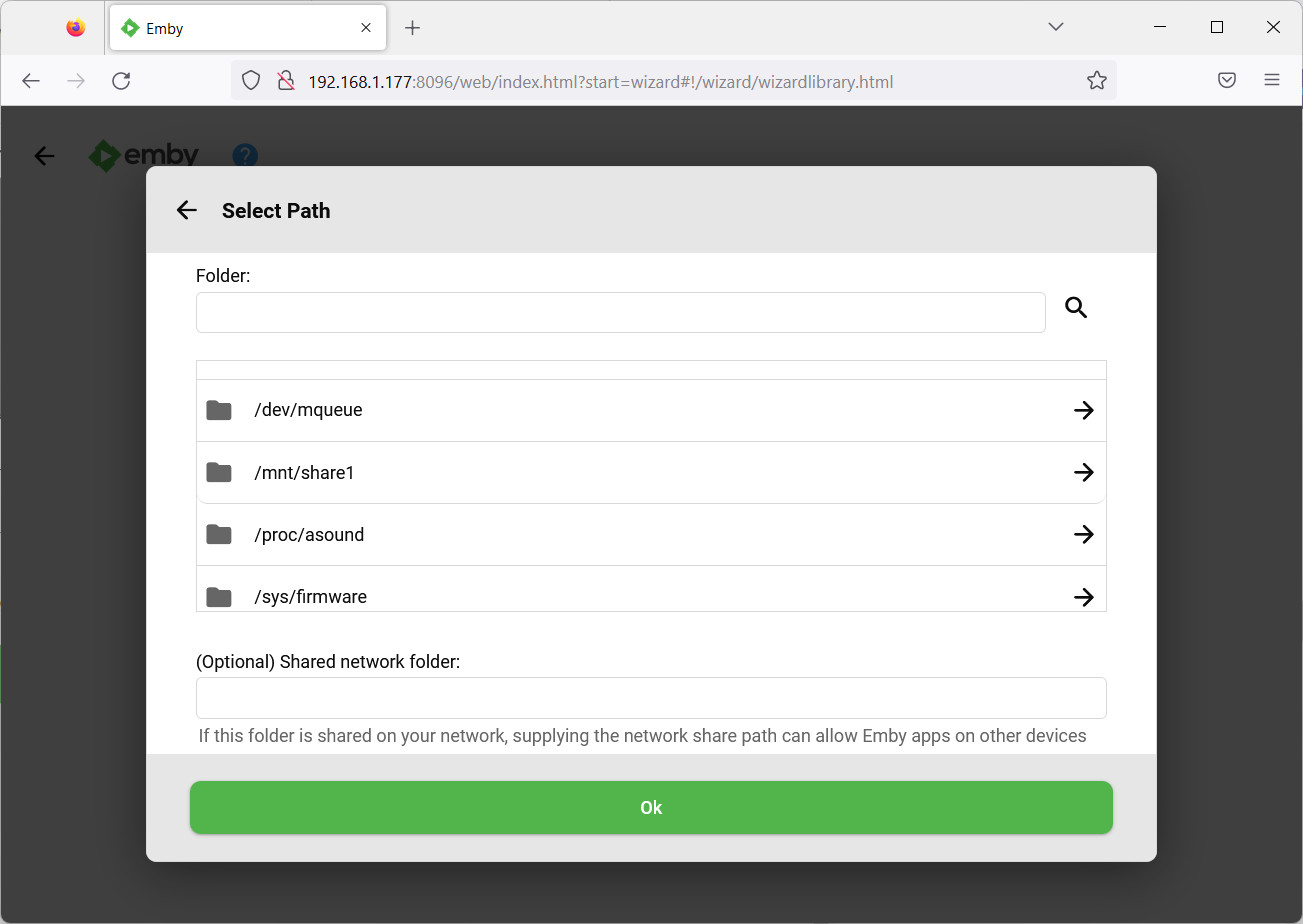
From the web GUI, use the “+” button
That will open the path selection form. You can use here local folders or even network shares. In my case, I will scroll down the proposed paths list to identify the “/mnt/share1” folder:
and, from here, select my “pictures” folder previously created in my “/mount/myUSB/share1” local folder:
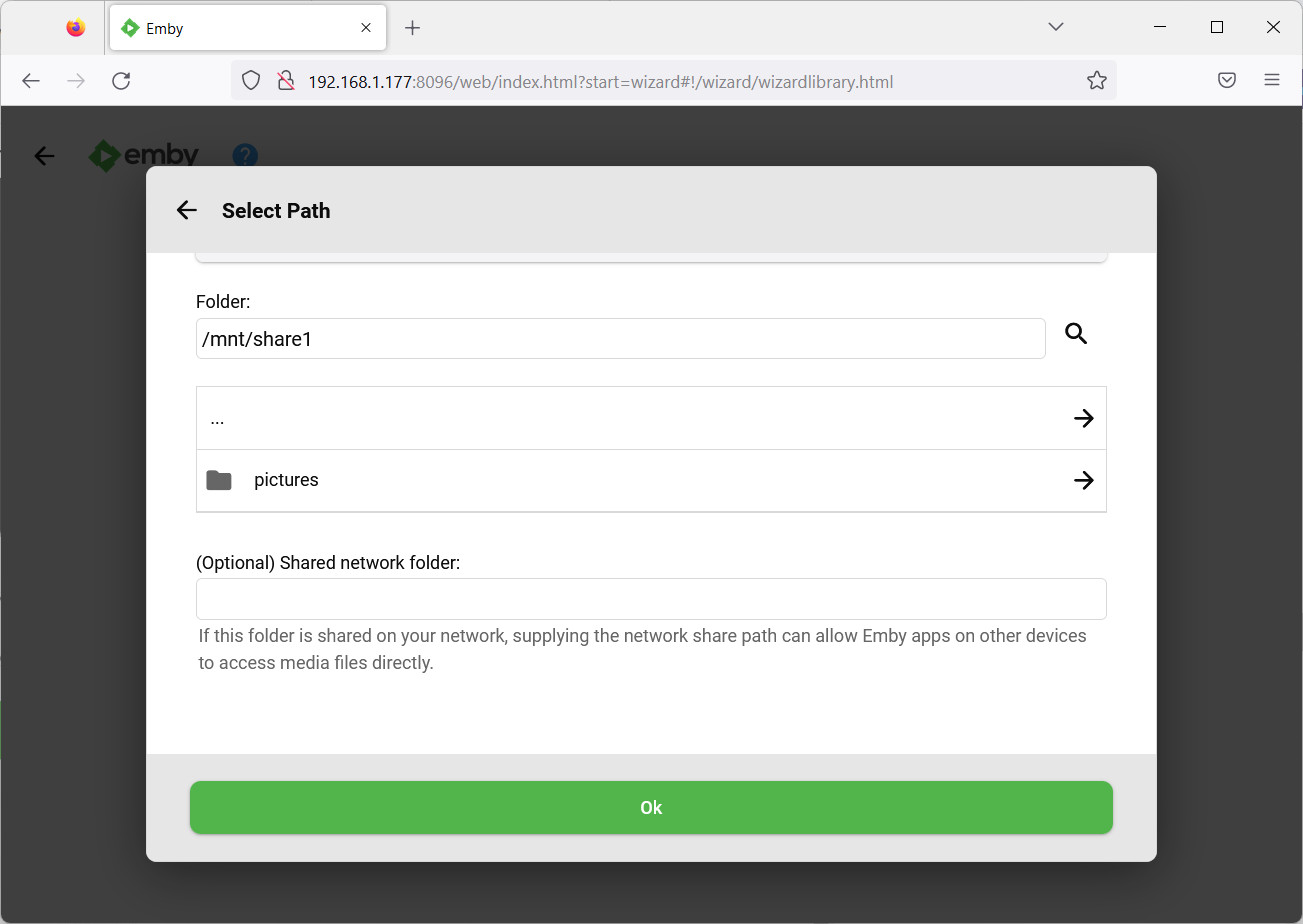
You can now click “Ok” to go back to the New Library form.
Then click again “Ok” to go back to our Wizard, where the media library is now shown:
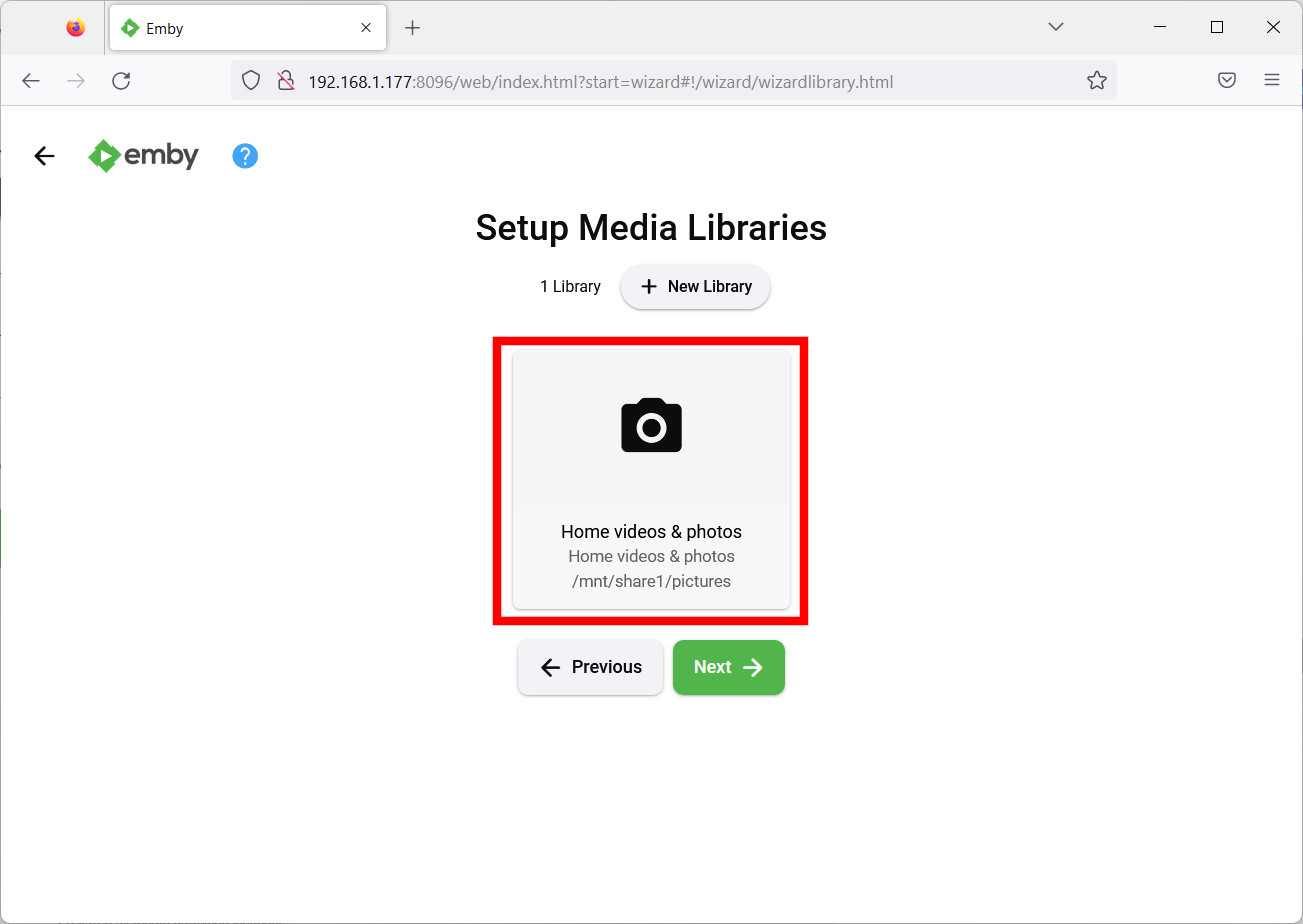
You can use the same procedure for other media or simply continue the setup and add other Media Libraries later.
Press Next to move on to preferred language settings for metadata:
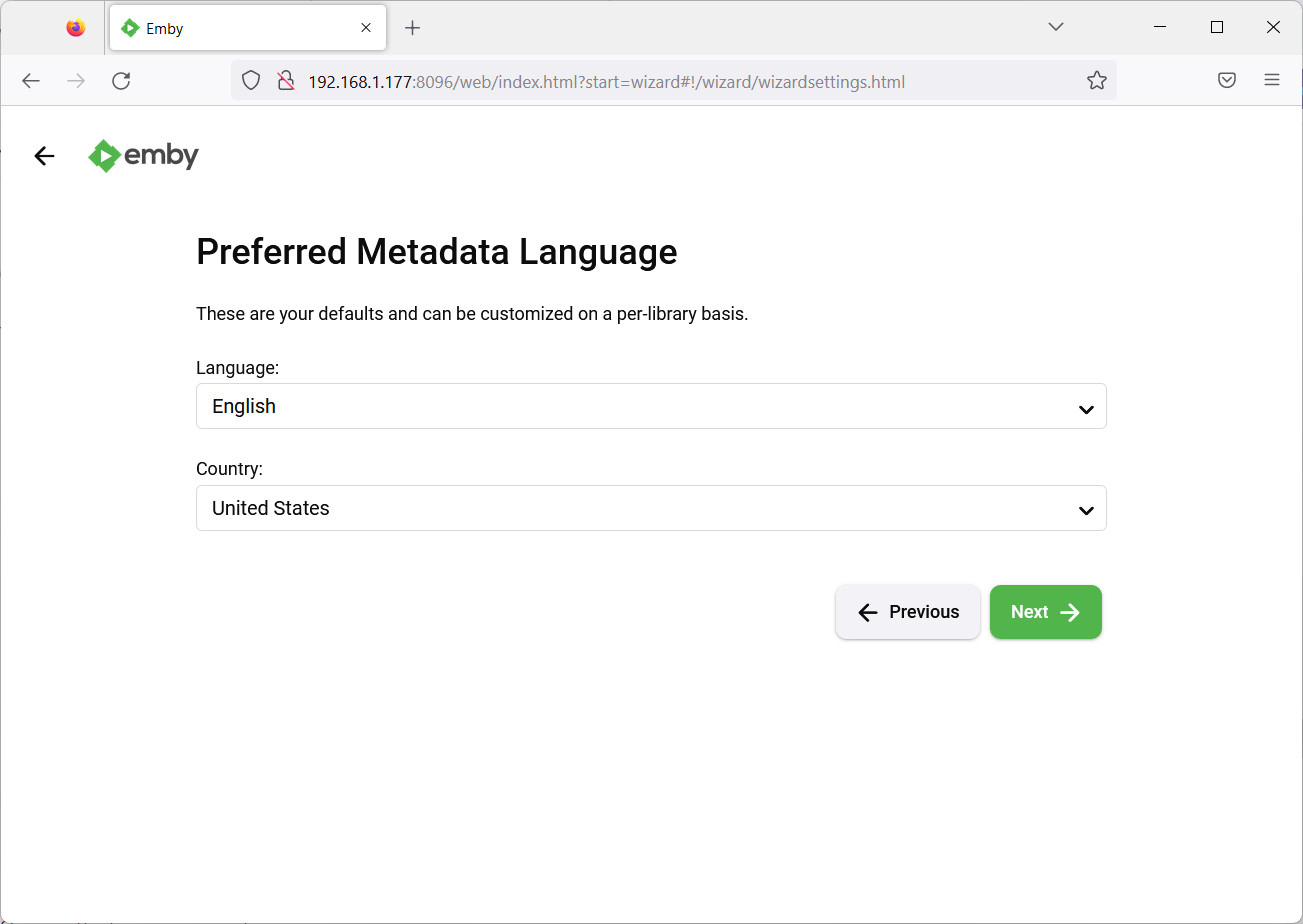
Once set up, press next:
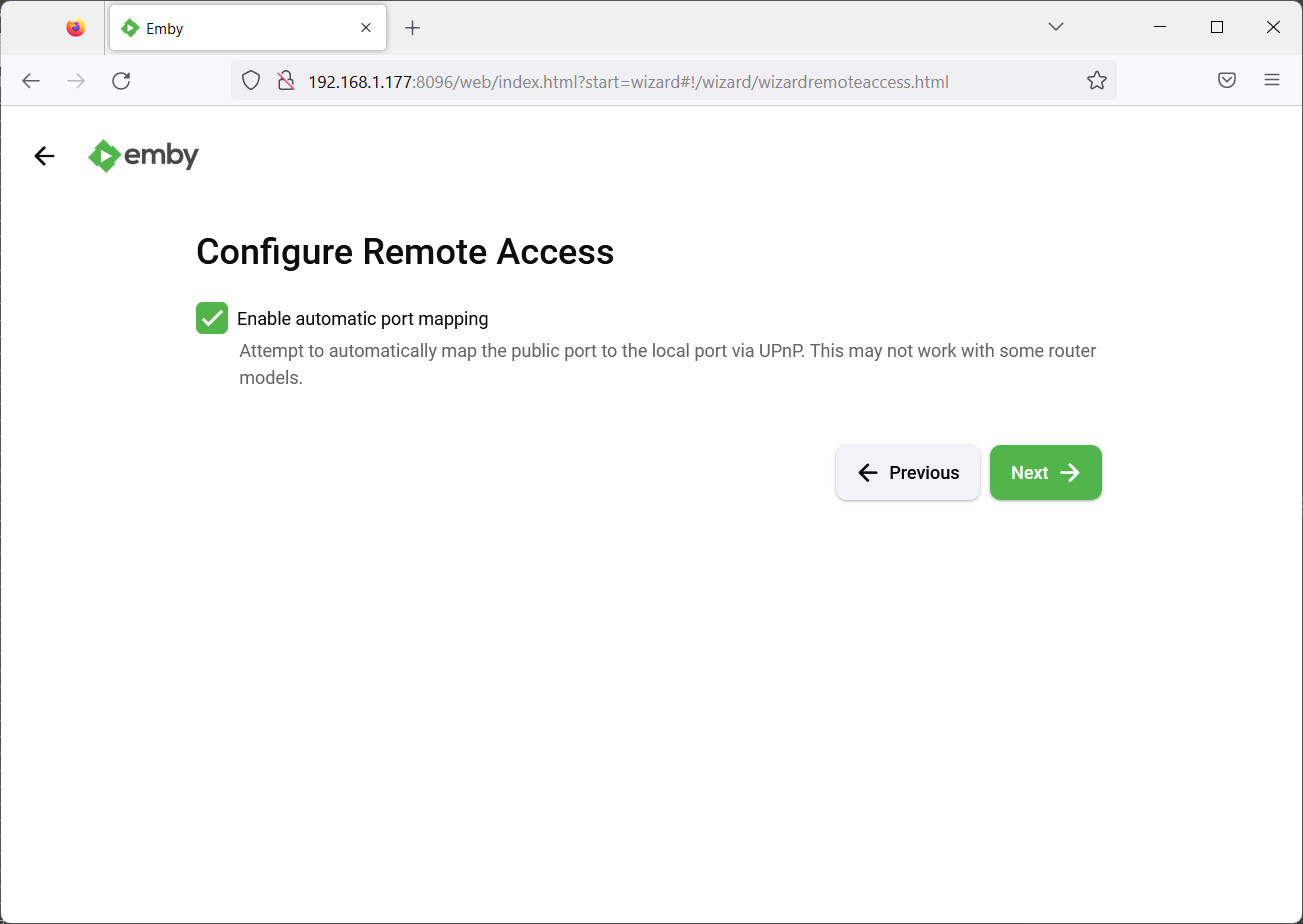
The above port mapping will make your Raspberry PI Emby server detectable in you local network if the router and the devices can support the UPnP protocol. I will keep it enabled and press Next.
The following page will show you the links to get the Privacy Policy and the Terms of Service:
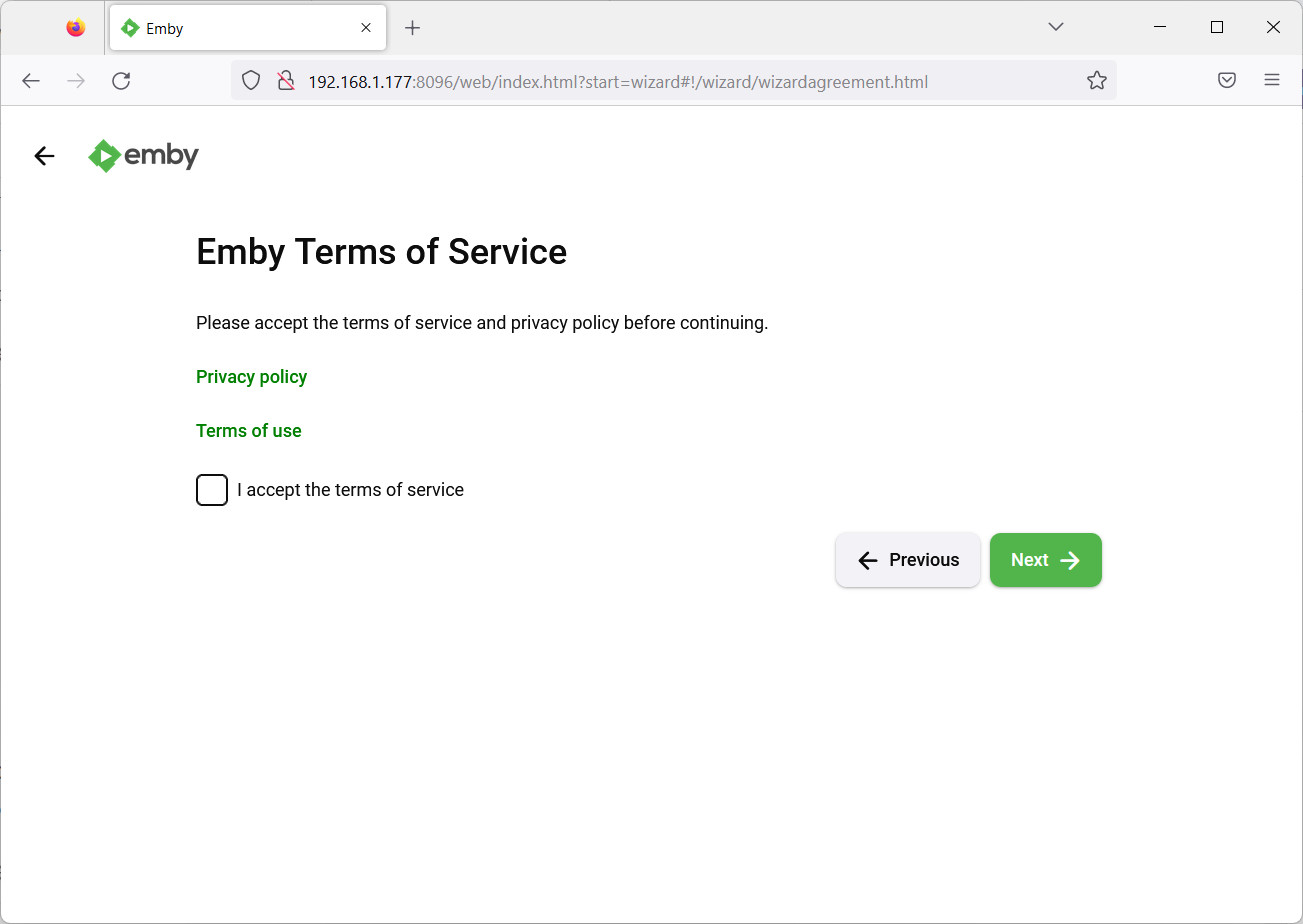
If you accept them, by flagging the small square, you can press Next and reach the final confirmation page:
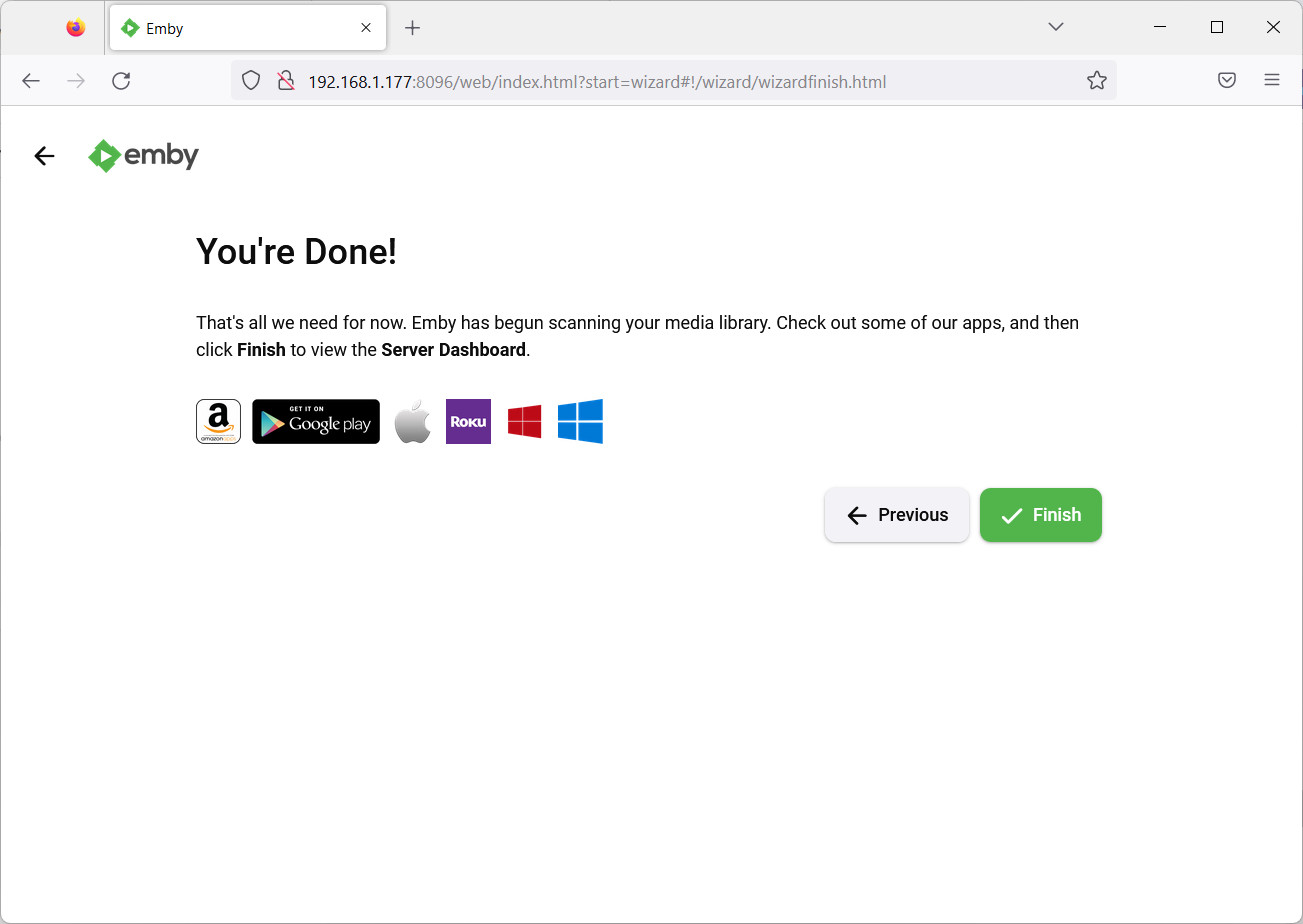
Click Finish to complete the setup.
Get Started with Raspberry PI and Emby
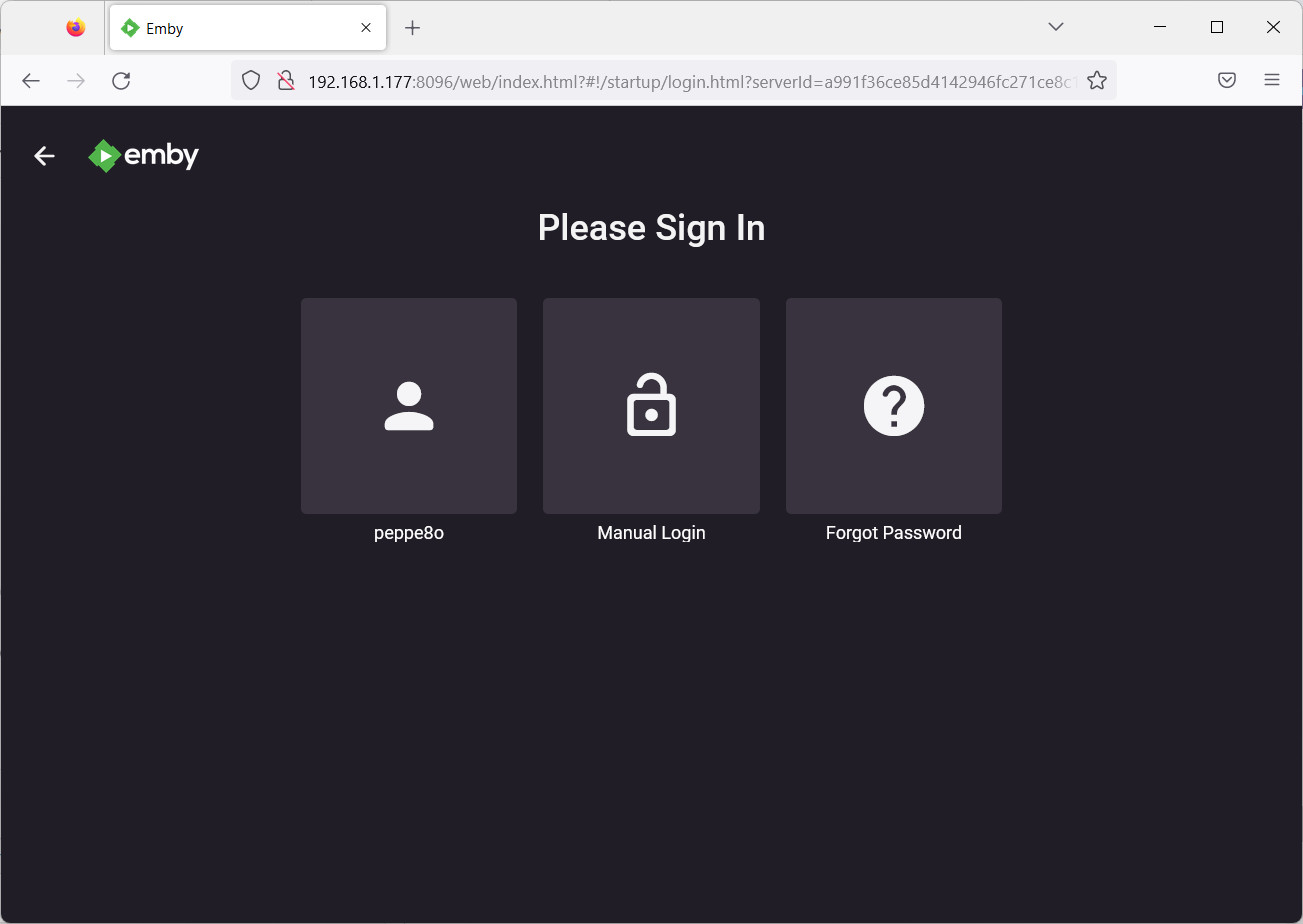
On the next login screen, you can use your credentials set during the Wizard, by selecting your user (peppe8o in my case):
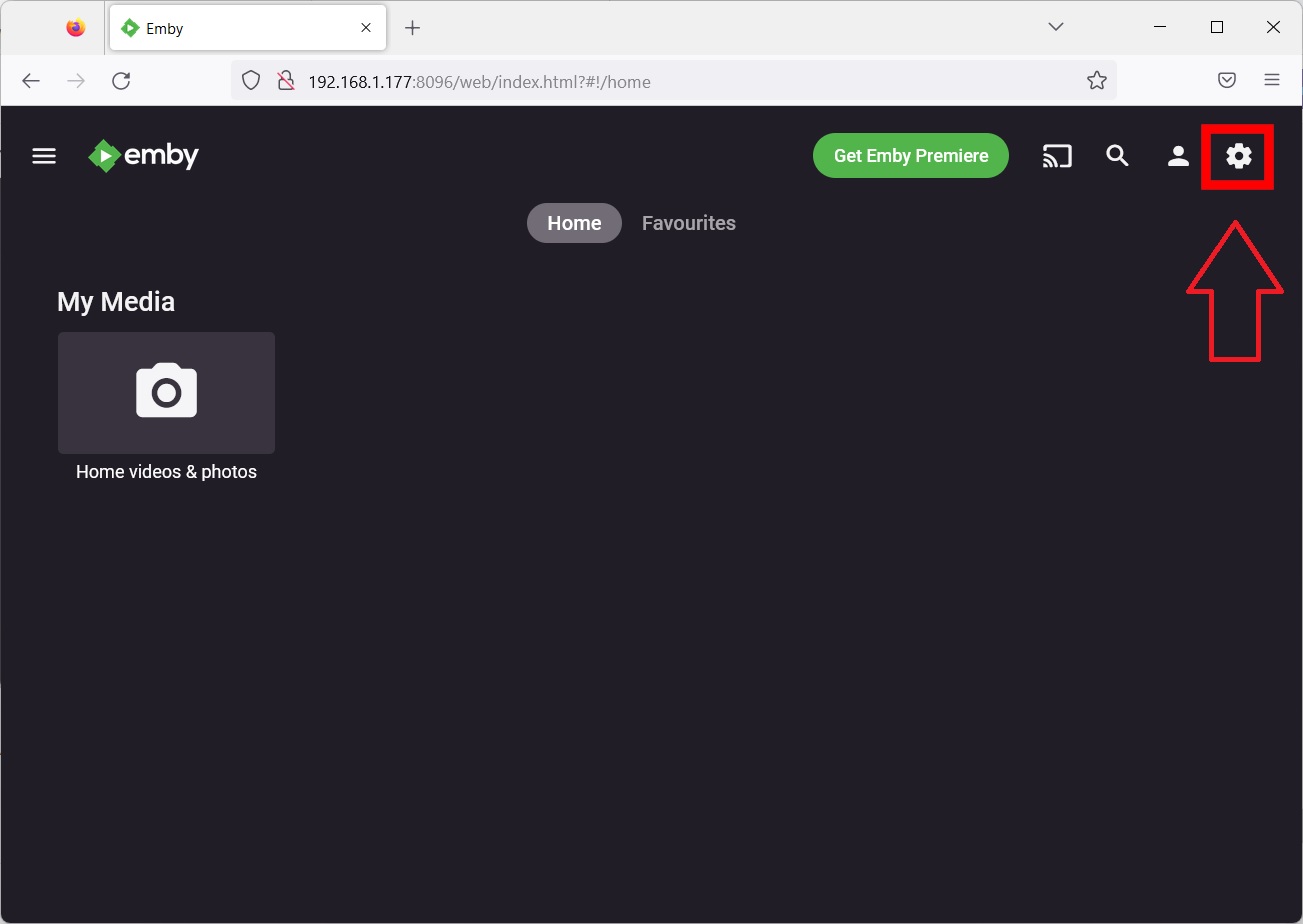
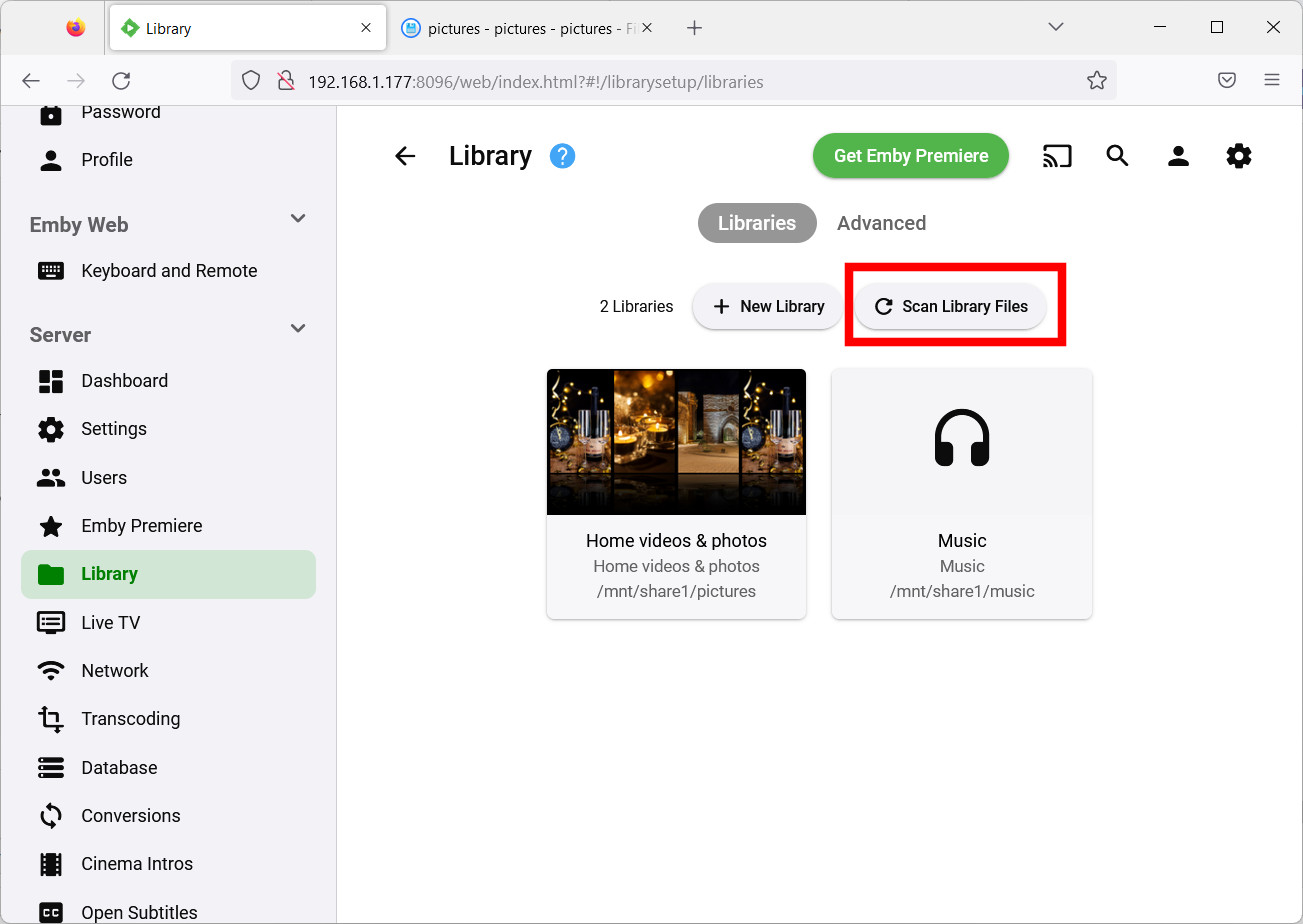
After logged in, you will find the only media library created. In order to add new libraries, after you created the related folders on Raspberry PI file system as previously described, please click the Settings button:
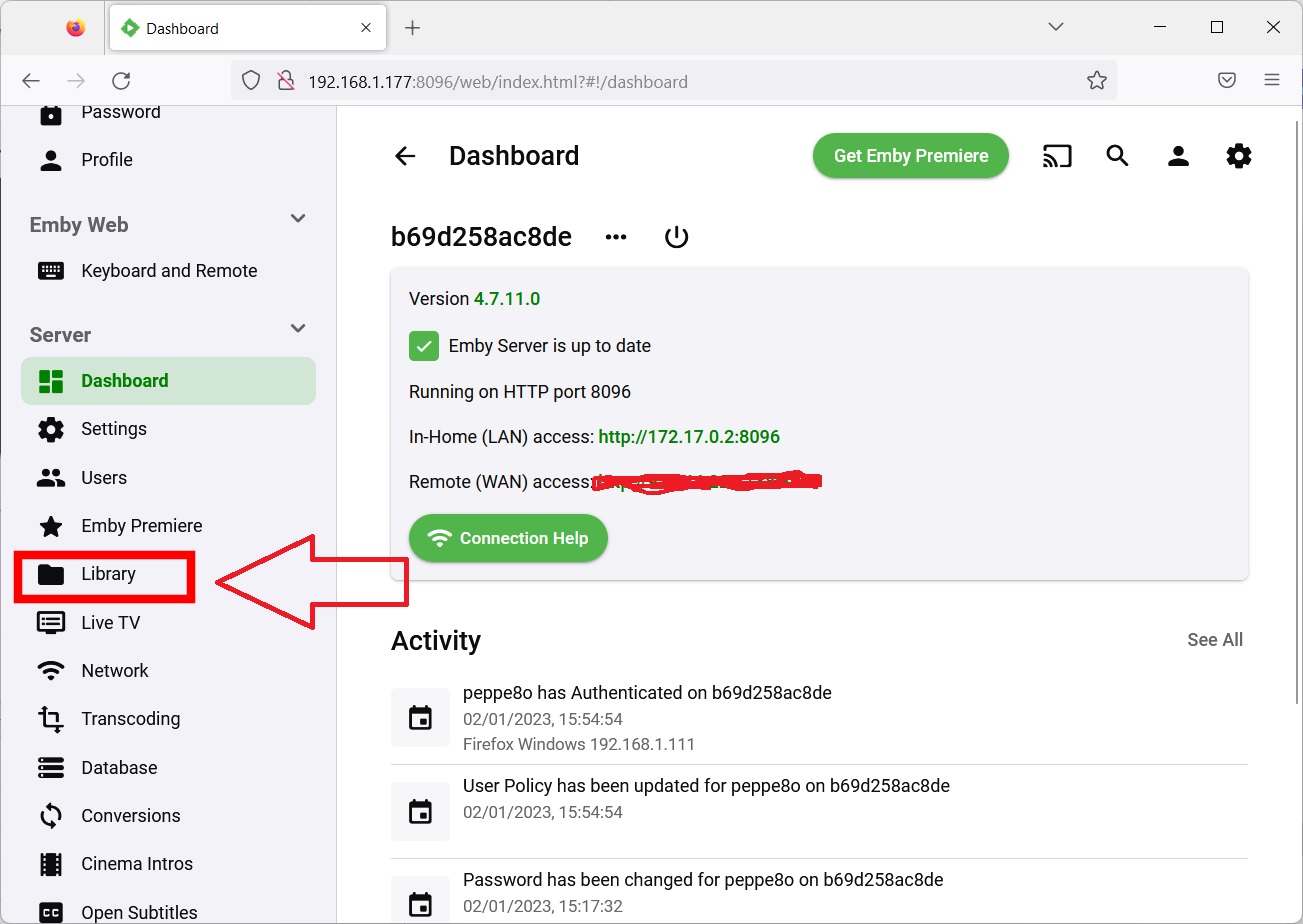
Scroll down the left-side menu and click the “Library” link:
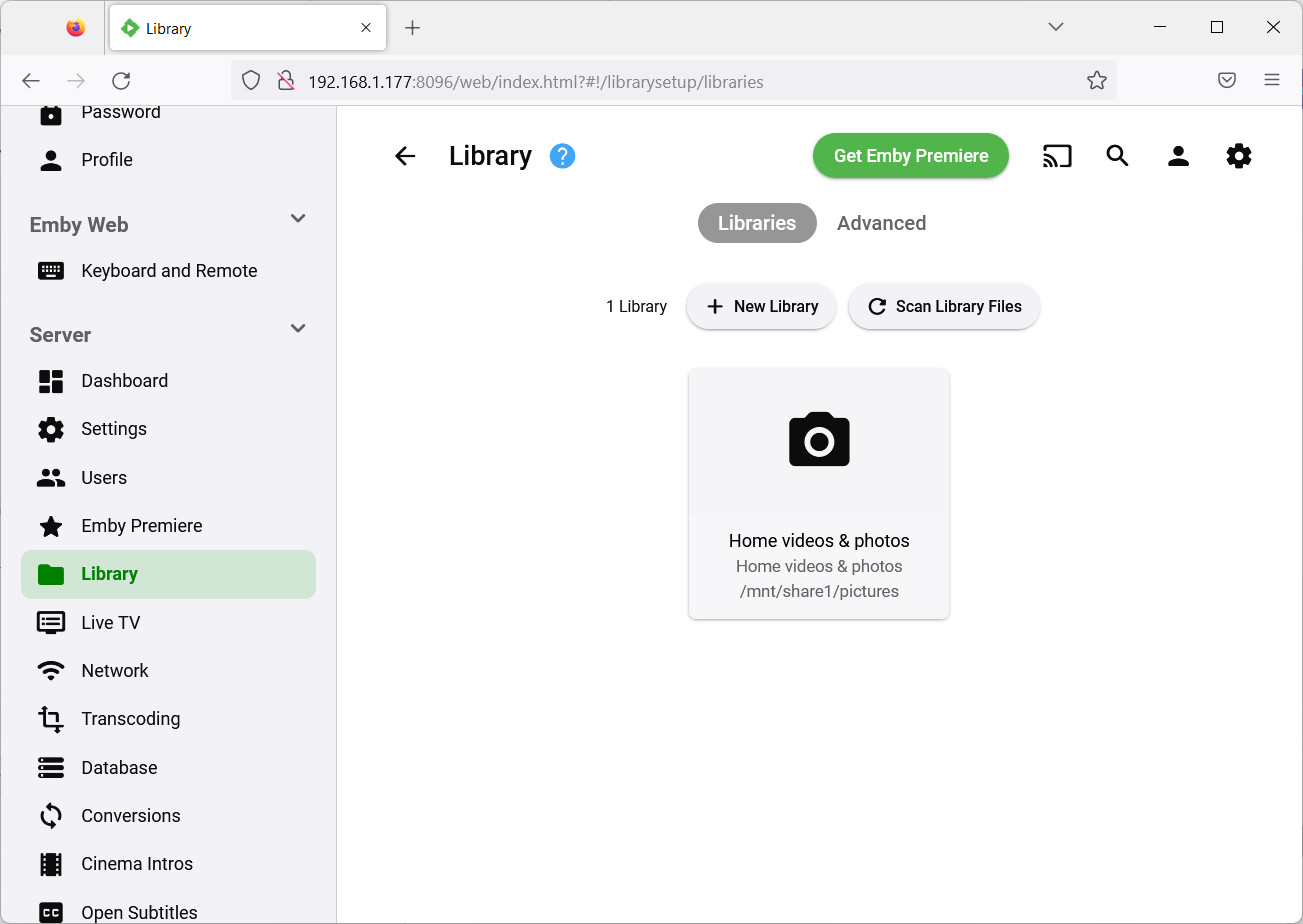
This will show you the new library page that can be used as already performed during the initial wizard:
The Settings menu will allow you to fully configure your Emby server.
But it will not help when looking at how to upload new media from your browser. This is, in my opinion, a great lack for Emby. But the next chapter will show you a workaround.
Web GUI for Uploading Media to Raspberry PI Emby Server
With the help of another Docker Container, we can easily fill the gap of this feature lack in Emby: we’ll use the Filebrowser container.
The command to install and run Filebrowser will be the following:
docker run -d \
    --name filebrowser \
    -v /media/myUSB/share1:/srv \
    -v filebrowser.db:/database/filebrowser.db \
    -v settings.json:/config/settings.json \
    -e PUID=$(id -u) \
    -e PGID=$(id -g) \
    -p 8080:80 \
    --restart=unless-stopped \
    filebrowser/filebrowser
From your remote PC and your favourite browser, use again your Raspberry PI’s IP to reach the new service, this time with port “8080” (in my case http://192.168.1.177:8080). This will redirect you to the Filebrowser login page:
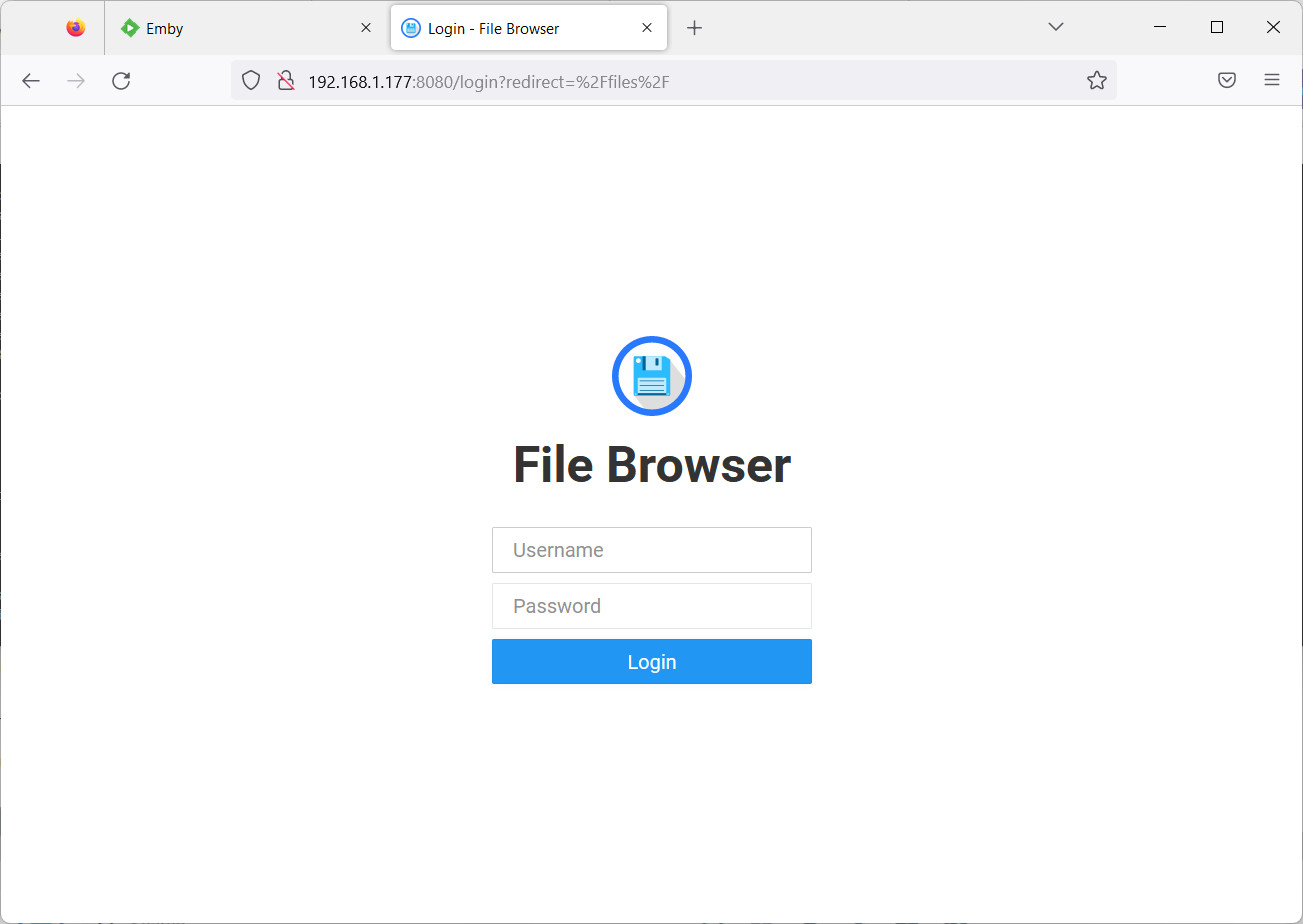
The Filebrowser default credentials are admin/admin (same for username and password). As first action, please change it from the Filebrowser dashboard by clicking Settings -> User Management (tab) -> Pencil icon near the user to edit -> change the password.

The Filebrowser home page will get you the list of your folders already created in your “/media/myUSB/share1” folder, with commands to upload/delete/modify files and folders, as well as the ability to create new folders. Please note that the “New folder” button will create a folder and enter it at the same time. This will appear to you similar to many common cloud storage services:

This will also help you in creating new library folders without the need to connect to your Raspberry PI Emby server terminal, and you will be able to upload/download/delete your media files from a browser, in a Google Drive-like manner.
Please note that, after uploading any media file to the folders, you will need to perform a “Scan Library Files” from your Emby settings -> Library:
What’s Next
Are you interested in more cool projects for your Raspberry PI computer board? Take a look at peppe8o Raspberry PI tutorials.
Enjoy!

Open source and Raspberry PI lover, writes tutorials for beginners since 2019. He's an ICT expert, with a strong experience in supporting medium to big companies and public administrations to manage their ICT infrastructures. He's supporting the Italian public administration in digital transformation projects.
![]()
![]()
![]()
![]()
![]()
![]()
![]()


