
Last Updated on 26th September 2025 by peppe8o
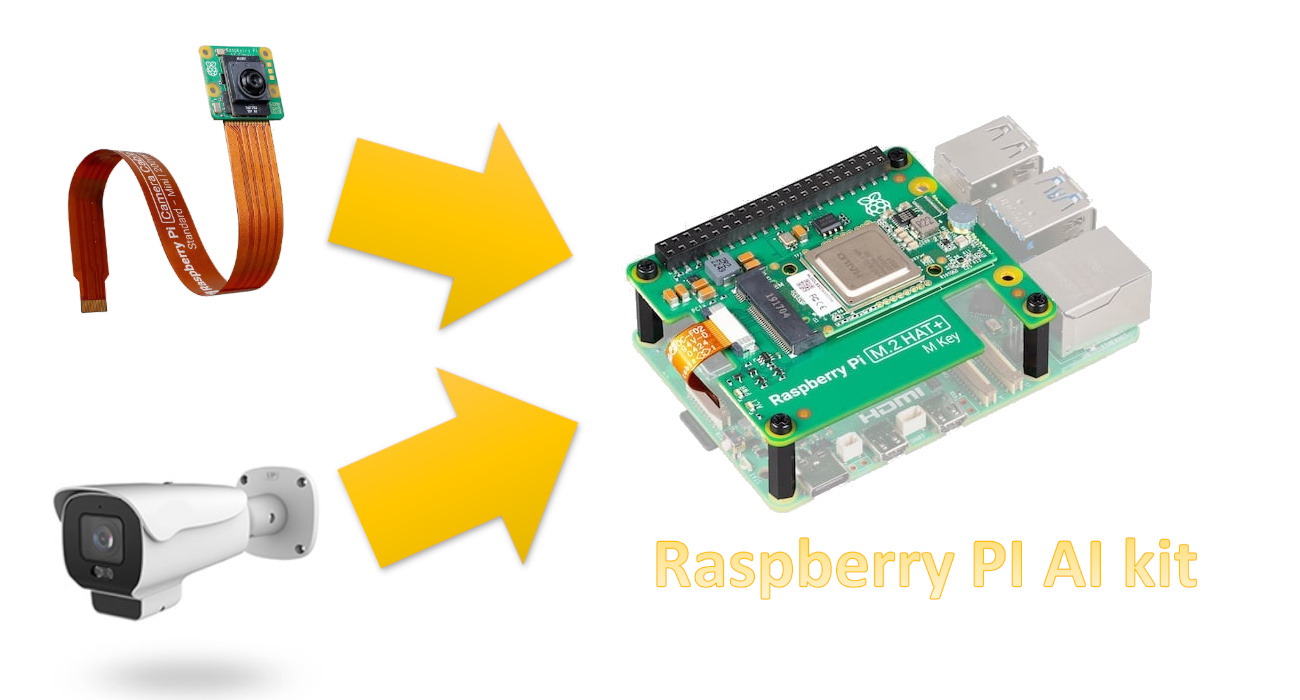
In this tutorial, I will show you how to use the Raspberry PI AI Kit coming from the Raspberry PI. For this, I will use my Raspberry PI 5 model B (2GB) computer board.
About the Raspberry PI AI Kit
The kit is based on the Hailo8L chip, an entry-level AI Accelerator module capable of running up to 13 tera-operations per second (TOPS). This module targets small AI projects related to image processing. This means that you can’t use it for AI chatbots, text processing, audio processing, and so on. In these cases, you must run your AI programs on the Raspberry PI CPU (with lower performance), for example, by using the Raspberry PI with Hugging Face models.
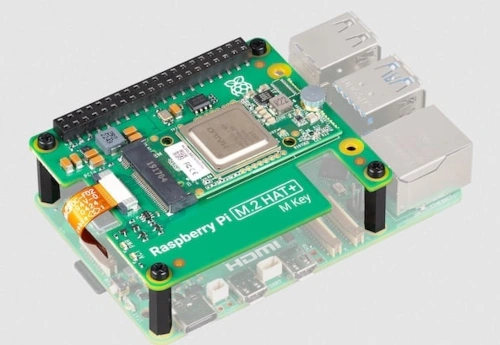
The Raspberry Pi AI Kit includes an M.2 HAT+, which uses a PCIe port. This makes the kit work only with Raspberry PI models supporting this interface (at the date of this post, only the Raspberry PI 5). The kit contains:
- Hailo8L AI module containing a Neural Processing Unit (NPU), with M.2 2242 form factor
- Raspberry Pi M.2 HAT+, to connect the AI module to your Raspberry Pi 5
- mounting hardware kit
- 16mm stacking GPIO header

What We Need
As usual, I suggest adding from now to your favourite e-commerce shopping cart all the needed hardware, so that at the end you will be able to evaluate overall costs and decide if to continue with the project or remove them from the shopping cart. So, hardware will be only:
- Raspberry PI Computer Board (including a proper power supply for your Raspberry PI model)
- high speed micro SD card (at least 16 GB, at least class 10)
- The Raspberry PI M.2 AI Kit (you can look for it in your local Amazon store or in the Raspberry PI approved resellers)
- Raspberry PI Camera (with a proper camera cable for your Raspberry PI computer board) OR an IP Camera (supporting RTSP protocol)
- (optionally) keyboard, mouse and monitor (with proper HDMI cable), if you will use the Raspberry PI Desktop OS
I also suggest using a Raspberry PI active cooling system, so that your Raspberry PI will keep a low temperature even when running heavy processes. You can see the advantages of it by looking at my Active Cooling tests with Raspberry PI post.
Step-by-Step Procedure
Preparing the Raspberry PI Operating System
The first step is installing the Operating System.
Many of the AI image processing projects require a desktop environment as the Python programs will open a desktop window showing the camera output. For this reason, you will probably wish to use the Raspberry PI OS Desktop, working from its terminal app, for the following terminal commands.
You can alternatively install the Raspberry PI OS Lite to get a fast and light operating system (headless). In this case, you will need to work from a remote SSH terminal. In this case, you will be able to see the camera output by opening a remote window in your PC with Xorg, even if you may experience a bit of latency when showing images.
The links provide you with the procedures for both OSes. Please find the differences between the 2 OS versions in my Raspberry PI OS Lite vs Desktop article.
Make sure that your system is up to date. Connect via SSH terminal and type the following command:
sudo apt update -y && sudo apt full-upgrade -yAlso, with the models having low RAM size, I suggest increasing the Raspberry PI Swap memory size (with the provided link) to at least 2048 MB.
Now, you should check that your Raspberry PI firmware is newer than 6 December 2023, with the following command:
sudo rpi-eeprom-updateIf the “CURRENT” date is earlier than 6 December 2023, please update the firmware.
You can now move to the Kit mounting process by shutting down the Raspberry PI:
sudo shutdown -h nowMount the Raspberry PI AI KIT and Raspberry PI Camera
This step involves physically mounting the Raspberry PI camera (if any) and the AI kit.
Mounting the Raspberry PI camera is a straightforward process, as this has just a cable to connect to one of the Raspberry Pi camera interfaces. If needed, please refer to the Raspberry Pi instructions to install a camera.
Then, you can use the Raspberry PI AI kit mounting instructions to get the AI kit ready. It is important to check that the PCIe cable is mounted in the right direction, as shown in the following picture:
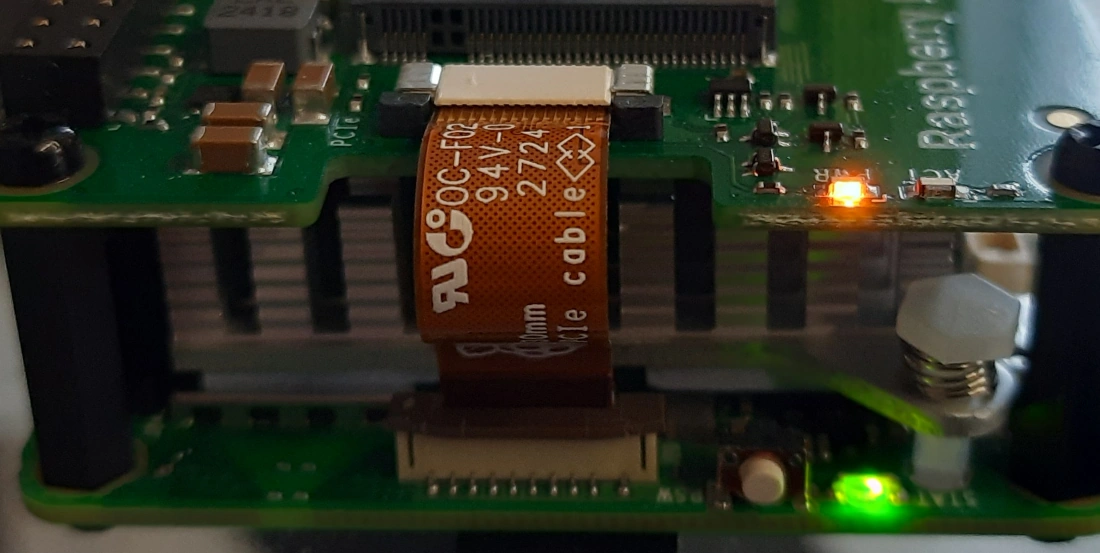
When you power on the Raspberry PI, the “PWR” LED on the M.2 HAT should switch to a steady orange light.
Install the Hailo Software
The Raspberry PI OS already brings all the required software to manage your Camera, if you wish to use it.
First of all, the Raspberry PI company suggests enabling the PCIe 3.0 Gen speed, which you can do by editing the config.txt file:
sudo nano /boot/firmware/config.txtAnd appending the following line:
dtparam=pciex1_gen=3Save and close the file.
We need to install the Hailo tools, which will make our AI kit work. You can do it with the following terminal command:
sudo apt install hailo-all -yAfter this step, please restart your Raspberry PI:
sudo rebootTesting the Raspberry PI AI Kit
You can test now if everything went ok, with the following terminal command:
hailortcli fw-control identifyWhich should return to you an output, like the following:
pi@raspberrypi:~ $ hailortcli fw-control identify
Executing on device: 0001:01:00.0
Identifying board
Control Protocol Version: 2
Firmware Version: 4.20.0 (release,app,extended context switch buffer)
Logger Version: 0
Board Name: Hailo-8
Device Architecture: HAILO8L
Serial Number: HLDDLBB243500312
Part Number: HM21LB1C2LAE
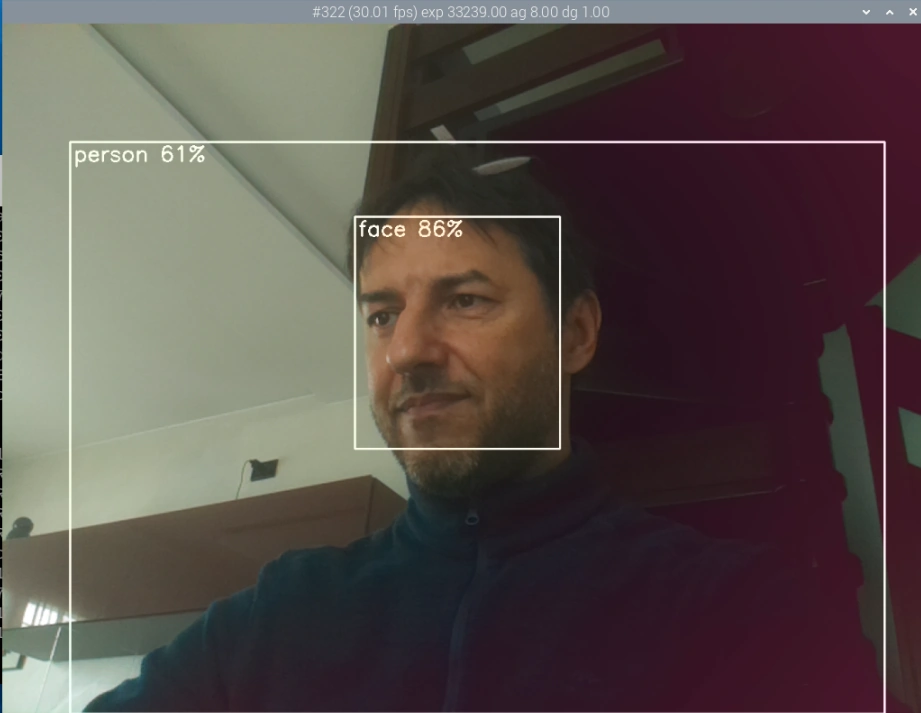
Product Name: HAILO-8L AI ACC M.2 B+M KEY MODULE EXT TMPYou are now ready to run your tests. If you are using a Raspberry PI Camera, the first test can be the following:
rpicam-hello -t 0 --post-process-file /usr/share/rpi-camera-assets/hailo_yolov5_personface.jsonPlease note that if you’re using a remote Xorg window, you must append the --qt-preview option:
rpicam-hello -t 0 --post-process-file /usr/share/rpi-camera-assets/hailo_yolov5_personface.json --qt-previewThis will open a preview window, where you can see the face detection model running, with faces detected. The box will include the detection probability in percentage:
Other available examples with the PI camera are available from the Raspberry PI AI Kit page.
Hailo Examples for Raspberry PI
The Hailo engineers gave us a few examples for Raspberry PI boards with their accelerator module.
You can get these examples by cloning their GitHub project:
git clone https://github.com/hailo-ai/hailo-rpi5-examples.gitAfter this, please enter the cloned folder and install them:
cd hailo-rpi5-examples
./install.sh
Please note that this should enable a Python Virtual Environment (you can read more about it from my Beginner’s Guide to Use Python Virtual Environment with Raspberry PI (venv)), so that your prompt should show a (venv_hailo_rpi5_examples) before the user name, at the beginning of the line. If not, please issue the following command:
. setup_env.shAfter every Raspberry PI reboot, please remember to re-activate the Virtual Environment with this command.
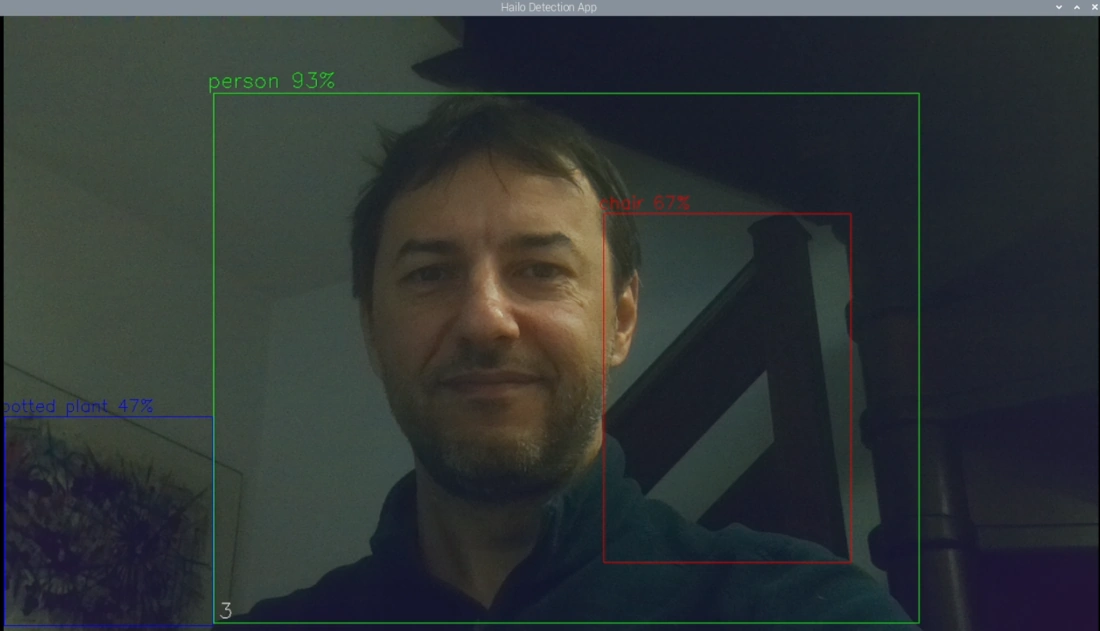
Now, you can run the provided examples with the following command:
(venv_hailo_rpi5_examples) pi@raspberrypi:~/hailo-rpi5-examples $ python basic_pipelines/detection.py --input rpiThis will open again a window with your Raspberry PI camera stream and AI detection:
The Hailo examples also give you a few more test scripts:
python basic_pipelines/pose_estimation.py --input rpipython basic_pipelines/instance_segmentation.py --input rpipython basic_pipelines/depth.py --input rpiRun the Raspberry PI AI Kit Detection with Remote IP Camera
If you have a remote IP camera supporting RTSP stream, your Raspberry PI AI Kit can analyse its images with a few tweaks.
Identify the IP Camera RTSP link
First of all, please make sure that you have a working RTSP link. Depending on your IP camera, you can find it in the iSpy connect – Cameras page. For example, my IP camera has a link built with the following structure:
rtsp://user:password@Camera_IP_address/11Once you find your one, please test it with VLC (already available in Raspberry PI OS, easy to get and install on any Computer). By using your RTSP link in your VLC (opening it from Media -> Open Network Stream), you will see the stream from your camera.
Tweak the gstreamer_helper_pipelines.py file
If you are still inside the “hailo-rpi5-examples” folder, please edit the gstreamer_helper_pipelines.py file with the following command:
nano venv_hailo_rpi5_examples/lib/python3.11/site-packages/hailo_apps_infra/gstreamer_helper_pipelines.pyWe must add 2 additional parts. The first part, which must be integrated in this file, is the bolded one in the following code extract:
def get_source_type(input_source):
    # This function will return the source type based on the input source
    # return values can be "file", "mipi" or "usb"
    if input_source.startswith("/dev/video"):
        return 'usb'
    elif input_source.startswith("rpi"):
        return 'rpi'
    elif input_source.startswith("libcamera"): # Use libcamerasrc element, not suggested
        return 'libcamera'
# peppe8o.com edit
    elif input_source.startswith("rtsp"): # Use libcamerasrc element, not suggested
        return 'rtsp'
# END peppe8o.com edit
    elif input_source.startswith('0x'):
        return 'ximage'
    else:
        return 'file'
The second part, still in the same file, is the one bolded in the following:
    elif source_type == 'ximage':
        source_element = (
            f'ximagesrc xid={video_source} ! '
            f'{QUEUE(name=f"{name}queue_scale_")} ! '
            f'videoscale ! '
        )
# peppe8o.com edit
    elif source_type == 'rtsp':
        source_element = (
            f"rtspsrc location={video_source} name=src_0 ! "
            "rtph264depay ! h264parse ! avdec_h264 max-threads=2 ! "
            "video/x-raw, format=I420 ! "
        )
# END peppe8o.com edit
You can now save and close this file.
With these changes, you can use your Raspberry PI AI Kit with your IP Camera with the following terminal command:
python basic_pipelines/detection.py --input rtsp://your_rtsp_linkThis will show you your remote IP camera video stream with Hailo inference:
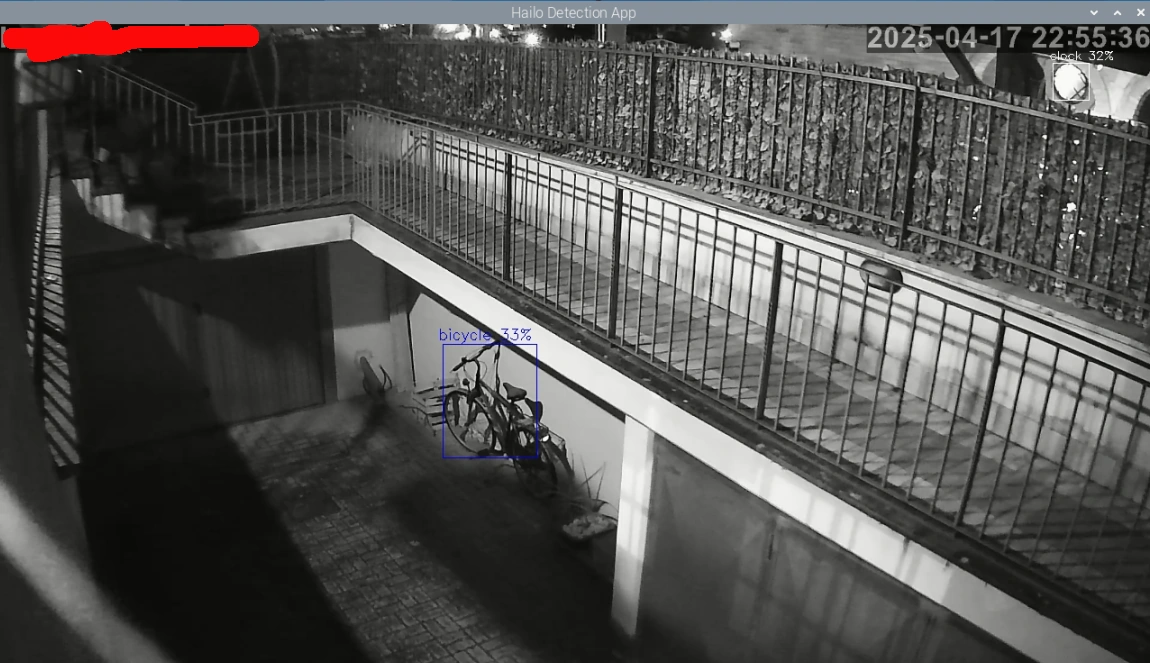
As you can see, the results are good even with night vision!
Final Thought about the Raspberry PI AI Kit
The kit is a very good way to get started with AI projects. It can perform AI-powered edge analysis with powerful hardware to fit many of the common image processing needs.
On the other hand, it misses the capability for it to train custom models, which would make it a complete solution for all the AI “hobbyists” and medium to small business needs.
The limit of this hardware to image processing, not allowing other media formats such as text and audio inference, could be a problem for some projects which this hardware could greatly support in terms of computing capabilities.
In the end this is, anyway, a great hardware solution for people wishing to take their first steps in AI projects.
What’s Next
If you want to discover many other projects for your Raspberry PI, you can take a look at peppe8o Raspberry PI tutorials.
Enjoy!

Open source and Raspberry PI lover, writes tutorials for beginners since 2019. He's an ICT expert, with a strong experience in supporting medium to big companies and public administrations to manage their ICT infrastructures. He's supporting the Italian public administration in digital transformation projects.
![]()
![]()
![]()
![]()
![]()
![]()
![]()


Congratulations! First tutorial who works for rtsp with hailo 8 examples.
Thank you for your feedback, Hav!