Last Updated on 2nd September 2023 by peppe8o
In this tutorial I’m going to show you how to run Raspberry PI OS Lite GUI applications from a Windows PC.
Sometimes it can be useful for a number of purpose to execute application with GUI in a Raspberry PI OS Lite version. With Xmin you can remote to Windows PC an X11 window, getting Raspberry PI GUI applications showed in your remote PC.
This can be useful, for example, when you need a local browser in your Raspberry PI to view pages not published, or when need to control from Windows a Linux application working only from GUI (like an x3270 terminal emulator for mainframe). Or you can play amazing games from Linux universe with a light linux box and your Windows PC exposing the GUI.
Usually people install a desktop environment in your Raspberry PI and configure a remote desktop connection. But this solution brings workload and resource usage that may be useless for you.
An alternative is using an X Server in your Windows PC together with an SSH session, then forwarding Gui applications from Raspberry PI OS to Windows. This requires in Raspberry PI OS only an X-Window, which is something far lighter than a desktop environment.
Difference Between Desktop Environment, Window Manager and X-Window
Pleasefind below the main difference between 3 graphical levels in Linux systems. Those definitions come from Wikipedia (pages referred in each item):
- (Ref. Wikipedia X Window System) The X Window System (X11, or simply X) is a windowing system for bitmap displays, common on Unix-like operating systems. X provides the basic framework for a GUI environment: drawing and moving windows on the display device and interacting with a mouse and keyboard. X does not mandate the user interface – this is handled by individual programs. As such, the visual styling of X-based environments varies greatly; different programs may present radically different interfaces.
- (Ref Wikipedia Window Manager) A window manager is a system software that controls the placement and appearance of windows within a windowing system in a graphical user interface. Most window managers are designed to help provide a desktop environment. They work in conjunction with the underlying graphical system that provides required functionality—support for graphics hardware, pointing devices, and a keyboard, and are often written and created using a widget toolkit.
- (Ref Wikipedia Desktop Environment) In computing, a desktop environment (DE) is an implementation of the desktop metaphor made of a bundle of programs running on top of a computer operating system, which share a common graphical user interface (GUI), sometimes described as a graphical shell. The desktop environment was seen mostly on personal computers until the rise of mobile computing. Desktop GUIs help the user to easily access and edit files, while they usually do not provide access to all of the features found in the underlying operating system. Instead, the traditional command-line interface (CLI) is still used when full control over the operating system is required.
What We Need
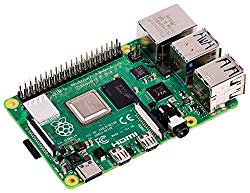
As usual, I suggest adding from now to your favourite e-commerce shopping cart all the needed hardware, so that at the end you will be able to evaluate overall costs and decide if to continue with the project or remove them from the shopping cart. So, hardware will be only:
- Raspberry PI (including proper power supply or using a smartphone micro usb charger with at least 3A)
- micro SD card (at least 16 GB, at least class 10)
We’ll need also a Windows PC.
Check hardware prices with following links:
Step-by-Step Procedure
Install OS in Raspberry PI
For this step, please refer to Install Raspberry PI OS Lite. At the end, please remember to update your OS:
sudo apt update
sudo apt upgrade
Install Required Components in Raspberry PI and Windows PC
We use – from Linux side – the most known X-Window package in Linux universe: Xorg. From Raspberry PI terminal, type:
sudo apt install xorg
From Windows PC side, I suppose you already have Putty installed. We need to choose the X-Server which will show in Windows PC applications running in Raspberry PI. One of most known is Xming. You can download its installer from Xming Sourceforge page. Installation will be with the default settings with Windows installer downloaded.
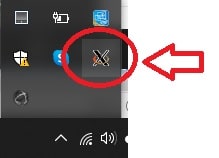
Once started and running, you should see Xming icon in you icon tray:
Configure Raspberry PI OS and Windows
In Raspberry PI OS Lite, check correct value for DISPLAY environment parameter. Type:
echo $DISPLAY
And you should receive the following:
pi@raspberrypi:~ $ echo $DISPLAY
localhost:10.0
Otherwise, correct DISPLAY parameter with the following:
export DISPLAY=localhost:10.0
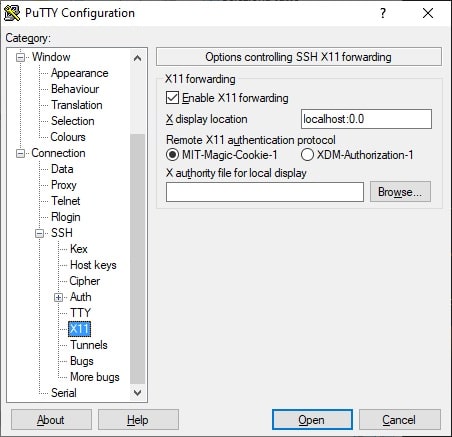
In Windows PC, once Xming is running, we must set Putty connection parameters to make it forwarding X11 window. From Category list (left column), go to Connection -> SSH -> X11 and configure as the picture below:
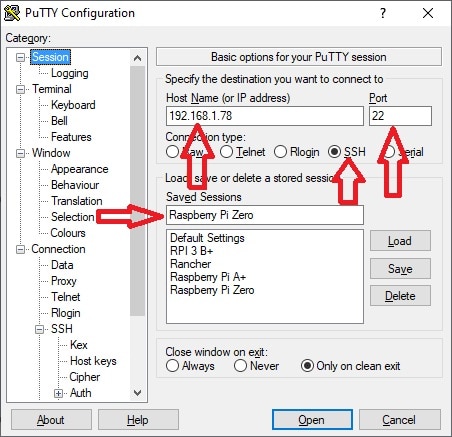
Now go from Category List (left column) in Session and configure your connection parameter. In below picture, “192.168.1.78” is my Raspberry PI address, so must be changed with your own. Port must be 22. Connection Type must be “SSH”. Saved Session Name can be whatever you want to remember your connection between other saved sessions. In my case, I’m using my Raspberry PI Zero W for this test (but works with all other Raspberry PI boards):
Now connect to your Raspberry PI terminal with this session.
Test X-Window routing
Our test will go with a cool X11 game. XBill is an arcade game from 1994 in which the player has to prevent an evil computer hacker named “Bill” from installing a popular Operating System on various machines. The OS can spread over networks and purges existing systems (BSD, Solaris, SGI IRIX, …). Install it in your Raspberry PI with
wget http://http.us.debian.org/debian/pool/main/x/xbill/xbill_2.1-9_armhf.deb
sudo apt install ./xbill_2.1-9_armhf.deb
And execute it with the command:
xbill
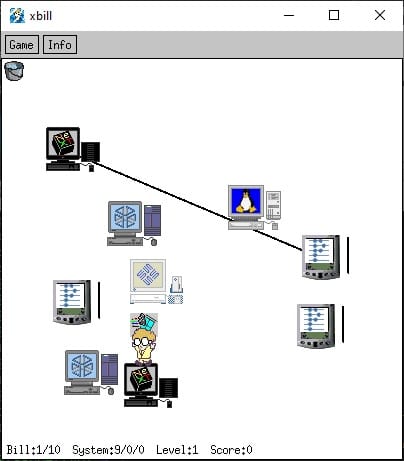
The xbill game window should appear in your Windows PC and you should be able to start a new game:
Final Considerations
When using X11 forwarding from Raspberry PI to a Windows one, remember that you will save alla data within GUI application locally in your Linux OS. So, if you need to transfer them, you will likely use, for example, an SFTP transfer application like Filezilla.
Enjoy!

Open source and Raspberry PI lover, writes tutorials for beginners since 2019. He's an ICT expert, with a strong experience in supporting medium to big companies and public administrations to manage their ICT infrastructures. He's supporting the Italian public administration in digital transformation projects.

when i execute the xbill it says “segmentation fault”, can you help me out a bit.
Hi Malith,
Segmentation fault is a generic error which can happen for a number of reasons, some of which are identified at . You can first try to change your power supply (be aware that smartphones chargers may bot be able to supply enough Ampere) or MicroSD card. Please let me know if this helps in fixing
For a different approach check out CloudTk for displaying Raspberry Pi X11 apps remotely in a web browser.
https://cloudtk.tcl-lang.org/page/CloudTk
Sorry it should read
https://wiki.tcl-lang.org/page/CloudTk