

Last Updated on 4th January 2026 by peppe8o
In the previous tutorial we saw how to install and configure a single BotWave transmitter. In this post we’ll see how to integrate our BotWave network with additional Raspberry PI nodes.
Running a network of Raspberry Pi RM Nodes
What we just did was using the local client on a single Raspberry PI, which means that everything is done locally on your device. That usually is enough for most people. But if you have multiple Raspberry PIs and you want to cover a large area, you might want to use another BotWave key feature that is Client-Server managment. That basically means that you will have multiple pis connected to a single centralized machine that will manage the node.
I will be using a regular debian laptop as a server, and the same pi as a client. The two devices will be on the same network, it will simplify things.
Setting Up The Server
To setup the server, follow the exact same instructions as the client, but select the server component when prompted.
Once the server installed, run it with bw-server. A command line prompt will appear the same way as the local client does.
In the prompt, run the following command to get your servers IP:
botwave> < hostname -I
192.168.1.90
You don’t have any more configuration to do on the server, let’s jump to our previously used Raspberry Pi.
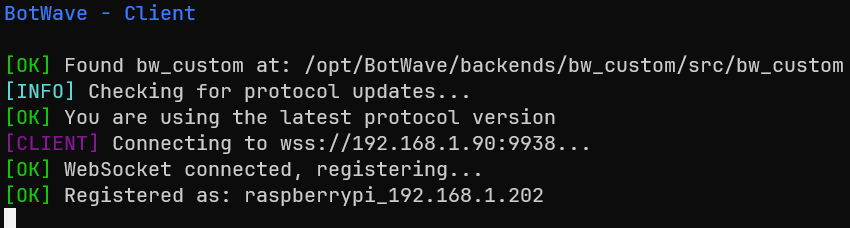
Let’s simply run the command
sudo bw-client 192.168.1.90where 192.168.1.90 is your servers IP address.
You should get both on client and server side messages telling you that your Raspberry Pi registered as a client.
From the server side:

Now let’s list our clients on the server prompt. It should show all the PIs currently connected to the server.
botwave> list
 Connected Clients ───────────────────

ID: raspberrypi_192.168.1.202
  Hostname: raspberrypi
  Machine: armv6l
  System: Linux
  Protocol Version: 2.0.1
  Connected: 2026-01-01 17:35:27
  Last seen: 2026-01-01 17:35:27
Now let’s list our clients files:
botwave> lf all
[INFO] Listing files from 1 client(s)
[OK]   raspberrypi (raspberrypi_192.168.1.202): 1 file(s)
    file_example_WAV_10MG.wav (10.1 MB)
Did you see the all keyword ? On commands requesting an action of one or more clients, we need to specify the target(s). This can be done in 4 ways:
- The
clientID, eg:raspberry_192.168.1.11 - The
clienthostname, eg:raspberry - Multiple clients, eg:
raspberry,raspberry2 - Every connected client:
all
Let’s go back to our client files, as we can see, it listed the previously downloaded files. But it would be annoying if we should manually download our files on each client of our network.
That’s why the upload and dl commands exist. Here are the two main ways to upload files to the clients:
1. Upload a file stored on the server machine:
botwave> upload all /home/server/Downloads/file_example_WAV_10MG.wav # a single file

botwave> upload all /home/server/Downloads/bw_files/ # every .wav file in the given folder
2. Upload a file stored on an external server:
botwave> dl all https://file-examples.com/storage/feed8756ec69569209a5889/2017/11/file_example_WAV_10MG.wav # download the file from an external urlThe other commands are always following the same structure as the local client ones, but with the targets to specify after the command. The start command is the following:
botwave> start all file_example_WAV_10MG.wav 90 true "peppe8o" "Broadcasting a cool file !"
[BCAST] Starting broadcast ASAP
[BCAST] Starting broadcast on 1 client(s)...
[OK]   raspberrypi (raspberrypi_192.168.1.202): START command sent
[BCAST] Broadcast start commands sent: 1/1

[OK] raspberrypi (raspberrypi_192.168.1.202): Broadcast started
As for the stop command, it will become stop all. Once again, run help to get a list of every command and their syntax.
Automating tasks
A great feature of BotWave is task automation. For example you don’t want to always log into your Raspberry Pi to connect it to a server, or you might want to directly start playing a file on boot ? It is possible ! I will show you how to do it in this last part of the tutorial.
Case 1: You want to automatically connect to a server on boot
This part is pretty straight-forward to setup. It only require one command to setup a Systemd service of a client instance of BotWave.
To do so, run
sudo bw-autorun client 192.168.1.90 # replace the ip with your servers one
BotWave Autorun - Systemd Service Manager

[OK] System requirements check passed
[FILE] Directory ensured: /opt/BotWave/uploads
[FILE] Directory ensured: /opt/BotWave/handlers
[OK] Client script found: /opt/BotWave/client/client.py
[INFO] Installing BotWave Client service...
Created symlink '/etc/systemd/system/multi-user.target.wants/bw-client.service' → '/etc/systemd/system/bw-client.service'.
[INST] Service bw-client installed and enabled
[START] Service bw-client started
[OK] BotWave client service(s) installed and started successfully!
Your Raspberry Pi will now directly connect to the server in background, even automatically after booting.
Case 2: You want to automatically play a file when the Raspberry Pi boots
For this part, we will also use the bw-autorun tool, but before that we will need to setup a handler. Handlers are small script files executed when certain BotWave events occur, such as client startup.
To do so, let’s start by running:
sudo bw-nandl l_onready.hdl # l_ prefix is to specify that the handler is for the local client, onready triggers on the local client startupIt will open a text editor, at the end, append: start file_example_WAV_10MG.wav 90 # replace the values depending on your configuration.
Then save and exit with Ctrl+O, Ctrl+X.
Finally, run the sudo bw-autorun local command to start the local client on boot.
Enjoy !


