

Last Updated on 10th October 2025 by peppe8o
In this tutorial, I will show you how to install and setup the No-IP DUC on Raspberry PI with Docker.
Many Raspberry PI projects (like using it as a server, as home automation or simply for Raspberry PI remote access) involve having its services exposed to the internet. It means that your Raspberry PI will not only answer its local IP address queries, but it will also be available with external internet access. This is useful for accessing your home server, monitoring IP cameras & managing your website’s DNS, among many other things.
About No-IP
No-IP is a widely known Dynamic DNS service offering free hostnames easily manageable from a web dashboard. No-IP owns a wide number of public domains and gives its customers the use of subdomains for free. No-IP will take care to publish your IP to public DNS servers so that your subdomain will be reachable from everywhere in the world. Once defined your favourite hostname, your work will be only update the IP associated with your hostname with the dynamic IP address you get from your Internet Service Provider. To simplify this operation, the No-IP team gives you a free Dynamic Update Client (DUC), available for Windows, Linux and MacOS, which scans at defined intervals your current public IP and operates dynamic updates to your subdomain record.
Before digging into the DNS topic, you have to take into consideration some networking concepts which can negatively influence this project’s success.
Networking Considerations
Public IP (Internet Protocol) addresses – usually referring only to IPv4 – are a list of IP addresses known and reachable worldwide. They are managed following IEEE recommendations and through local agencies deputed to ensure IP usability. They are associated with mnemonic labels (domain names) with the help of a worldwide connected network of public DNS servers (Domain Name Servers).
These assets are really important for computer communications because they are the main way internet devices can communicate with each other. Public IPs are also precious resources because their number is far lower than the available internet devices.
To face the lack of Public IP addresses, Internet Providers usually make use of some networking techniques like NAT (Network Address Translation), giving their customers only reusable private IP addresses gathered and exposed from a single public IP address. This allows them to reduce static IP address usage.
So, the first requirement for dynamic DNS usage is: you need to ask your Internet Provider if you have a public or private IP address. You can also get this info by comparing the WAN IP of your internet gateway device (usually your router) with the output from this terminal command:
curl icanhazip.com If those values are different, the only way is to ask your Internet Provider if they can get you a Public IP address instead of a Private IP address.
If those values are the same, then you are on the right track to get a working dynamic DNS. But this IP address can change according to the Internet Service Provider’s operations, since ISPs usually assign dynamic IP addresses. The last problem is the reason why No-IP helps.
The second consideration regards Port Forwarding. This part isn’t strictly required for dynamic DNS, but you need it for publishing Raspberry PI services. If you use a router to connect your Raspberry PI to the internet and you want to expose some Raspberry PI services to the public network, then you should configure your router to redirect incoming traffic (usually both TCP and UDP) to one of its internal LAN devices.
Let’s use an example. You need to publish your HTTP page hosted on your Raspberry PI (let’s assume with local network IP 192.168.1.10) to the internet. HTTP service usually relies on port 80. In this case, you have to configure your router with a rule to port-forward TCP incoming connections on port 80 from every internet device to your Raspberry PI’s port 80. This operation varies with different router models, and you need to check the router user guide for detailed procedures to make it work.
What We Need
As usual, I suggest adding from now to your favourite e-commerce shopping cart all the needed hardware, so that at the end you will be able to evaluate overall costs and decide if to continue with the project or remove them from the shopping cart. So, hardware will be only:
- Raspberry PI Computer Board (including proper power supply or using a smartphone micro USB charger with at least 3A)
- high-speed micro SD card (at least 16 GB, at least class 10)

Step-by-Step Procedure
Raspberry PI configuration is simple, but the project requires some preparatory configurations on the No-IP page. You need to arrange your dynamic DNS record before installing the DUC client in your RPI.
Prepare No-IP account
Please start creating a free No-IP.com account (if not available) on the No-IP signup page from your browser. With a free plan, you can get, without costs, up to 3 dynamic DNS names, and you will need to confirm your hostname every 30 days. This task is really simple and can be achieved easily from the notice email that No-IP will send to you a few days before the dynamic hostname expiration.
Take note of your account mail and password, because you will need of them in the Raspberry PI No-IP setup.
Now, you must create a new hostname. We need an IPv4 address with an “A” type DNS record. Please find this procedure from the “Add a Hostname to Your Account” chapter in their Getting Started Guide page. You will reach the following form:

The public IP address of your current PC will be automatically filled in the “IPv4 Address” field. This can be left as is because it will soon be automatically updated by our DUC. When filling in the “Host” field with your favourite hostname, No-IP will check if it is available. If not, you will need to change the selected Host value or the domain (“ddns.net” in the picture).
The complete URL available for you will be composed of the hostname you select, a “.” (dot) and the selected domain.
Tasks on No-IP are finished. Let’s move on to setting up the update client on Raspberry PI.
Prepare the Raspberry PI Operating System
The next step is to install the Raspberry PI OS Lite (I suggest the 64-bit version) to get a fast and lightweight operating system (headless). If you need a desktop environment, you can also use the Raspberry PI OS Desktop, in which case you will work from its terminal app. Please find the differences between the 2 OS versions in my Raspberry PI OS Lite vs Desktop article.
Once installed, please make sure that your OS is up to date. From your terminal, use the following command:
sudo apt update -y && sudo apt full-upgrade -yWe also need Docker. For this task, please refer to my Beginner’s Guide to Install and Use Docker with Raspberry PI tutorial.
Install No-IP DUC in Your Raspberry PI with Docker
With Docker installed, running the NO-IP DUC is a matter of a few minutes, even for beginners.
Please create an environment file (a text file) which will collect all the settings we need to correctly run the DUC service:
nano noip-duc.envPlease fill in the file according to the following (in red, the parts you must change):
# noip-duc.env with DDNS Key
NOIP_USERNAME=your_email@email.it
NOIP_PASSWORD=your_password
NOIP_HOSTNAMES=your_noip_full_hostname
The first line is just a comment, so you can leave it as is.
The second and third lines must be set according to the email address and the password you used to sign up for your account in the No-IP service.
The last line should be filled with the complete URL you set for your hostname. For example, if you set “my” as the Host and choose “ddns.net” as the domain, the full URL will be “my.ddns.net”.
Please save and close the file (CTRL+X).
Now, the NO-IP DUC on Raspberry PI will run with the following terminal command:
docker run -d --restart unless-stopped --env-file noip-duc.env --name noip-duc ghcr.io/noipcom/noip-duc:latestHere’s the explanation of the options from this Docker run command.
- -d: this option will make the Docker container run in detached mode (you don’t need to keep the terminal session active to get the container running, and it will persist even if you log out from the Raspberry)
- –restart unless-stopped: this will make the container automatically restart even if your Raspberry PI reboots, until you don’t issue the docker stop command
- –env-file noip-duc.env: this option will pass to the container the settings prepared in our “noip-duc.env” file
- –name noip-duc: this option will give the container the “noip-duc” mnemonic name, so that you can easily identify it from the docker ps command when running alongside other Docker containers
- ghcr.io/noipcom/noip-duc:latest: this identifies the official Docker image for the DUC service, keeping the latest image version
Only for the very first time you run this command, it will take a bit more time to download the container’s image. Once done, it will return to you the prompt. You can check if everything went correctly by looking at the Docker logs for this container:
docker logs noip-ducYou should see something like the following:
pi@raspberrypi:~/docker/noip-duc $ docker logs noip-duc
[2025-10-10T16:37:12Z INFO  noip_duc::public_ip] Attempting to get IP with method Dns(No-IP Anycast DNS Tools)
[2025-10-10T16:37:12Z INFO  noip_duc::observer] got new ip; current=79.49.176.167, previous=0.0.0.0
[2025-10-10T16:37:13Z INFO  noip_duc::observer] update successful; current=79.49.176.167, previous=0.0.0.0
[2025-10-10T16:37:13Z INFO  noip_duc::observer] checking ip again in 5m
The “update successful” message tells you that it ran without errors.
Test No-IP DUC with Raspberry PI
In this paragraph, we’ll prepare a very easy test for our dynamic DNS service resolution by publishing a simple Apache test page from the Raspberry PI. Again, we’ll use Docker to create a simple web server to test the correct routing.
From the terminal command in your Raspberry PI, please use the following:
docker run -d -p 80:80 --name http_test httpd:latestThis command will use the “httpd” container image, which is the official Apache container for a simple web server.
In this case, we also need an incoming port. The “-p 80:80” option will instruct the Docker container to expose port 80 for external connections to the Raspberry PI.
For this test, you need your router configured to map port 80 from the WAN to port 80 of your Raspberry PI.
Once done, please use your favourite browser to browse the web page coming from the full URL of your NO-IP domain. Please take care to connect to the “http” (without “s”) page. Even if this is insecure, it’s enough for a small test. For example, with the No-IP domain I use for my tests (myhomepi.webhop.me), my URL will be http://myhomepi.webhop.me.
Your browser could notify you that connecting to an HTTP (insecure) page may be a risk. For example, Google Chrome shows the following warning (it changes from browser to browser):
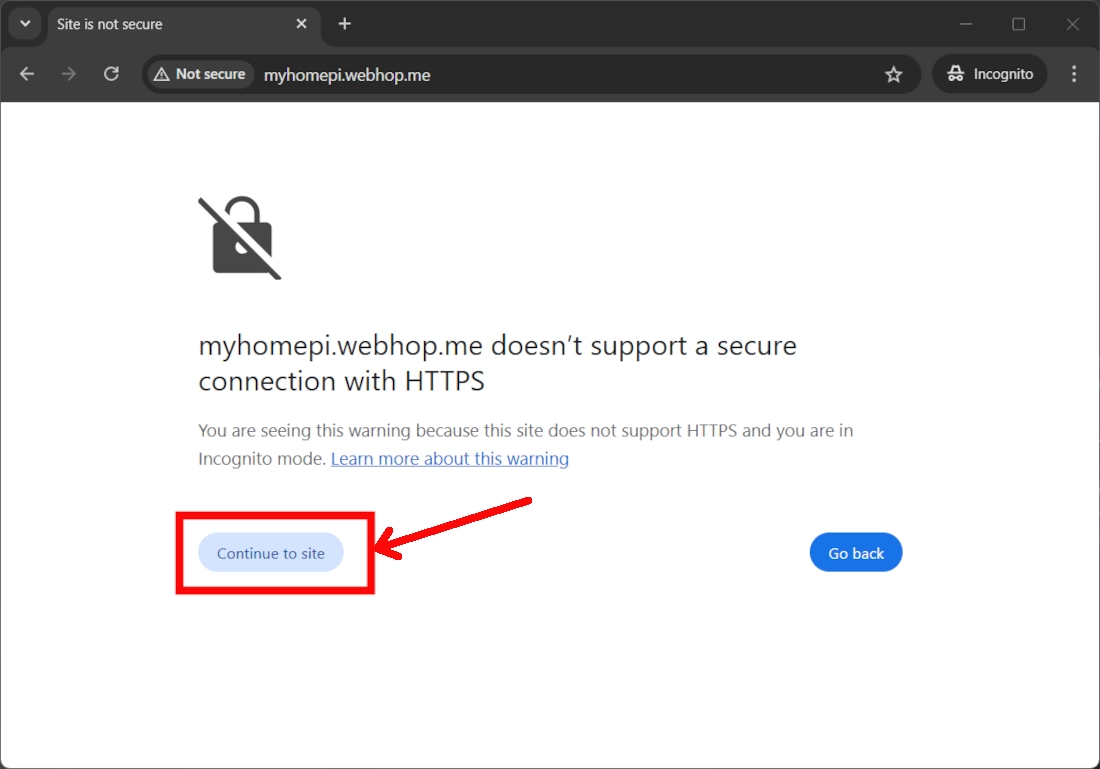
As you are the owner of the domain and as this is a very limited test, you can proceed by clicking the “Continue to site” button highlighted in the previous screenshot.
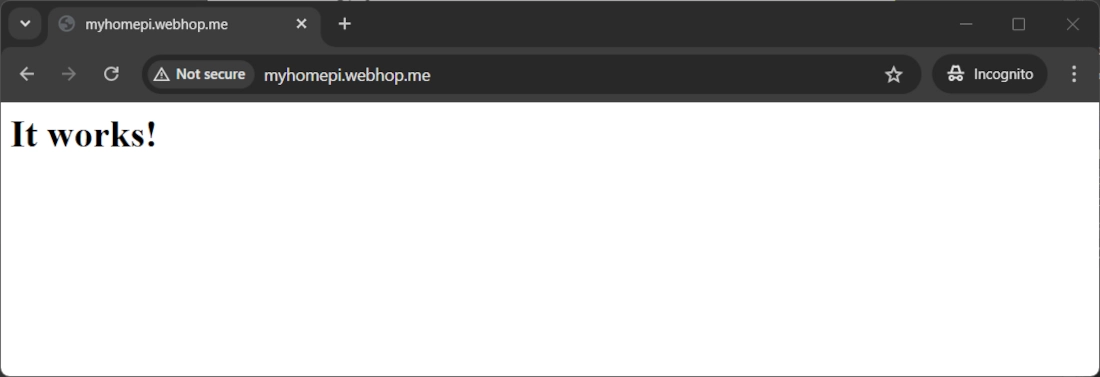
You will see the following page, which simply tells you that everything works:
Now, you can remove the insecure Apache container with the following two commands:
docker stop http_test
docker rm http_test
Additionally, you can also remove the port mapping in your router if you currently don’t use it.
What’s Next
If you want to discover many other projects for your Raspberry PI, you can take a look at peppe8o Raspberry PI tutorials.
Enjoy the NO-IP DUC on Raspberry PI!

Open source and Raspberry PI lover, writes tutorials for beginners since 2019. He's an ICT expert, with a strong experience in supporting medium to big companies and public administrations to manage their ICT infrastructures. He's supporting the Italian public administration in digital transformation projects.
![]()
![]()
![]()
![]()
![]()
![]()
![]()


This was incredibly helpful. Thank you.
Thank you for your feedback, Gene