Last Updated on 6th February 2022 by peppe8o
What Is Pascal
Many people from my age still remember from university studies what is Pascal.
A wide description of this very old programming language can be found in Wikipedia Pascal description page.
Pascal is an imperative and procedural programming language, created as a small, efficient language intended to encourage good programming practices. It is named in honour of the French mathematician, philosopher and physicist Blaise Pascal.
It was very successful in the 1970s, notably on the burgeoning minicomputer market. Widely used as a teaching language in university-level programming courses in the 1980s, it was also used in production settings for writing commercial software during the same period.
Beside others, some wide companies included Pascal in their systems (like, for example, IBM and Apple).
Because of its great success, there where a number of implementations, most famous being Borland Pascal (also known as Turbo Pascal).
In this guide I’ll show you how to install and configure Free Pascal in your Raspberry PI. I’ll also show you how to setup a simple and useful terminal IDE to control and analyze your Pascal code.
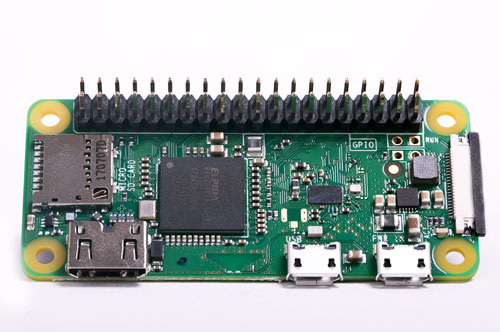
I’ll use Raspberry PI Zero W, but this guide works also with newer Raspberry PI boards.
HW Requirements
Free Pascal is really lightweith, having very affordable memory and disk requirements (Ref: https://freepascal.org/docs-html/current/user/usersu1.html#x9-80002.1.1):
- 8 Megabytes of free memory. This is sufficient to allow compilation of small programs.
- Large programs (such as the compiler itself) will require at least 64 MB. of memory, but 128MB is recommended. (Note that the compiled programs themselves do not need so much memory.)
- At least 80 MB free disk space. When the sources are installed, another 270 MB are needed.
What We Need
As usual, I suggest adding from now to your favourite e-commerce shopping cart all the needed hardware, so that at the end you will be able to evaluate overall costs and decide if to continue with the project or remove them from the shopping cart. So, hardware will be only:
- Raspberry PI Zero W (including proper power supply or using a smartphone micro usb charger with at least 3A) or newer Raspberry PI Board
- high speed micro SD card (at least 16 GB, at least class 10)
Check hardware prices with following links:
Step-by-Step Procedure
Prepare OS Environment
As usual, start from OS installation and update. After installing Raspberry PI OS Lite, please make your OS up-to-date:
sudo apt update
sudo apt upgrade
Install and Configure Free Pascal and Terminal IDE
Having Aptitude, installing Free Pascal is really simple as executing following command from Raspberry PI terminal:
sudo apt install fpc
This will download alla dependencies, installing and configuring Free Pascal command line (fpc) in your system. Let’s check what version is installed:
pi@raspberrypi:~ $ fpc -iV
3.0.4
Version will be helpful in a while…
From here. your fpc terminal command is ready to work, using system config file available in “/etc/fpc.cfg” path. You can compile Pascal programs files (usually “.pas” files) and execute them.
Using Free Pascal IDE
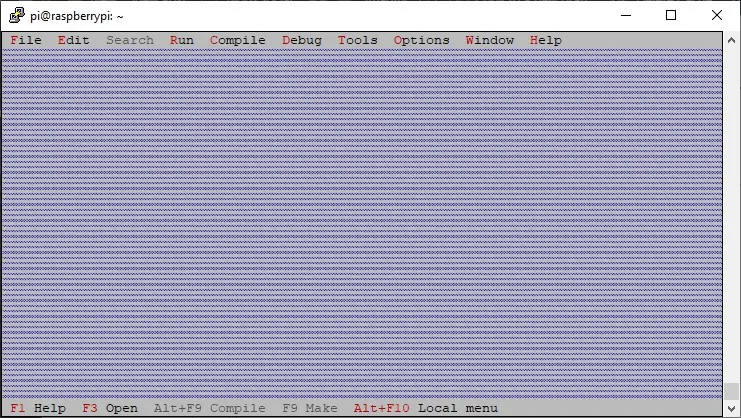
But fpc installation includes also a useful terminal IDE, that you can enable with the simple terminal command:
fp
Resulting in following IDE from terminal:
Navigating in FP IDE is quite simple but not intuitive. Basically, main keys / chortcuts you will use:
- arrows: move inside active window
- ALT+ red menù letter: open selected menù drop down list
- F6 or SHIFT+F6: move between Windows
- ALT+F3: Close active window
- ALT+x: Exit IDE
- TAB: move between selectable items inside a window
- ESC: exit from selection
More shortcuts can be found in Free Pascal Keyboard shortcuts page.
When you launch Free Pascal IDE, it will create in your current directory 3 files (if not already available): fp.cfg, fp.dsk and fp.ini. These files owns local configurations for your IDE, which are unlinked from fpc system configuration.
pi@raspberrypi:~ $ ls
fp.cfg fp.dsk fp.ini
Testing Hello World Program
From here, we’ll create our classic hello world first program.
From IDE home, create a New File (ALT+f -> New):
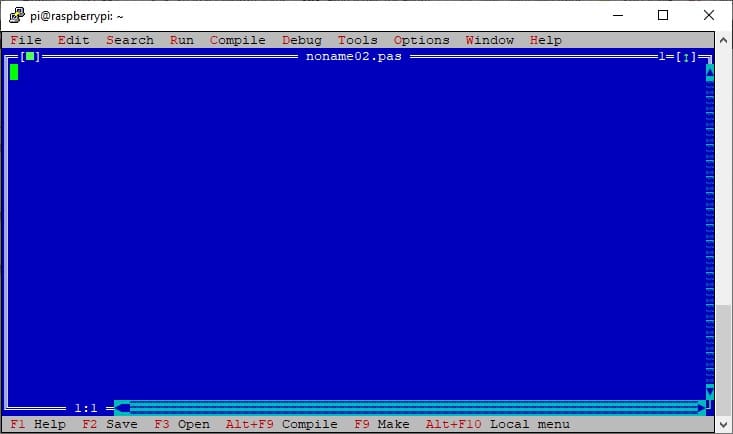
Copy following text inside your editor:
program HelloWorld;

begin
 writeln('Hello World, peppe8o.com!');
end.
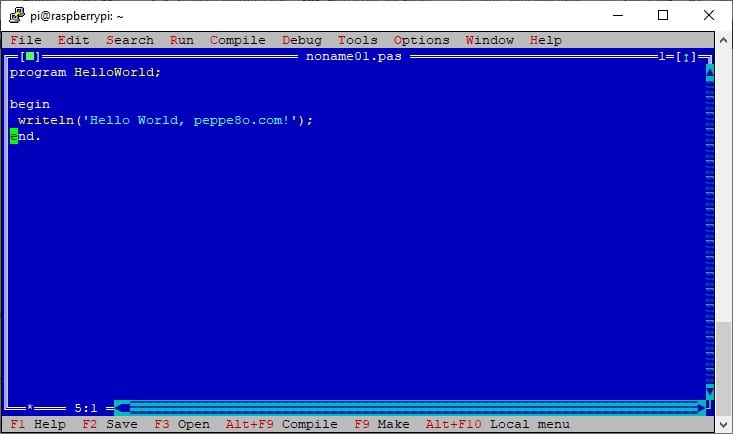
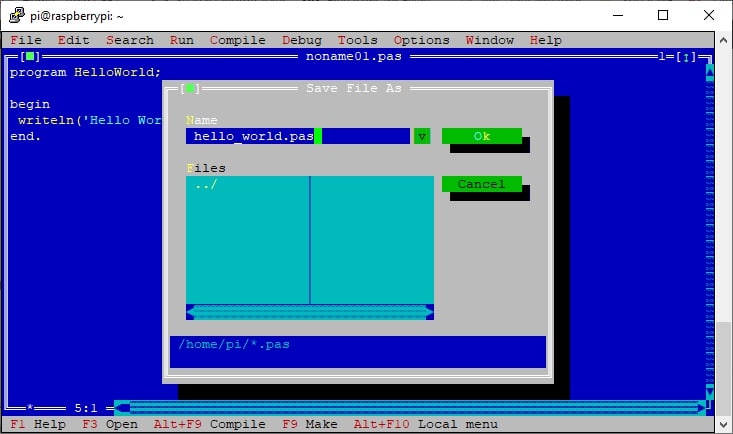
Save your file as “hello_world.pas” (ALT+f -> “Save as” -> write hello_world.pas -> press ENTER):
Before running your program, you need to compile it to check if code is correct (ALT+C -> “Compile”). You will note following compiling error:
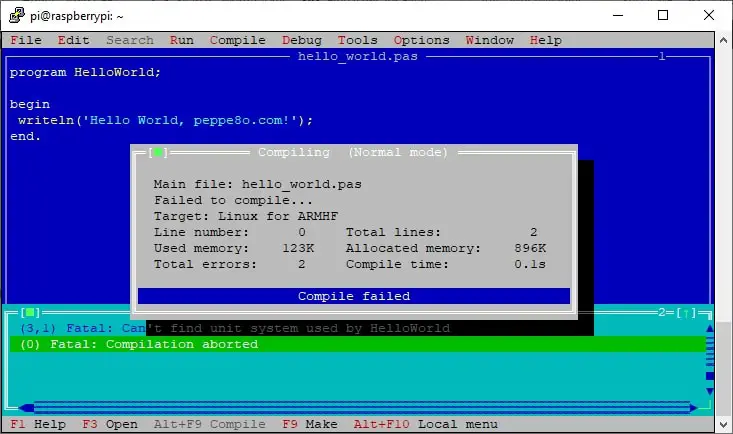
reporting following info:
Main file: hello_workd.pas
Failed to compile…
Target: Linux for ARMHF
Line number: 0 Total lines: 2
Used memory: 124K Allocated memory: 896K
Total errors: 2 Compile time: 0.2s

Compile failed
Pressing ALT+F3, you will close Compiling result window and activate Compiler Messages Window reporting:
(3,1) Fatal: Can't find unit system used by HelloWorld
(0) Fatal: Compilation aborted
This is a common and simple error. FP IDE, as said, started with local configuration unlinked to system configuration. FOr this reason we need to add paths to units required. Be aware that changing directory where you launch fp IDE will result in new local config files and will require same operation.
Let’s add required paths. Go under Options menu (ALT+o) -> “Directories”. Press Tab utill editing screen becames editable and add following paths, caring to change version (mine is 3.0.4) to your one:
/usr/lib/arm-linux-gnueabihf/fpc/3.0.4/units/arm-linux
/usr/lib/arm-linux-gnueabihf/fpc/3.0.4/units/arm-linux/*
/usr/lib/arm-linux-gnueabihf/fpc/3.0.4/units/arm-linux/rtl
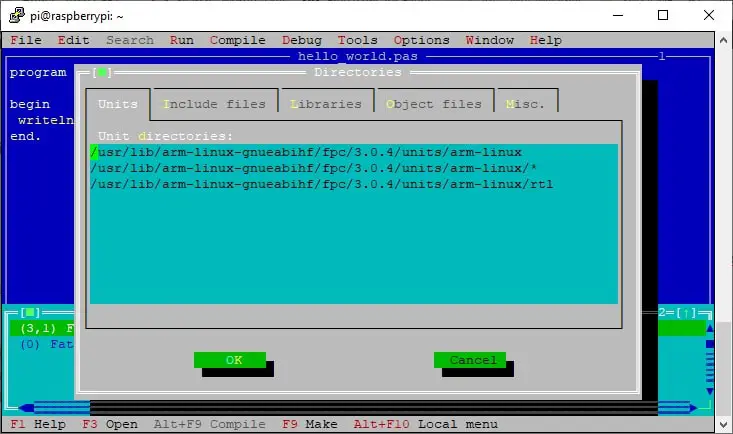
Press tab to activate “OK” button and then ENTER.
Close Compiler Messages Windows (ALT+f3) if still open, to go back in you code.
With new configuration on place, try again to compile (ALT+c -> “Compile”). This will result in a more pleasant “Compile Successful” message:
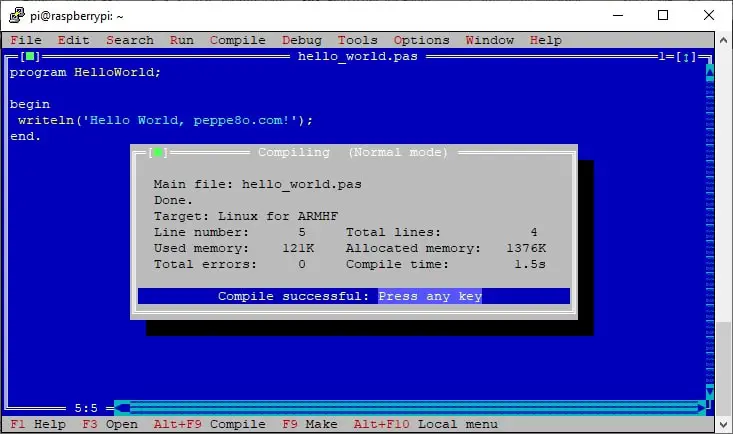
Press any key to go back on code. Run your code by selecting Run menù (Alt+r) -> Run. This will move back you terminal window in ssh shell and show your hello world program running by writing “Hello World, peppe8o.com!”:
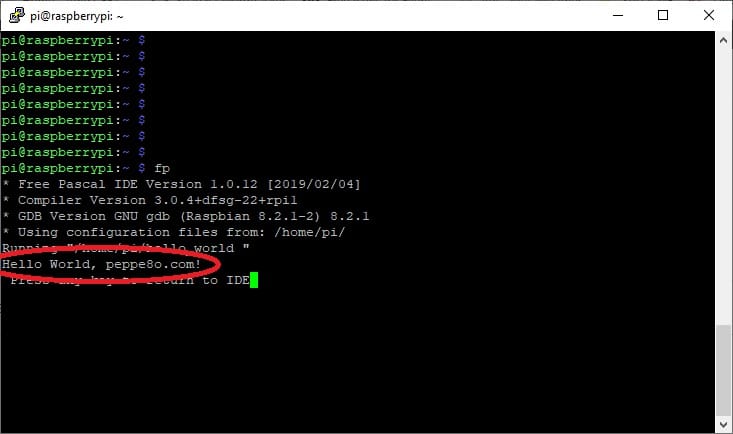
Final operation, close FP IDE (ALT+x) and go back to terminal. Checking again your folder content, you will find a few more files:
pi@raspberrypi:~ $ ls
fp.cfg fp.dsk fp.ini hello_world hello_world.o hello_world.pas
- fp.cfg, fp.dsk and fp.ini have been already discussed. Directories included are available inside fp.cfg file.
- hello_world.pas contains our program code, that you can check and edit from terminal
- hello_world and hello_world.o are generated in compiling procedure. hello_world.o contains compiled code. hello_world is the executable code. You can now run it also from terminal by typing “./hello_world” resulting in following output:
pi@raspberrypi:~ $ ./hello_world
Hello World, peppe8o.com!
Enjoy!

Open source and Raspberry PI lover, writes tutorials for beginners since 2019. He's an ICT expert, with a strong experience in supporting medium to big companies and public administrations to manage their ICT infrastructures. He's supporting the Italian public administration in digital transformation projects.

