
Last Updated on 4th April 2026 by peppe8o
In this tutorial, I’m going to show you how to install and use Streamlit with Raspberry PI computer boards. This will enable you to fastly deploy web apps directly from your Python scripts, without the need to have html, Javascript, or CSS skills.
About Streamlit
Streamlit is a Python library allowing you to build interactive web applications with just a few lines of code. Perfect for Raspberry Pi projects, Streamlit fastly shows dashboards, chat interfaces, maps, and charts in your browser.
Key features:
- Zero frontend: Pure Python code lines
- Built-in widgets: Sliders, buttons, file upload, chat input
- Charts & maps: You can grab your data from pandas, Plotly, maps, with native support
- Session state: naturally tracks user interactions
From monitoring CPU temperature to IoT dashboards, Streamlit makes complex data apps trivial. In this tutorial, I’ll show you some of the basic elements from Streamlit, which just gives you an idea on how easily you can use it.
I will use my Raspberry PI 5 Model B (8GB), but this tutorial should work with any Raspberry PI computer board.
What We Need
As usual, I suggest adding from now to your favourite e-commerce shopping cart all the needed hardware, so that at the end you will be able to evaluate overall costs and decide if to continue with the project or remove them from the shopping cart. So, hardware will be only:
- Raspberry PI Computer Board (including proper power supply or using a smartphone micro USB charger with at least 3A)
- high speed micro SD card (at least 16 GB, at least class 10)
Step-by-Step Procedure
Prepare the Operating System
The first step is to install the Raspberry PI OS Lite to get a fast and lightweight operating system (headless). If you need a desktop environment, you can also use the Raspberry PI OS Desktop, in which case you will work from its terminal app. Please find the differences between the 2 OS versions in my Raspberry PI OS Lite vs Desktop article.
Please make sure that your Operating System is up to date. From your terminal, use the following command:
sudo apt update -y && sudo apt full-upgrade -yWe also need pip. You can check if it is available in your Raspberry PI (and install it, if missing) with the following terminal command:
sudo apt install python3-pip -yInstall Streamlit on Raspberry PI
Now, we can install Streamlit. Before this, we need to create a Virtual Environment according to the Python security recommendations (more info about Python virtual environments are available from my Beginner’s Guide to Use Python Virtual Environment tutorial). We’ll name this virtual environment streamlit:
python3 -m venv streamlitNow, we must activate the virtual environment. Please remember to activate it every time you will run the app we’ll create:
source streamlit/bin/activateYou can see the virtual environment activated as you will get its name at the beginning of your prompt:
(streamlit) pi@raspberry:~ $Finally, we can install Streamlit with the following terminal command:
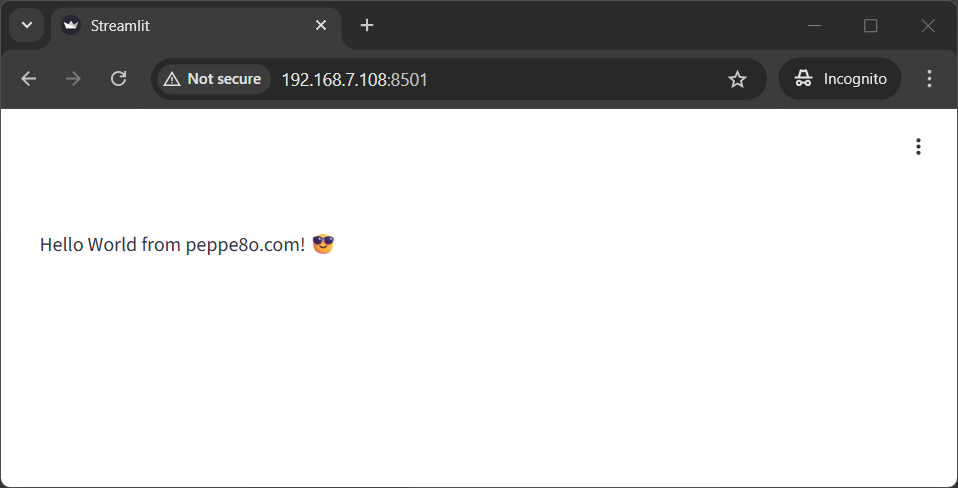
pip install streamlitNow, we can test it by creating a simple web app with an “Hello World” message. Please note that Streamlit apps have a “.py” file extension, like any other Python script.
Let’s create the file:
nano app.pyAnd fill it with the following content:
import streamlit as st
st.write("Hello World from peppe8o.com! :sunglasses:")
Save the file and close it.
Now, you can run this simple app with the following terminal command:
(streamlit) pi@raspberry:~ $ streamlit run app.pyYou app will be live in a very few seconds, and you will get the URL to reach it from your terminal, similarly to the following:
(streamlit) pi@raspberry:~ $ streamlit run app.py

Collecting usage statistics. To deactivate, set browser.gatherUsageStats to false.

  You can now view your Streamlit app in your browser.

  Local URL: http://localhost:8501
  Network URL: http://192.168.7.108:8501
  External URL: http://212.171.5.119:8501
From a remote device in the same LAN, you can use the provided Network URL in any browser to reach the web app:
At any time, from the Raspberry PI terminal you can close the running Streamlit app with CTRL+C.
Run Streamlit As A Service (Daemon)
As you may note, running Strealit in such mode implies that you must keep your terminal attached (otherwise the app will stop working). It is not practical is you want to run a service in your Raspberry PI without keeping it with a terminal session active all the time.
For this reason, you can create a systemd service which will make the app running even if you logout from your Raspberry PI and will automatically restart if you restart it.
Please create the service configuration with the following terminal command:
sudo nano /etc/systemd/system/streamlit-app.serviceNow, please fill the file with the following content. It is important to note that you must change the user/group if your user is different from the “pi”. In the same way, you must change the paths (bolded in the following code snippet) if you installed it on a different path or if you saved the app.py in a different location.
Another important part is in the server port: if you want to expose your app with a different port (for example, the default 80 for browsers) you should change the “8501” with your preferred.
[Unit]
Description=Streamlit app
After=network.target

[Service]
Type=simple
User=pi
Group=pi
WorkingDirectory=/home/pi/streamlit
ExecStart=/home/pi/streamlit/bin/python -m streamlit run /home/pi/app.py --server.port 8501
Restart=always
RestartSec=5

[Install]
WantedBy=multi-user.target
Save and close.
You can now enable and start the new service with the following commands:
sudo systemctl daemon-reload
sudo systemctl enable streamlit-app.service
sudo systemctl start streamlit-app.service
At this point, the service should be up and running, as you can check with sudo systemctl status streamlit-app.service which should give you back something like the following:
(streamlit) pi@raspberry:~ $ sudo systemctl status streamlit-app.service
● streamlit-app.service - Streamlit app
     Loaded: loaded (/etc/systemd/system/streamlit-app.service; enabled; preset: enabled)
     Active: active (running) since Fri 2026-04-03 14:22:39 CEST; 1min 14s ago
 Invocation: 8e9a15b133c74c168ffbada794668c34
   Main PID: 1861 (python)
      Tasks: 7 (limit: 9583)
        CPU: 1.052s
     CGroup: /system.slice/streamlit-app.service
             └─1861 /home/pi/streamlit/bin/python -m streamlit run /home/pi/app.py --server.port 8501

Apr 03 14:22:39 raspberry systemd[1]: Started streamlit-app.service - Streamlit app.
Apr 03 14:22:40 raspberry python[1861]: Collecting usage statistics. To deactivate, set browser.gatherUsageStats to false.
Apr 03 14:22:40 raspberry python[1861]:   You can now view your Streamlit app in your browser.
Apr 03 14:22:40 raspberry python[1861]:   Local URL: http://localhost:8501
Apr 03 14:22:40 raspberry python[1861]:   Network URL: http://192.168.7.108:8501
Apr 03 14:22:40 raspberry python[1861]:   External URL: http://212.171.5.119:8501
Basic Examples of Streamlit with Raspberry PI
In this chapter, I will show you some examples to use basic elements available from the Streamlit library.
Stream a Text Line
With this example, we’ll how to show a text string, getting it to appear character by character.
Please change the app.py file as the following:
# by peppe8o.com
import time
import streamlit as st

st.write("Hello World from peppe8o.com! :sunglasses:")

def text_stream():
    text = "This is a text-stream line"
    for ch in text:
        yield ch
        time.sleep(0.03)

st.write_stream(text_stream)
The write_stream statement requires a stream to be woking. In this example we create the stream by using a custom function (text_stream()). On his side, this function uses the yield keyword, which creates a “generator” instead of returning the text at once.
The result is visible in the following:
Table from Dataframe
Streamlit offers a native integration with pandas dataframes, allowing you to show a table from them with a single code line.
Please edit the app.py again, using the following content:
# by peppe8o.com
import os
import shutil
import subprocess
from datetime import datetime
import pandas as pd
import streamlit as st

# Get Raspberry PI's parameters
def get_cpu_temp():
    try:
        output = subprocess.check_output(["vcgencmd", "measure_temp"], text=True).strip()
        return output.replace("temp=", "").replace("'C", "")
    except Exception:
        return "N/A"

def get_memory_info():
    meminfo = {}
    with open("/proc/meminfo", "r") as f:
        for line in f:
            key, value = line.split(":", 1)
            meminfo[key] = int(value.strip().split()[0])  # kB

    total_gb = meminfo["MemTotal"] / 1024 / 1024
    available_gb = meminfo.get("MemAvailable", 0) / 1024 / 1024
    used_gb = total_gb - available_gb
    used_pct = (used_gb / total_gb) * 100 if total_gb else 0

    return total_gb, available_gb, used_gb, used_pct

def get_load():
    with open("/proc/loadavg", "r") as f:
        load1, load5, load15 = f.read().split()[:3]
    return load1, load5, load15

def get_uptime_days():
    with open("/proc/uptime", "r") as f:
        uptime_seconds = float(f.read().split()[0])
    return uptime_seconds / 86400

def get_disk_info():
    total, used, free = shutil.disk_usage("/")
    return total / 1024**3, used / 1024**3, free / 1024**3, (used / total) * 100

mem_total, mem_avail, mem_used, mem_pct = get_memory_info()
load1, load5, load15 = get_load()
disk_total, disk_used, disk_free, disk_pct = get_disk_info()

# Create a pandas Dataframe
df = pd.DataFrame(
    [
        ["CPU Temperature", f"{get_cpu_temp()} °C"],
        ["CPU Load (1 min)", load1],
        ["CPU Load (5 min)", load5],
        ["CPU Load (15 min)", load15],
        ["Memory Used", f"{mem_used:.2f} GB ({mem_pct:.1f}%)"],
        ["Memory Available", f"{mem_avail:.2f} GB"],
        ["Disk Used", f"{disk_used:.2f} GB ({disk_pct:.1f}%)"],
        ["Disk Free", f"{disk_free:.2f} GB"],
        ["Uptime", f"{get_uptime_days():.2f} days"],
        ["Updated", datetime.now().strftime("%Y-%m-%d %H:%M:%S")],
    ],
    columns=["Metric", "Value"],
)

# Show the web app
st.title("Raspberry Pi OS Current Stats")
st.dataframe(df, hide_index=True, use_container_width=True)
In this script, all the additional libraries and custom functions are functional to get Raspberry PI’s parameters (like CPU, RAM, Storage). Everything till the df = pd.DataFrame() line is functional to get the data we need.
the only part where Streamlit is involved in printing the resulting dataframe is the last line, where the st.dataframe() uses the resulting dataframe to convert it to a table. Here’s the result:
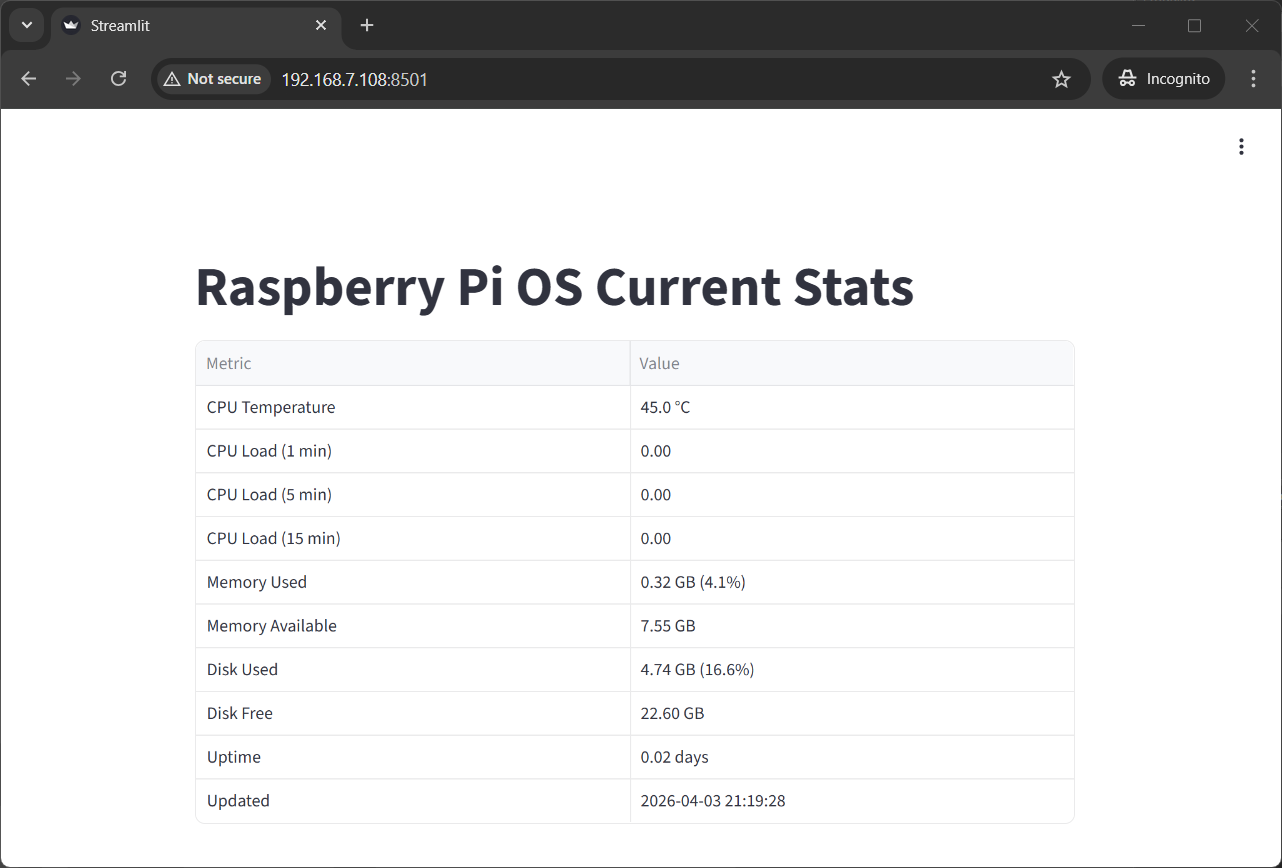
Dataframes with additional columns and/or rows will result into a table where you can navigate them without loosing the headers.
Showing Charts
Please edit the app.py file again, to use the following lines where we’ll see how simple is drawing a chart:
# by peppe8o.com
import pandas as pd
import requests
import streamlit as st
url = (
"https://api.open-meteo.com/v1/forecast"
"?latitude=37.51"
"&longitude=15.08"
"&hourly=temperature_2m,relative_humidity_2m,wind_speed_10m"
"&timezone=auto"
)
data = requests.get(url).json()
df = pd.DataFrame({
"time": data["hourly"]["time"],
"temperature": data["hourly"]["temperature_2m"],
"humidity": data["hourly"]["relative_humidity_2m"],
"wind_speed": data["hourly"]["wind_speed_10m"],
})
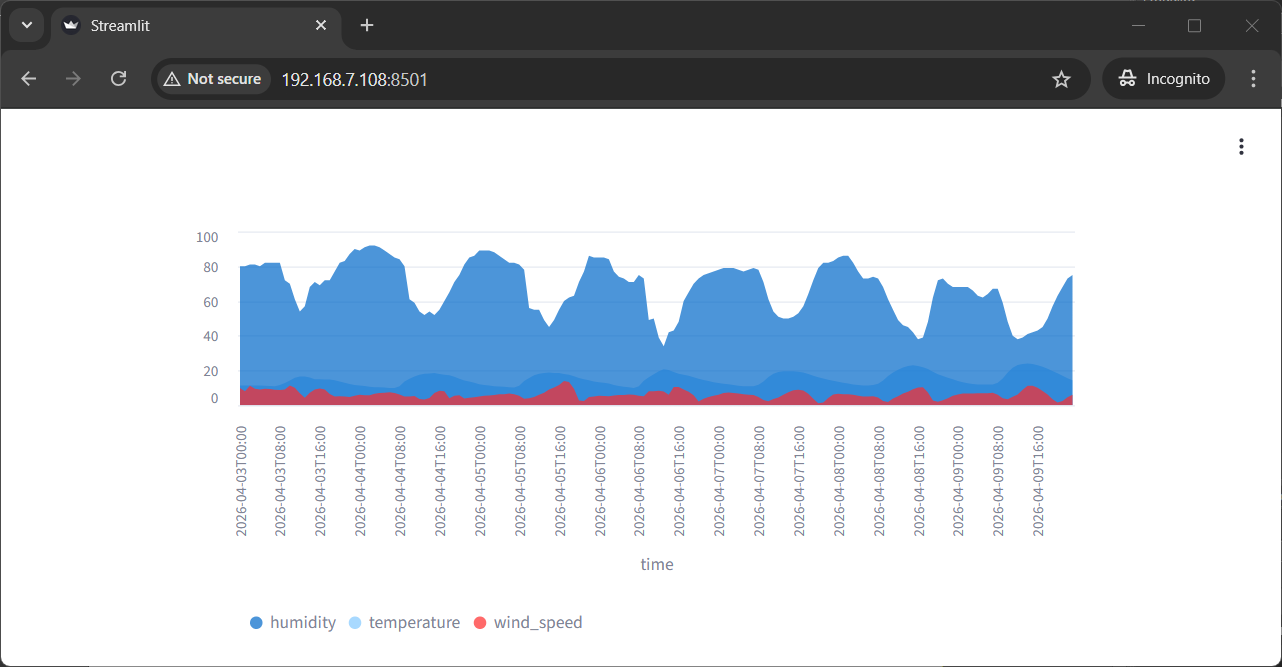
st.area_chart(df, x="time", y=["temperature", "humidity", "wind_speed"])This file requests weather data for a specific location to Open-Meteo API and puts the resulting values (for temperature, humidity, and wind) into a pandas dataframe.
Again, Streamlit has a great integration with dataframes, and this time the st.area_chart() method allows us to draw data into an area chart with a single code line. Here’s the result:
Simulate a ChatBot with Streamlit on Raspberry PI
In the last example, I will show you how to simulate a simple chatbot. Here I will just use Python code to answer with a simple echo to the user, but you can easily change the bot answer with a self-hosted AI model to create your AI chatbot! (please refer, for example, to my LangChain with Raspberry PI and Ollama article).
Open the app.py file for editing and use the following content:
# by peppe8o.com
import time
import streamlit as st

st.title("Echo Chat Demo")

if "messages" not in st.session_state:
    st.session_state.messages = []

def stream_text(text, delay=0.03):
    for char in text:
        yield char
        time.sleep(delay)

for message in st.session_state.messages:
    with st.chat_message(message["role"]):
        st.markdown(message["text"])

prompt = st.chat_input("Say something")

if prompt:
    user_message = {
        "role": "user",
        "text": prompt,
    }
    st.session_state.messages.append(user_message)

    with st.chat_message("user"):
        st.markdown(prompt)

    bot_reply = f"Echo: {prompt}"

    with st.chat_message("assistant"):
        full_reply = st.write_stream(stream_text(bot_reply, delay=0.03))

    st.session_state.messages.append({
        "role": "assistant",
        "text": full_reply,
    })
This may appear a bit complex, but in the following paragraphs I’ll try to make it clearer.
The first 2 lines just import the required libraries:
import time
import streamlit as st
The following line sets the page title:
st.title("Echo Chat Demo")The following line creates a chat memory, where messages are stored. This keeps the message history untill you stay in hte page. it will be cleaned if you reload the page:
if "messages" not in st.session_state:
    st.session_state.messages = []
The following lines will create the streaming effect for bot answers, as already shown in the previous example:
def stream_text(text, delay=0.03):
    for char in text:
        yield char
        time.sleep(delay)
Now, the following part loops through saved messages, showing them in the main chat area:
for message in st.session_state.messages:
    with st.chat_message(message["role"]):
        st.markdown(message["text"])
The chat_input() method creates a new field at the bottom of the chat, where user can type its text. Saving it to the prompt variable allows us to get a trigger when user submits any message. Moreover, this variable returns the text that the user submitted:
prompt = st.chat_input("Say something")The following part, all inside the if statement, will be automatically executed from streamlit every time the user sends any text:
if prompt:At the user prompt, we collect the “user” role with its text message and save this entry in the session_state. Then, we’ll print the user text in the main chat area:
    user_message = {
        "role": "user",
        "text": prompt,
    }
    st.session_state.messages.append(user_message)

    with st.chat_message("user"):
        st.markdown(prompt)
Here comes the bot reply. We use a simple “Echo” message, followed by the same message of the user, but you can change it with any function you like. After setting the bot reply, we stream it to the main chat area:
    bot_reply = f"Echo: {prompt}"

    with st.chat_message("assistant"):
        full_reply = st.write_stream(stream_text(bot_reply, delay=0.03))
Now, we also add the bot reply to the session_state, so that we’ll keep it in the chat history:
st.session_state.messages.append({
"role": "assistant",
"text": full_reply,
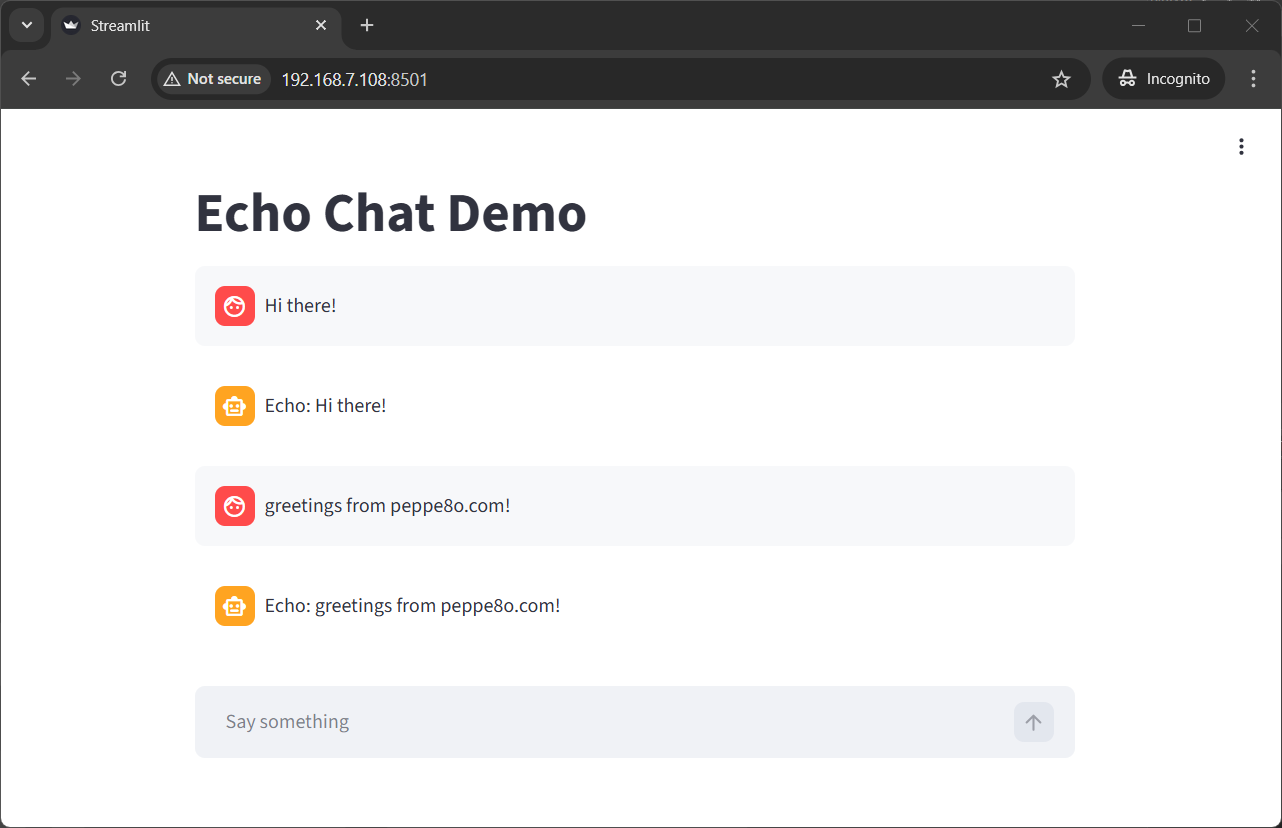
})You can now see the simulated chatbot and you should get something like the following:
Complete Streamlit User Guide
You can find a complete reference to all the available Streamlit methods in the Streamlit API reference Docs.
Resources
Next Steps
If you are interested in more Raspberry PI projects (both with Lite and Desktop OS), take a look at my Raspberry PI Tutorials.
Enjoy!

Open source and Raspberry PI lover, writes tutorials for beginners since 2019. He's an ICT expert, with a strong experience in supporting medium to big companies and public administrations to manage their ICT infrastructures. He's supporting the Italian public administration in digital transformation projects.
![]()
![]()
![]()
![]()
![]()
![]()
![]()


