
Last Updated on 8th February 2026 by peppe8o
In this tutorial, I’m going to show you how to install and use Icecast2 on a Raspberry PI computer board, with a complete example.
As the web became more popular, many web radios born because of their low maintenance costs. One of the most popular platforms to broadcast a private web radio is Icecast2, which also runs on Raspberry PI computer boards
This post will start by describing what Icecast is, what you need to run a public web radio, and installation and configuration for a very simple web broadcasting.
What is Icecast
Icecast is an open-source software (distributed under the GNU GPL, version 2) able to create a self-hosted streaming server. Supports a number of audio/video media formats, like Ogg (Vorbis and Theora), Opus, WebM and MP3.
You can use Icecast to create an Internet radio station, run a private jukebox and many other things in minutes. Its configuration may appear a bit complex because its main configuration requires manually handling XML files, but I hope this tutorial will help you to understand the basics of using this platform.
Before Starting
Before starting with Icecast2 installation and configuration, you need to thing how your listeners will reach your radio broadcast: internet listeners should reach you from the web with a defined URL. Here, there are 2 options:
- If your Internet Service Provider gives you a public IP, you can use a free No-IP domain and keep it updated with my How to configure No-IP DUC in your Raspberry PI tutorial. In this case, you must also be able to set a port forwarding rule in your home router, so that it will direct all the incoming connections from the internet on its port 8000 to the port 8000 of your Raspberry PI. This feature is sometimes referred to as “Virtual Server”.
- The second option is buying a paid domain and setting it up with a Cloudflare Tunnel on Raspberry PI, exposing the
http://localhost:8000service. The provided link gives you my tutorial for this step.
The Icecast2 Streaming Schema
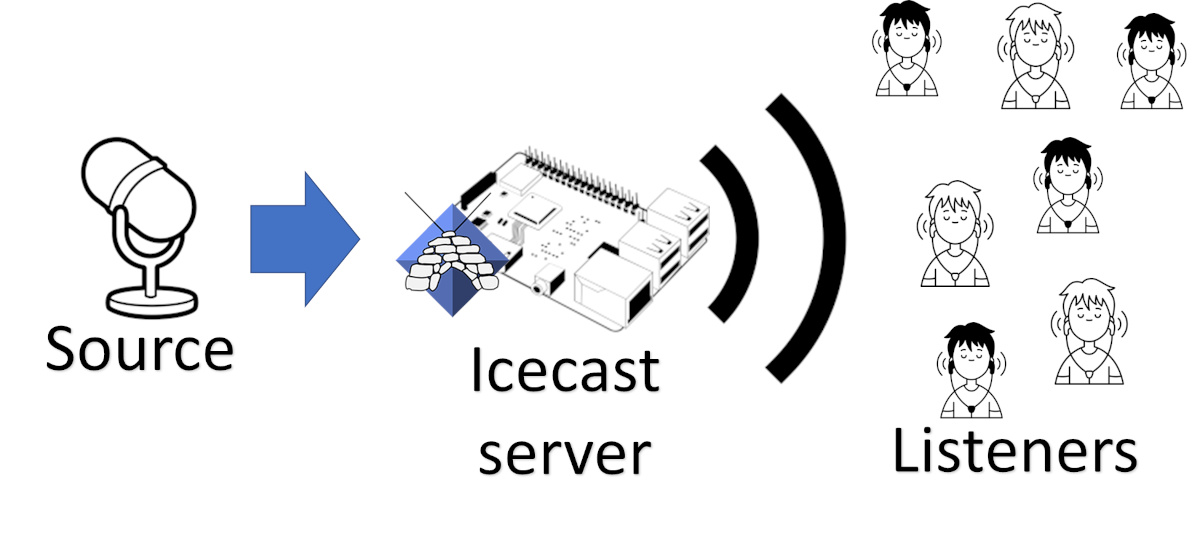
Finally, please remember that Icecast works as a broadcasting server. So, you need to configure:
- The Icecast server, which we’ll install on our Raspberry PI computer board
- a voice source, for this tutorial, I will show how to get this with a simple desktop app. But you can choose one of the supported Icecast clients
The following picture shows you the general schema:
What We Need
As usual, I suggest adding from now to your favourite e-commerce shopping cart all the needed hardware, so that at the end you will be able to evaluate overall costs and decide if to continue with the project or remove them from the shopping cart. So, hardware will be only:
- Raspberry PI Computer Board (including proper power supply or using a smartphone micro USB charger with at least 3A)
- high speed micro SD card (at least 16 GB, at least class 10)
Step-by-Step Procedure
We’ll proceed by installing the OS, installing Icecast2, configuring our first mount point and configuring a typical client from where our voice will be broadcast.
Prepare Operating System
Start installing your OS. I strongly suggest using Raspberry PI OS Lite (for a fast, headless operating system). But you can also install Raspberry PI OS Desktop, in this case working from its terminal console.
Make your OS up to date. From terminal:
sudo apt update -y && sudo apt full-upgrade -yInstall Icecast2 on Raspberry PI (Raspberry PI OS)
The official Icecast installation docs require you to download the source and compile it from your computer. An easier way is to use the convenient aptitude package manager. From your Raspberry PI terminal:
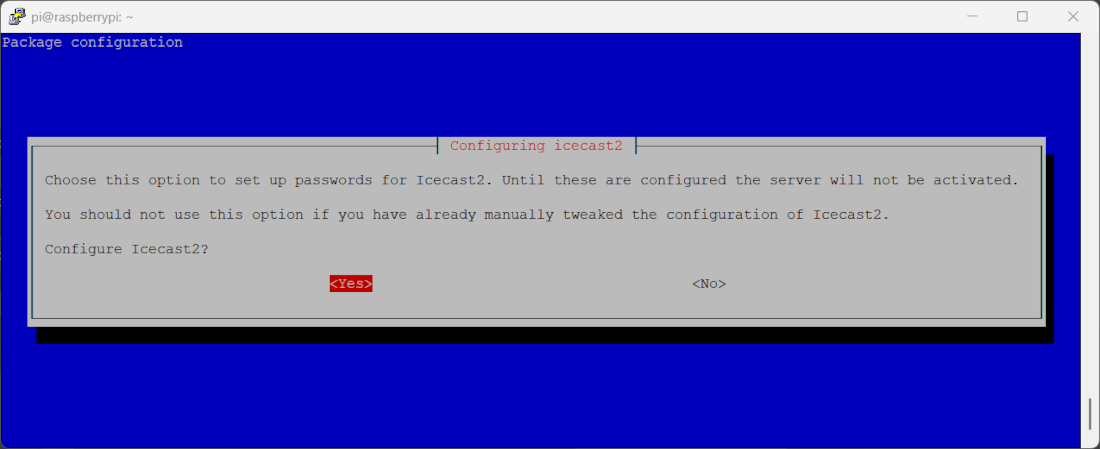
sudo apt install icecast2 -yThe installation procedure will ask you if you want to set the initial configuration and passwords now. I suggest selecting Yes and then press ENTER key:
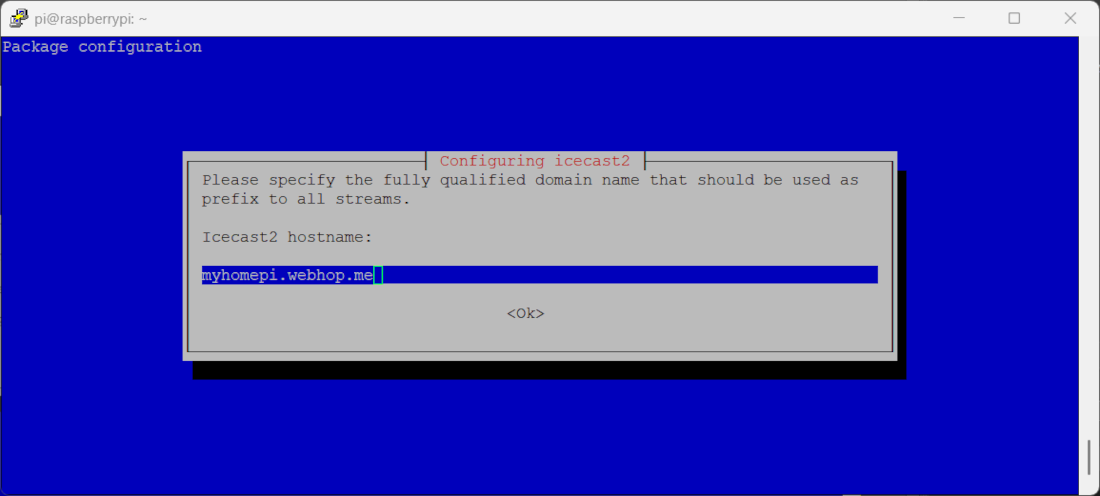
The next screen will ask for your domain from where your listener will receive the radio stream. I will use my free No-IP domain; you must use your one instead:
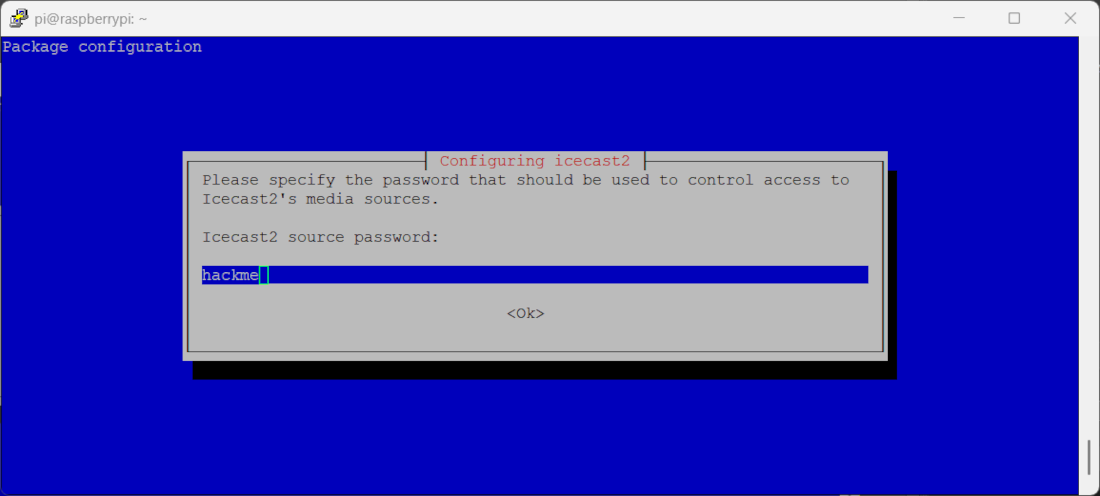
Before completing the Icecast installation, you will be required to add 3 passwords. The first one is to control access to media sources (please add your favourite password):
The second password is required to use stream relays (used in multinode streaming). Even if you will hardly use this configuration, you have to enter your favourite password and press enter:

The final (and most important) password will grant access to the administration console. Please also add this password (using your favourite one) and press ENTER:
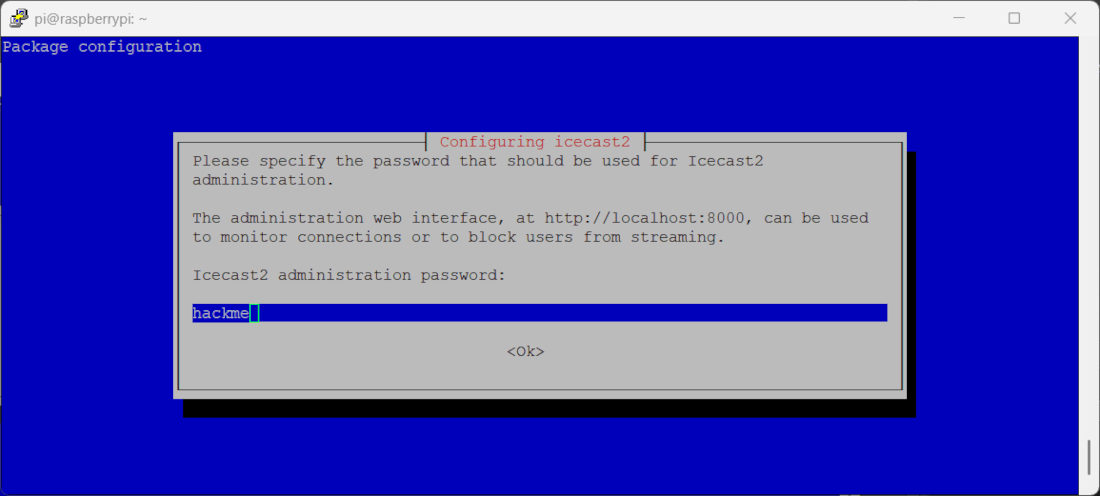
For all the 3 passwords just added, the default user will be “admin”. These passwords can be edited from the default Icecast configuration file (icecast.xml).
Setup Icecast2: Configure icecast.xml, Passwords, Mountpoint
An Icecast radio (or, in general, media) can be thought of as a mount point that will be mapped in a specific URL to be published. To create your very first radio, make a backup copy of the default Icecast configuration file and open it to edit:
sudo cp /etc/icecast2/icecast.xml /etc/icecast2/icecast.xml.backup
sudo nano /etc/icecast2/icecast.xml
Add the following code before the final </icecast> row:
    <mount type="normal">
        <mount-name>/example.ogg</mount-name>
        <username>iceUser</username>
        <password>icePwd</password>
        <max-listeners>10</max-listeners>
        <dump-file>/tmp/dump-example.ogg</dump-file>
        <burst-size>65536</burst-size>
        <hidden>1</hidden>
        <public>1</public>
        <on-connect>/home/icecast/bin/stream-start</on-connect>
        <on-disconnect>/home/icecast/bin/stream-stop</on-disconnect>
    </mount>
Use your favourite user and password instead of iceUser/icePwd. These credentials will be needed in your source software to stream your radio.
Also set max-listeners (the maximum number of users who can listen to your stream) according to your needs, but also be aware that the Raspberry PI can suffer from too many listeners. You need to test increasing this value to understand how many concurrent people you can serve.
You can get more advanced options from the Icecast configuration file docs.
Close and save your file. Restart Icecast to make changes running:
sudo systemctl restart icecast2.serviceYou can also check if the new configuration file worked with the Status command:
sudo systemctl status icecast2.serviceThis will create a very basic web radio, which will be available from http://myhomepi.webhop.me:8000/example.ogg (the last part coming from mount-name). Anyone will be able to listen to it from a common web browser once a streaming source starts broadcasting. You will see something like the following, with an active (running) state for the process.
pi@raspberrypi:~ $ sudo systemctl status icecast2.service
● icecast2.service - LSB: Icecast2 streaming media server
     Loaded: loaded (/etc/init.d/icecast2; generated)
     Active: active (running) since Fri 2026-02-06 20:40:59 CET; 6s ago
 Invocation: 9ff0b1356322436595884c81aa653b6a
       Docs: man:systemd-sysv-generator(8)
    Process: 2554 ExecStart=/etc/init.d/icecast2 start (code=exited, status=0/SUCCESS)
      Tasks: 4 (limit: 9583)
        CPU: 39ms
     CGroup: /system.slice/icecast2.service
             └─2558 /usr/bin/icecast2 -b -c /etc/icecast2/icecast.xml

Feb 06 20:40:59 raspberrypi systemd[1]: Starting icecast2.service - LSB: Icecast2 streaming media server...
Feb 06 20:40:59 raspberrypi icecast2[2554]: Starting streaming media server: icecast2.
Feb 06 20:40:59 raspberrypi icecast2[2558]: [2026-02-06  20:40:59] WARN CONFIG/_parse_root Warning, <loc...
Feb 06 20:40:59 raspberrypi icecast2[2558]: [2026-02-06  20:40:59] WARN CONFIG/_parse_root Warning, <adm...
Feb 06 20:40:59 raspberrypi systemd[1]: Started icecast2.service - LSB: Icecast2 streaming media server.
How to use Icecast2: source client (BUTT)
We now need to configure our source: the device from which we’ll broadcast our voice. Icecast supports several clients, listed at https://icecast.org/apps/.
For this tutorial, I will use the free BUTT (Broadcast Using This Tool), available for many desktop environments such as Windows, macOS, and Linux. I will use BUTT from my Windows computer to stream my voice from the Icecast with the Raspberry PI server.
You can use the installer apps from the BUTT’s webpage, which also includes, for Windows, a portable version (doesn’t require any installation process).
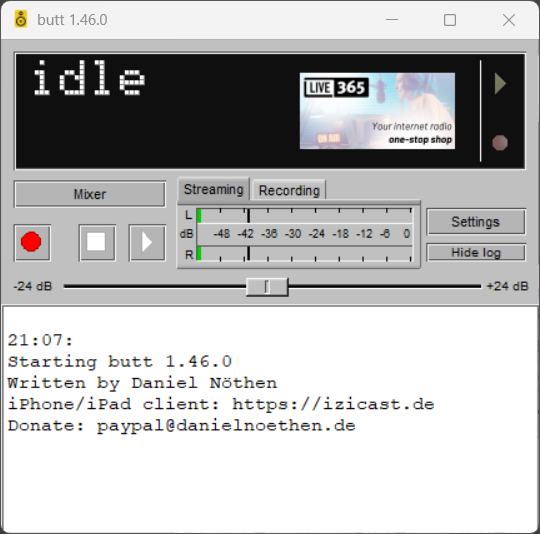
Once launched, it will appear in a clean, old-style theme:
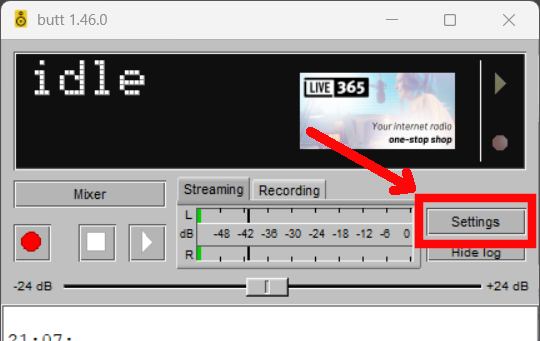
Please click the “Settings” button to set up the Icecast streaming server:
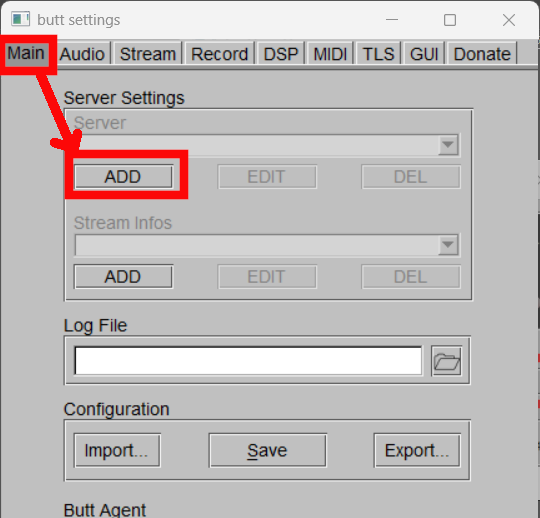
In the coming window, from the Main section, please click the “ADD” button, in the Server Settings area:
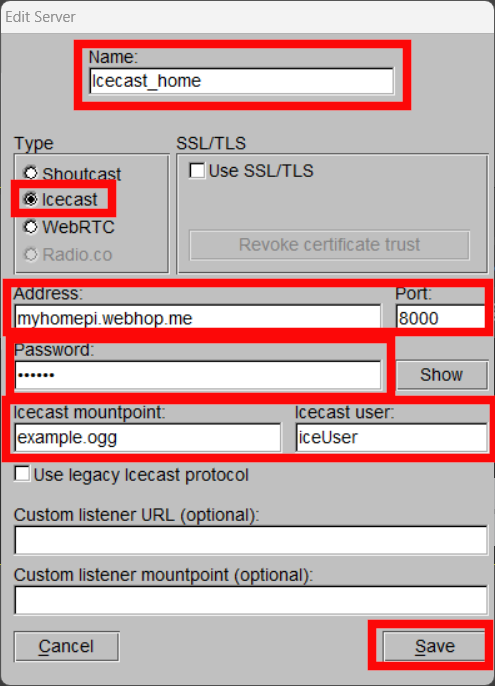
Now, please fill in the new server configuration with your preferred name. Take care to select “Icecast” in the server Type. Then compile the other fields with your domain name (port should be 8000 unless you changed it in the icecast.xml configuration file). User, Password, and mountpoint must be set according to what defined in the mount previously set.
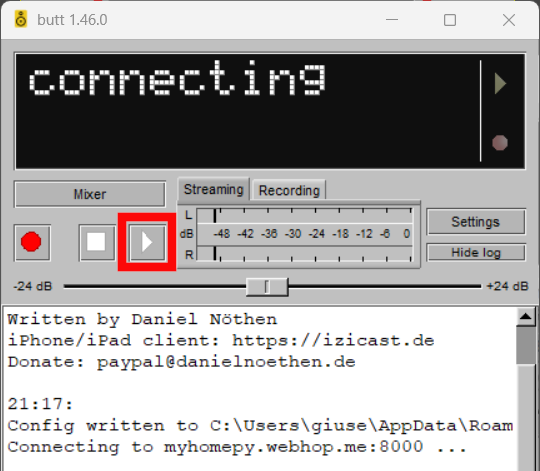
When finished, please click “Save” and go back to the BUTT home. Here you can now click the “Connect” button (highlighted in the following screenshot) to start the streaming:
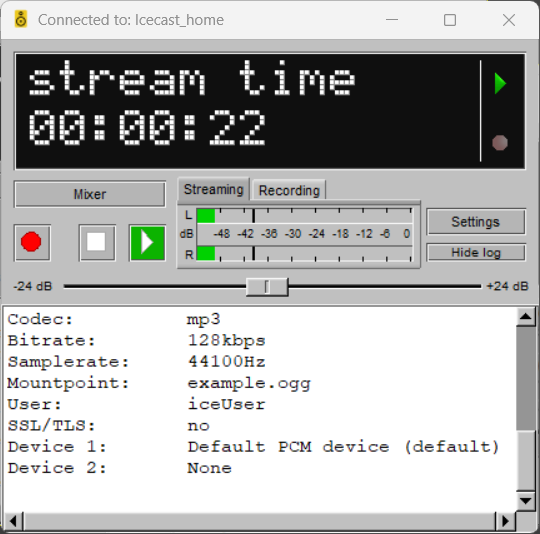
BUTT will start to stream your voice from the current microphone of your computer:
Listen to your Broadcast from Icecast2 on Raspberry PI
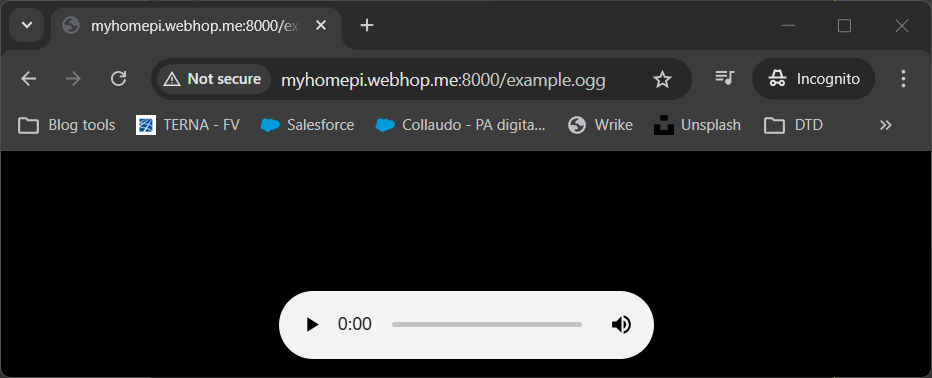
From your favourite browser, add your URL composed by domain name, port and mount-point. According to my example, it will be http://myhomepi.webhop.me:8000/example.ogg. You will find a player ready to listen:
More info about configuration and tunings can be found in Icecast2 official Docs.
Resources
- https://icecast.org/apps/
- https://danielnoethen.de/butt/
- https://icecast.org/docs/
- https://www.icecast.org/docs/icecast-trunk/config_file/
Next Steps
If you are interested in more Raspberry PI projects (both with Lite and Desktop OS), take a look at my Raspberry PI Tutorials.
Enjoy your web radio with Icecast2 and Raspberry PI!

Open source and Raspberry PI lover, writes tutorials for beginners since 2019. He's an ICT expert, with a strong experience in supporting medium to big companies and public administrations to manage their ICT infrastructures. He's supporting the Italian public administration in digital transformation projects.
![]()
![]()
![]()
![]()
![]()
![]()
![]()


