Last Updated on 26th May 2023 by peppe8o
In this tutorial, I’m going to show you how to install and use NEMS on Raspberry PI, also showing how to add a simple monitoring task.
Home systems and small office server failures can be annoying when you rely on their availability and realize that they aren’t working only when you need them.
For similar reasons, big companies (which can get economic damages from outages) adopted complex monitoring systems able to check service status and activate support groups on failures.
What ordinary people don’t know is that one of the most powerful monitoring systems available on the market is an open-source software: Nagios. It is so spread in ICT Field that it forked in a version dedicated to single board computers (NagiosPI), on which the NEMS server adds very useful GUIs.
What is NEMS
NEMS is the Nagios Enterprise Monitoring Server, a project of Category5 TV. It is a sophisticated, ready-to-use monitoring distro for single board computers (SBCs), designed to include all the software needed to run Nagios on the Raspberry Pi and other microcomputers in a single distribution image like those from ODROID or PINE64. Evolved to include enterprise builds for VMWare ESXi, Amazon Web Services’ EC2, Docker and more, it features a modern, self-hosted browser-based UI, and countless extras. At its core, NEMS is a lightweight Debian deployment optimized for performance, reliability and ease of use.
What You Need
As usual, I suggest adding from now to your favourite e-commerce shopping cart all the needed hardware, so that at the end you will be able to evaluate overall costs and decide if to continue with the project or remove them from the shopping cart. So, hardware will be only:
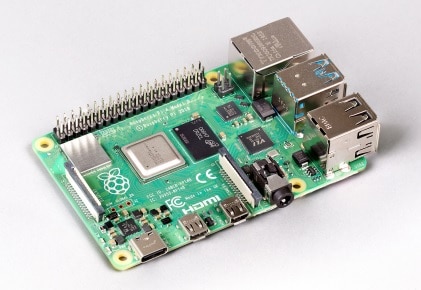
- a Raspberry PI computer board (including proper power supply or using a smartphone micro USB charger with at least 3A)
- high speed micro SD card (at least 16 GB, at least class 10). Consider that the raw OS will use about 5GB of space, so 8GB SD Cards may be a bit too small when you will start logging several devices
You will also need an ethernet cable for the first boot because NEMS OS hasn’t a WiFi pre-configuration procedure and because it suggested using a wired connection.
Step-by-Step Procedure
Preparing SD Card
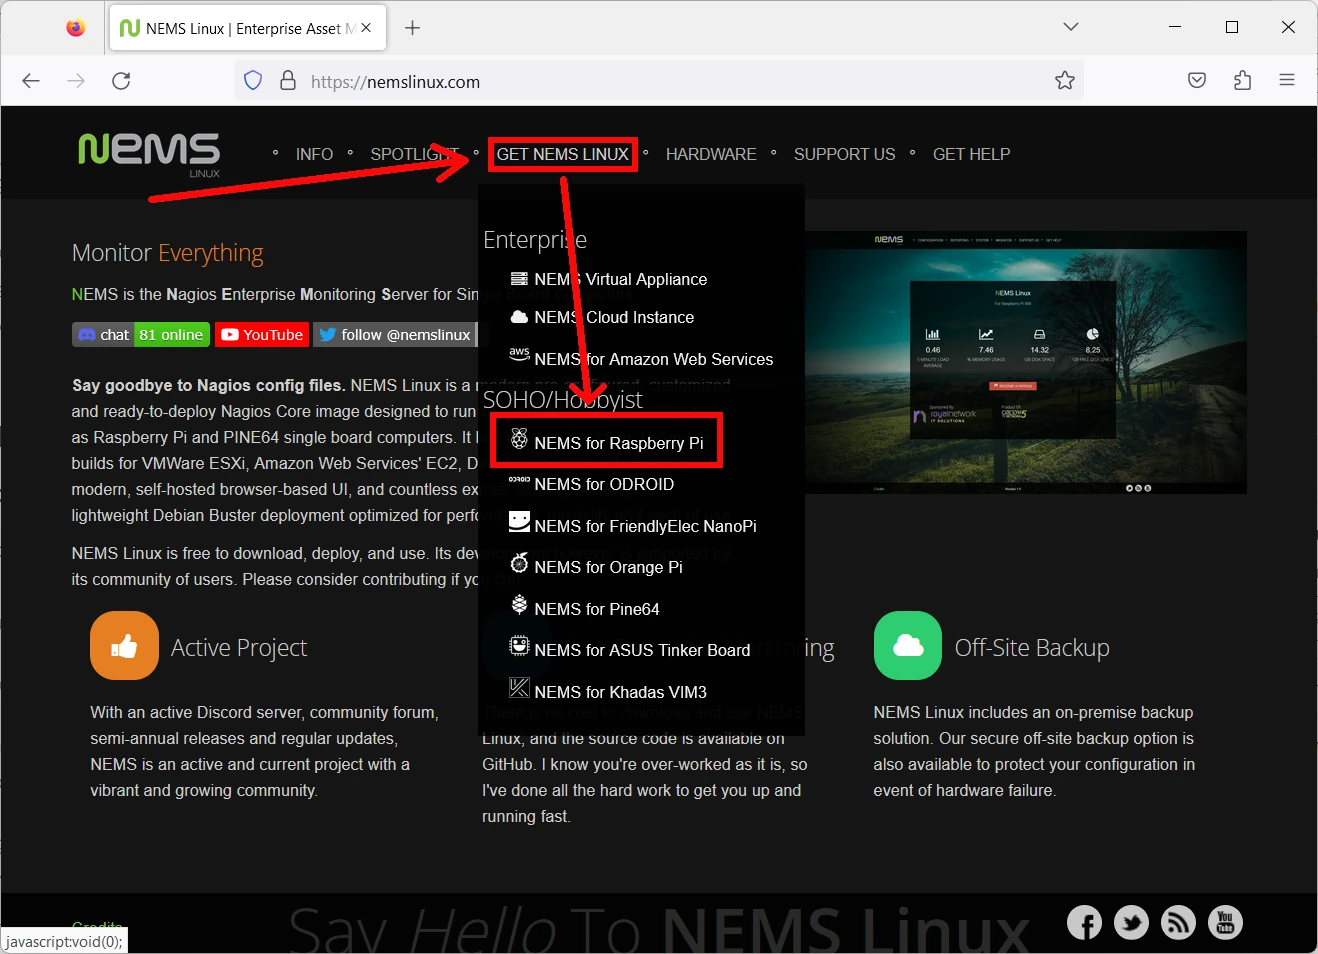
First of all, get the latest version of the OS image. From NEMS Linux home page select GET NEMS LINUX from the top main menù and click “NEMS for Raspberry PI”.
Scroll the page to the bottom and choose your favourite download type (direct or torrent).
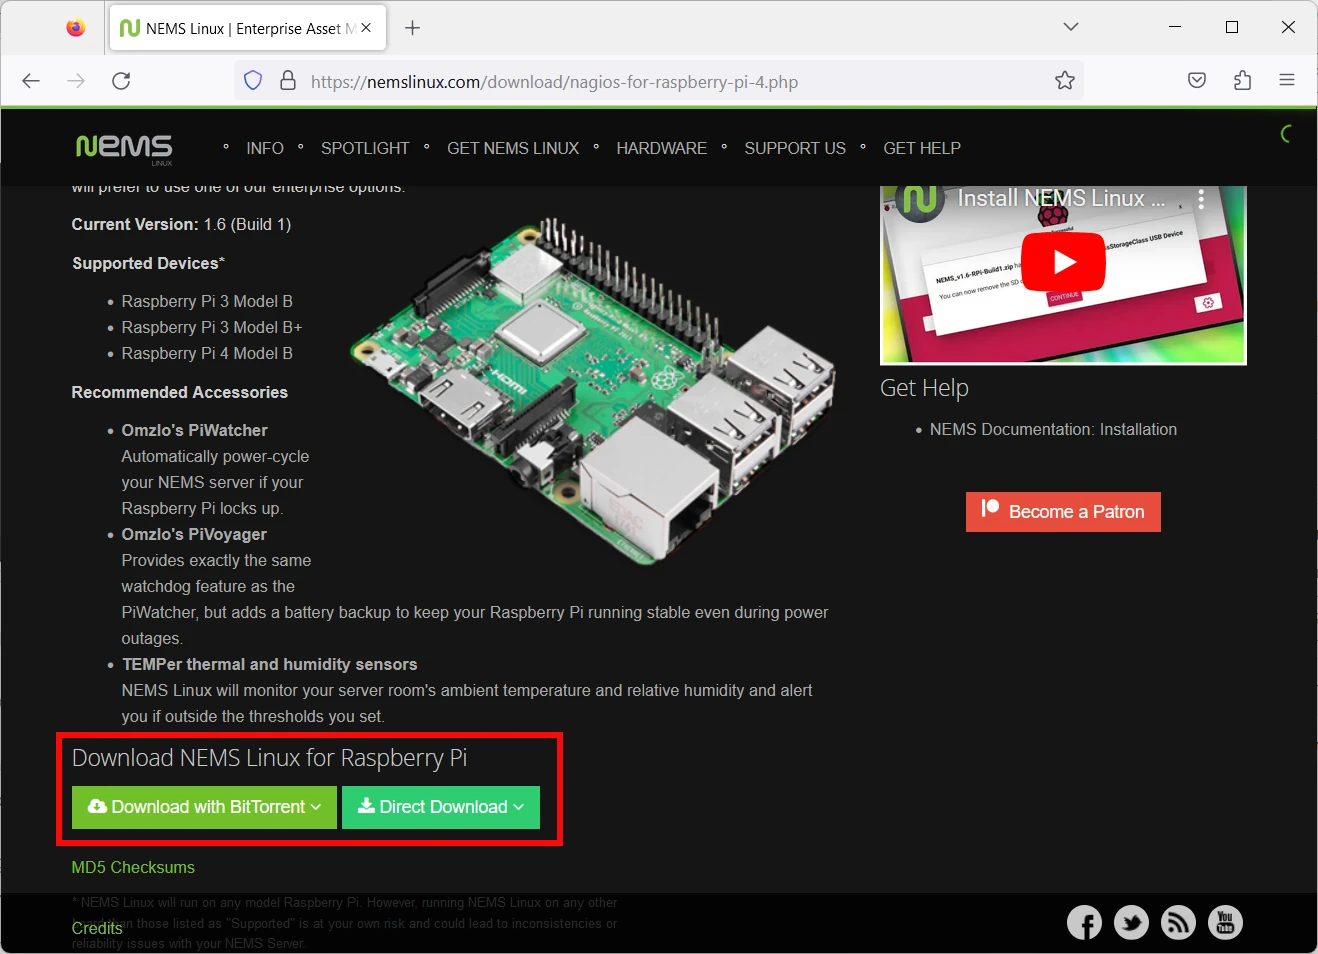
You will get a “.zip” file which includes the “.img” operating system image but, usually, there is no need to extract it for flashing.
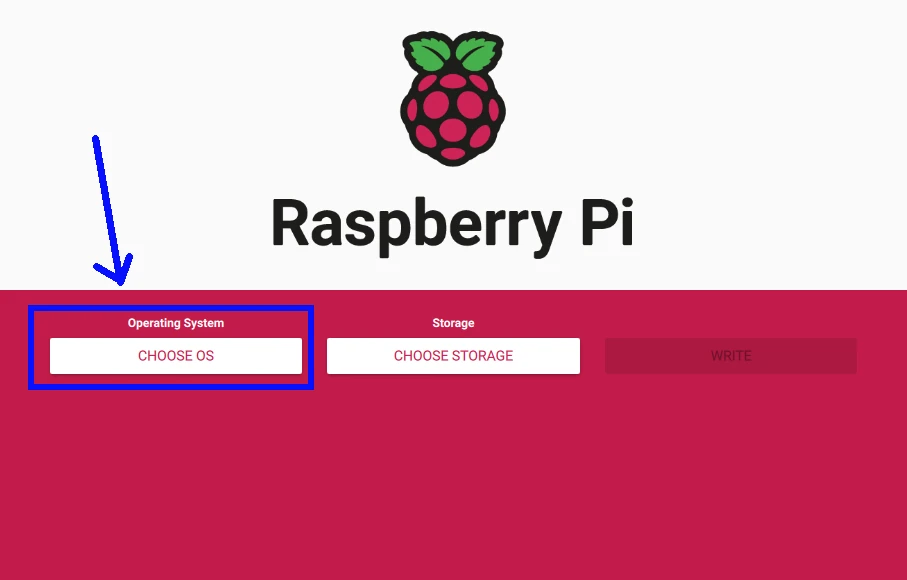
Flash the image to your SD card with your favourite software. If you use the Raspberry PI Imager, open it (in Windows, please run it with administrative permissions). Please click the “Choose OS” button:
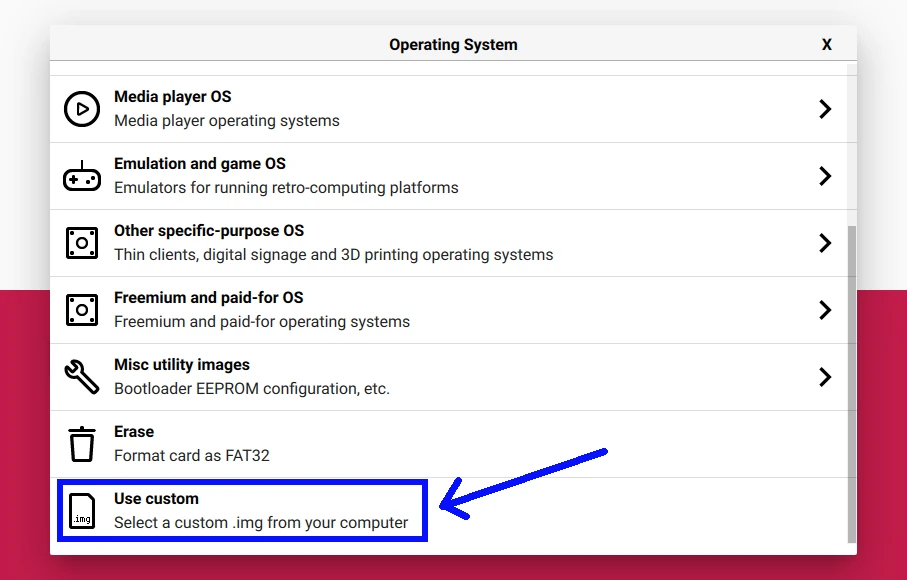
Scroll down and select “Use Custom” option:
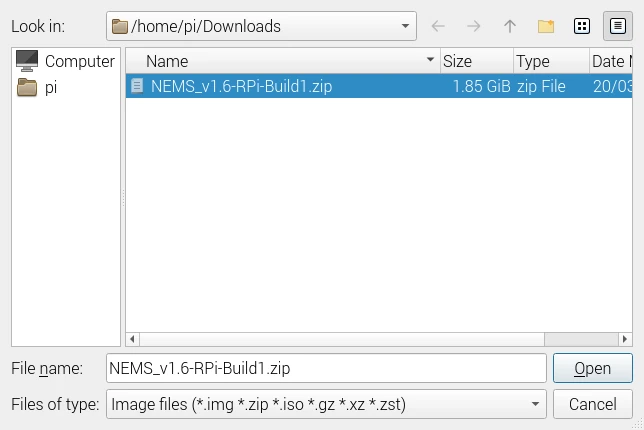
Select the downloaded image of NEMS:
Now that your OS image is
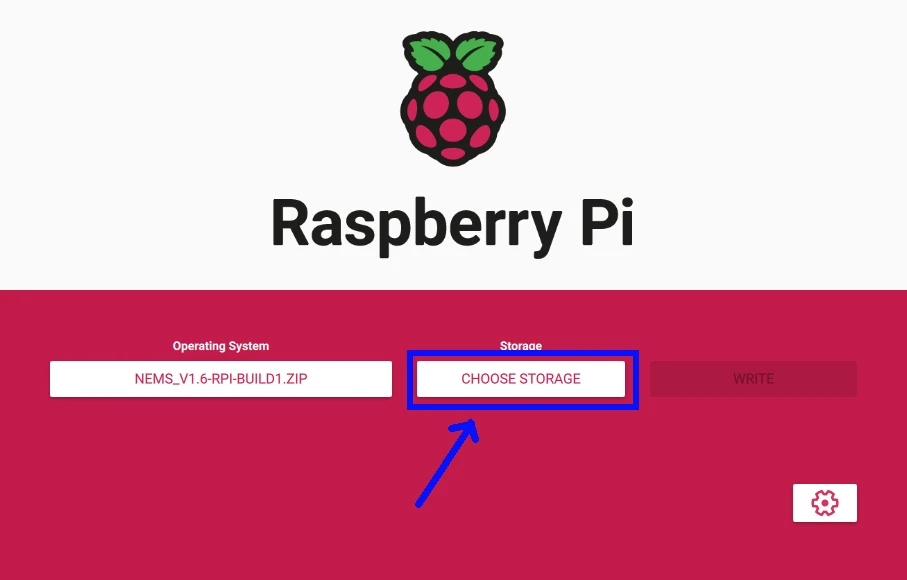
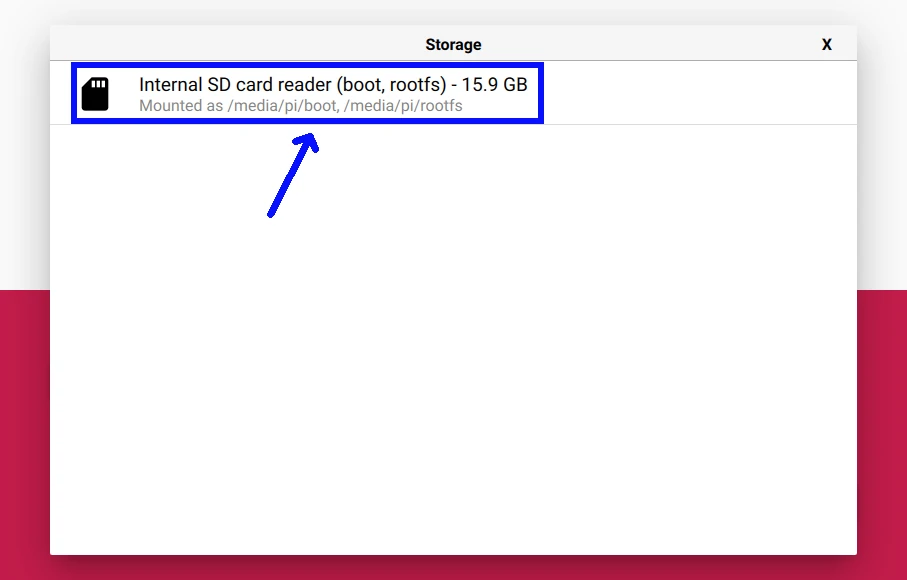
If not already done, you can plug the micro SD card in your PC where the flashing software is installed and please select it:
When using custom images, I also suggest using the Raspberry PI Imager with the Advanced Options empty. This can save your life as in some particular cases these options that work with the default Raspberry PI OS could make custom OSes not boot. So, open the Advanced Settings from the related button:
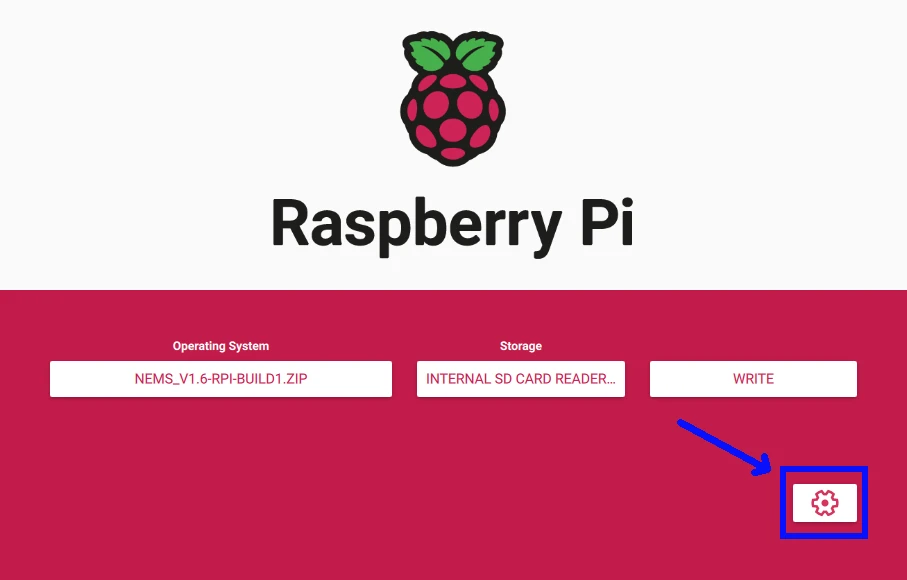
And check that all the fields are empty:
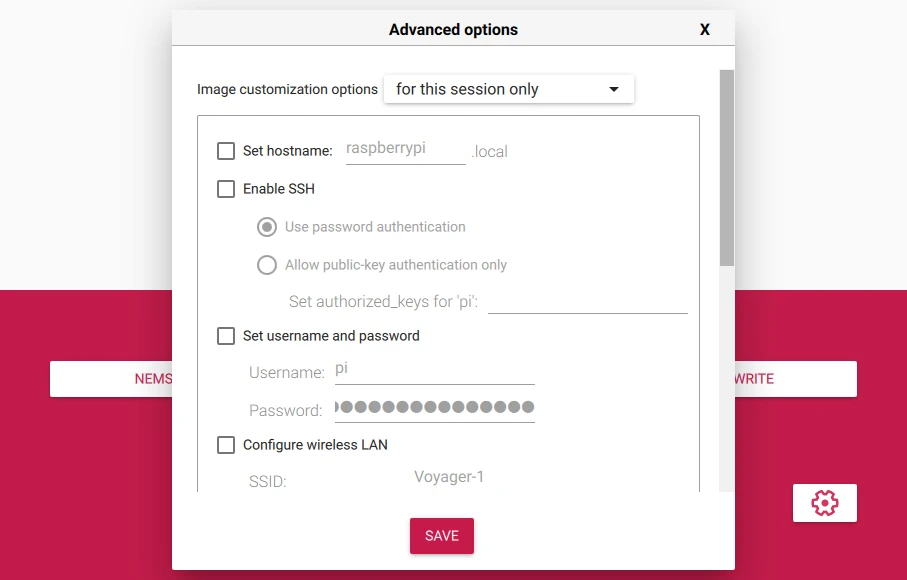
After saving, you can now proceed with the “Write” button and wait for the image flashing to be completed. Then, insert the micro SD card in your Raspberry PI, connect the ethernet cable and power it on.
Connecting NEMS Dashboard
The first time you power on your Raspberry PI, NEMS will automatically resize its filesystem to fill your SD card and reboot. So, it is better to wait a few minutes before log-in (only on the very first boot).
Identify your Raspberry PI IP address (consider that the default hostname will be nems.local). Mine is 192.168.1.94, so you will use your one instead of mine.
From your favourite browser, connect to your Raspberry PI address:
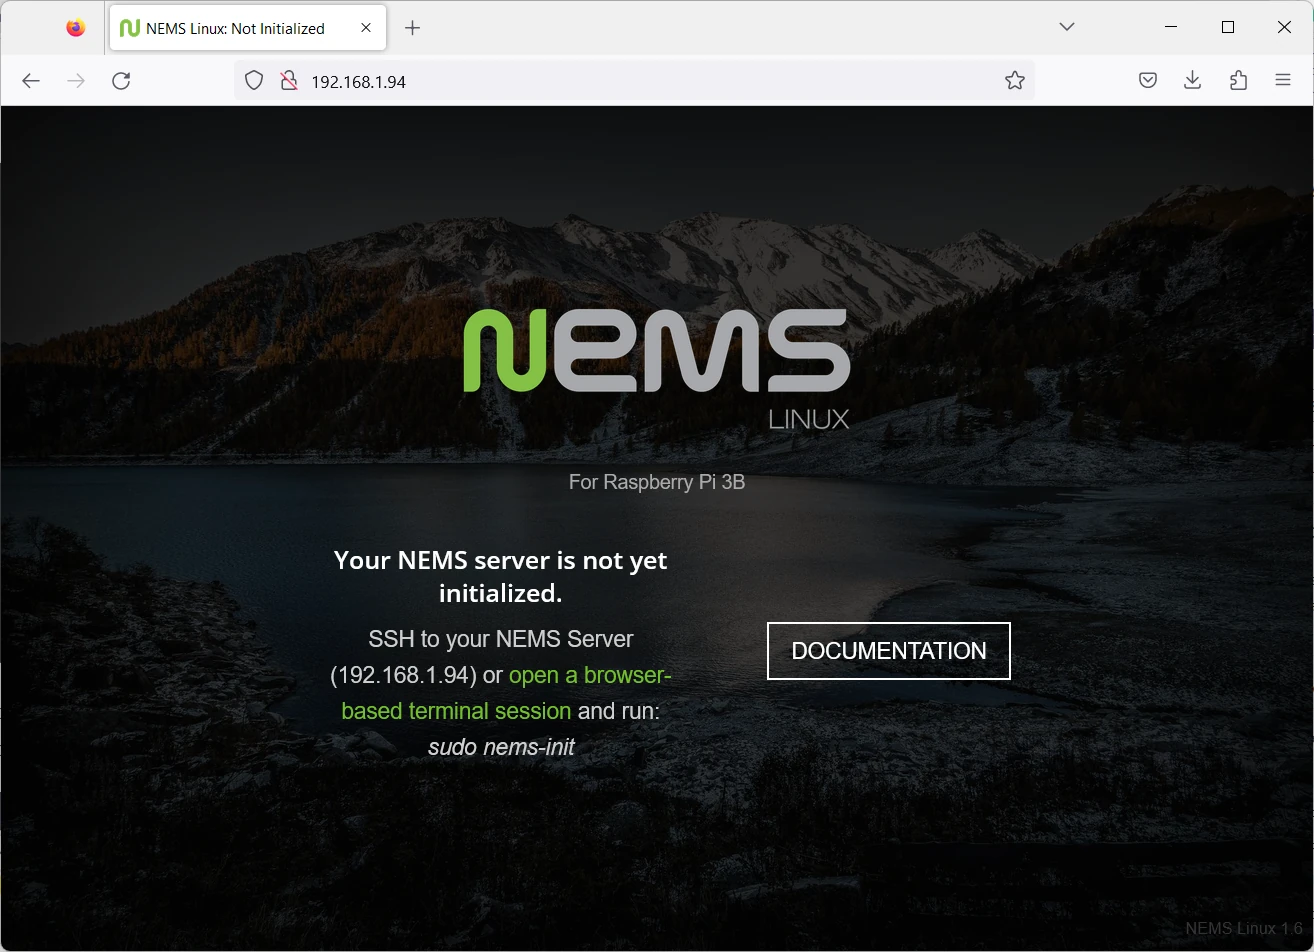
Click “open a browser-based terminal session”. You may have a security warning because this url doesn’t use a certificate:
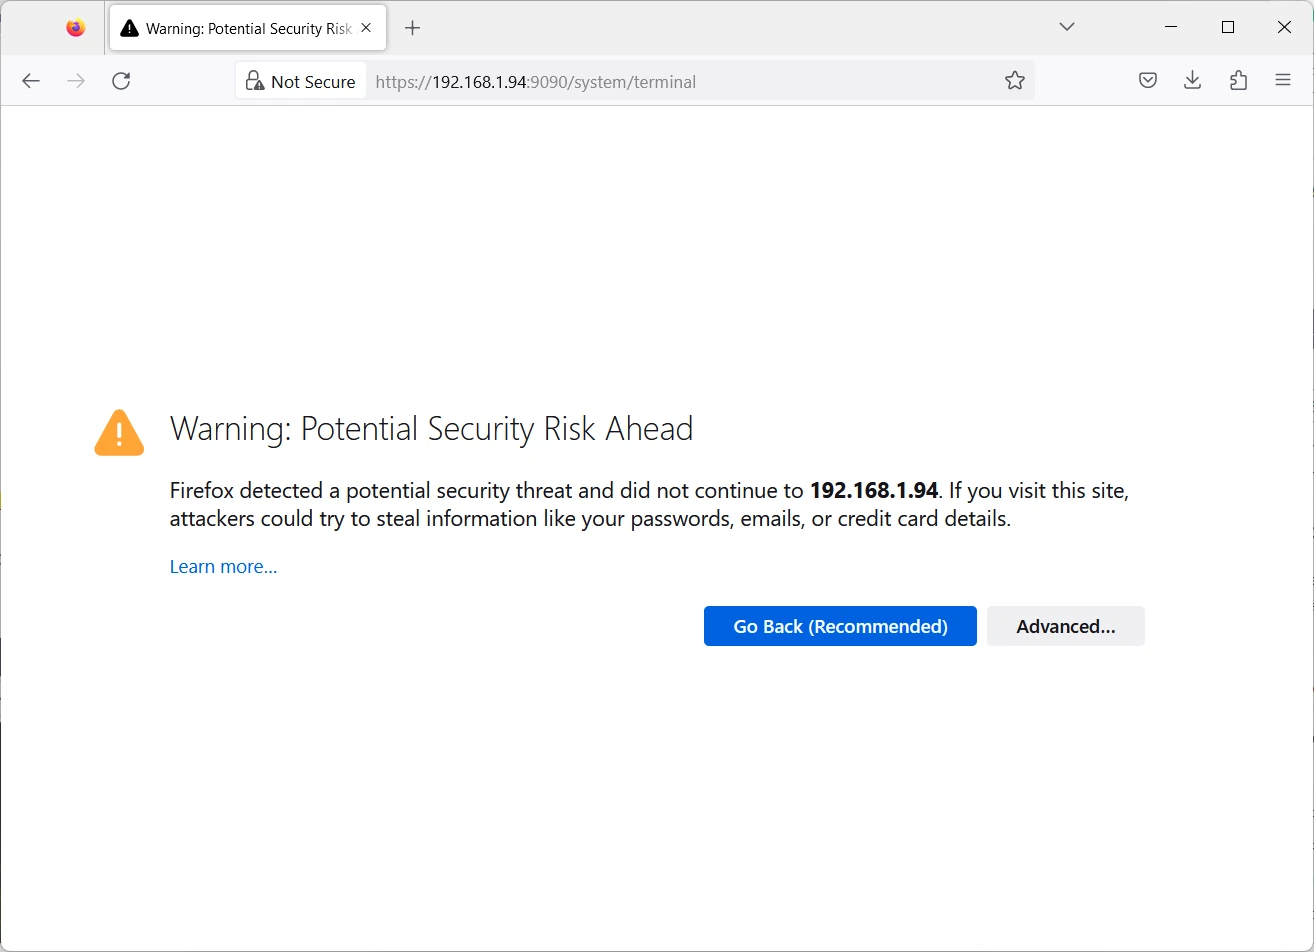
This screen may vary depending on your browser. As this is your Raspberry PI address and you’re in your local network, go to “Advanced” and click “Accept the risk and continue”. The NEMS login page will be shown:
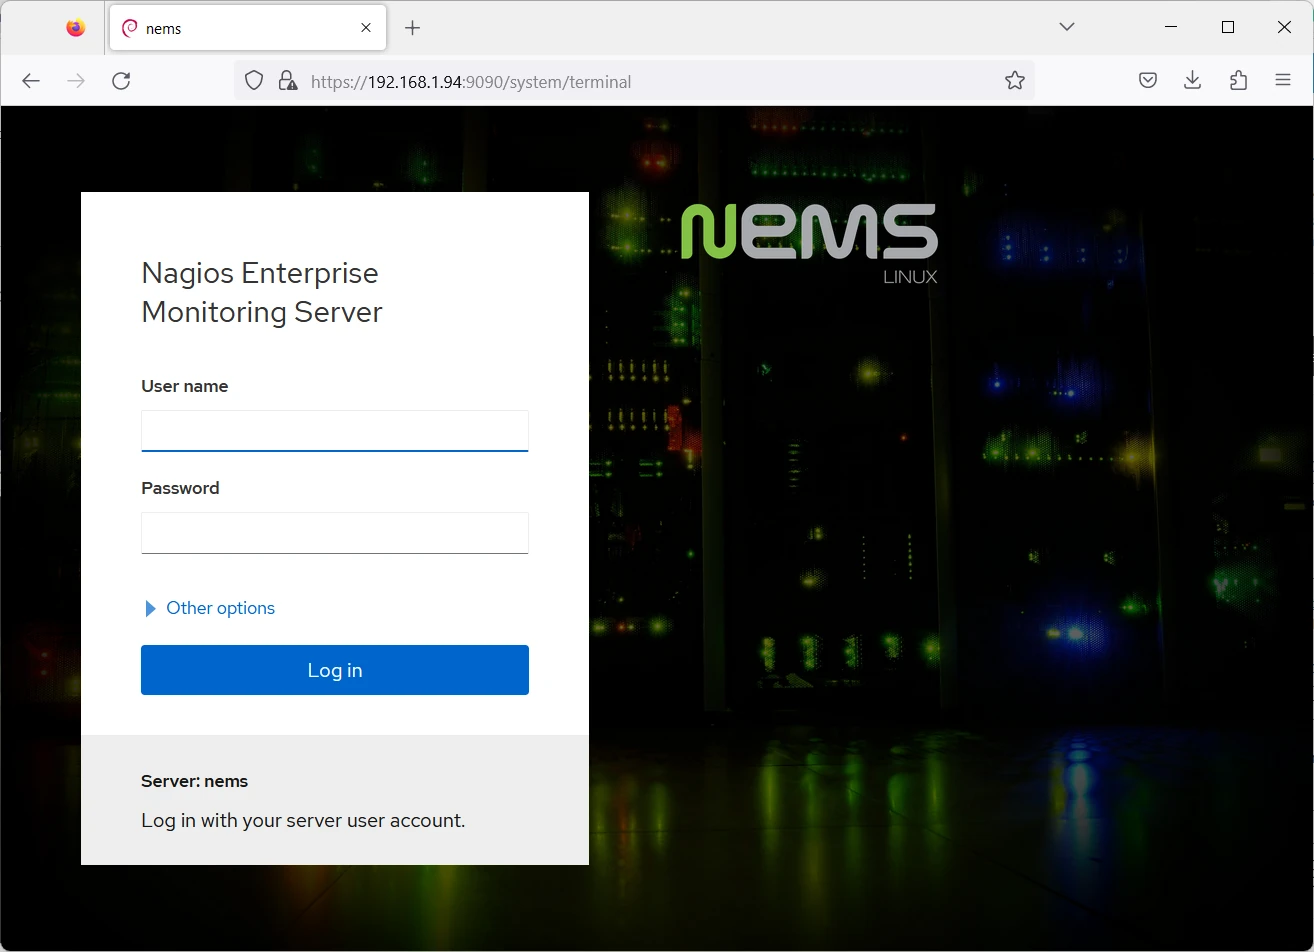
Use default NEMS user credentials:
- use: nemsadmin
- password: nemsadmin
This default user/password will be the same also for SSH connections. Click the “Log In” button. A terminal session appears now:
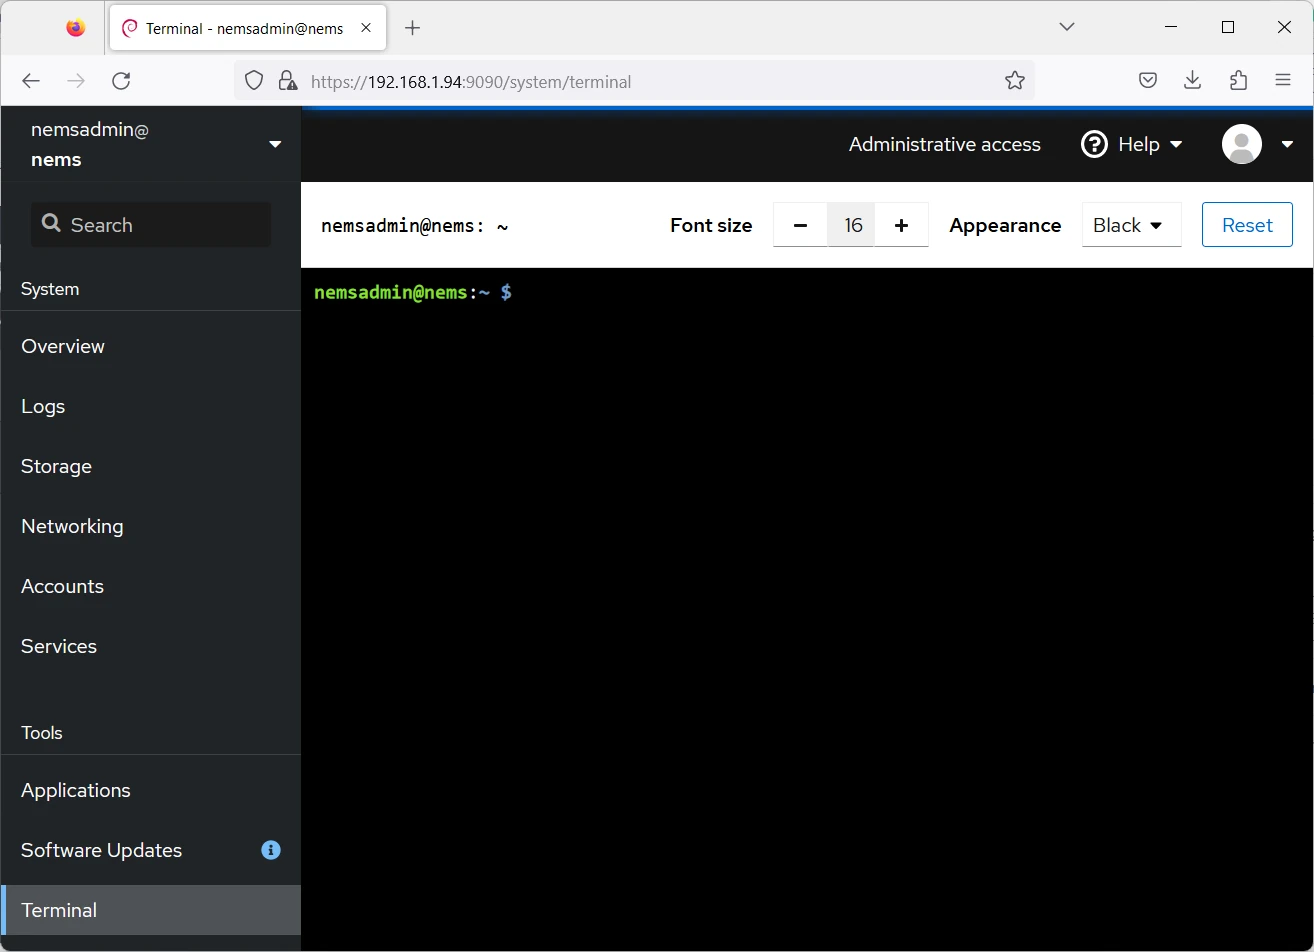
In this session, type the command:
sudo nems-initThe following steps will help in the initial configuration. It will start with the timezone selection:
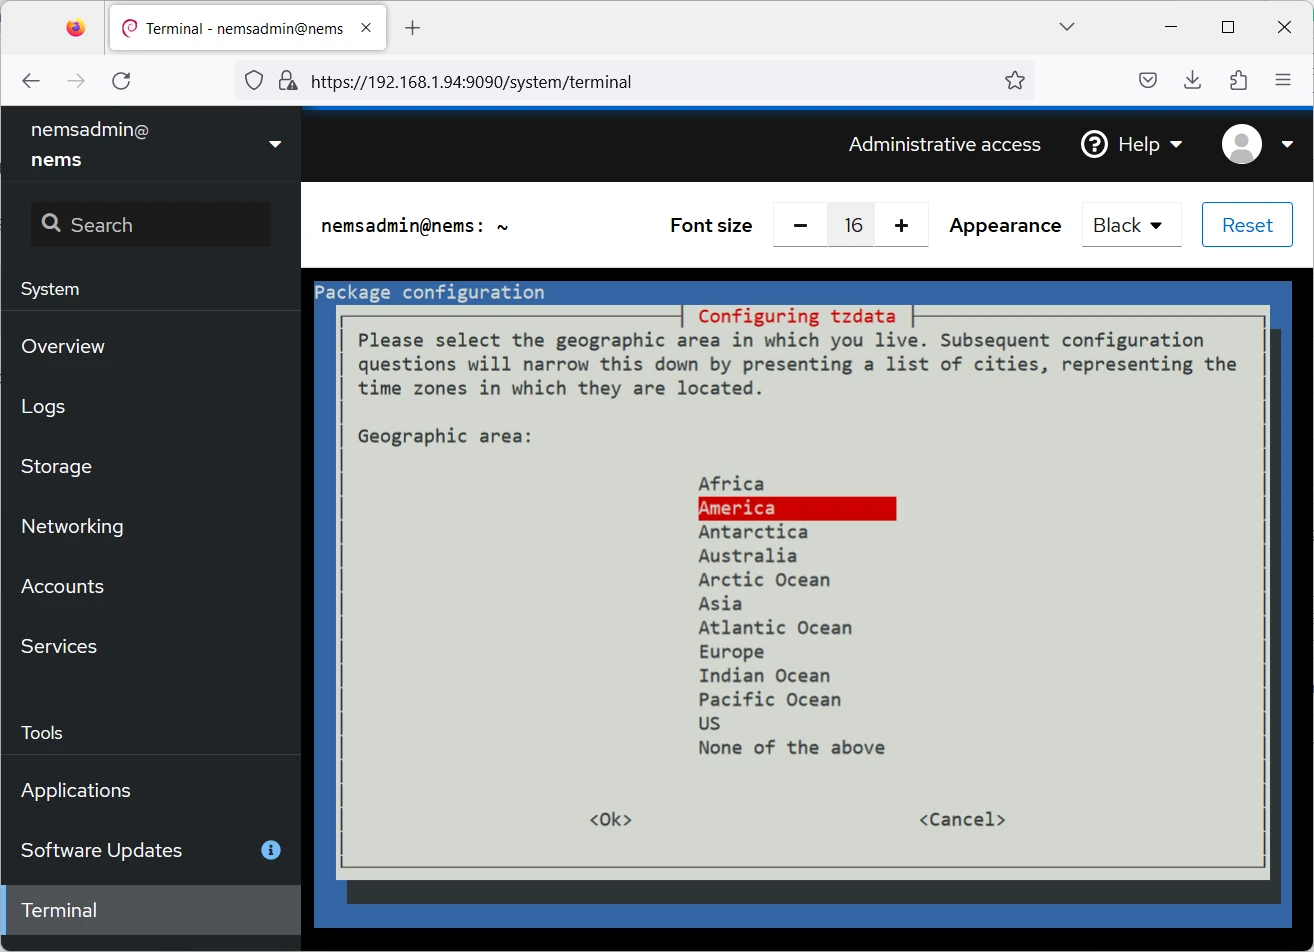
Select your one with up/down arrow keys and go to OK with the tab key, then confirm. The next screen will allow configuring your city:
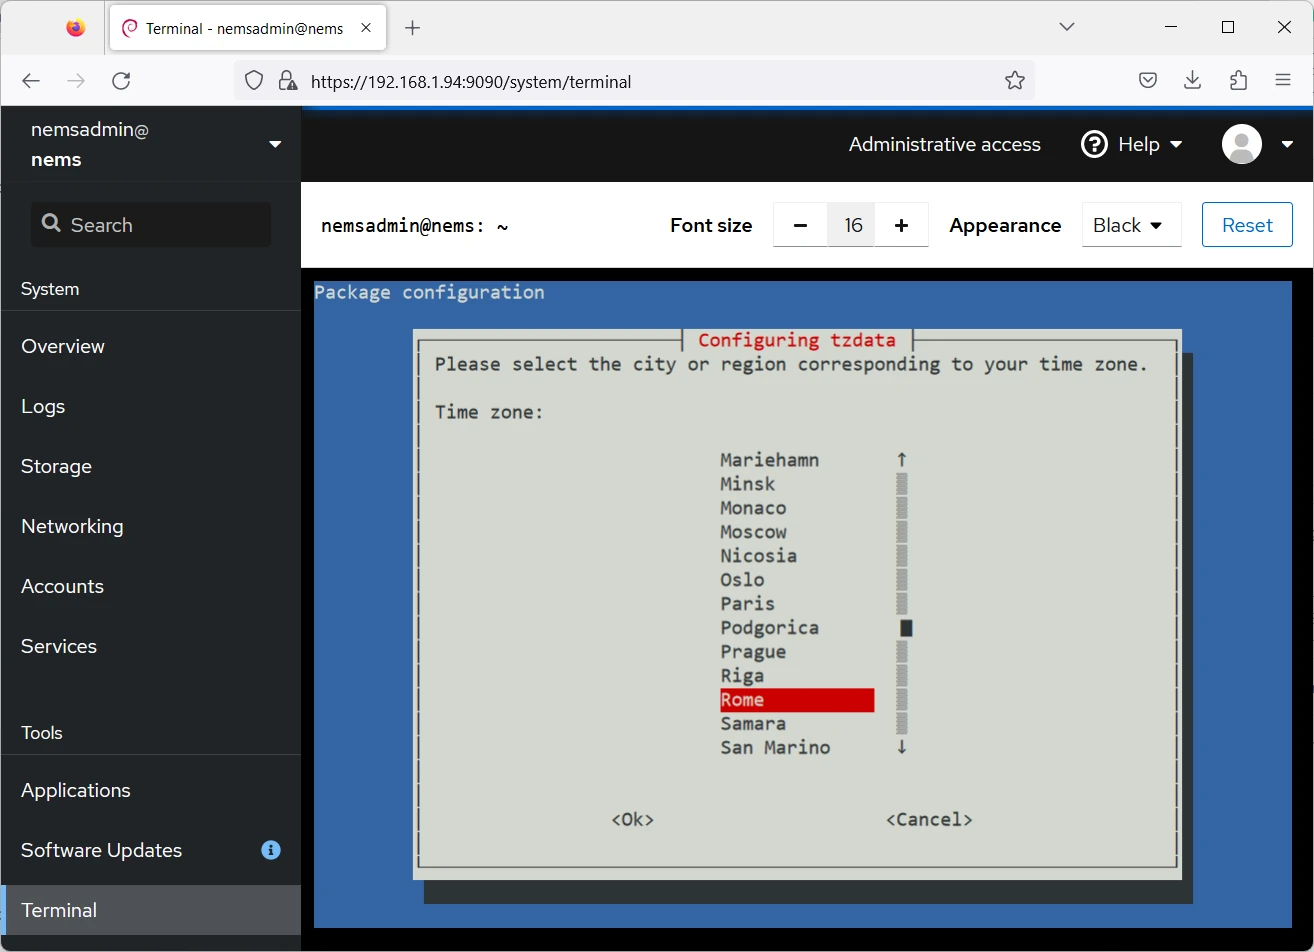
Select your one and push Ok. The next screen will let you choose what locales to generate. You can select your one or go directly to “Ok” and confirm with the next default ones (en_US.UTF-8).
Now NEMS asks you to create a user (with your favourite credentials) that will take the place of the less secure default user with the default password. Please write your username:
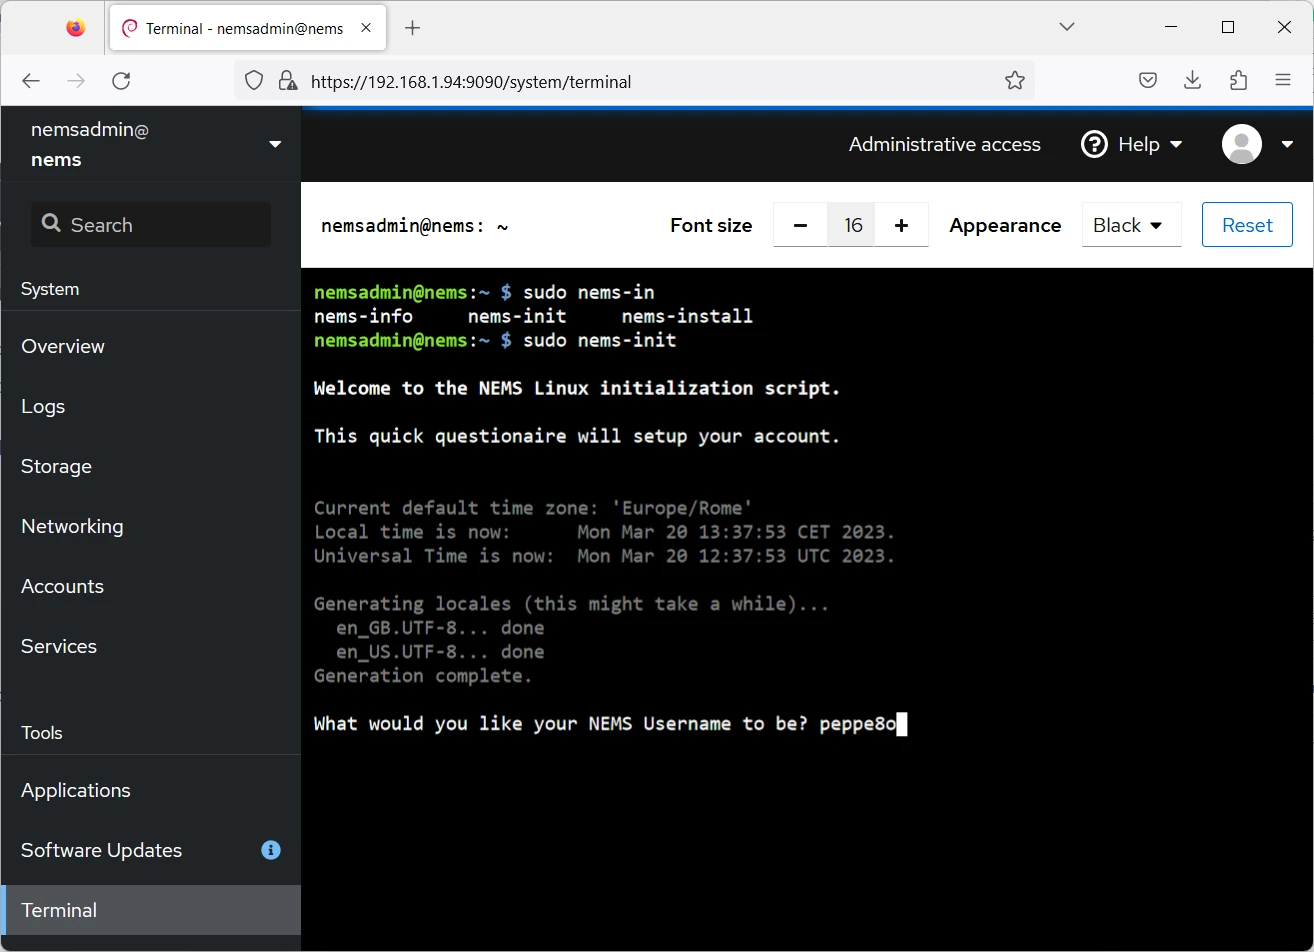
and your password (twice):
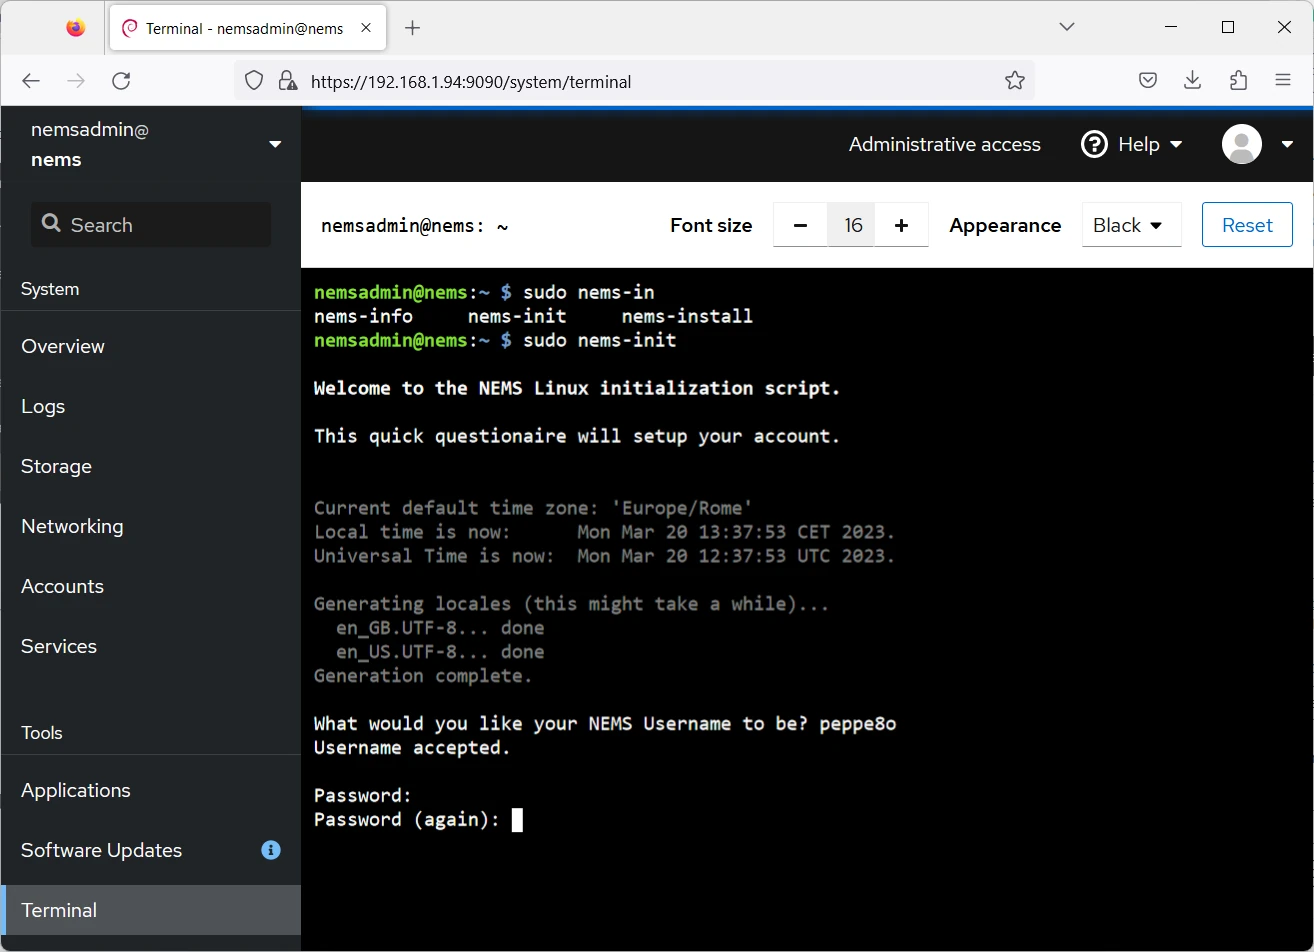
In the following question, you can also set the email address where to send notifications.
Removing the default user will cause a disconnection of the current user (no more existing):
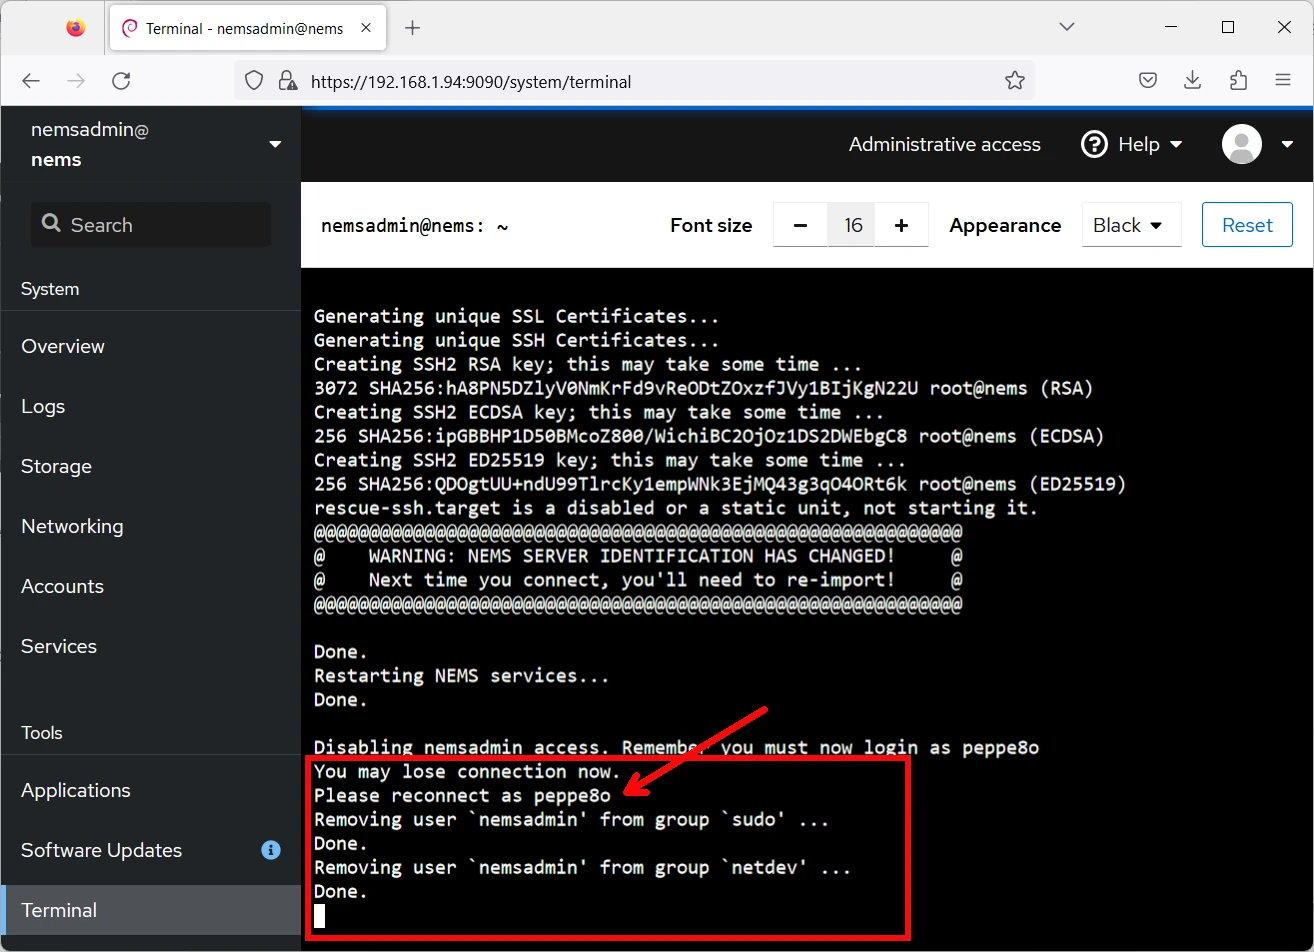
The NEMS initialization has been completed.
Main NEMS Pages
After NEMS installation and initialization, you have to go back to the home page by using only the Raspberry PI IP address as URL in your browser (removing subdirectories from the URL):
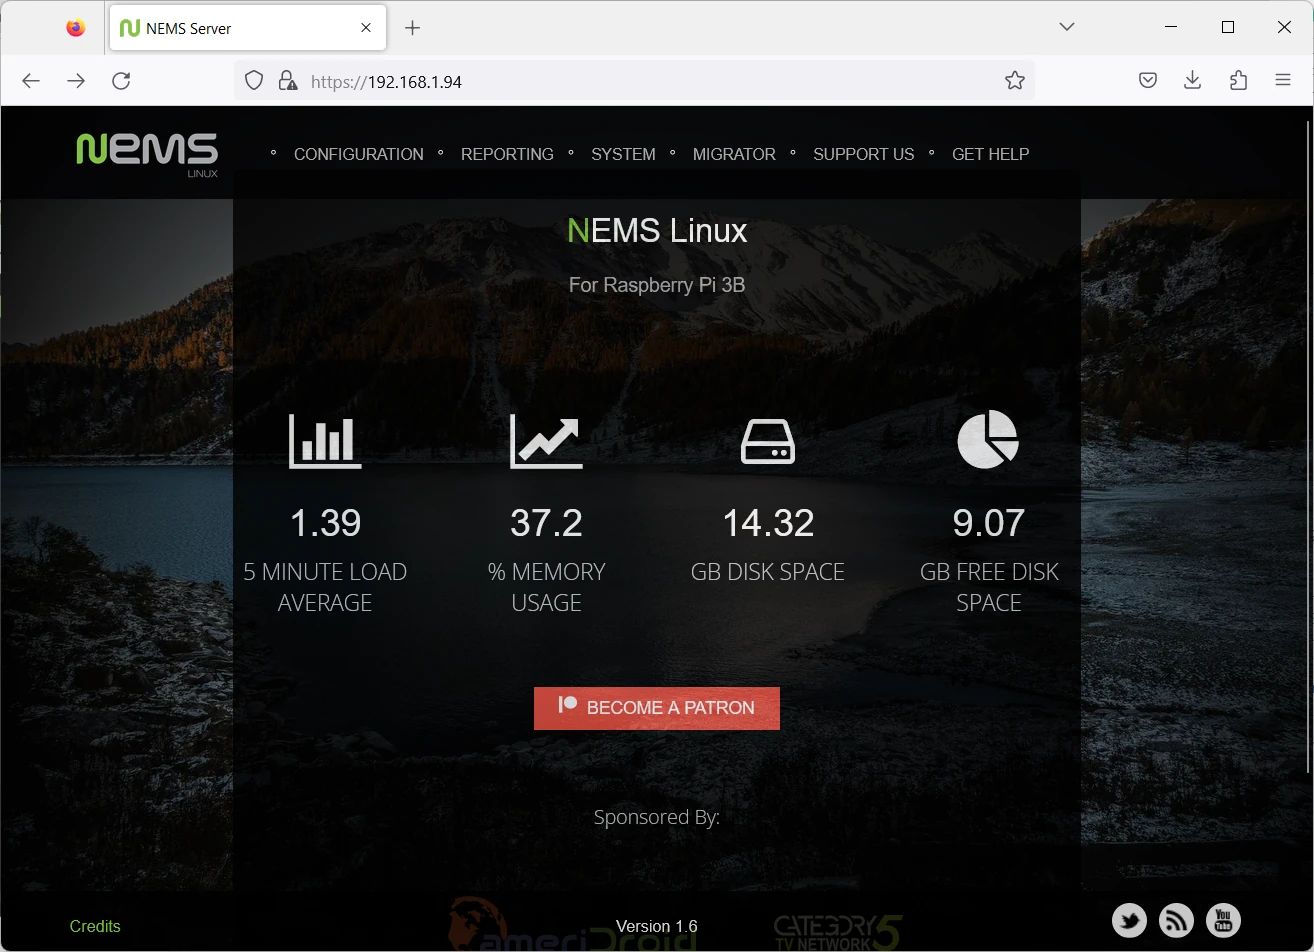
This page shows the Raspberry PI main system parameters. You can find here, in the top menù, a list of internal links that will give you configuration and/or reporting access by requiring your credentials (if you are logged out).
Configuration Page
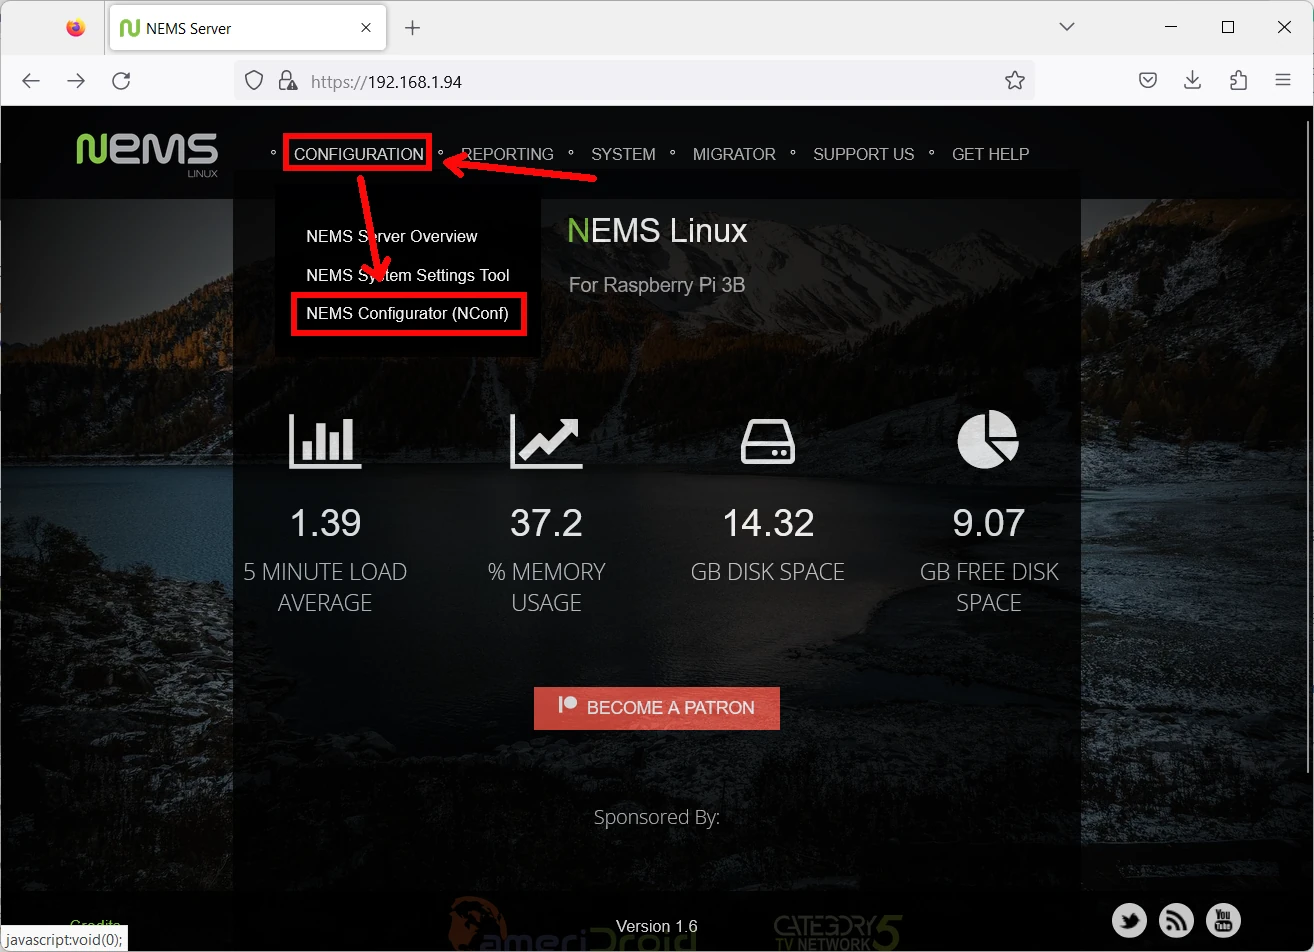
From the home page, you can reach a very important page: NEMS Configurator (NConf). Available from the “CONFIGURATION” main menu, it is used to add hosts and services and to configure your monitoring tasks:
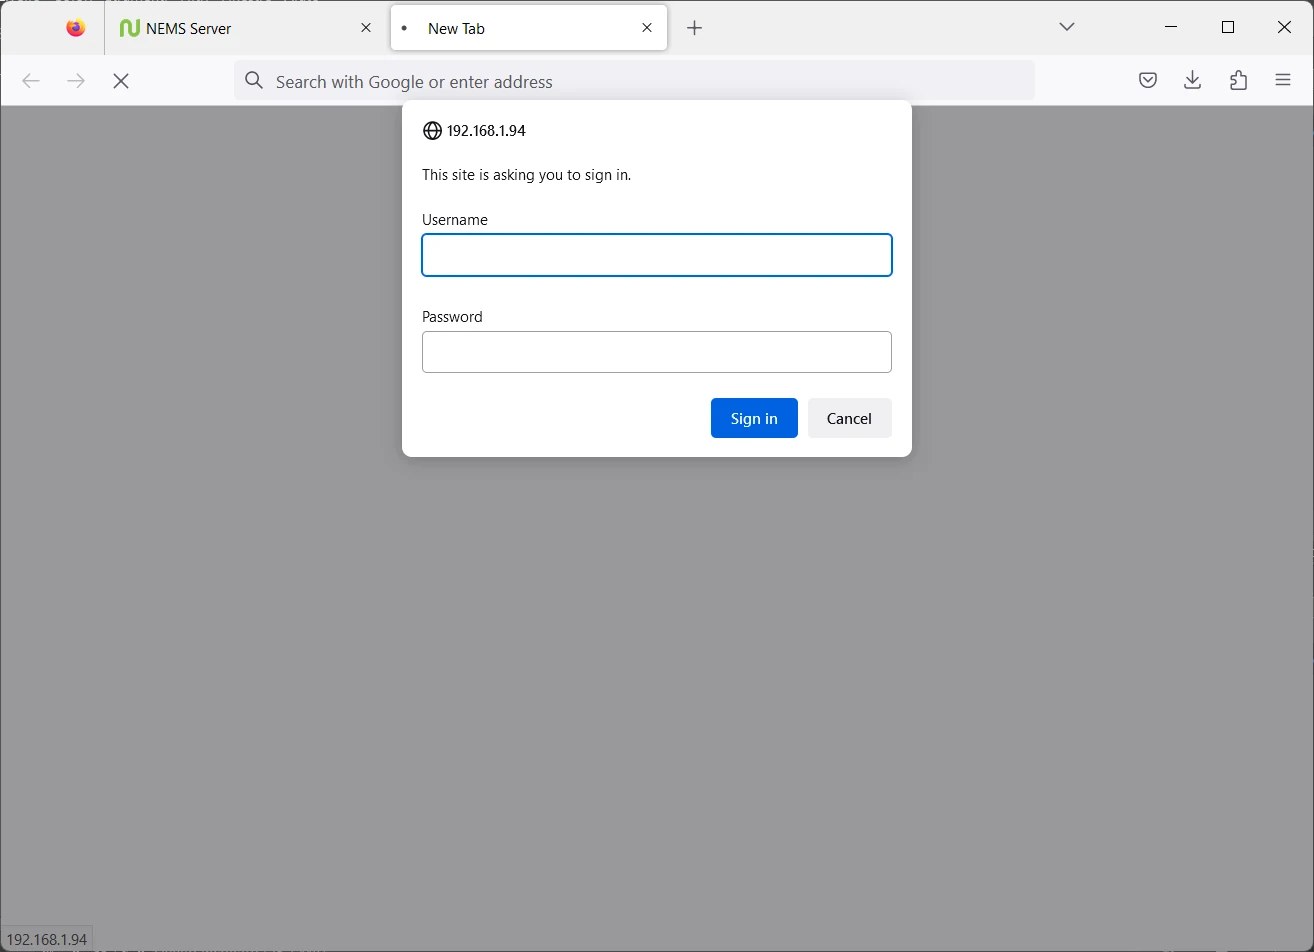
As we’ve been disconnected after providing the new credentials in our initialization step, we’ll be required to enter the username and password:
So, we’ll reach the NConf page, from where you can add/show devices, services and so on:
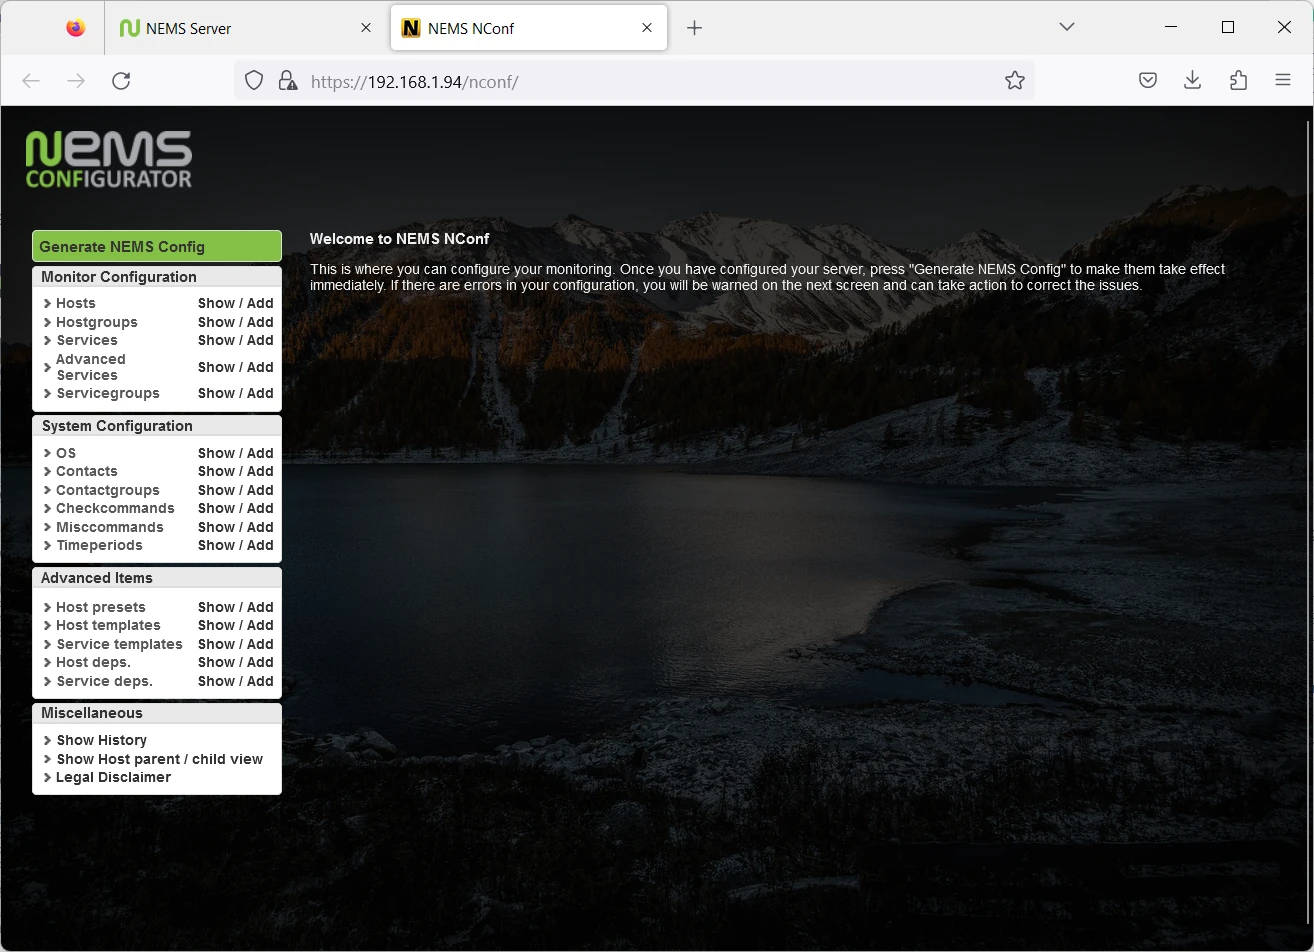
In the following chapters, please remember that each new configuration needs a “deploy” action to be alive.
Reporting Pages
Another important part of the NEMS home page is the “REPORTING” section:
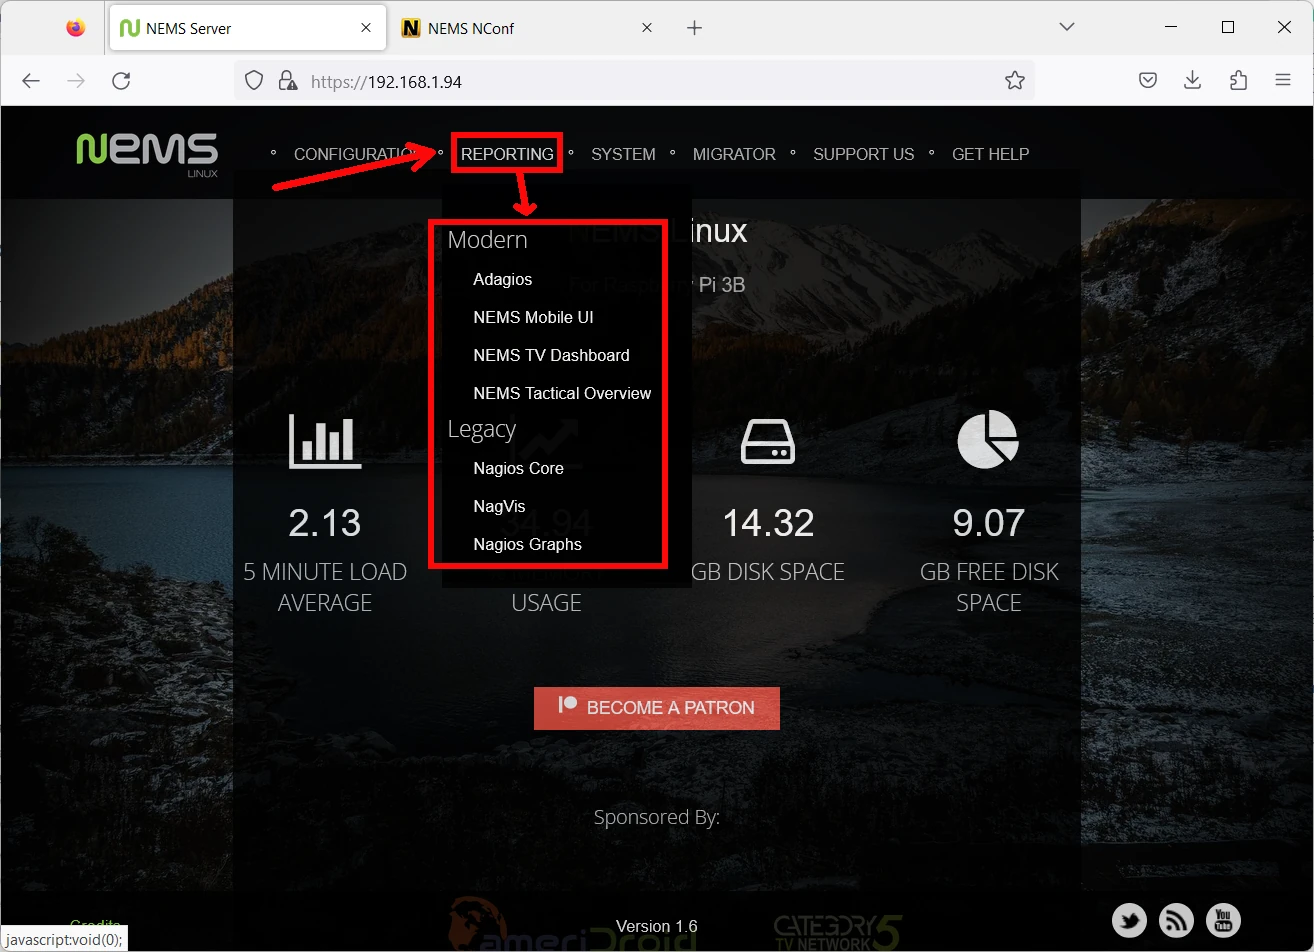
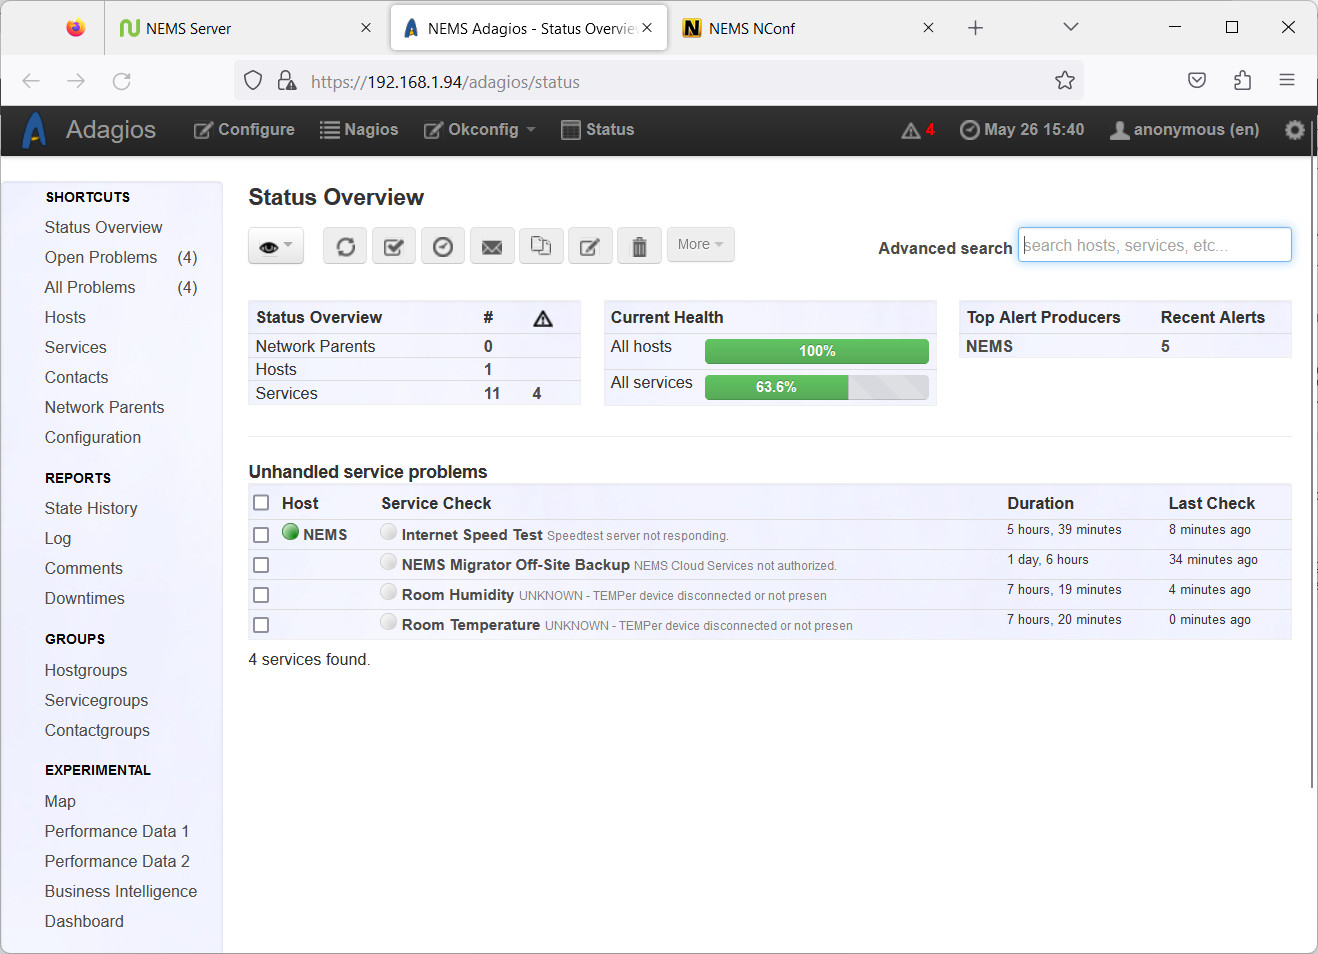
From here you can select your favourite reporting dashboard, like Adagios:
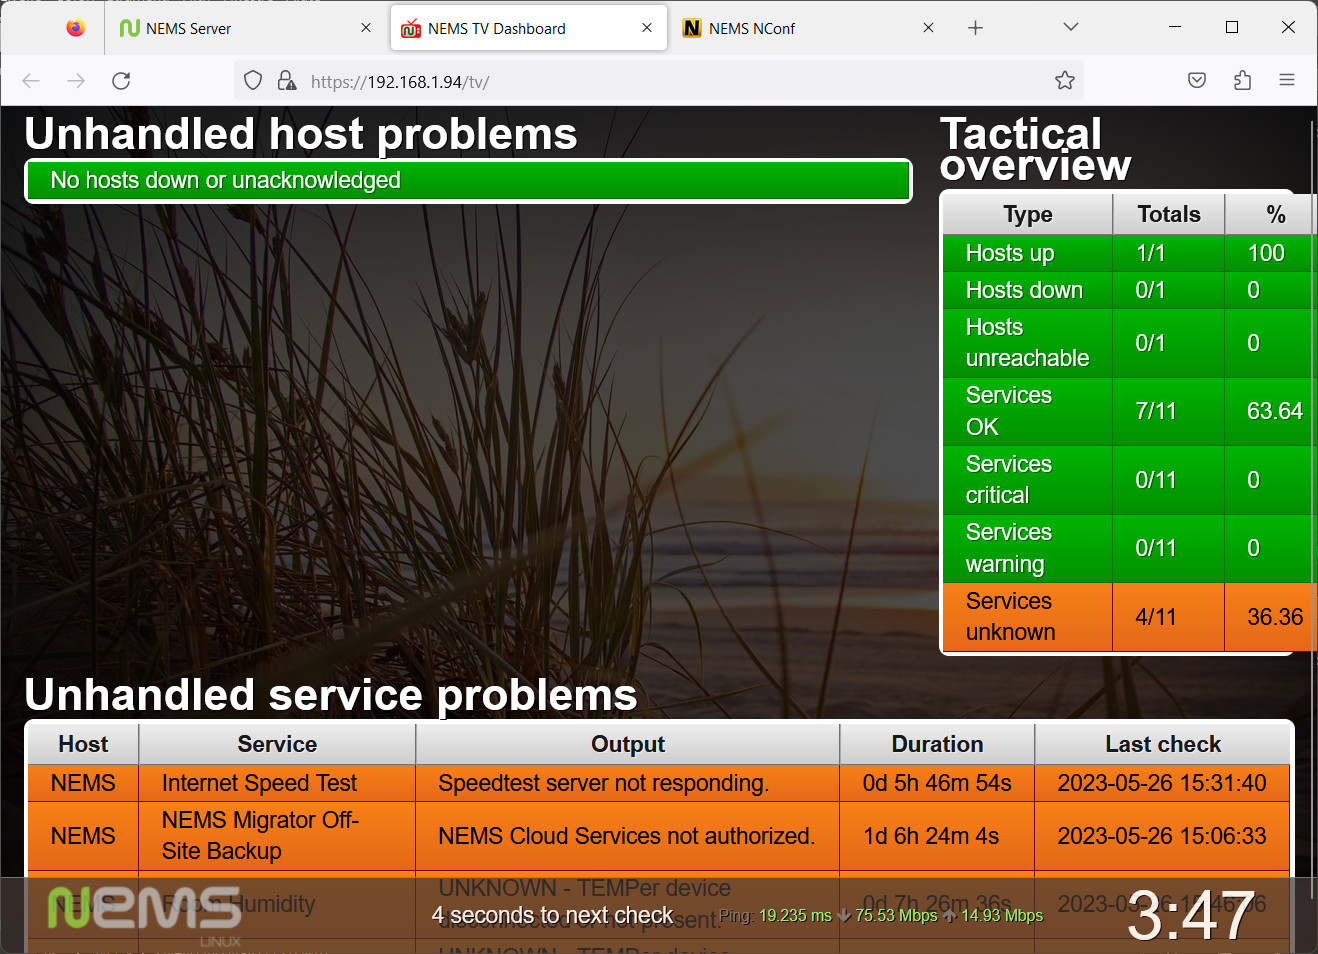
The Nagios TV Dashboard:
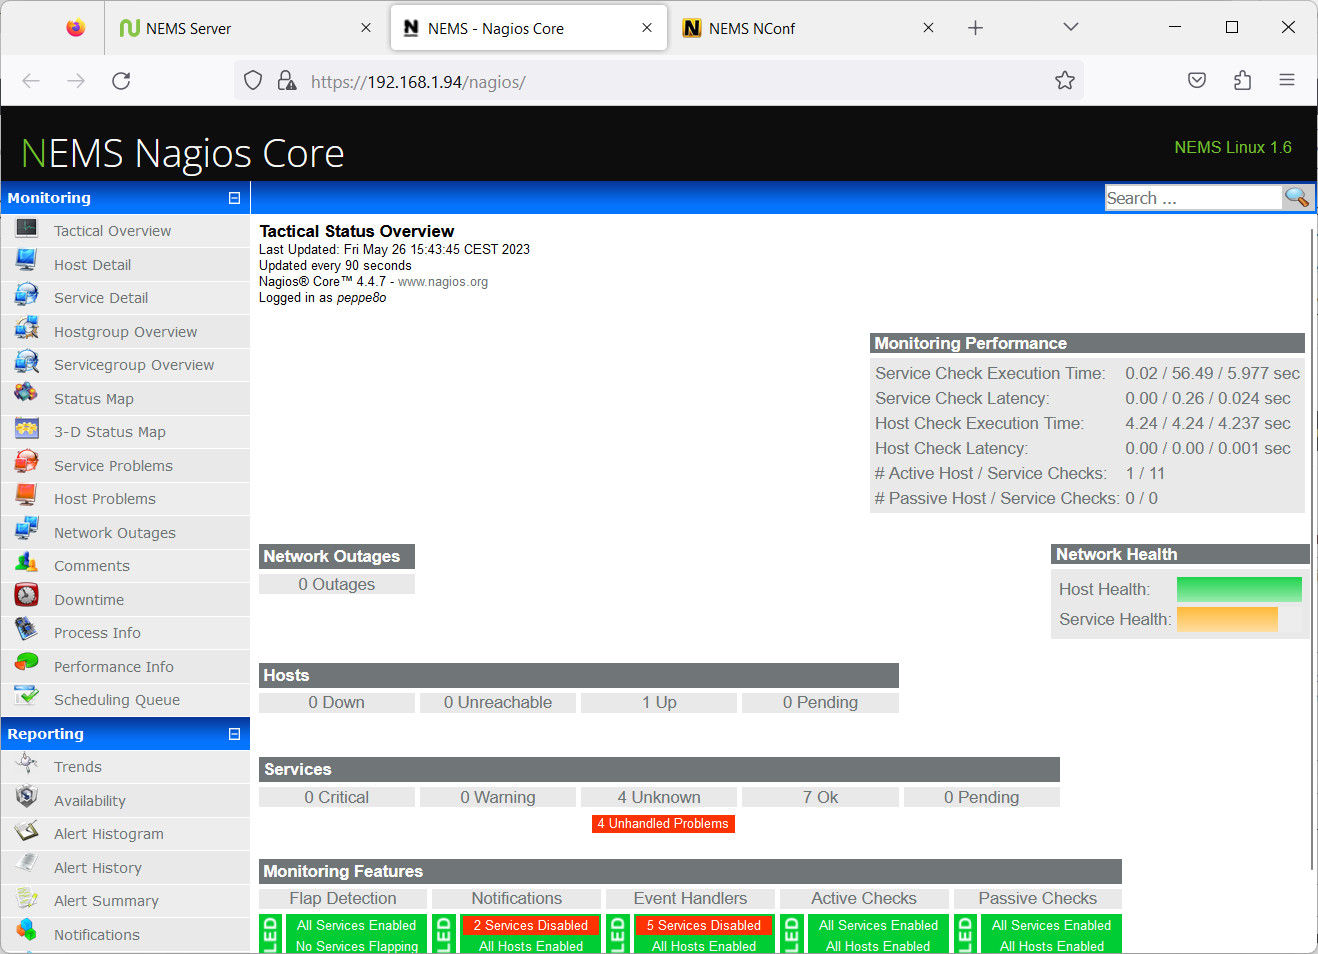
Nagios Core:
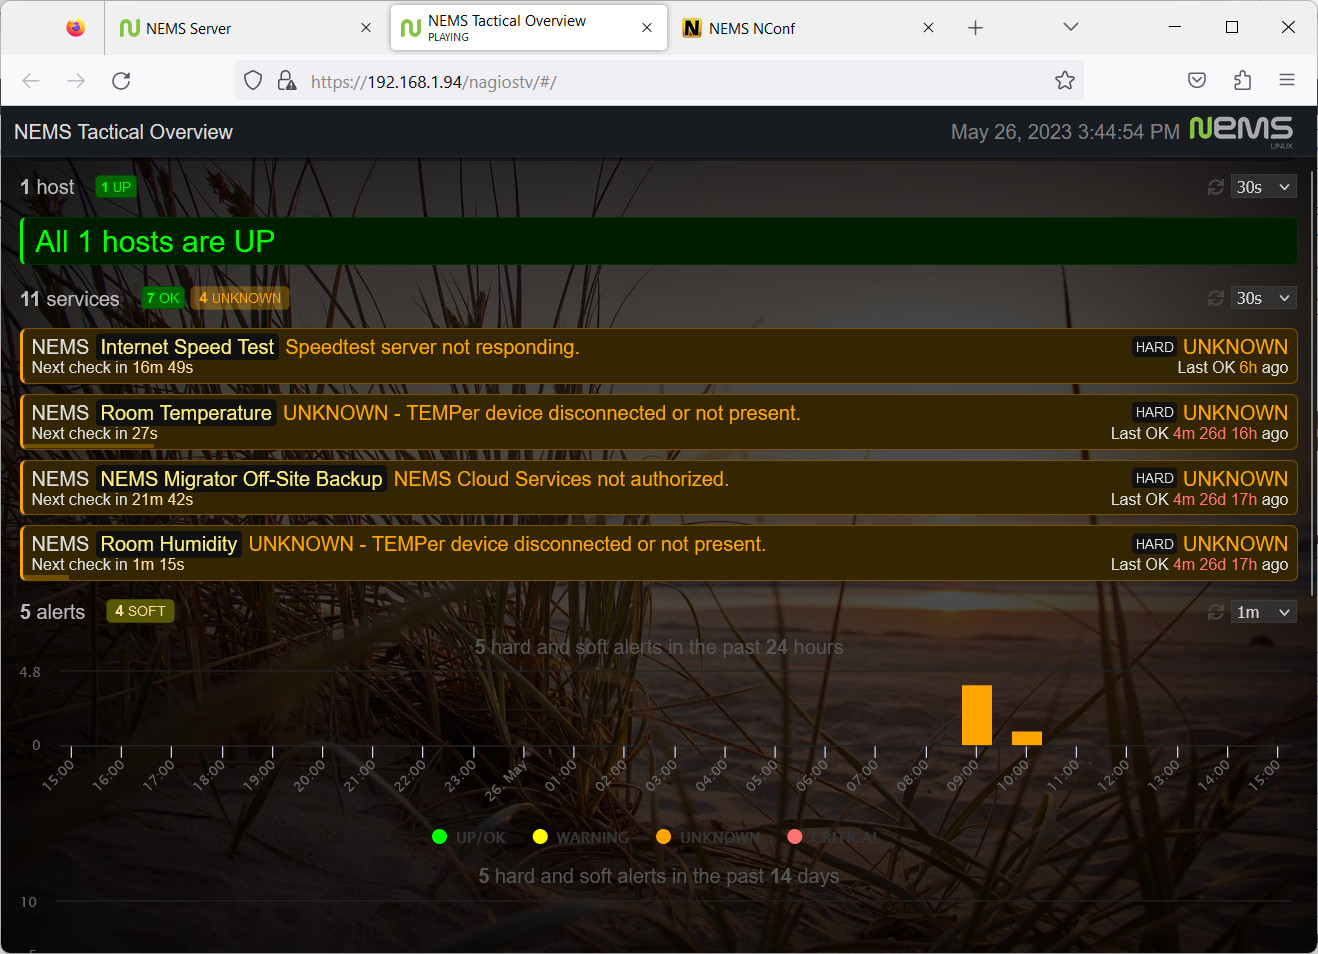
NEMS Tactical Overview:
Configure Your First Network Monitoring Task From GUI
Nagios and NEMS doc pages are not very rich on how to configure monitoring services from GUI, while configuration from the terminal is more detailed. But the following example will explain how to do it in an easier way.
I will setup a very simple monitoring task which will control my second Raspberry PI (which has an IP address 192.168.1.85) only by pinging it.
We’ll need to define the new host, configure ping monitoring and generate a new configuration to deploy on live monitoring.
Define New Host
From NEMS NConfig, on left menù, find the “Hosts” row and click the “Add” button near it.
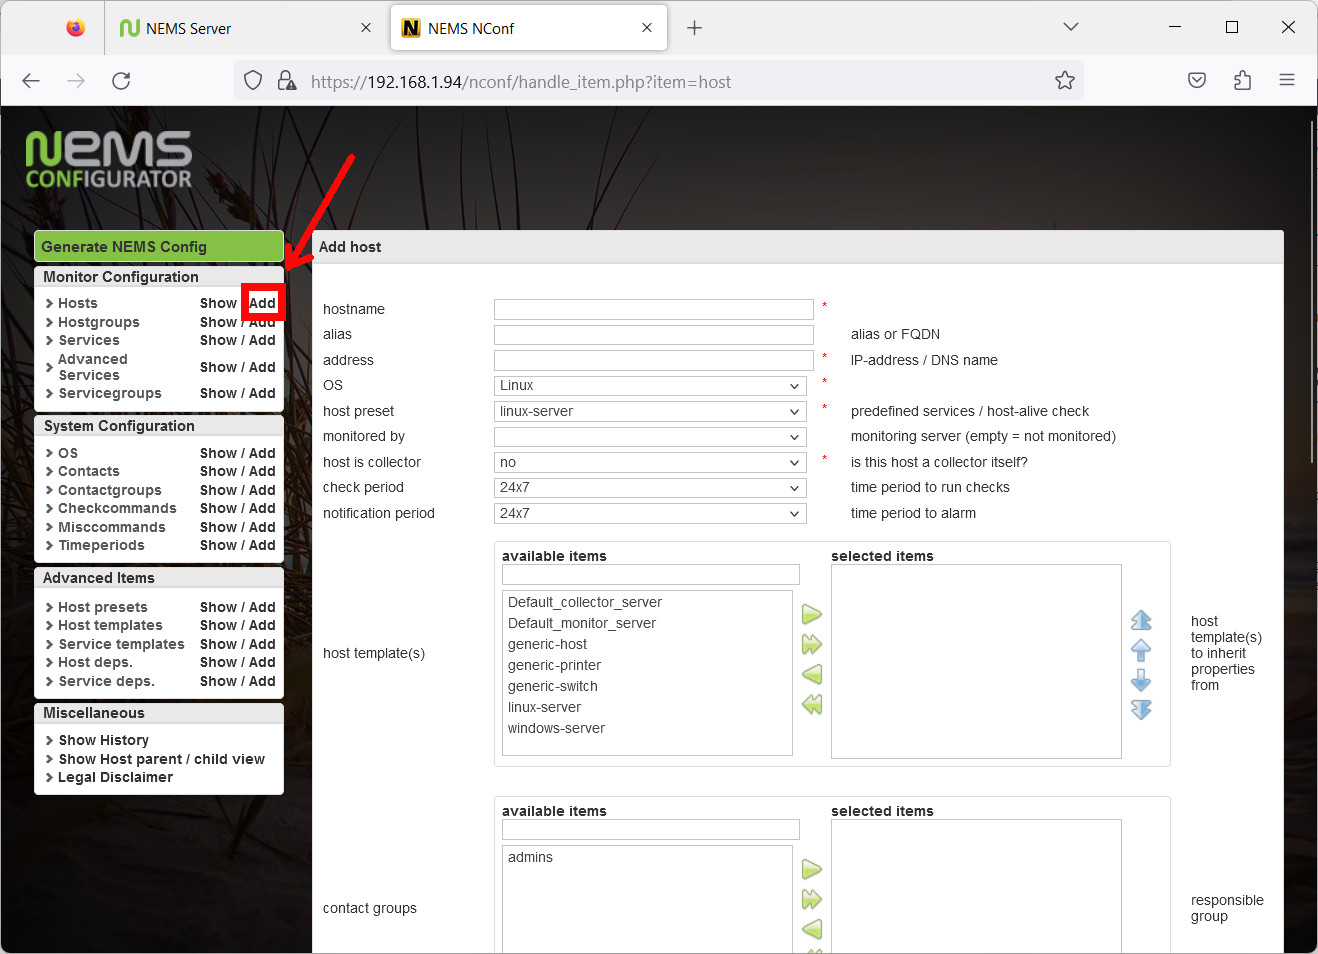
Even if you can configure a huge number of parameters, for this basic purpose complete the following ones:
- hostname: raspberrypi.local
- alias: My Second Pi
- address: 192.168.1.85
- host preset: linux-server
- monitored By: Default Nagios
- host template(s): linux-server
- contact groups: admins
- check interval: 1
- retry interval: 1
- first notification delay: 3
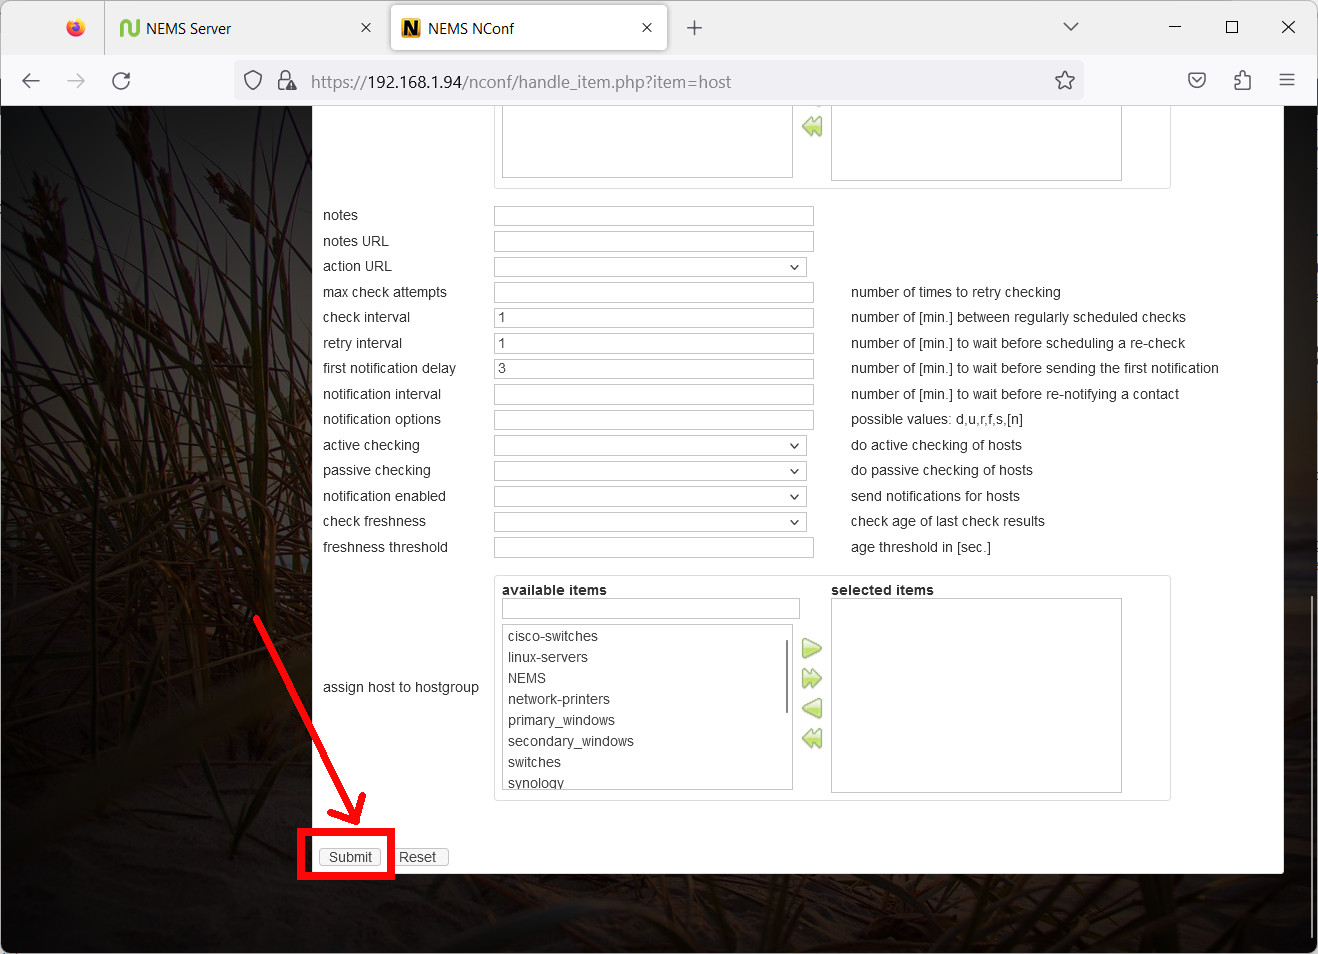
Now, please click the Submit button at the bottom part of the page:
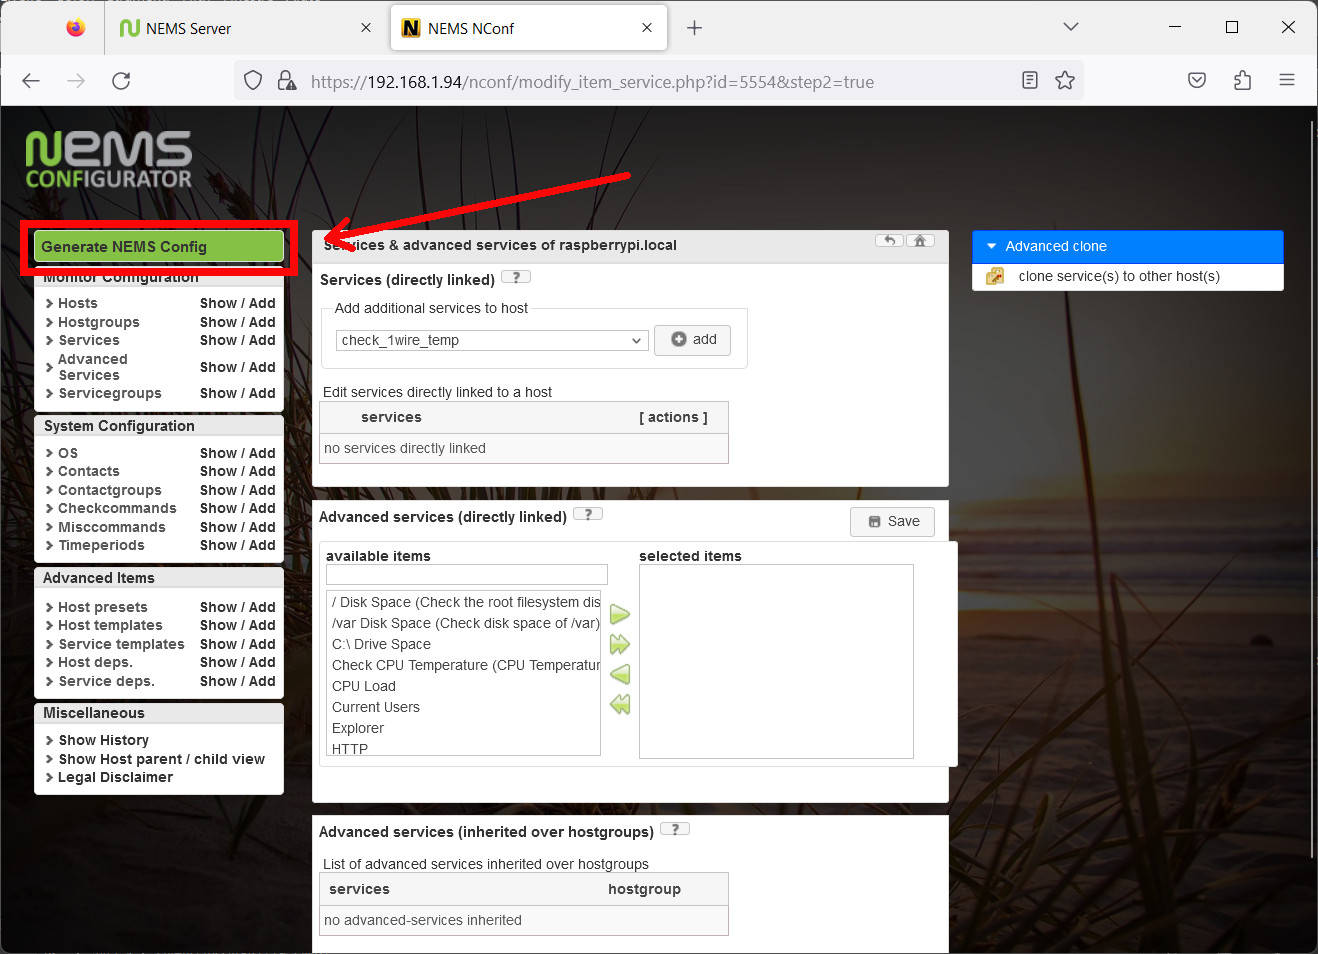
The following page enables us to setup a number of deeper services. For a basic ping, we don’t need to create services. On left menù, click “Generate Nagios config”:
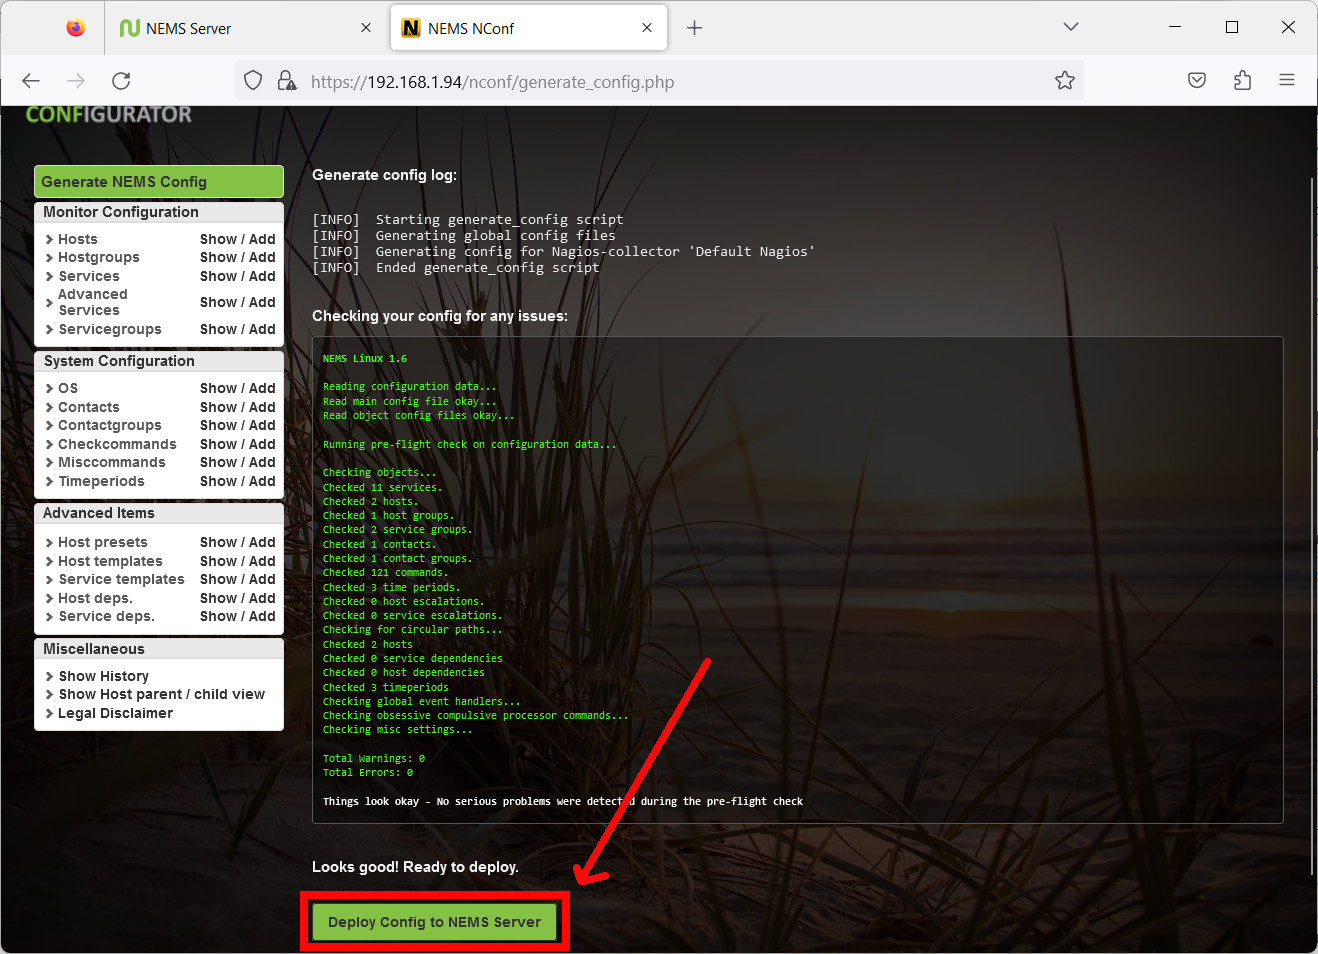
Once the monitoring configuration is performed, we can deploy it to the NEMS service with the button highlighted at the bottom part of the following page:
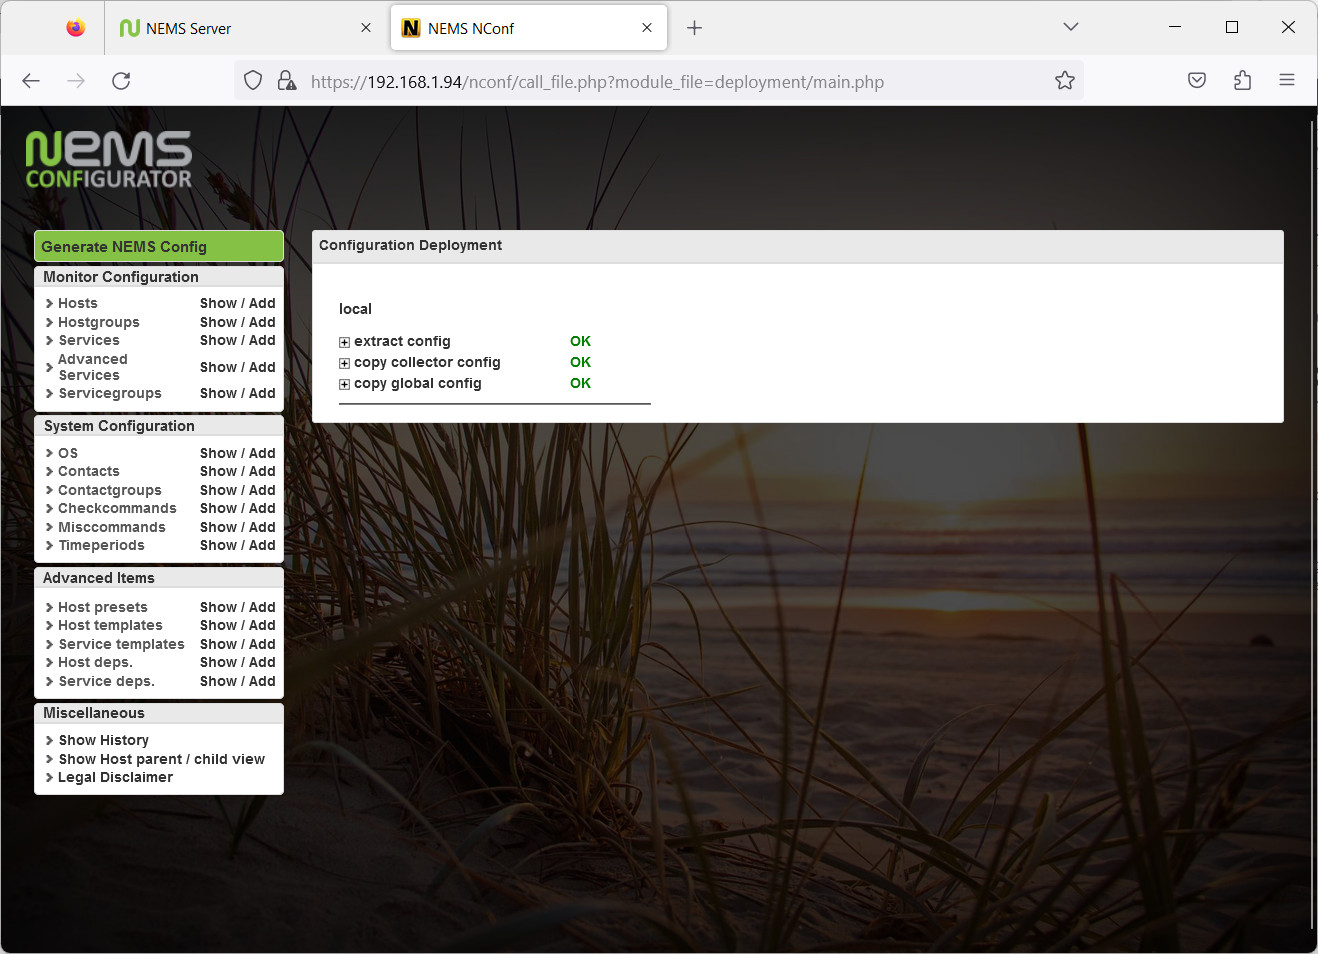
A confirmation page will show all the deploying jobs successfully completed:
After configuration deployment is finished, you can switch to Adagios in order to check the new host after clicking the “Hosts” link from menù:
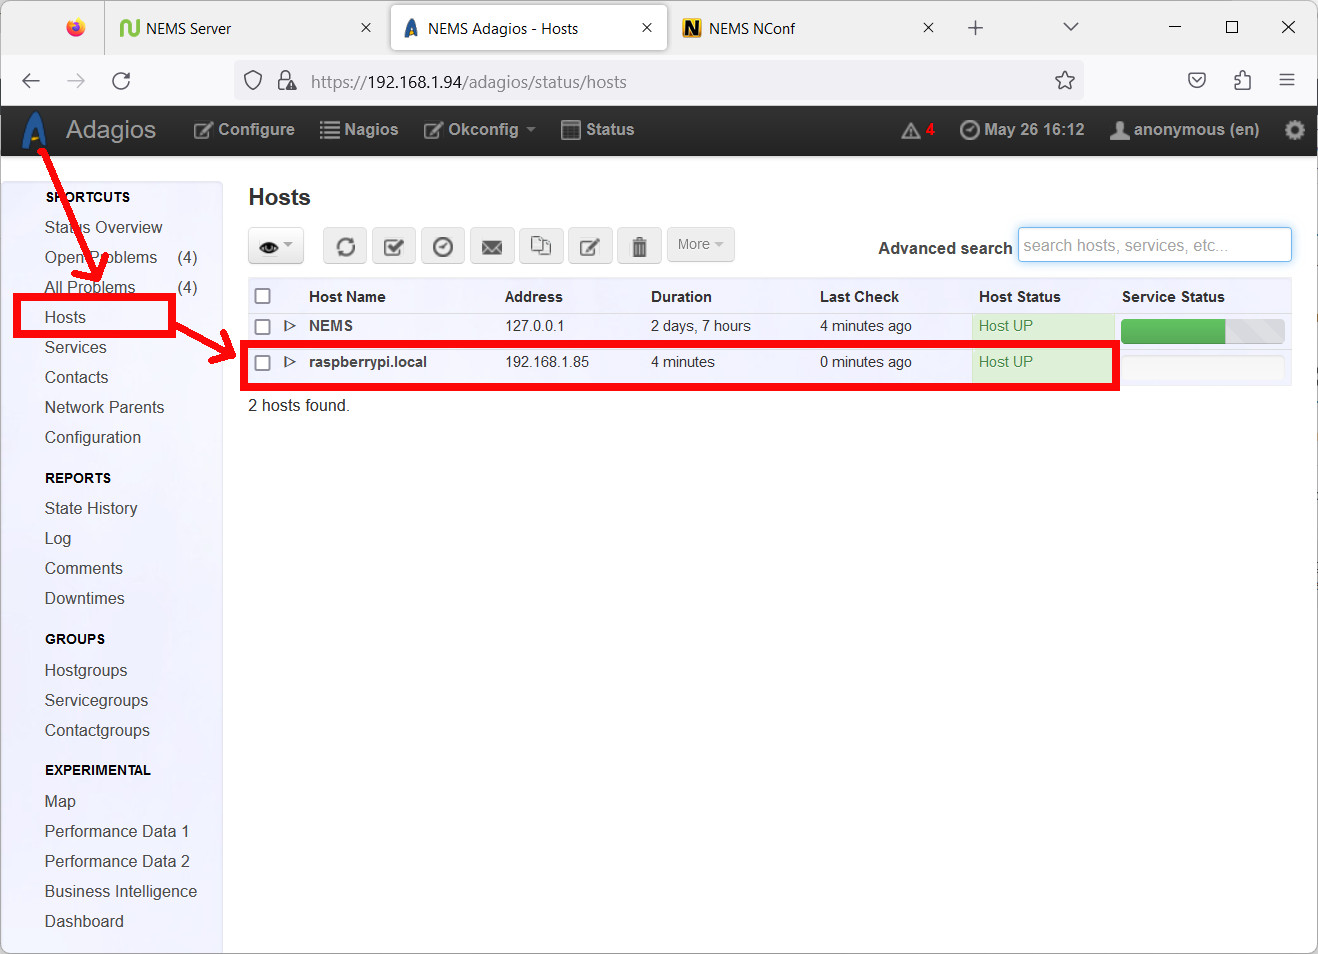
This page shows that the host has been reached and is up (which means it is correctly answering ping signals).
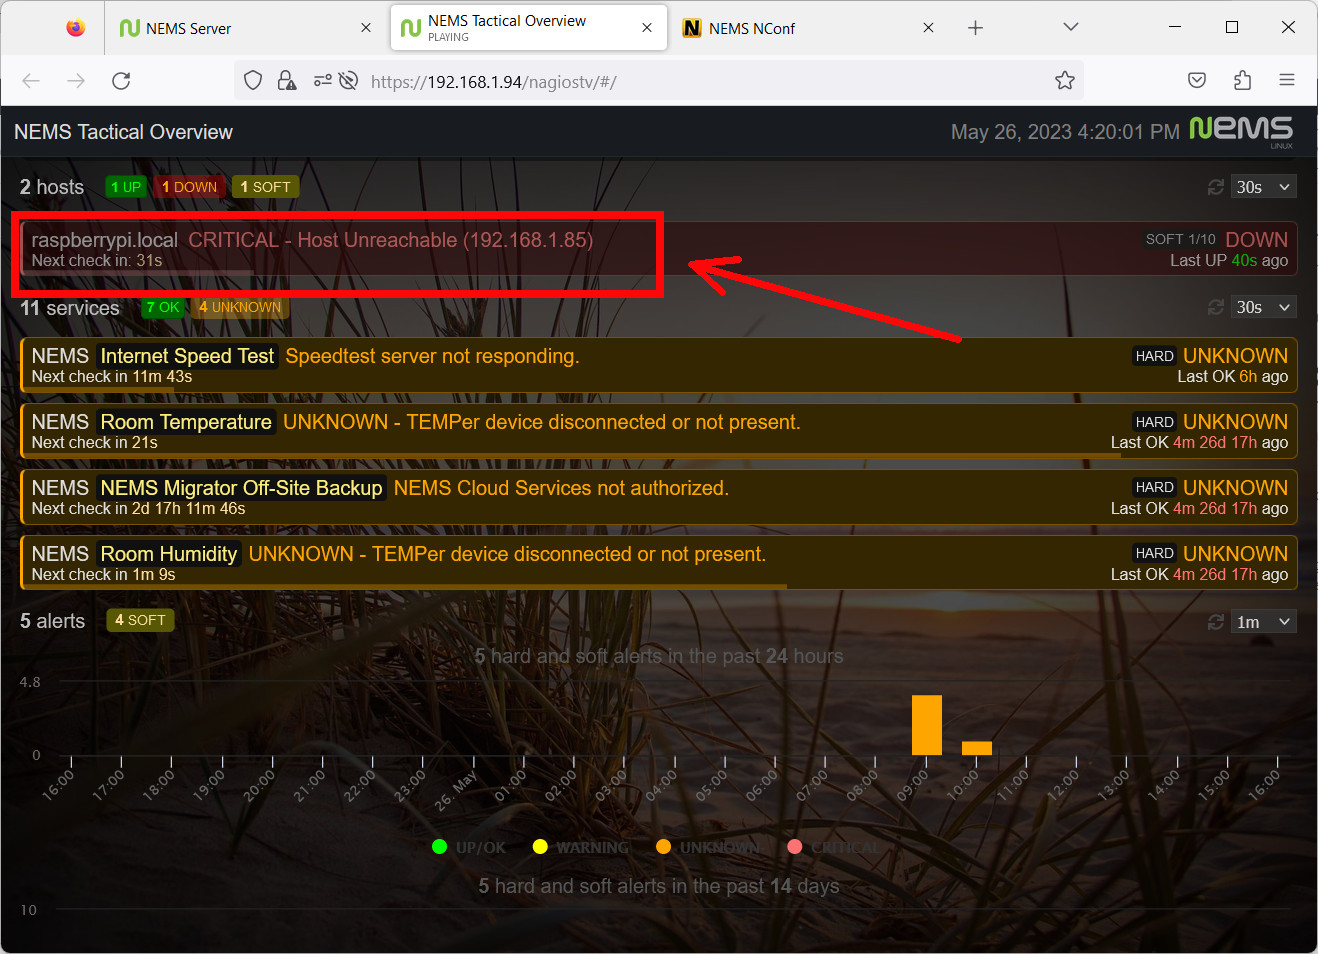
A real-time monitor is available from NEMS Tactical Overview, which refreshes itself automatically and will warn once failed ping is detected. For example, shutting down the monitored Raspberry PI (my 192.168.1.85 host), I’ll get warned of the issue:
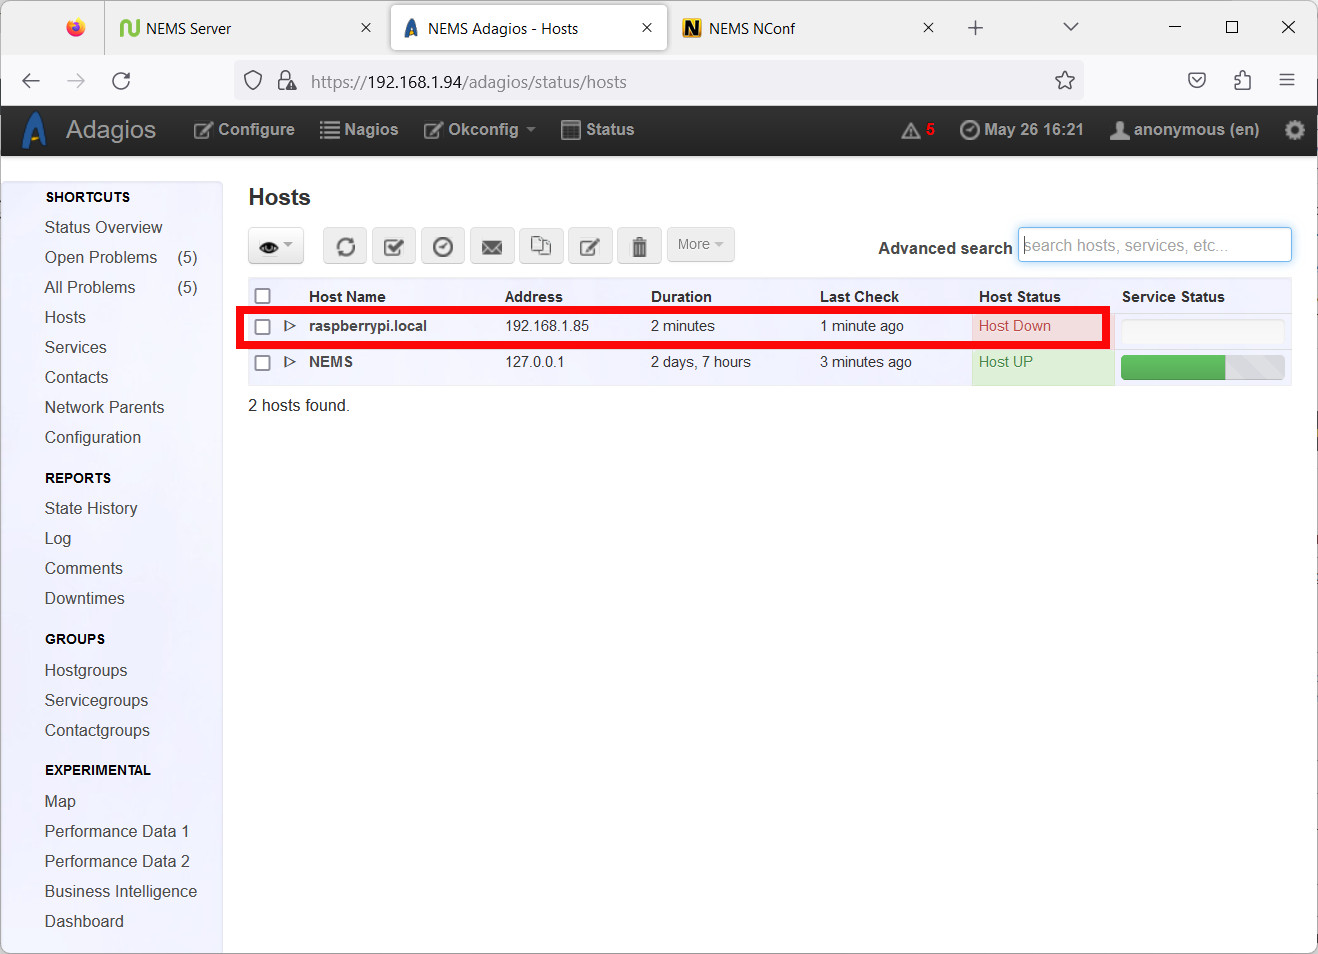
while NEMS Adagios will require a manual refresh to show the current state:
More documentation about NEMS can be found on NEMS official docs page.
Nagios info for deeper configurations can be found on Nagios official docs page.
Enjoy your NEMS Raspberry PI server!

Open source and Raspberry PI lover, writes tutorials for beginners since 2019. He's an ICT expert, with a strong experience in supporting medium to big companies and public administrations to manage their ICT infrastructures. He's supporting the Italian public administration in digital transformation projects.

The idiot admins of this distro use the KNOWN-BROKEN md5 hashing algorithm for their downloads with NO SIGNATURES for better security and integrity verification. Even though this is standard practice elsewhere.
Unlike some noobs, I have sadly seen md5 checksum matches on two files that the sha256 differed on. So it can indeed matter in the REAL world, not just for the sake of what some naive people call ‘paranoia’. I immediately distrust security-related distros and software that is apparently this level of ignorant at admin level. Also, the downloads are hosted on a completely different domain – dittodistro com – requiring even more verification.
There is also a changelog from as recently as 2019, where they intentionally dumb-down their standards to fit ESX-i software, which was ignorantly using the SHA1 algorithm which is ALSO somewhat insecure. In 2019, not 2009… Was this retrograde decision reversed in more recent releases? Couldn’t the world get ESX-i to get a patch instead? The mind boggles at times.
People like this appear not to live in the real technological world where threats as relating to the above verification needs, are not real. They are, they are automated, and they happen in seconds. Security through obscurity (being lucky when using sloppy methods) is NOT real security. With all due respect, Wake up!
Hi LangleeHoHoHo,
thank you for your interesting check and opinions. I think that you could email the NEMS team to make them aware of your improvement suggestions, every sane developer would accept criticism focused to make a software more reliable and secure