
Last Updated on 20th June 2026 by peppe8o
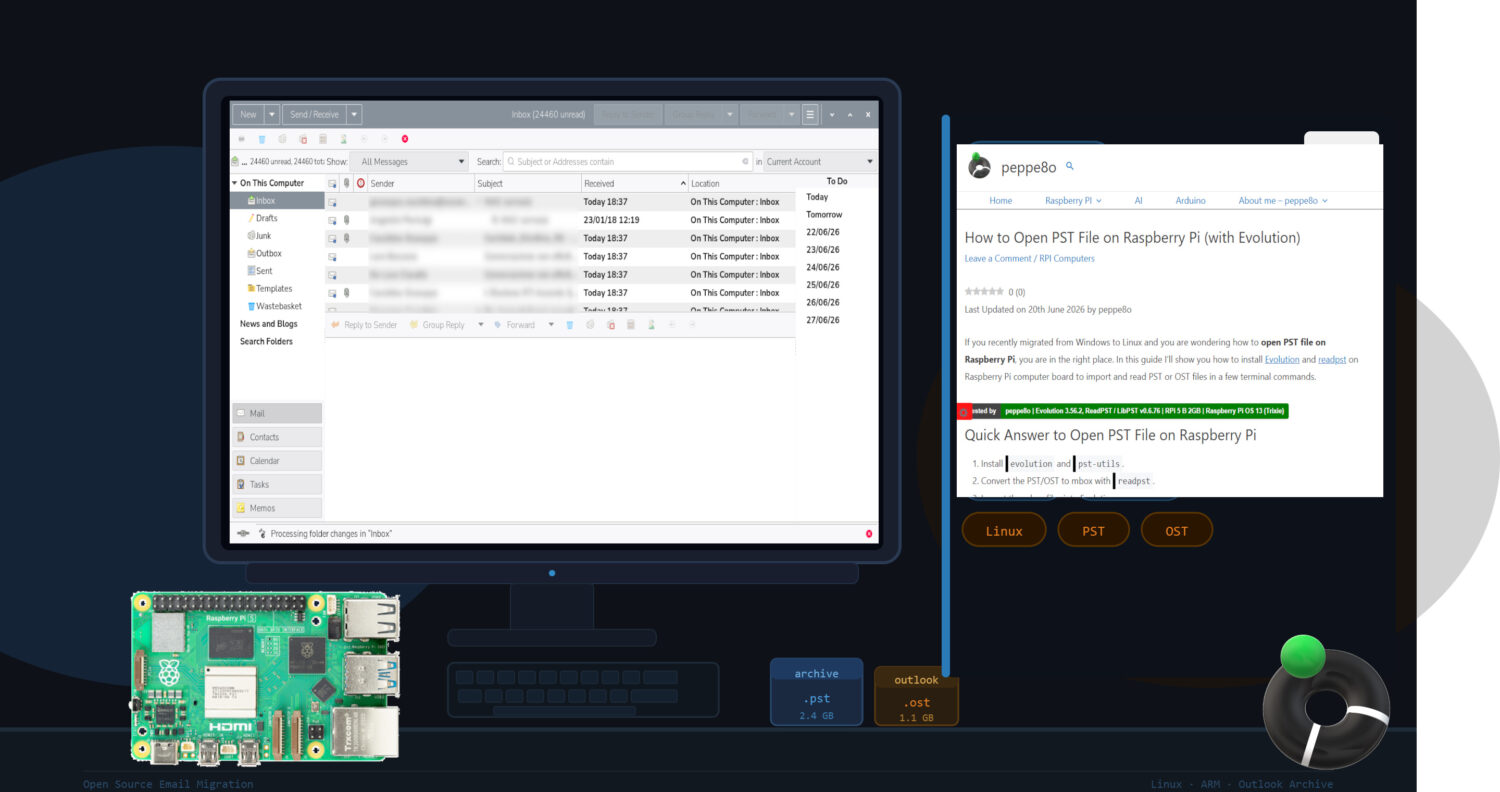
If you recently migrated from Windows to Linux and you are wondering how to open PST file on Raspberry PI, you are in the right place. In this guide, I’ll show you how to install Evolution and readpst on a Raspberry Pi computer board to import and read PST or OST files in a few terminal commands.
Quick Answer to Open PST File on Raspberry Pi
- Install
evolutionandpst-utils. - Convert the PST/OST to mbox with
readpst. - Import the mbox files into Evolution.
Keep reading for the full step-by-step.
What We Need
As usual, I suggest adding from now to your favourite e-commerce shopping cart all the needed hardware, so that at the end you will be able to evaluate overall costs and decide if to continue with the project or remove them from the shopping cart. So, hardware will be only:
- Raspberry PI Computer Board (including a proper power supply or using a smartphone micro USB charger with at least 3A)
- high-speed microSD card (at least 16 GB, at least class 10)
Step 1. Prepare the Operating System
The first step is to install the Raspberry PI OS Desktop, where you can use the following commands in its terminal app.
Before we learn how to open a PST file on Raspberry Pi, please make sure that your Operating System is up to date. From your terminal, use the following command:
sudo apt update -y && sudo apt full-upgrade -yStep 2. Install Evolution and readpst
On Raspberry Pi OS (Debian-based), both tools are in the official repository. You can easily install them with the following terminal command:
sudo apt install evolution pst-utils -yThis installs:
- Evolution — lightweight open-source email client for Linux.
- pst-utils — provides the
readpstcommand for converting Outlook archives.
If you want to verify the install, you can check their versions:
readpst --versionevolution --versionStep 3. Prepare the Working Folder
With the aim to keep things clean, we’ll create a dedicated folder for our pst/ost files:
mkdir -p ~/Desktop/mail-import/outputWe’ll copy all the files to import into this folder. You can do this task with a copy/paste action in the File Manager app, or with the terminal cp command. For example:
cp /path/to/email_file.pst ~/Desktop/mail-import/Then, please enter the created folder:
cd ~/Desktop/mail-importNote: If your file name contains spaces, always wrap it in double quotes.
Step 4. (Optional) Measure Resource Usage on Your Raspberry Pi
Knowing how the process impacts your Raspberry Pi helps you plan large migrations. If you want to measure performance on your own board, you can use the tool provided in this step. Otherwise, you can skip it.
Unfortunately, in the Aptitude repository there isn’t a tool able – alone – to monitor and give you complete stats about all the time and resources required during a process. The time package makes this work only for the execution time. For this reason, I’ve prepared a script to collect all the required info, which enabled me to show you useful stats.
Prepare the Monitoring Function
If you want to compare the same stats with yours, you must install the time package:
sudo apt install time -yNow, you can define a temporary bash function that you can use in your terminal until you close it. So, this function will reside in your Raspberry PI’s memory only for the terminal session and will be deleted (without any residual part) at the close of it.
Please copy all the following lines and paste them into your terminal:
rtime() {
  local logfile="$1"
  shift
  if [ -z "$logfile" ] || [ $# -eq 0 ]; then
    echo "Usage: rtime2 logfile command [args...]"
    return 1
  fi

  local cmd=("$@")
  local start end elapsed status pid temp_before temp_after
  local max_rss=0
  local max_cpu=0

  : > "$logfile"
  echo "timestamp,cpu_percent,mem_percent,rss_kb,temp_c" >> "$logfile"

  temp_before=$(vcgencmd measure_temp 2>/dev/null | sed -E 's/.*=([0-9.]+).*/\1/')
  start=$(date +%s)

  "${cmd[@]}" > /tmp/rtime2.out 2>&1 &
  pid=$!

  while kill -0 "$pid" 2>/dev/null; do
    read cpu mem rss <<< $(ps -p "$pid" -o %cpu=,%mem=,rss= --no-headers 2>/dev/null | awk '{print $1,$2,$3}')
    [ -z "$cpu" ] && cpu=0
    [ -z "$mem" ] && mem=0
    [ -z "$rss" ] && rss=0
    temp=$(vcgencmd measure_temp 2>/dev/null | sed -E 's/.*=([0-9.]+).*/\1/')
    [ -z "$temp" ] && temp=""
    echo "$(date -Is),$cpu,$mem,$rss,$temp" >> "$logfile"
    cpu_int=${cpu%.*}
    [ "$rss" -gt "$max_rss" ] && max_rss=$rss
    [ "$cpu_int" -gt "$max_cpu" ] && max_cpu=$cpu_int
    sleep 1
  done

  wait "$pid"
  status=$?
  end=$(date +%s)
  temp_after=$(vcgencmd measure_temp 2>/dev/null | sed -E 's/.*=([0-9.]+).*/\1/')
  elapsed=$((end-start))

  {
    echo "command,${cmd[*]}"
    echo "exit_status,$status"
    echo "elapsed_seconds,$elapsed"
    echo "peak_rss_kb,$max_rss"
    echo "peak_cpu_percent,$max_cpu"
    echo "temp_before_c,$temp_before"
    echo "temp_after_c,$temp_after"
    echo "stdout_stderr_file,/tmp/rtime2.out"
  } >> "$logfile"

  cat "$logfile" | tail -n 10
  return "$status"
}
With this function, you can use rtime followed by the log file path, then the command you want to measure:
rtime logfile.log command [arguments...]In short: rtime + log file + command to run.
Step 5. Convert PST or OST to mbox
Run readpst with the following options>
-o output: sets the “output” folder as the storage position where to place the converted files-r: recursive flag to preserve the original folder structureemail_file.pstoremail_file.ost: is the filename of the email box to convert.
So, the command becomes:
readpst -o output -r email_file.pst # or email_file.ostPlease repeat this command for every file you want to import.
Of course, if you want to monitor the used resource, please use the following command instead:
rtime readpst.log readpst -o output -r email_file.pst # or email_file.ostNow, you can check the output folder with the following command, which will list all the converted files:
find ~/Desktop/mail-import/output -type fThe expected result will appear similar to the following:
output/email_file/Inbox/mbox
output/email_file/Sent/mbox
output/email_file/Deleted Items/mbox
output/email_file/Project Archive/mbox
You will find multiple mbox files as well as other Outlook objects (like, for example, contacts). The mbox files are the ones we want to import into Evolution.
Step 6. Import and Open the PST Emails on Raspberry PI
Open Evolution from the terminal:
evolutionIf you want to monitor this process too, the command becomes:
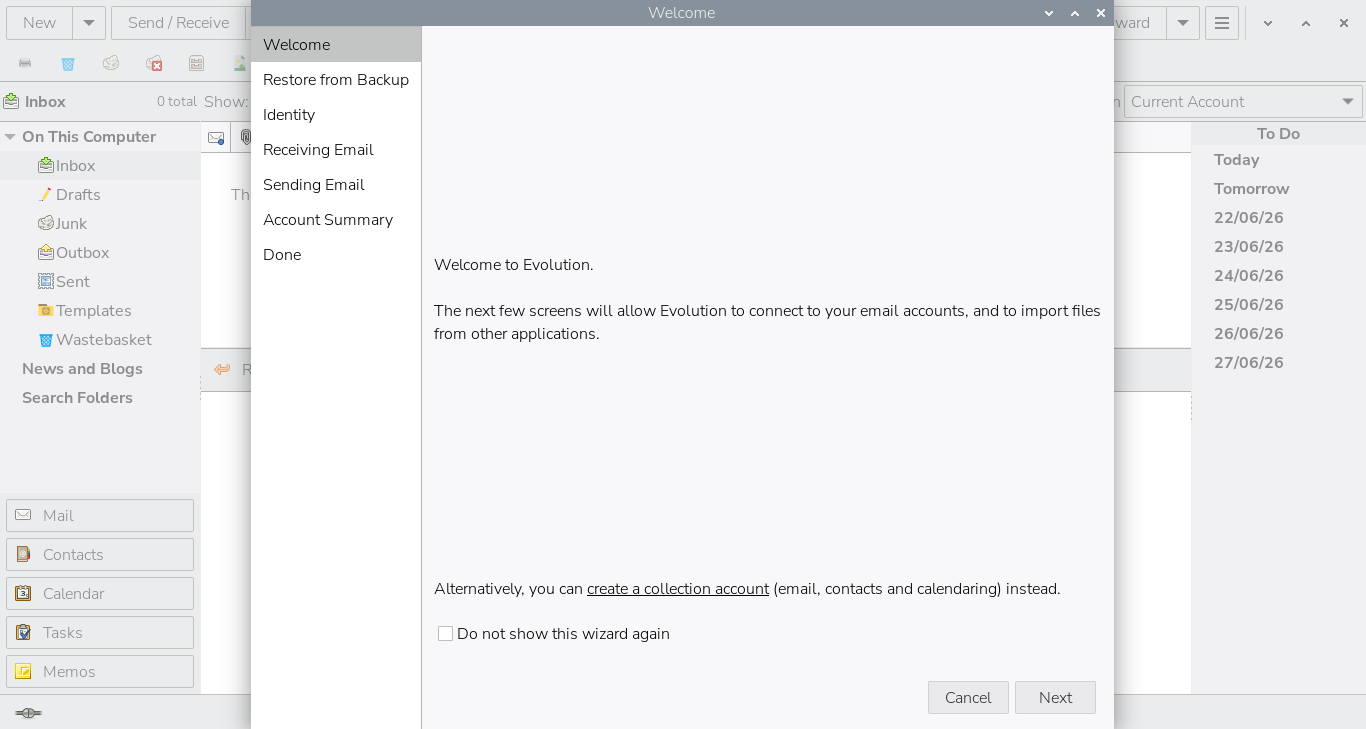
rtime evolution.log evolutionIf this is the first time you open Evolution, it may show you a welcome page, which you can follow for the first settings, or you can just click the “Cancel” button:
Then:
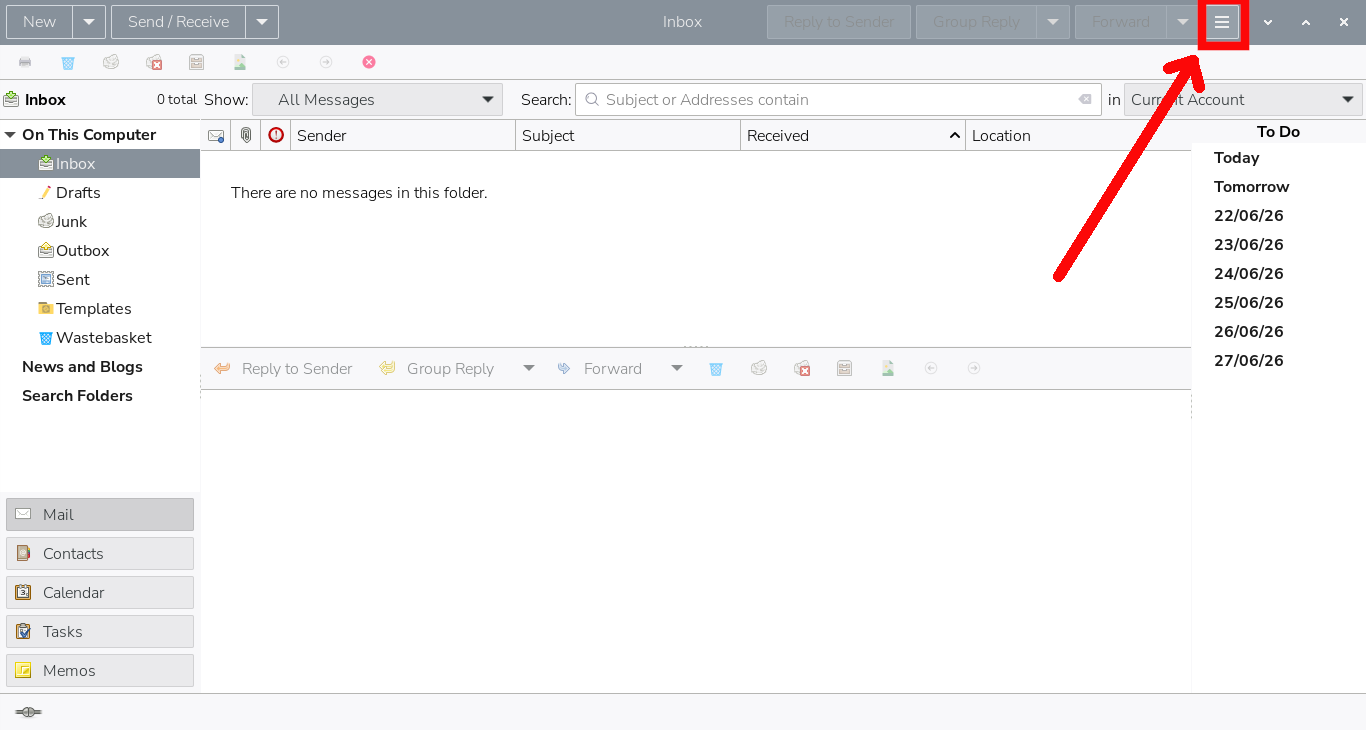
1. Click the ≡ menu (top-right):
2. In this menu, select File, then Import.
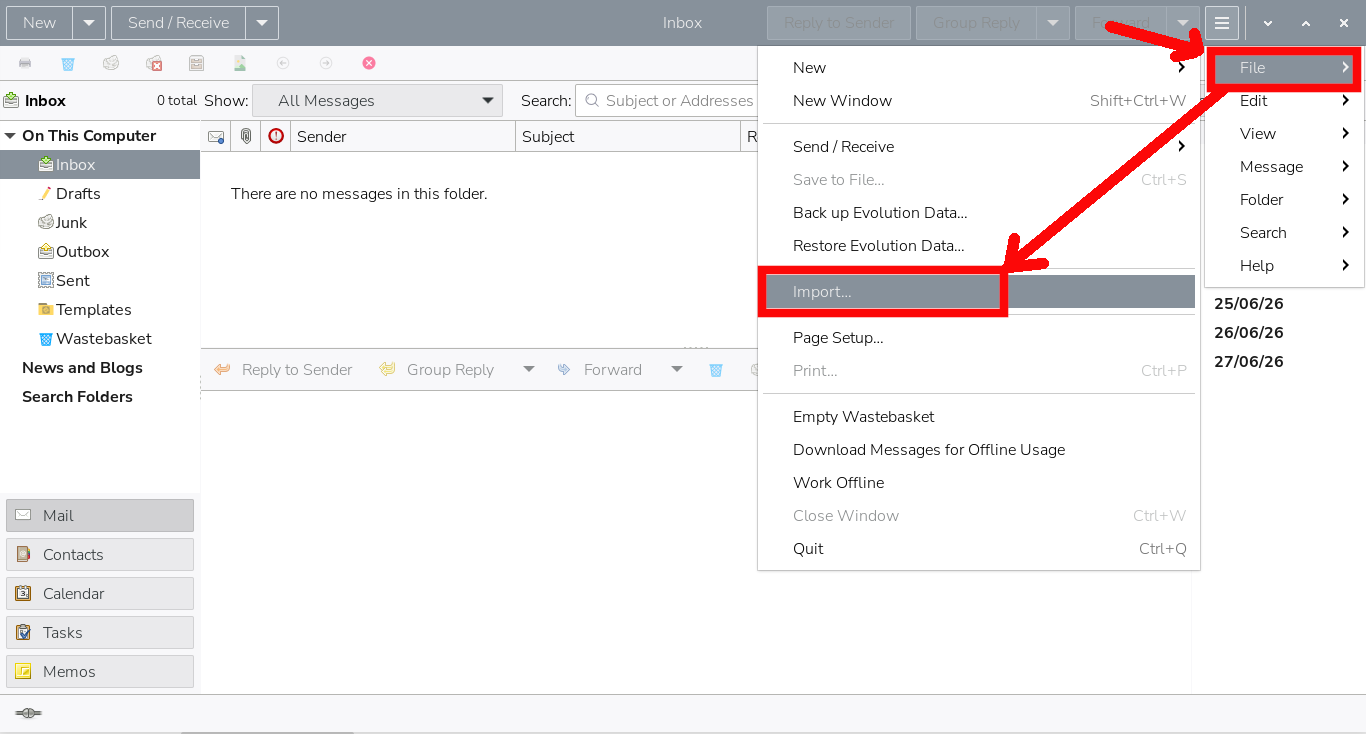
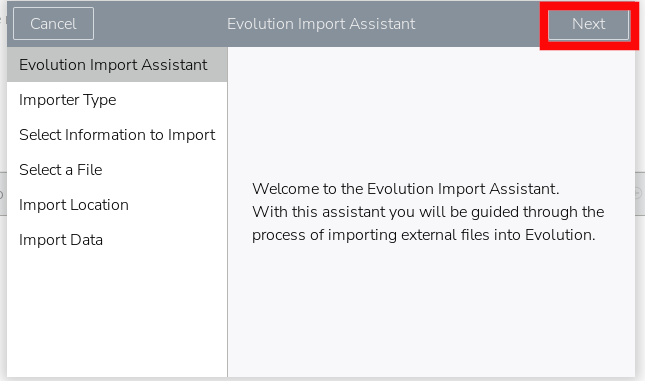
This will open the Evolution Import Assistant, a wizard which will guide you through the import process.
3. In the first window, please click Next:
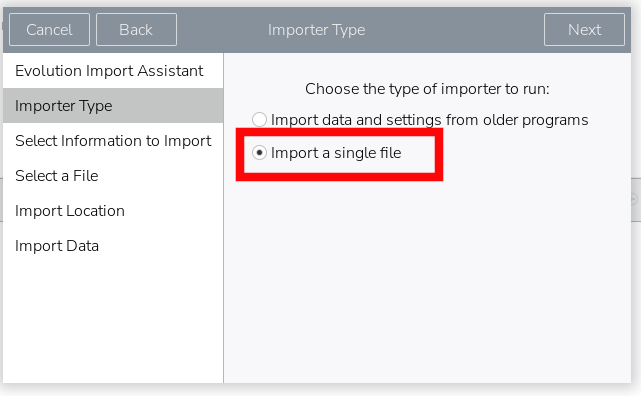
4. Choose Import a single file → Next
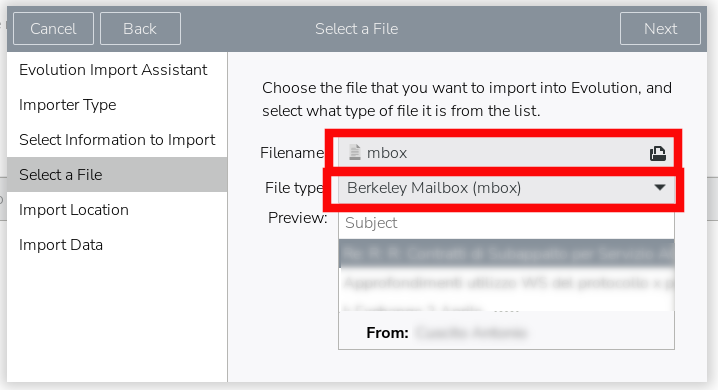
5. Click the field at the right of the Filename and browse to ~/Desktop/mail-import/output/, then navigating until you select the first of your mbox files to import. Also, this will automatically set the “file type” to Berkeley Mailbox. → Next
6. Choose the destination folder in Evolution → Next.

7. Finally, click the Apply button.
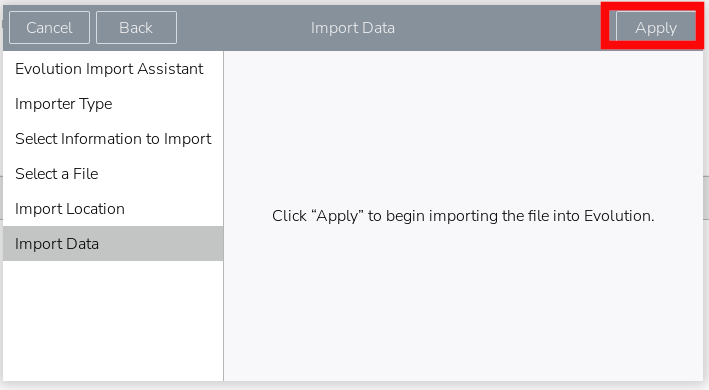
After this, Evolution will import all the email files in your selected folder, and you will see all the messages (with their attachments):
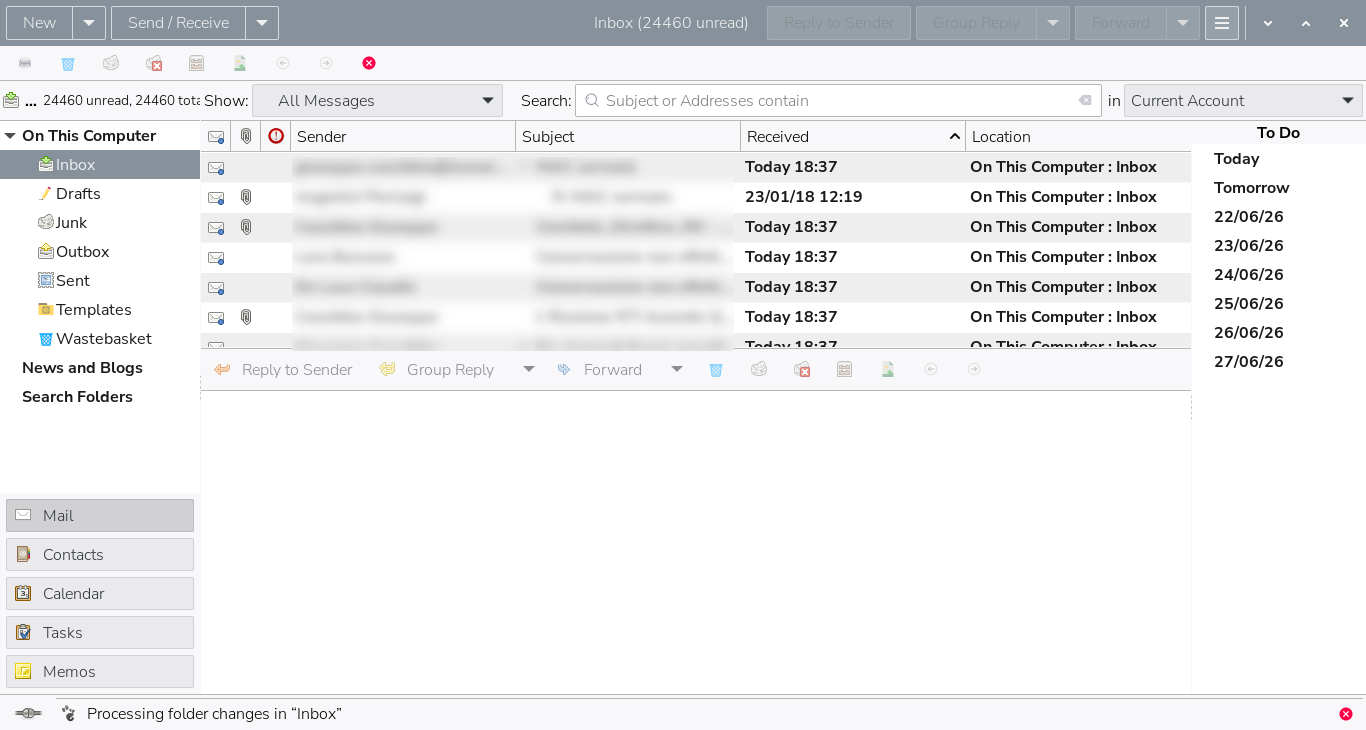
Repeat for each folder you want to recover. You will be able to see all your emails in Evolution.
Now you have successfully managed to open PST file on Raspberry Pi.
My results (Raspberry Pi 4 – 4GB – SSD Storage)
Here is my configuration:
| Metric | Value |
|---|---|
| Raspberry Pi model | Raspberry Pi 4 Model B 4GB |
| OS | Raspberry Pi OS 13 (Trixie) |
| Archive size | 6.9 GB PST |
In the following CPU temperature values, please consider that my Raspberry PI uses an active cooling fan, so your temperatures could be higher without it.
For the readpst phase:
| Metric | Value |
|---|---|
| Conversion time | ~60 seconds |
| Peak RAM | ~50 MB |
| Peak CPU | ~20% |
| Start temperature | 54.9°C |
| End Temperature | 58.2°C |
The Evolution import phase:
| Metric | Value |
|---|---|
| Conversion time | ~130 seconds |
| Peak RAM | ~365 MB |
| Peak CPU | ~85% |
| Start temperature | 54.3°C |
| End Temperature | 60.9°C |
Troubleshooting
Evolution does not show imported mail
Do not copy raw folders into the Evolution data directory and expect them to appear. Always use the Import command with a real mbox file.
OST conversion is incomplete
Some OST files are partially synchronised Exchange archives and may not convert fully. In that case, convert the OST to PST on a Windows machine first, then re-run readpst on the PST file.
Resources
- https://wiki.gnome.org/Apps/Evolution
- https://manpages.ubuntu.com/manpages/trusty/man1/readpst.1.html
- https://peppe8o.com/install-raspberry-pi-os-desktop-with-optional-remote-desktop/
- https://peppe8o.com/active-cooling-raspberry-pi/
What’s Next
If you want to discover many other projects for your Raspberry PI, you can take a look at peppe8o’s Raspberry PI tutorials.
Enjoy!
FAQ
No. You usually need to convert the PST file to mbox first before importing it into Evolution.
Not directly and not always reliably. In some cases, you must convert the OST file to PST first.
You need Evolution and pst-utils, which provides the readpst command.
readpst converts Outlook archives into mbox folders and files that Evolution can import.
No. Evolution normally imports one mbox file at a time through the import assistant.
Yes, as long as you have enough free disk space and enough RAM for the conversion and import steps.

Open source and Raspberry PI lover, writes tutorials for beginners since 2019. He's an ICT expert, with a strong experience in supporting medium to big companies and public administrations to manage their ICT infrastructures. He's supporting the Italian public administration in digital transformation projects.
![]()
![]()
![]()
![]()
![]()
![]()
![]()


