
Last Updated on 19th June 2026 by peppe8o
Whether you are running a desktop environment or managing a remote server via SSH, Mutt (and its modern counterpart NeoMutt) is the one of the best solutions in terms of lightweight and speed as Raspberry PI email client that works entirely from the command line.
In this tutorial, I’ll show you how to install and configure a mutt terminal mail system on Raspberry Pi computer boards. I’ll also give you info to set up secure authentication (App Passwords) for modern providers like Gmail and Outlook, and how to use it as a headless email client for your automated scripts.
In this tutorial, I’m going to use my Raspberry PI 4 Model B (4GB), but it applies also to newer Raspberry Pi computer boards.
Why use a Mutt Terminal Mail Client on Raspberry Pi?
When managing a Raspberry Pi, traditional desktop email clients soon become too heavy and resource-intensive. Mutt is a text-based mail user agent (MUA) that brings several advantages:
- Ultra-lightweight: It uses almost zero CPU and an incredibly low RAM footprint.
- Scriptable: You can easily pipe terminal outputs directly into an email.
- Secure: It supports modern encryption and can be paired with GPG to hide your credentials.
Real-World Performance Metrics on Raspberry Pi
To show you exactly how lightweight this setup is, I installed it on my hardware and measured the resource impact during a real synchronization session. Here are the real-world metrics from my benchmarking test:
- Hardware Used: [Raspberry Pi 4 Model B – 4GB RAM]
- Operating System: [Raspberry Pi OS 13 Trixie (Lite)]
- RAM Usage (Idle): [~26 MB] (measured while NeoMutt was open in the background).
- RAM Usage (sending a message from terminal): [~21 MB] (measured while sending a message from the Raspberry PI bash).
- Storage Footprint (Local Cache): [~1.2 MB] (the local cache keeps your MicroSD safe from continuous heavy read/write operations).
Keeping the memory usage under 30 megabytes means you can run this mutt email client on any vintage or low-spec board (like the Raspberry Pi Zero W) without impacting your other self-hosted services or background tasks.
What We Need
As usual, I suggest adding from now to your favourite e-commerce shopping cart all the needed hardware, so that at the end you will be able to evaluate overall costs and decide if to continue with the project or remove them from the shopping cart. So, hardware will be only:
- Raspberry PI Computer Board (including proper power supply or using a smartphone micro USB charger with at least 3A)
- high speed micro SD card (at least 16 GB, at least class 10)
Step-by-Step Procedure
Step 1. Prepare the Operating System
The first step is to install the Raspberry PI OS Lite to get a fast and lightweight operating system (headless). If you need a desktop environment, you can also use the Raspberry PI OS Desktop, in which case you will work from its terminal app. Please find the differences between the 2 OS versions in my Raspberry PI OS Lite vs Desktop article.
Please make sure that your Operating System is up to date. From your terminal, use the following command:
sudo apt update -y && sudo apt full-upgrade -yStep 2: How to Install Mutt Email Client on Raspberry PI
Now that we updated our repository lists, we can install the packages. While the classic mutt package is still available, I highly recommend installing NeoMutt, a modern fork that includes sidebar support and better IMAP caching natively.
Run the following command in your terminal to install mutt / neomutt:
sudo apt install neomutt -yTo keep our email experience organized and fast, we need to create local directories where Mutt will cache mail headers and bodies. This prevents Mutt from re-downloading your entire inbox every time you open it:
mkdir -p ~/.mutt/cache/headers ~/.mutt/cache/bodiesIMPORTANT: For Gmail users, because of Gmail advanced authentication, you have to generate an app-specific password from your google account in order to make mutt work, then use the password generated instead of your Google one. If you don’t use an app-specific password with Gmail, you will get a “Login failed” error from Mutt. Same concerns are appliable also to Hotmail and other providers.
Create a new Mutt configuration file:
nano ~/.mutt/muttrcFor a very simple and basic IMAP configuration, please use the following template. It is based on Gmail settings, so you should check IMPS and SMTP configurations for your email provider. Also, the mail tree could change based on your provider folders organization (some email providers may use, for example, “INBOX.SENT” instead of “[Gmail]/Sent Mail”).
Change also “email@gmail.com”, “youSecretPassword”, “email” and “User Alias” with your ones.
IMPORTANT NOTES: from my test, there are some important things to care about in the smtp_url variable. The “@” character must be subsituted with a “%40”. Moreover, if your password include spaces (as in the passwords for secure apps from Gmail, you must remove these spaces. For example, a string like “abdc efgh jklm nopq” becomes “abdcefghjklmnopq” in this variable. If you don’t use these adjustments, you will get an authentication error when trying to send emails.
#=========== Personal info ================
set from = "email@gmail.com"
set realname = "Your Name"

#================ IMAP ====================
set imap_user = "email@gmail.com"
set imap_pass = "youSecretPassword"
set folder = "imaps://imap.gmail.com:993"
set spoolfile = "+INBOX"
set postponed="+[Gmail]/Drafts"
set trash = "+[Gmail]/Trash"
set record="+[Gmail]/Sent Mail"
set mbox="+[Gmail]/All Mail"

#============== Caching ==================
set header_cache = "~/.mutt/cache/headers"
set message_cachedir = "~/.mutt/cache/bodies"
set certificate_file = "~/.mutt/certificates"

#================ SMTP ====================
set smtp_url = "smtps://email%40gmail.com:youSecretPassword@smtp.gmail.com:465/"
set hidden_host = yes
set use_envelope_from = yes
set envelope_from = yes
set allow_8bit = yes

#========== Connection tuning ==============
set imap_keepalive = 300
set mail_check = 60

#============= Composition =================
set editor = "nano"
set edit_headers = yes
set charset = UTF-8
unset use_domain
set use_from = yes

#============= Preferences =================
# (Use UP/DOWN arrows to scroll a message)
bind pager <Up> previous-line
bind pager <Down> next-line
# Disable local copies for automated emails to avoid batch mode warnings
set copy = no
Once finished, save and exit.
Step 3. Use Mutt as Terminal Email Client
You are now ready to use Mutt in your Raspberry PI as terminal email client. Please issue the following terminal command:
neomuttAfter the login operations, you will find all your emails:
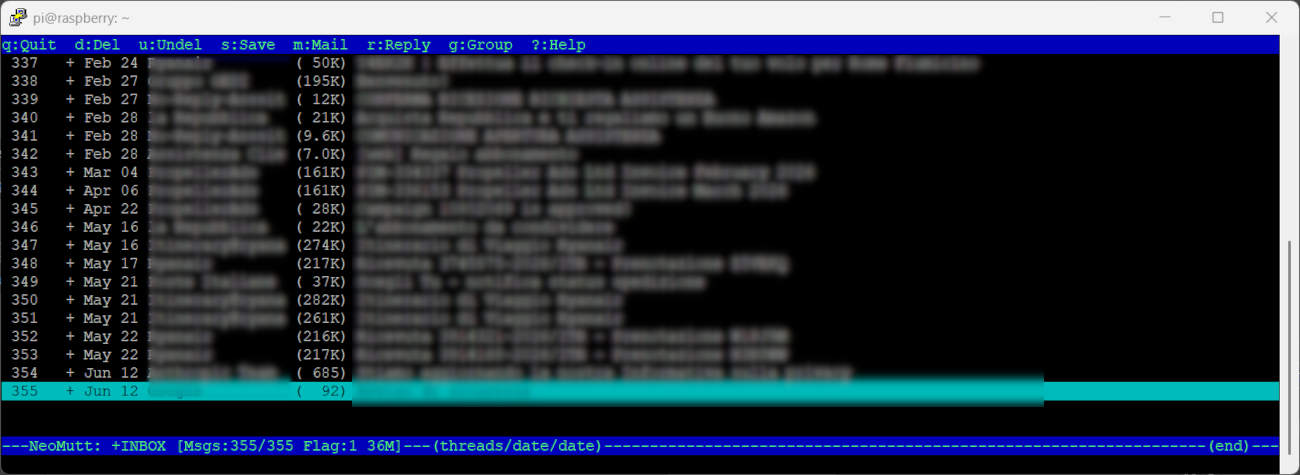
Please find below some useful commands.
In list view (the page where you see all your emails):
ENTER-> open the selected emailup/down ARROWS-> scroll emailsq-> quitem-> compose new email with your editor (nano)d-> mark message to be deleted (on mutt exit a delete confirmation will be requested)u(on a message previously marked to delete and then “u” again) -> unmark message from deletion
In email view:
down arrow(orENTER)-> scroll message down by 1 lineSPACE-> scroll message down by 1 pageup arrow(orDEL) -> scroll message up by 1 linei(orq) -> exit from message and go back to list viewleft / right ARROWS-> navigate between different messages
To send an email:
- use the
mkey to start a new message composition - write the recipient address. You can also insert more recipients by separating them with “;” (semicolon) characters, press
RETURN - write the subject, then press
RETURN - move the cursor after the header lines and write the message body
- once finished, save the message with
CTRL+X, thenY, as you usually do when saving a file with the nano editor - now you have the message preview, and you can send it with the
Ykey
Moreover, with the “?” key you can get complete help showing how to use Mutt.
Step 3: Using Mutt as a Headless Email Client for Automation
One of the best reasons to deploy a headless email client on a Raspberry Pi is system automation. You don’t need to open the Mutt interface to send an email; you can do it directly via command line or inside Bash/Python scripts.
Here is how to send a quick email with an attachment (e.g., a security camera snapshot, an IoT sensor log, or a system backup report). This line assumes, for example, that you have a txt file with your backup log stored at /home/pi/backup_log.txt:
echo "The backup process completed successfully." | neomutt -s "Pi Alert: Backup Done" -a /home/pi/backup_log.txt -- recipient@example.comNeoMutt Docs
More advanced features can be found in NeoMutt Docs page.
🛠️ Troubleshooting: Why is my 10/10 email still going to Spam?
If you test your setup using services like Mail-Tester.com and achieve a perfect 10/10 score, your NeoMutt configuration is flawless.
However, aggressive filters like Microsoft Outlook/Hotmail might still put your first emails into the Junk folder. This happens due to a lack of “sender reputation” from your local residential IP.
How to fix it: Go to your webmail, find the message in the Spam folder, and click “Not Spam”. Adding your sender email to your safe contacts list will permanently train the filter, and all subsequent automated alerts from your Raspberry Pi will land safely in your main Inbox.
How to get your own metrics (Developer Notes)
If you want to re-run the tests on your specific board to check your performance, you can use the following commands while Mutt is active:
- Check RAM:
ps -o rss,command -p $(pgrep neomutt)(value in Kilobytes). - Check Cache Size:
du -sh ~/.mutt/cache/ - Get precise OS version:
cat /etc/os-release | grep PRETTY_NAME
Resources
- http://www.mutt.org/
- https://neomutt.org/
- https://peppe8o.com/raspberry-pi-os-lite-vs-desktop/
- https://neomutt.org/guide/
What’s Next
If you want to discover many other projects for your Raspberry PI, you can take a look at peppe8o’s Raspberry PI tutorials.
Enjoy!

Open source and Raspberry PI lover, writes tutorials for beginners since 2019. He's an ICT expert, with a strong experience in supporting medium to big companies and public administrations to manage their ICT infrastructures. He's supporting the Italian public administration in digital transformation projects.
![]()
![]()
![]()
![]()
![]()
![]()
![]()


very good article but what would you do when testing mutt to send an email you got the error message:
Error sending message, child exited 1 ()
?
Hi André. This error warning is specific to Mutt and this line is simple warning that something went wrong, but doesn’t refer the reason. You should check Mutt logs, an help can be Mutt official debug tips page