
Last Updated on 26th April 2026 by peppe8o
In this tutorial, I will show you how to monitor Artificial Intelligence tasks running in your Raspberry PI with MLFlow. We’ll install everything on your Raspberry PI’s storage, so your data will remain protected in your device, and no cloud services will get any of it.
I will use my last project, showing how to build a self-hosted Chatbot on Raspberry PI, to show you how to use MLFlow.
About MLFlow
MLflow is an open-source platform designed to improve the machine learning lifecycle.
It helps developers to get data from its machine learning apps by tracking experiments and managing models.
With MLflow, you can log parameters, metrics, and artifacts: this will enable you to check how your AI model is going and verify answers, performances, and so on. Its modular components allow flexible integration with existing workflows, from local development to production pipelines.
Moreover, MLFlow offers automatic integration with several existing services: in some cases, putting an “autologging” line will be enough to collect the main data from your app.
What We Need
As usual, I suggest adding from now to your favourite e-commerce shopping cart all the needed hardware, so that at the end you will be able to evaluate overall costs and decide if to continue with the project or remove them from the shopping cart. So, hardware will be only:
- Raspberry PI Computer Board (including proper power supply or using a smartphone micro USB charger with at least 3A)
- high-speed micro SD card (at least 16 GB, at least class 10)
Step-by-Step Procedure
Prepare the AI App
As said, we need to start from an existing and working AI model. All the instructions are available in my AI Chatbot on Raspberry PI tutorial, where you can find all the required steps to install Ollama (as the AI inference engine), LangChain (as the AI framework), and Streamlit (as the web app).
Prepare the Raspberry PI with MLFlow
We need to install MLFlow in the same Python virtual environment where the AI app is running. So, according to my example, we need to activate the environment:
source ai_chatbot/bin/activateNow, we can proceed to install MLFlow with pip:
pip install mlflowThat’s enough to run the MLFlow server with the following terminal command (please use all the following lines as a single command). Please change the IP address of my Raspberry PI (192.168.1.218) with your own, as well as the network range of my LAN (192.168.1.*) with your network:
mlflow server \
       --host 0.0.0.0 \
       --port 5000 \
       --backend-store-uri sqlite:///mlflow.db \
       --allowed-hosts "192.168.1.*,localhost,127.0.0.1" \
       --cors-allowed-origins "http://192.168.1.218:5000,http://localhost:5000"
Below is a short explanation of the options used in this command:
--host 0.0.0.0: sets MLFlow server to listen to any connection coming to the Raspberry PI interface--port 5000: The MLFlow will expose its web GUI at port 5000--backend-store-uri sqlite:///mlflow.db: This sets MLFlow to use a local SQLite database on the current path. This option will create an mlflow.db file, which the server will use without the need for any SQL server instance--allowed-hosts "192.168.1.*,localhost,127.0.0.1": this sets the hosts allowed to call the MLFlow server, where the “*” character is a wildcard. With these options, I enable my whole home network (192.168.1.*) as well as requests from the same Raspberry PI where the MLFlow server is installed--cors-allowed-origins "http://192.168.1.218:5000,http://localhost:5000": this option enables Cross Origin requests. It is required to enable internal parts of the MLFlow service to properly communicate with each other
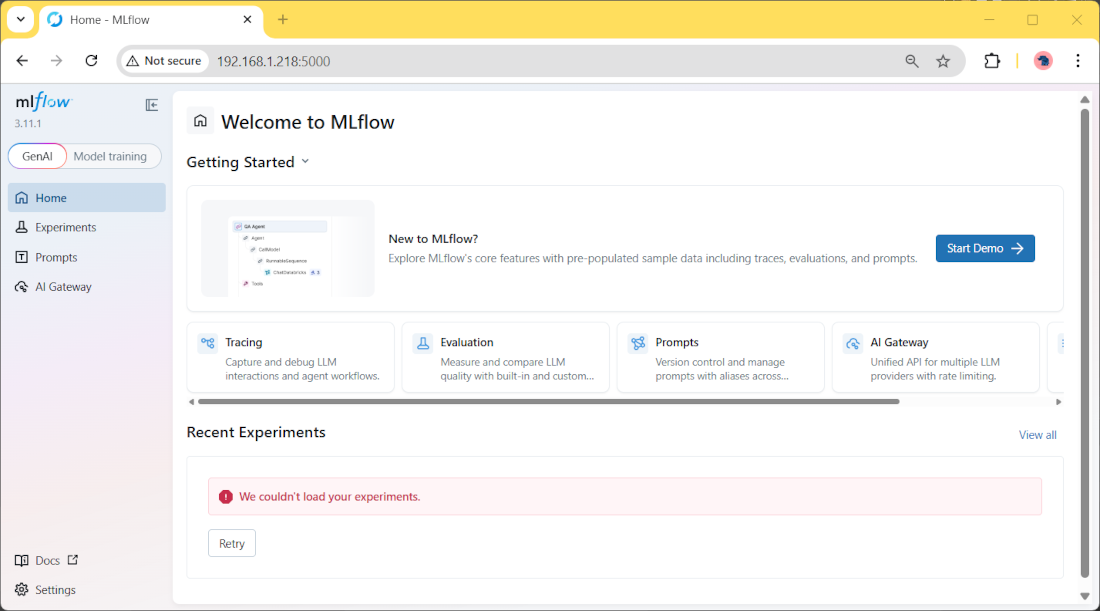
Now, from any browser (remote or local to your Raspberry PI), please use the Raspberry PI’s IP address and the “5000” port to reach the MLFlow server GUI. In my case, it will be http://192.168.1.218:5000. You will reach the MLFlow server GUI:
Make MLFlow Server Run with Systemd
You may note that the server command keeps an interactive session, with the server shutting down if you stop it (for example, with a logout).
For this reason, we’ll see how to convert it to a system process, so running without the need to manually launch it.
For this task, please create the following systemd file:
sudo nano /etc/systemd/system/mlflow_server.serviceAnd fill it with the following content. You may note that the mlflow command in the ExecStart line must use your virtual environment path. Please correct it according to your path, if it differs from mine:
[Unit]
Description=MLFlow server
After=multi-user.target

[Service]
Type=simple
User=pi
WorkingDirectory=/home/pi
ExecStart=/home/pi/ai_chatbot/bin/mlflow server \
       --host 0.0.0.0 \
       --port 5000 \
       --backend-store-uri sqlite:///mlflow.db \
       --allowed-hosts "192.168.1.*,localhost,127.0.0.1" \
       --cors-allowed-origins "http://192.168.1.218:5000,http://localhost:5000"
Restart=always
RestartSec=5

[Install]
WantedBy=multi-user.target
Now enable the new service with the following terminal commands:
sudo systemctl daemon-reload
sudo systemctl enable mlflow_server.service
sudo systemctl start mlflow_server.service
From now on, our Raspberry PI will run the MLFlow server without the need for any terminal command and will automatically restart it at any reboot or failure.
Use MLFlow Autologging with LangChain
MLFlow allows you to use automatic logging with many AI frameworks (both cloud and local).
My chatbot example uses LangChain, and this is a first special case: with LangChain, MLFlow has some limitations in autologging. But we’ll test it and check what the results are, even if limited.
Before all, we must install the complete LangChain package (as the chatbot was built with only langchain-core and langchain-community). Please use the following terminal command, after you have activated the virtual environment:
pip install langchainNow, let’s change the previous ai-assistant.py script. We’ll rename it as mlflow-test01.py, so tracking the changes. You can download the first test from my download area with the following terminal command:
wget https://peppe8o.com/download/python/mlflow/mlflow-test01.pyHere, we just add the following 4 lines, compared to the original chatbot script:
import mlflow
mlflow.set_tracking_uri("http://192.168.1.218:5000")
mlflow.set_experiment("my-chatbot")
mlflow.langchain.autolog()
It is important to note that the MLFlow import and settings must stay in the first lines of your scripts.
The first line imports the MLFlow library. The set_tracking_uri tells the script how to reach the MLFlow server. The set_experiment gives this test a name (“my-chatbot”), which will allow us to get its data in the MLFlow server dashboard. The langchain.autolog() will collect all the AI metrics available to LangChain with MLFlow.
Now, please run the chatbot:
(ai_chatbot) pi@raspberrypi:~ $ streamlit run mlflow-test01.pyNow, please use your chatbot with a few prompts.
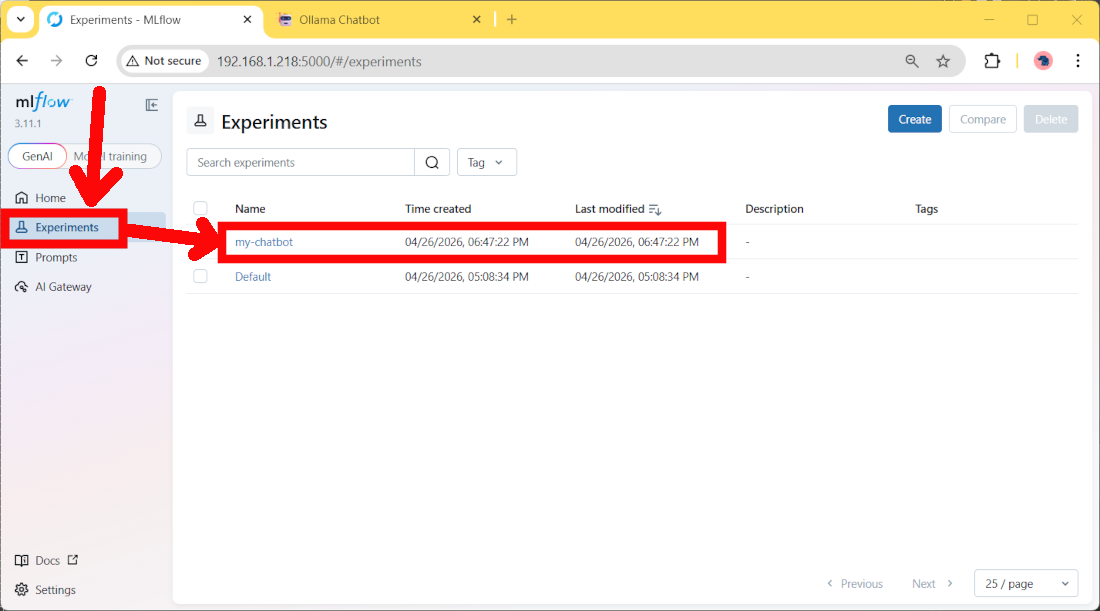
After this, please go back to the MLFlow server dashboard. Here, please move to the Experiments page, and you will find a new entry:
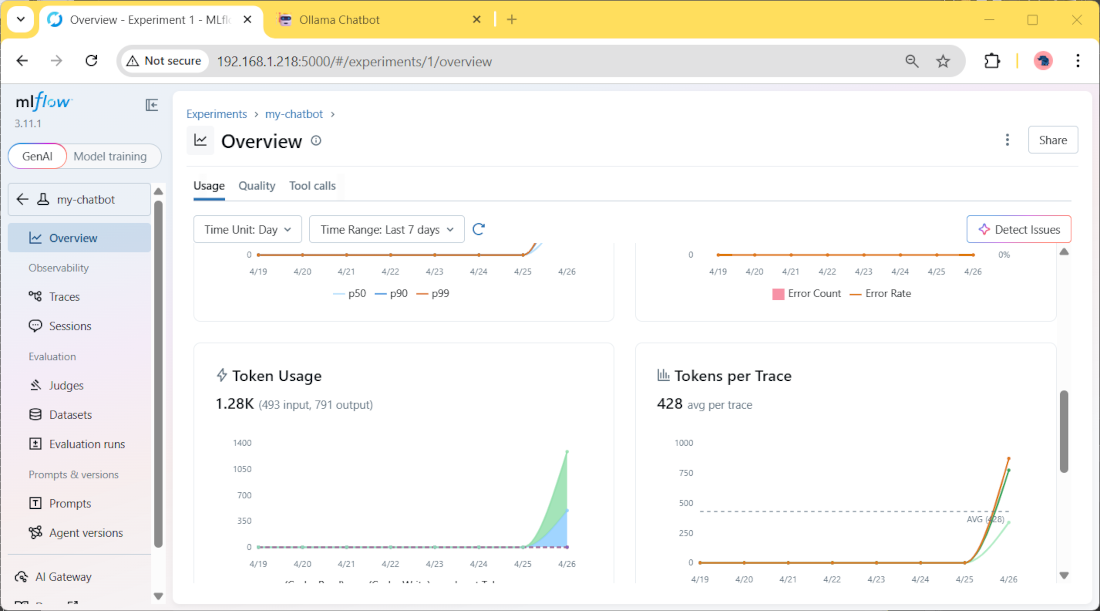
If you click it, you will find more details about the measured parameters, like for example the token usage and duration time:
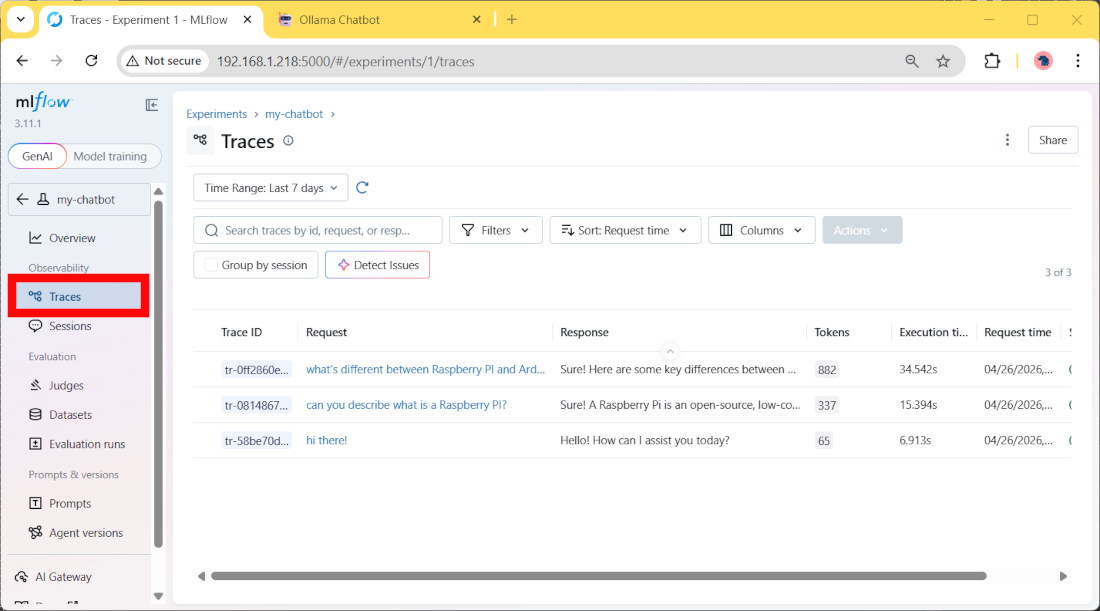
Moreover, in the Traces menu, you can see details about every single user prompt and the AI responses:
Add Custom Measures with MLFlow
If the automatic logging isn’t enough for you and you need more parameters to monitor your AI project, you can add custom parameters calculated inside the Python script.
The following test will use the MLFlow “Run” section to log some performance and model info. You can download the complete file from my download section:
wget https://peppe8o.com/download/python/mlflow/mlflow-test02.pyComparing it with the previous test, we’ll note some important differences.
The first (less important) is that we also import the time package. We’ll use it to get a different measure for the AI answer generation:
import timeIn the prompt generation section, we use the previous module to calculate the latency. This calculation is made before the answer generation and after it, with the following lines:
    start_time = time.time()
    ....
    latency = time.time() - start_time
Now, the most important addition is in the following block:
    with mlflow.start_run(run_name="chat_turn"):
        mlflow.log_param("model", "qwen2.5:0.5b")
        mlflow.log_param("prompt_length", len(prompt))
        mlflow.log_param("history_length", len(st.session_state.messages))
        mlflow.log_metric("latency_sec", latency)
        mlflow.log_metric("reply_length", len(full_reply))
        mlflow.set_tag("app", "streamlit")
        mlflow.set_tag("llm_backend", "ollama")
        mlflow.set_tag("type", "chatbot_turn")
Here we start a new “run” for each prompt, and we’ll log some additional values manually defined as in the previous lines. The most important difference between them is that:
- “log_param” will track text parameters
- “log_metrics” will track number values, which can be shown, for example, in charts
- “log_tags” will track tags associated with the runs
Run this Streamlit application:
(ai_chatbot) pi@raspberrypi:~ $ streamlit run mlflow-test02.pyAnd add a few interactions with your chatbot.
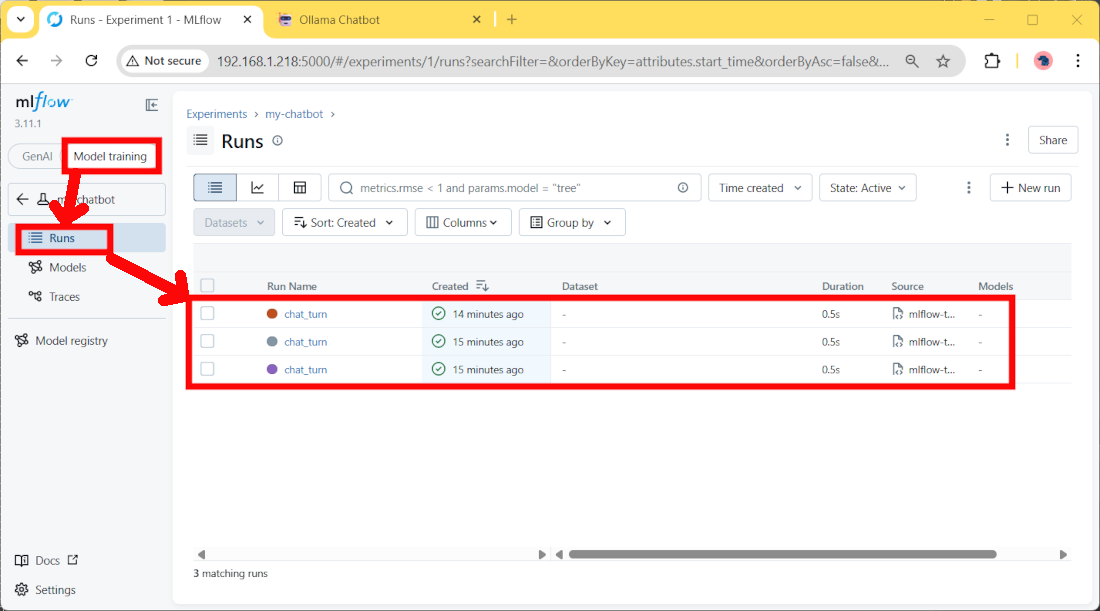
On the MLFlow server side, we’ll find the logged data by selecting the “Model Training” option on the top switch, then clicking the “Run” link:
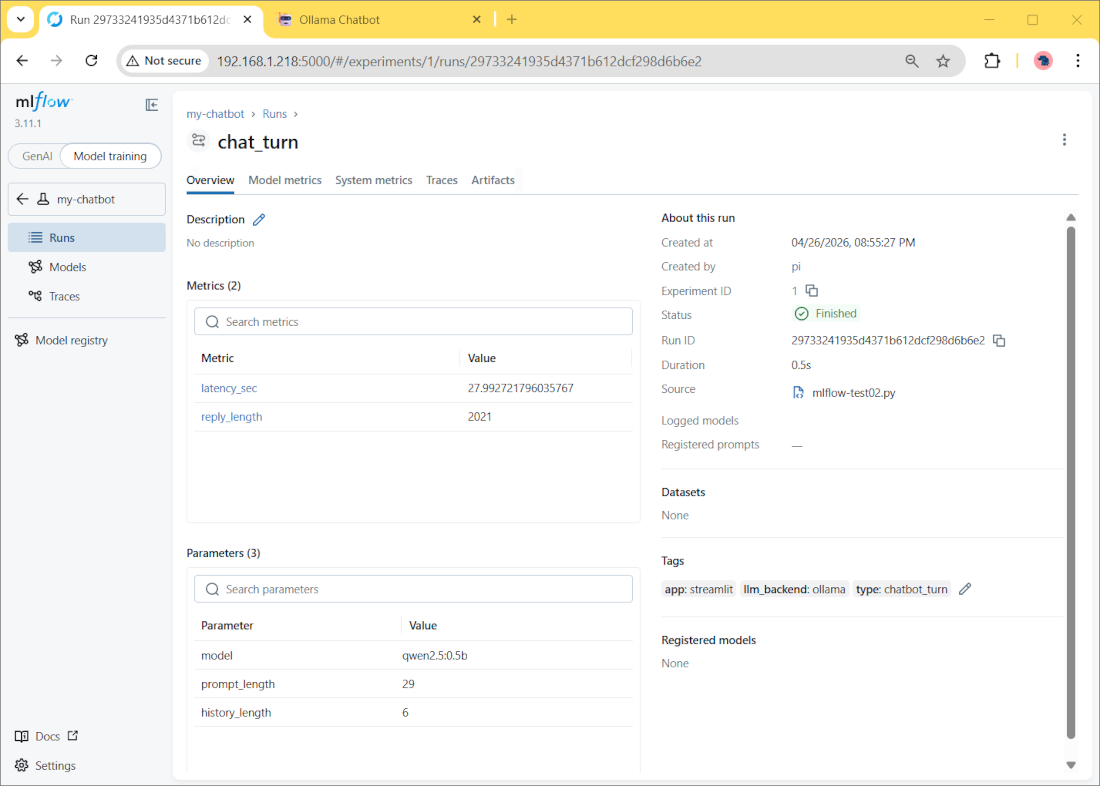
Here we’ll find more details about each user prompt. By clicking one of these runs, you can find the logged data for it:
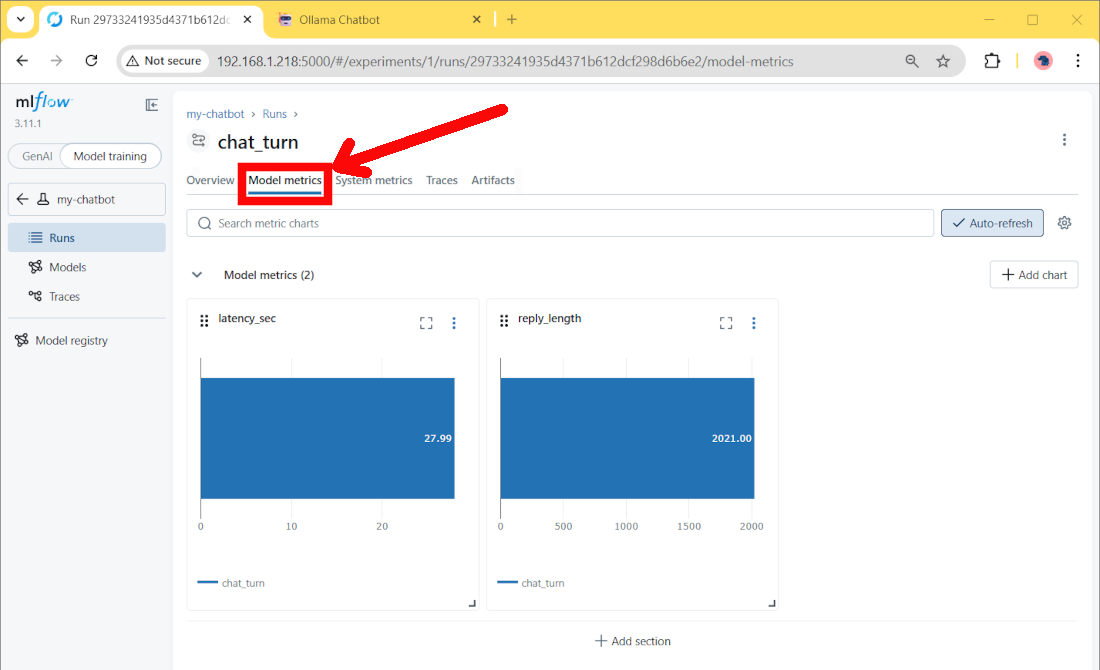
Moving to the “Model metrics” section, we’ll also find some metric charts:
Resources
Next Steps
If you are interested in more Raspberry PI projects (both with Lite and Desktop OS), take a look at my Raspberry PI Tutorials.
Enjoy!

Open source and Raspberry PI lover, writes tutorials for beginners since 2019. He's an ICT expert, with a strong experience in supporting medium to big companies and public administrations to manage their ICT infrastructures. He's supporting the Italian public administration in digital transformation projects.
![]()
![]()
![]()
![]()
![]()
![]()
![]()


