

Last Updated on 17th January 2026 by peppe8o
In this tutorial, I will show you how to setup a Raspberry PI with Ubuntu Server OS.
Even if Raspberry Pi comes with the Raspberry PI OS as the first option for many beginners, some people might find it interesting to test services and applications provided by Ubuntu, one of the most famous open-source OSs supported by a very strong web community.
In this tutorial, we’ll install the Ubuntu Server version (without a Desktop Environment). For those who don’t know the difference between Ubuntu Server and Ubuntu Desktop, the main difference is that the first one doesn’t offer a desktop environment (icons, windows, and so on). So, with Ubuntu Server you will have only a terminal interface to manage everything of your Raspberry PI.
I will provide the steps using my Raspberry PI 4 model B, but the following instructions will work with any Raspberry PI computer board compatible with 64-bit OS.
What do you need
As usual, I suggest adding from now to your favourite e-commerce shopping cart all the needed hardware, so that at the end you will be able to evaluate overall costs and decide if to continue with the project or remove them from the shopping cart. So, hardware will be only:
- Raspberry PI Computer Board (including proper power supply or using a smartphone micro USB charger with at least 3A)
- high speed micro SD card (at least 16 GB, at least class 10)
You’ll also need a Personal Computer to prepare the MicroSD storage for your Raspberry PI.

Step-by-Step Guide
Flash the MicroSD Card with Raspberry PI – Ubuntu Server OS
We’ll use the Raspberry PI Imager software to flash (write the OS data) the MicroSD. This makes the setup procedure far simpler, as it allows for selecting all the needed settings to get the server up and running by using an easy-to-use GUI. You can get this software from the official Raspberry PI download page: https://www.raspberrypi.com/software/.
Once you install this software on your Personal Computer, please open it (I suggest running it with administrator privileges).
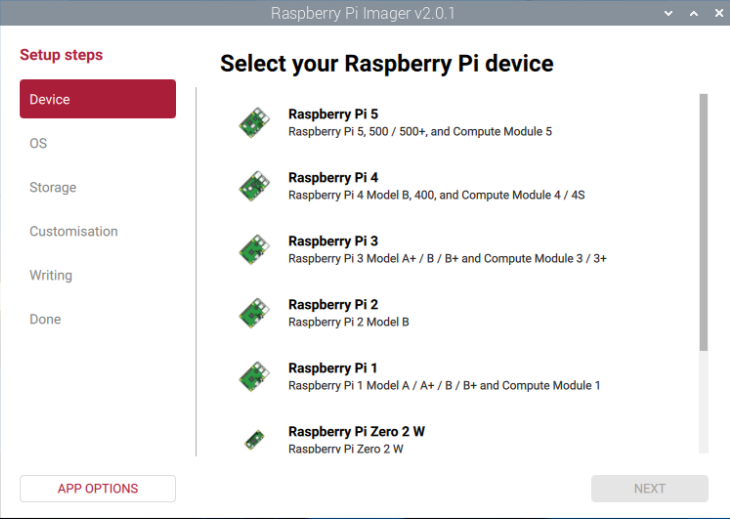
the first screen will allow you to select your Raspberry PI model. Please select your one and click “NEXT”:
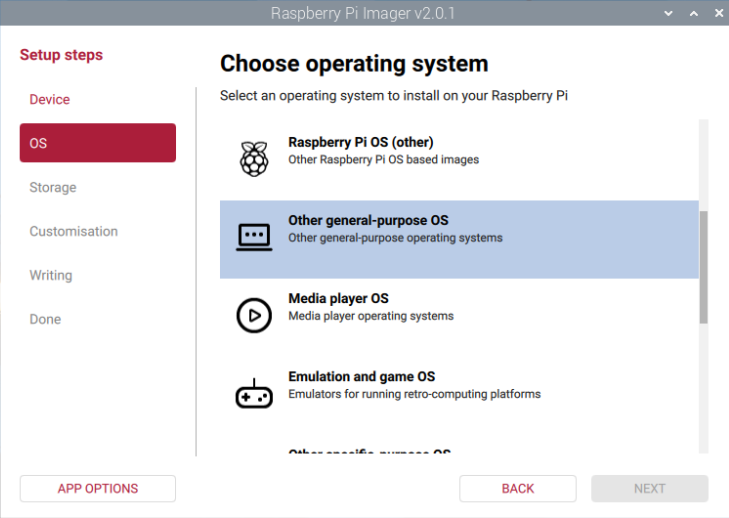
In the following screen we can choose the OS. Please scroll down to the “Other general-purpose OS” and click it:
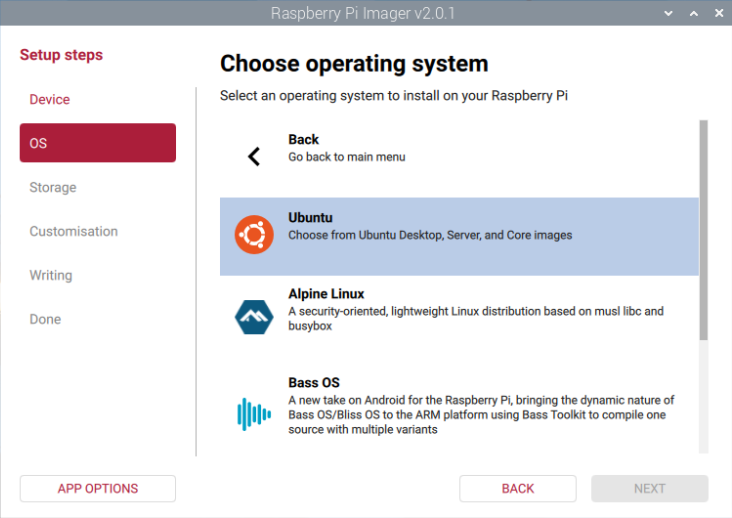
Please click now the “Ubuntu” group:
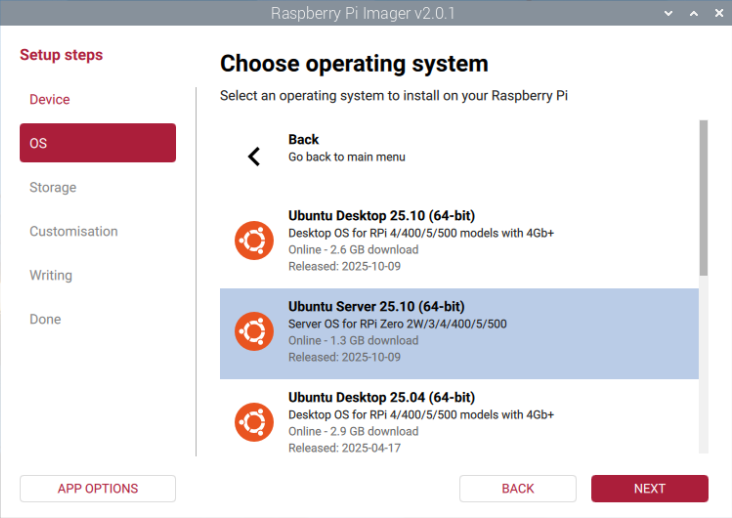
Now we can select the latest Ubuntu Server version. Please note that this screen also includes Desktop versions, but for this tutorial we need the server OS. After this, please click the “NEXT” button:
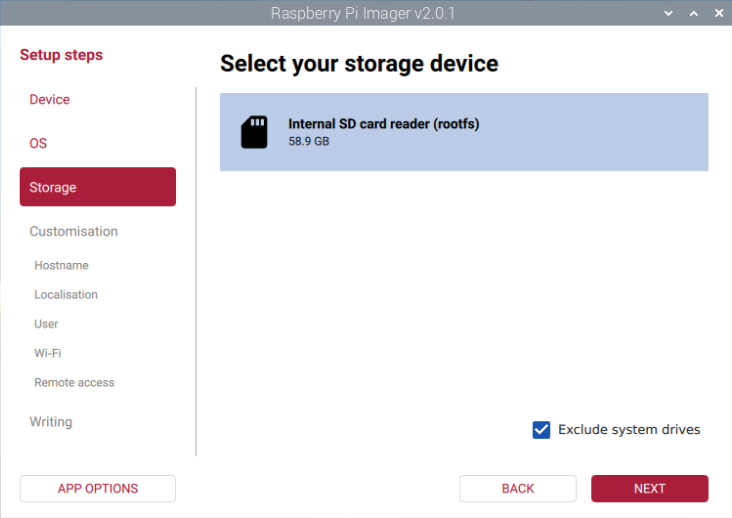
If you didn’t it before, please plug the microSD card in your computer where the Raspberry PI Imager is running. In the following screen we’ll be able to select it as storage:
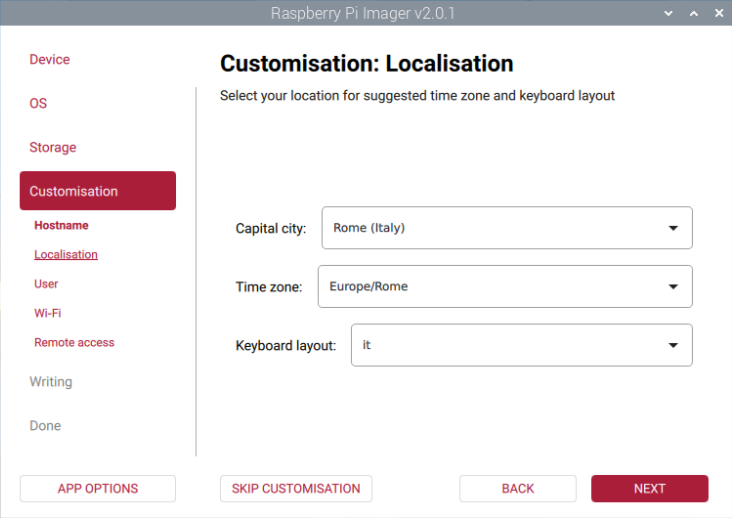
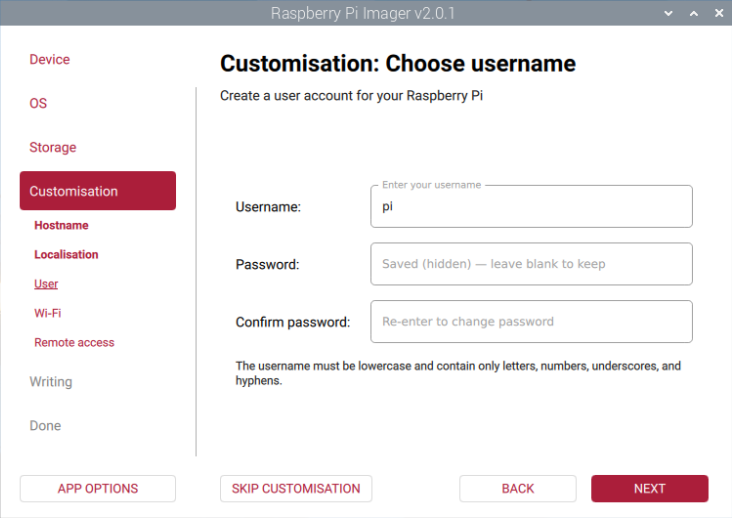
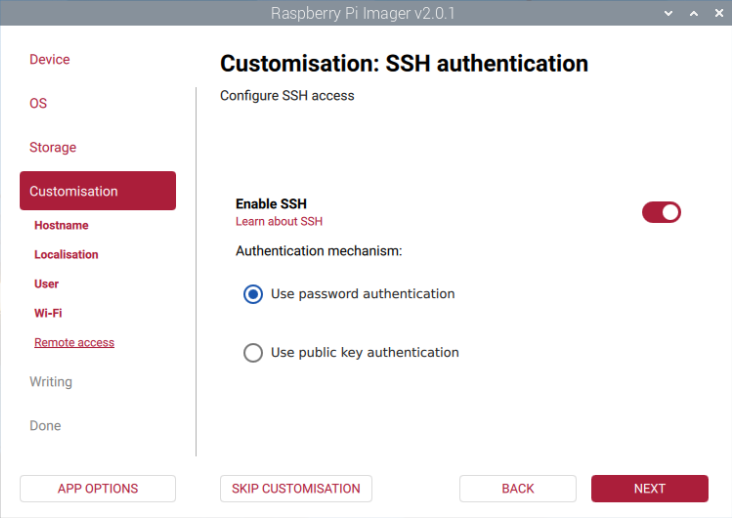
Now some customisation screens will come. In the following, you can set the hostname, your locale/keyboard layout, user credentials, the Wifi network where to connect from the first boot, and enable the SSH for remote access:


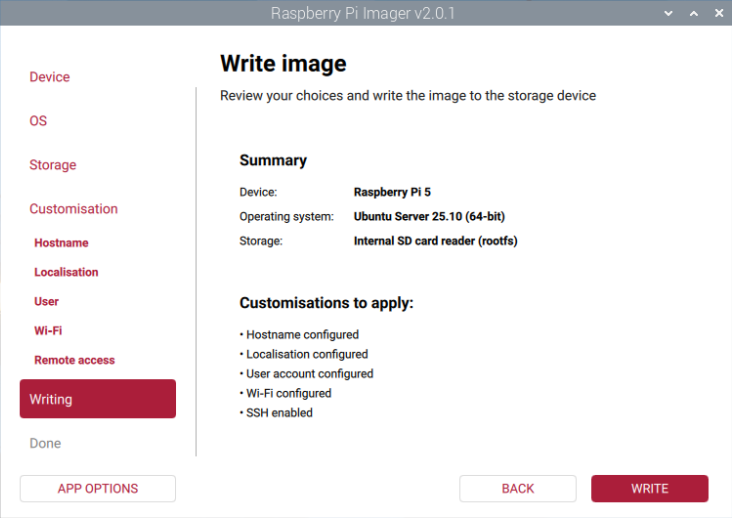
We are near to the image flashing process, so the Raspberry PI Imager gives us a summary of the current configuration:
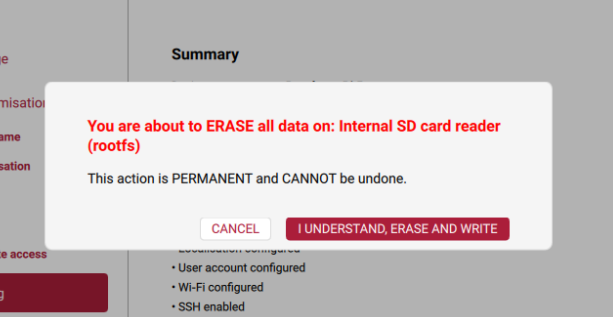
After you click the WRITE button, it will also warn you that this operation will delete all the data in the selected storage:
The software will download the OS and write it to the storage. At the end, you will receive a confirmation like the following:

Please remove the microSD card from your personal computer, plug it into your Raspberry PI and power it on.
Remotely Accessing your Raspberry PI with Ubuntu Server
The first boot may take a while to complete as (only) at the very first boot, the OS will perform some actions like expanding the file system to use the whole microSD storage.
Once you know your Raspberry PI’S IP Address, you can remotely access it with a remote SSH session.
For this task, I love using the free PuTTY installed on my computers, as it allows me to save my session configurations, giving them a name.
Whatever SSH client you use, please remember to set the following minimal configurations:
- IP: the Raspberry PI’s IP address
- Username and password: the credentials used in Raspberry PI Imager to customize your OS
- Port: 22
With some file transfer programs (like Filezilla) you can use these settings also to transfer files from and to your Raspberry PI via the SFTP protocol.
With command line-base tools (like the terminal in some remote PC like Linux based), you can also launch a remote SSH connection to your Raspberry PI iwth the following command (where you must change the “<username>” and “<Raspberry Pi’s IP address>” values with your ones):
ssh <username>@<Raspberry Pi’s IP address>This will prompt for the password.
Once you logged in your ubuntu server, please update and upgrade it to the latest packages with the following command:
sudo apt update -y && sudo apt full-upgrade -yThis command will ask you for the sudo password (required for every command with elevated privileges). By default, the password is the same as your current user.
Raspberry PI with Ubuntu Server: Networking Setup
If you need to change your networking interfaces, maybe add an ethernet configuration and/or change the WiFi, the Raspberry PI with Ubuntu server allows you to do this task by managing the 50-cloud-init.yaml file. Open it for editing:
sudo nano /etc/netplan/50-cloud-init.yamlYou will find the WiFi already configured here, as we set it with the Raspberry PI Imager.
You can edit it as shown in the following examples. Please note that the comments (lines starting with the “#” character) are not executed by the OS.
At any change, after saving the settings, you can make them run by rebooting the Raspberry PI or by using the following command:
sudo netplan applyIf any error occurs with the netplan apply, you can debug it as follows:
sudo netplan --debug applyNetworking example 1: Ethernet and WiFi with DHCP
With this example, you will set both your ethernet and WiFi interfaces to automatically get an IP address from your router. In the following examples, please remember to change the SSID-NAME and WIFI-PASSWORD with your one.
In this example, the dhcp4: true will do the job, setting both the interfaces to get the IP (v4) from the router where the Raspberry PI is connected:
network:
    version: 2
    ethernets:
        eth0:
            optional: true
            dhcp4: true
    wifis:
        wlan0:
            optional: true
            dhcp4: true
            access-points:
                "SSID-NAME":
                    password: "WIFI-PASSWORD"
Networking example 2: Ethernet and WiFi with Static IP
In this example, I will set both interfaces to use static IP addresses.
In this case you must check that your router isn’t using the same addresses for any other device in your home LAN (192.168.1.20 and 192.168.1.120 if you use my example values).
Also, make sure you are using the same addressing subnets (192.168.1.0/24 in my case) and that the router has the address 192.168.1.1.
The 8.8.8.8 and 8.8.4.4 for nameservers will make your Raspberry PI use the g Google’s nameservers to resolve DNS queries.
network:
    version: 2
    ethernets:
        eth0:
            optional: true
            dhcp4: false
            dhcp6: false
            addresses:
            - 192.168.1.20/24
            routes:
            - to: default
              via: 192.168.1.1
            nameservers:
              addresses: [8.8.8.8,8.8.4.4]
    wifis:
        wlan0:
            optional: true
            dhcp4: false
            dhcp6: false
            addresses:
            - 192.168.1.120/24
            routes:
            - to: default
              via: 192.168.1.1
            nameservers:
              addresses: [8.8.8.8,8.8.4.4]
            access-points:
                "SSID-NAME":
                    password: "WIFI-PASSWORD"
Final Check
Type the following command:
dpkg --print-architecturethat will show you have an arm64 (64-bit) OS:
arm64Other Raspberry PI Projects
If you want to discover many other projects for your Raspberry PI, you can take a look at peppe8o Raspberry PI tutorials.
Enjoy!

Open source and Raspberry PI lover, writes tutorials for beginners since 2019. He's an ICT expert, with a strong experience in supporting medium to big companies and public administrations to manage their ICT infrastructures. He's supporting the Italian public administration in digital transformation projects.
![]()
![]()
![]()
![]()
![]()
![]()
![]()


The current ubuntu-21.04-preinstalled-server-armhf+raspi.img.xz & ubuntu-21.10-preinstalled-server-armhf+raspi.img.xz do not support USB booting? Any idea how to update them to support USB booting? The RPi images work fine but just copying the boot partition doesn’t work for me.
Hi Jeff. With Raspberry PI 4 Model B it should be a simple job. Just use first steps from my ubuntu-desktop-and-raspberry-pi-4-fast-home-computer-booting-from-ssd/ tutorial, except that instead of Ubuntu Desktop image you have to use the server image. With other Raspberry PI computer boards, it should be not possible (maybe RPI 3 Model B, but with a different and more invasive procedure)