
Last Updated on 1st May 2026 by peppe8o
In this post, I’m going to show you how I made a fast desktop computer from my Raspberry PI 4 Model B with Ubuntu.
With remote activities increased due to pandemic, a lot of families needed more home computer to manage smart working, school sessions and family meetings. Ubuntu on Raspberry PI can be a fast solution for your cheap desktop computer, but only adopting certain tricks
Why Ubuntu on Raspberry PI
Before all, the Foundation has its own Operating System (Raspberry PI OS Desktop). So, you may ask why Ubuntu. From my personal experience, I have found Ubuntu on Raspberry PI 4 faster than Raspbian as it manages better the multithreading processes. When I run an application on Raspberry PI OS Desktop, I’ve noticed that all the work goes on a single CPU (monitoring with HTOP). On the other side, with Ubuntu I can see processes working on one or more CPUs according to processing load, resulting in a more fluid experience. I have seen this with Mozilla Thunderbird: on Raspberry PI OS Desktop it results extremely slow to open, compose emails and also send. On Ubuntu, it works far better.
For this reason, even if the default desktop environment for Ubuntu isn’t the fastest in the world (and you can also change it if you want), I feel this solution is better for home usage when you don’t want only browse a few pages, but also receiving and sending emails from several accounts, searching in many web pages and also working with Libre Office.
Let me say all, you will never get the same performance of a modern notebook or personal computer with their x64 processors but, with the following steps, I was able to use my Raspberry PI 4 Model B a nice desktop computer able to perform all of my tasks for my blog and I get a very good home PC.
A great performance improvement in my setup has been given by changing the SD card with a USB SSD disk for OS. This is a solution that can be adopted from Raspberry PI 4 model B. With a few hacks, you can boot USB OS also from a Raspberry PI 3 Model B. But Raspberry PI 4 offer more RAM than the 1GB available from RPI3, and I think that a basic home computer should have at least 4GB of RAM to be usable without freezing.
An important consideration goes to the power supply. When connecting the SSD to Raspberry PI, the disk will drain current. What can be provided from the Raspberry PI USB port could not be enough to power a fast SSD with a mouse and a keyboard. For this reason, I suggest using a USB to SSD disk adapter (usually a SATA) with an external power supply to make available the right current for all the devices.
So, let’s go to the steps to install and configure Ubuntu Desktop on Raspberry PI.
What We Need
As usual, I suggest adding from now to your favourite e-commerce shopping cart all the needed hardware, so that at the end you will be able to evaluate overall costs and decide if to continue with the project or remove them from the shopping cart. So, hardware will be only:
- Raspberry PI 4 Model B (including proper power supply or using a smartphone micro usb charger with at least 3A). I also suggest a board with at least 4GB of RAM
- a micro SD card (used only to change boot order)
- a USB/wireless keyboard and a mouse
- an HDMI monitor with HDMI cable
- an SSD disk (avoid those using Jmicron chip, some posts also suggest to avoid Crucial SSDs)
- a USB 3.0 to SSD adapter with external power supply (also here, avoid those using Jmicron chip)
Step-by-step Procedure
Enable USB Boot
This step is required only the very first time and changes Raspberry PI boot order to check USB port first, then moving to micro SD card only if USB boot fails.
For this step, you need the Raspberry PI Imager software. Check that your version is at least equal to or newer than 1.6.2. If not, you can download and install the new version from Raspberry PI Imager download page.
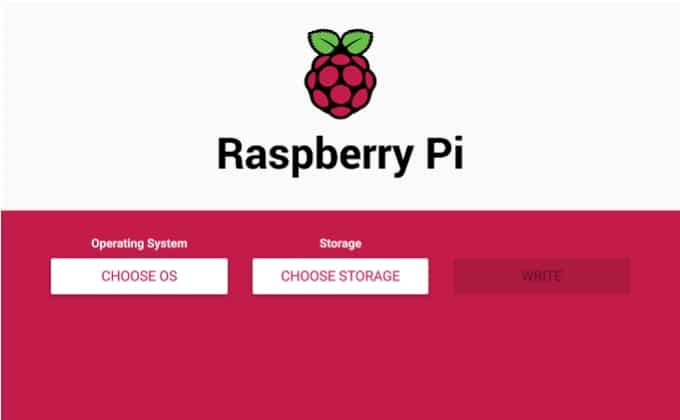
Insert your micro SD card in your PC with Raspberry PI Imager installed and open software:
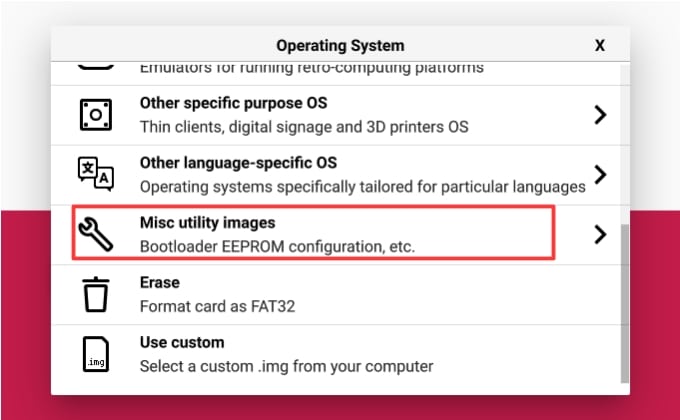
Select “Choose OS” button and scroll down to “Misc Utility images”:
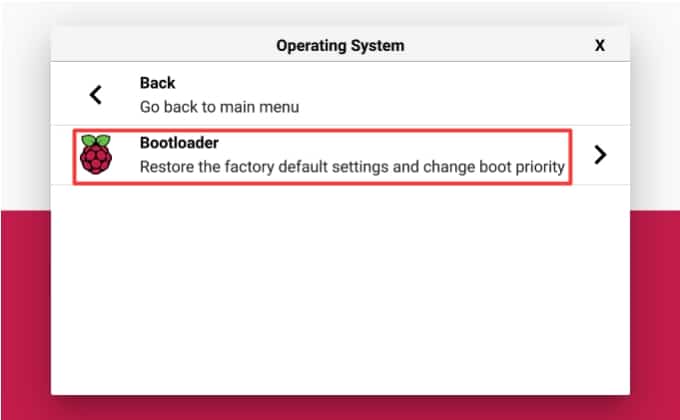
Select this option, then you should have only 1 option, regarding Bootloader:
Select this option, then identify “USB Boot”:
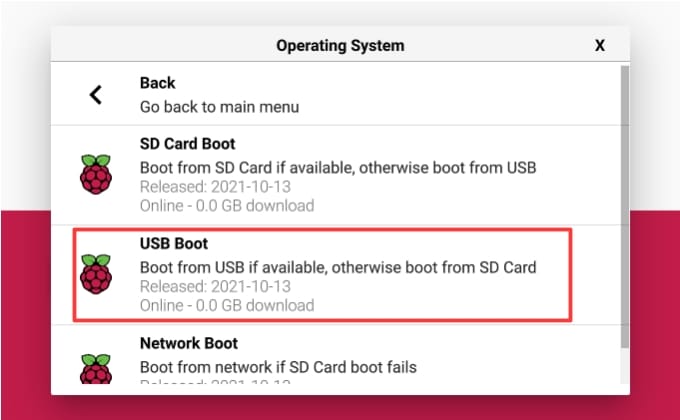
Click it, then you will be redirected to Raspberry PI Imager home screen. Use the “Choose Storage” button to identify your SD card, then push the button “WRITE”.
Wait for flashing to be finished.
Take the micro SD card and insert it in your Raspberry PI 4. Power on the RPI. At this point, the new bootloader will start to installing and this operation should be really fast. From your monitor (if connected to RPI) you will only see a green screen with no indication if everything has gone correctly. In your Raspberry PI, you will see only the green led flashing. (I would suggest the Raspberry PI Foundation implement a clear signal telling that everything has been completed successfully…)
My suggestion to you is to wait for a few minutes and then power off the Raspberry PI assuming that operations have finished.
Then you can extract the micro SD card from your Raspberry PI.
Flash Ubuntu Desktop on SSD disk
Connect the USB SSD disk to your PC with Raspberry PI Imager.
You can both use the Ubuntu Desktop version directly available from Imager or download your Ubuntu image from Canonical website (Canonical is the company that maintains Ubuntu) and flash it using the same software.
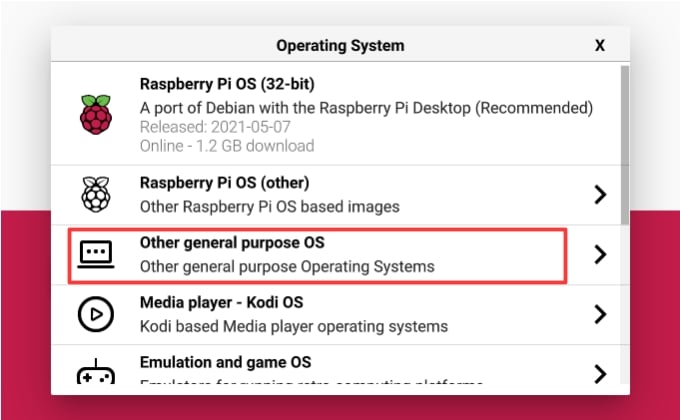
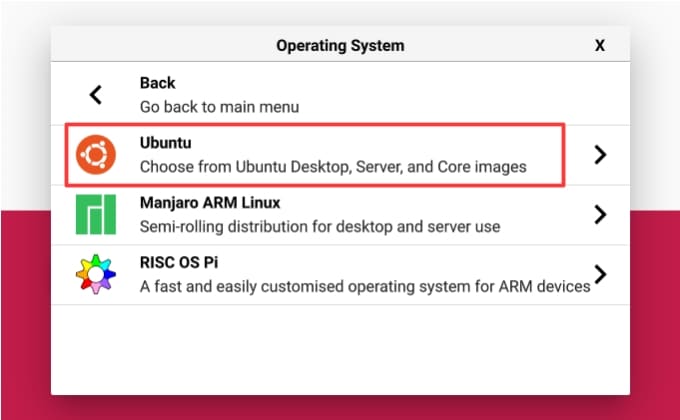
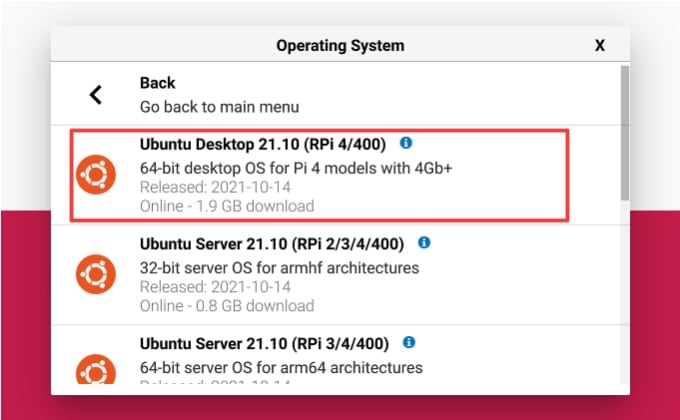
In first case, you can get it from “Choose OS” > “Other General Purpose OS” > “Ubuntu” > “Ubuntu Desktop xx.xx” (being “xx.xx” the latest version available), as following pictures show:
If you prefer downloading directly your image from Canonical, use the following link to download the Desktop image for Raspberry PI:
https://ubuntu.com/download/raspberry-pi
Please pay attention to downloading the Desktop version, not the server version!
Once downloaded the “.img.xz” file, open Raspberry PI Imager and from “Choose OS” options scroll down to “Use Custom”:
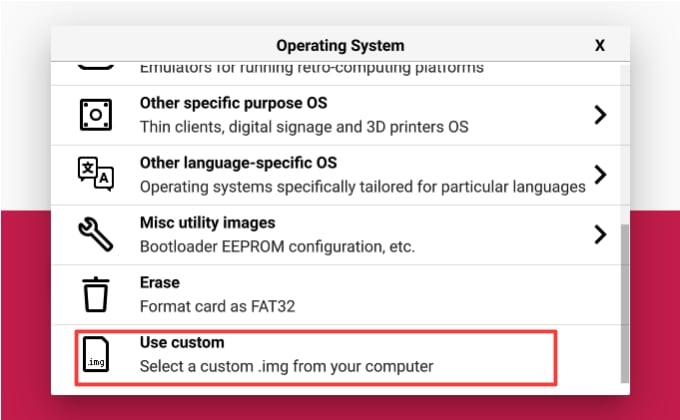
This enables you to select and use your own “.img” or “.img.xz” file.
As usual, from Imager home select the Storage, this time using the USB SSD disk.
With “WRITE” button start the OS flashing and wait for the operation to finish successfully.
Run Ubuntu Desktop from Raspberry PI
Now plug your USB SSD disk to Raspberry PI and power it on. Pay attention to using the Raspberry PI USB 3.0 port (those with blue internal), as other ports are USB 2.0, so granting fewer performances.
The very first boot could take a bit more time than usual as in this stage the new OS also expands its file system to the whole storage. Anyway, it should last only a very few minutes.
A wizard will drive you to customize Ubuntu Desktop preferences. Again, this phase comes only at the very first boot. Configure your favourite language, keyboard, password, network (and so on). At the end, you will arrive at your desktop. At this point, Ubuntu is installed and working.
Fixing Common Issues
A few common issues could be present in a fresh installation. I’ve found the following with related fixes:
- Desktop freezing randomically > Ubuntu Desktop freezing with Raspberry PI: how to fix
Please let me know if any other could occur and let me also know if you found a solution.
Test Your Disk Speed
Now you should have very high read/write performances on your disk. To test these performances, please refer to my Testing Raspberry PI Storage Speed (SD, USB) with dd.
A fast micro SD Card usually gets 15/20 MB/s of write/read. A fast SSD hard disk, even if limited by USB port, will grant about 200/300 MB/s (more than 10x times faster!).
Disable Power Manager
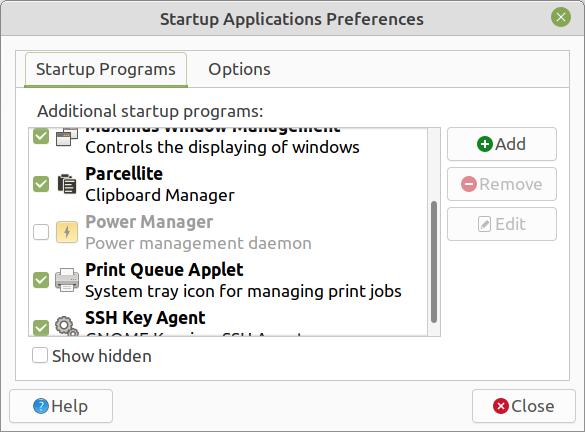
From my experience, many lagging problems, especially with keyboard, have been solved by disabling the Power Manager from applications launched at startup time.
From your menu, go to Preferences -> Startup Applications. Identify inside the resulting list of “Startup Programs” the Power Manager and disable it:
Change Desktop Environment to Mate
Desktop Environment has a great impact on system performance. A light DE means a more responsive OS and a better overall experience. A good compromise between lightness and usability is Mate DE, which can be installed with the following terminal commands:
sudo apt install tasksel
sudo tasksel install ubuntu-mate-desktop
To activate the new DE, you need to logout and then select your User. Before inserting your password, at the right-bottom part of the screen, you will find the “Options” button. Use it to select your preferred session (Mate to try it). Then enter your username and password as normal.
Install raspi-config
raspi-config is a useful terminal tool that enables customizing in a very simple manner many of Raspberry PI options. To install it, open a terminal session on your Raspberry PI desktop. Update your apt repository with the following command:
And now install raspi-config with the following terminal command:
sudo apt install raspi-config -yChange GPU Memory Split
Changing the GPU Memory Split allows giving more RAM to the graphical board, thus better supporting graphical environment. You can assign this in two ways: from config.txt file and from raspi-config. Please note that with raspi-config on Ubuntu I’ve found fewer options than the one on Raspbian. For this reason, the best way will be via config.txt. I’ll show you both ways.
Change GPU Memory Split via config.txt file
From the terminal, open the config.txt file:
sudo nano /boot/firmware/config.txtIdentify the gpu_mem variable and change it to your desired value. Raspberry PI 4 Model B with 4GB or more can be set also to 512MB
gpu_mem=512Save and close, then reboot
Change GPU Memory Split via raspi-config
Before starting this step, please close any programs you were testing, as this will require a reboot. From terminal, issue the following command:
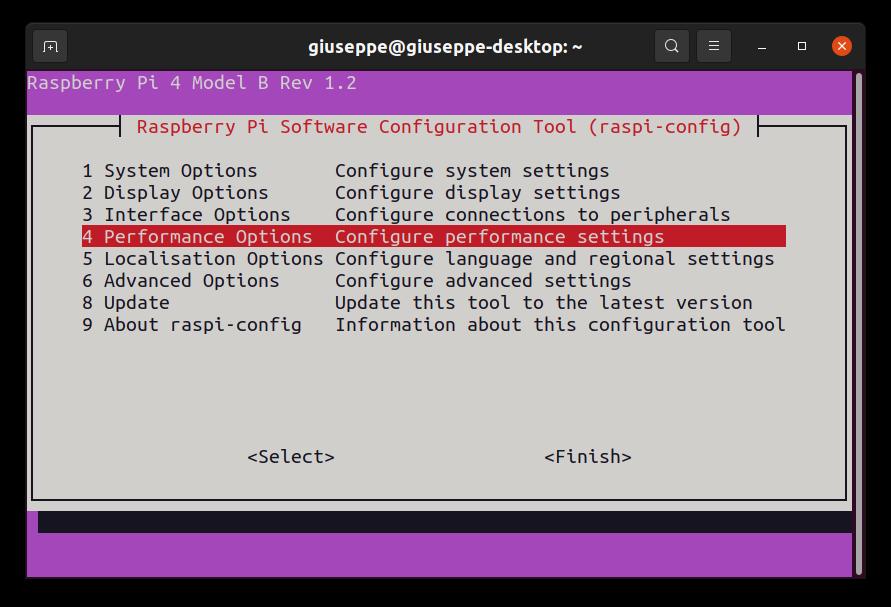
sudo raspi-configYou may be requested for root password, which is different from your user password. By default user password is empty (simply press return without typing anything. But remember to change it as soon as possible with the “sudo passwd” terminal command and keep it safe for future needs.
You will be prompted to a semi-graphical interface. Move down to “Performance Options”:
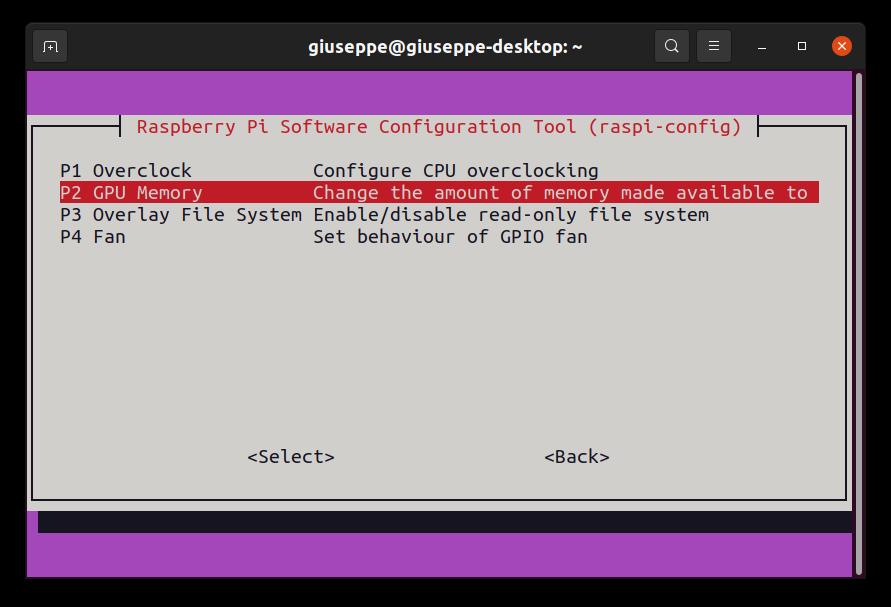
Press enter from your keyboard to access the sub-menu. Same way, now select the GPU Memory option:
The final screen shows available settings. Choose the one which assures more RAM to GPU/videocore:
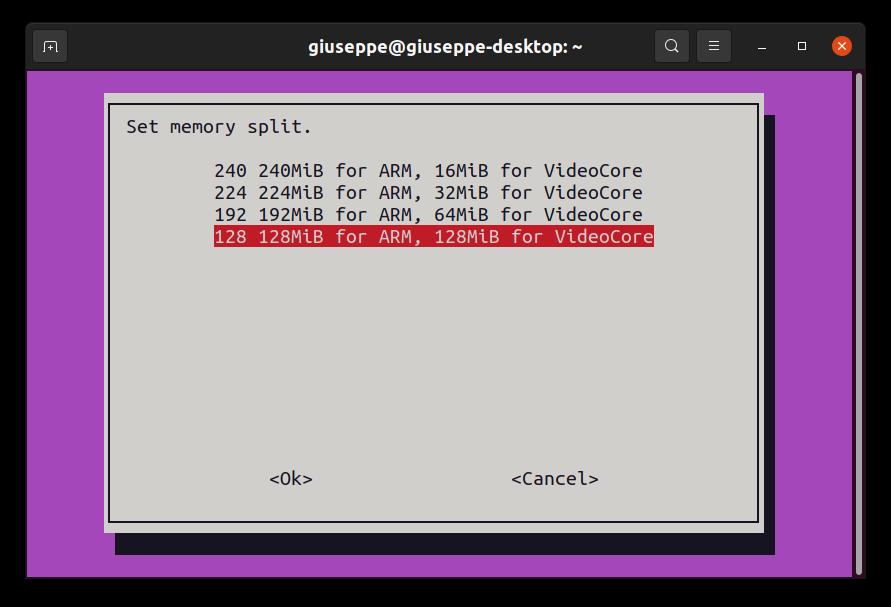
With “TAB” key from your keyboard, move on “Ok” and press enter to confirm this selection.
The screen will go back to raspi-config home. With the same “TAB” key from the keyboard, highlight “Finish” and press enter. A reboot will be required.
Updating System
Finally, also a software update with the “Software Updater” application is a good practice. You will find it already installed. Just run it and wait for updates to complete.
Software Changes
The new Ubuntu OS brings 2 different ways to install applications. One is the old and beloved apt, which runs from terminal. The second one comes with the new Snap store. The last has been integrated by default in the latest Ubuntu Desktop version and can be found in your OS renamed as “Ubuntu Software”
With Mate, Snap Store kept its original name.
The first time you open each section of Ubuntu Software, you can find a slow response on showing applications lists. With time your cache should start filling info, so making it faster.
You can use both indifferently, according to your needs and/or preferences. Following customizations are what I used in my setup. These are not needed, but they are worth a try.
Browser: Chromium Browser instead of Firefox
Google Chrome takes more than half of internet browser market share. It is one of the fastest and performs fine with any computer. It is based on the open-source project called Chromium, which is available from Ubuntu Software app. The only difference is that Google Chrome also adds some proprietary APIs to connect google services and sync settings between devices. At the time of this post, Google hasn’t released a Chrome version for AMR64 computer devices, so the best option is using Chromium.
As said, install Chromium from “Ubuntu Software” app. Open it, you can find it both by opening “Productivity” category or by searching snaps with “CTRL+F” from keyboard.
Email Client: Evolution Mail instead of Thunderbird
Mozilla Thunderbird has been a standard for email clients on Linux computers. Being a great alternative to Microsoft Outlook, it is features rich and has great power. But… for people, like me, using email client only to read/send email from different accounts.
A light and performing email client is Evolution Mail, the default Gnome client.
From a fresh Ubuntu Desktop, you can install it from “Ubuntu Software”. With Mate Desktop Environment you will find it already installed.
Install Raspberry PI Imager
The Raspberry PI imager is available from Ubuntu Software / Snap Store. You can install it directly from there.
Install Thonny
Finally, a must-have application for all Raspberry PI owners: Thonny. In Raspberry PI OS Desktop, it is available from the default installation. With Ubuntu, things are a bit more complicated because for a strange reason it is not available from apt repositories. To install it, we need to use pip from python3. Following are required commands:
sudo apt install python3-pip python3-tk
sudo cp /etc/environment /etc/environment.backup
sudo sed -i 's|PATH="|PATH="\/home\/'"$USER"'\/.local\/bin:|g' /etc/environment
pip3 install thonny
sudo usermod -a -G dialout $USER
Now Thonny is installed and working only if launched from terminal with the command:
thonnyBut we also want to run it from the application launcher… From terminal, create a copy of thonny icon into the default Ubuntu icon folder:
sudo cp /home/$USER/.local/lib/python3.9/site-packages/thonny/res/thonny.png /usr/share/icons/Then create a new desktop entry:
sudo nano /usr/share/applications/Thonny.desktopAnd paste the following:
[Desktop Entry]
Name=Thonny
Comment=Thonny IDE
Exec=thonny
Icon=thonny.png
Type=Application
Terminal=false
Save and close. You will find now Thonny in your application menù.
Enjoy your Ubuntu Desktop on Raspberry PI 4!

Open source and Raspberry PI lover, writes tutorials for beginners since 2019. He's an ICT expert, with a strong experience in supporting medium to big companies and public administrations to manage their ICT infrastructures. He's supporting the Italian public administration in digital transformation projects.
![]()
![]()
![]()
![]()
![]()
![]()
![]()


