
Last Updated on 13th April 2024 by peppe8o
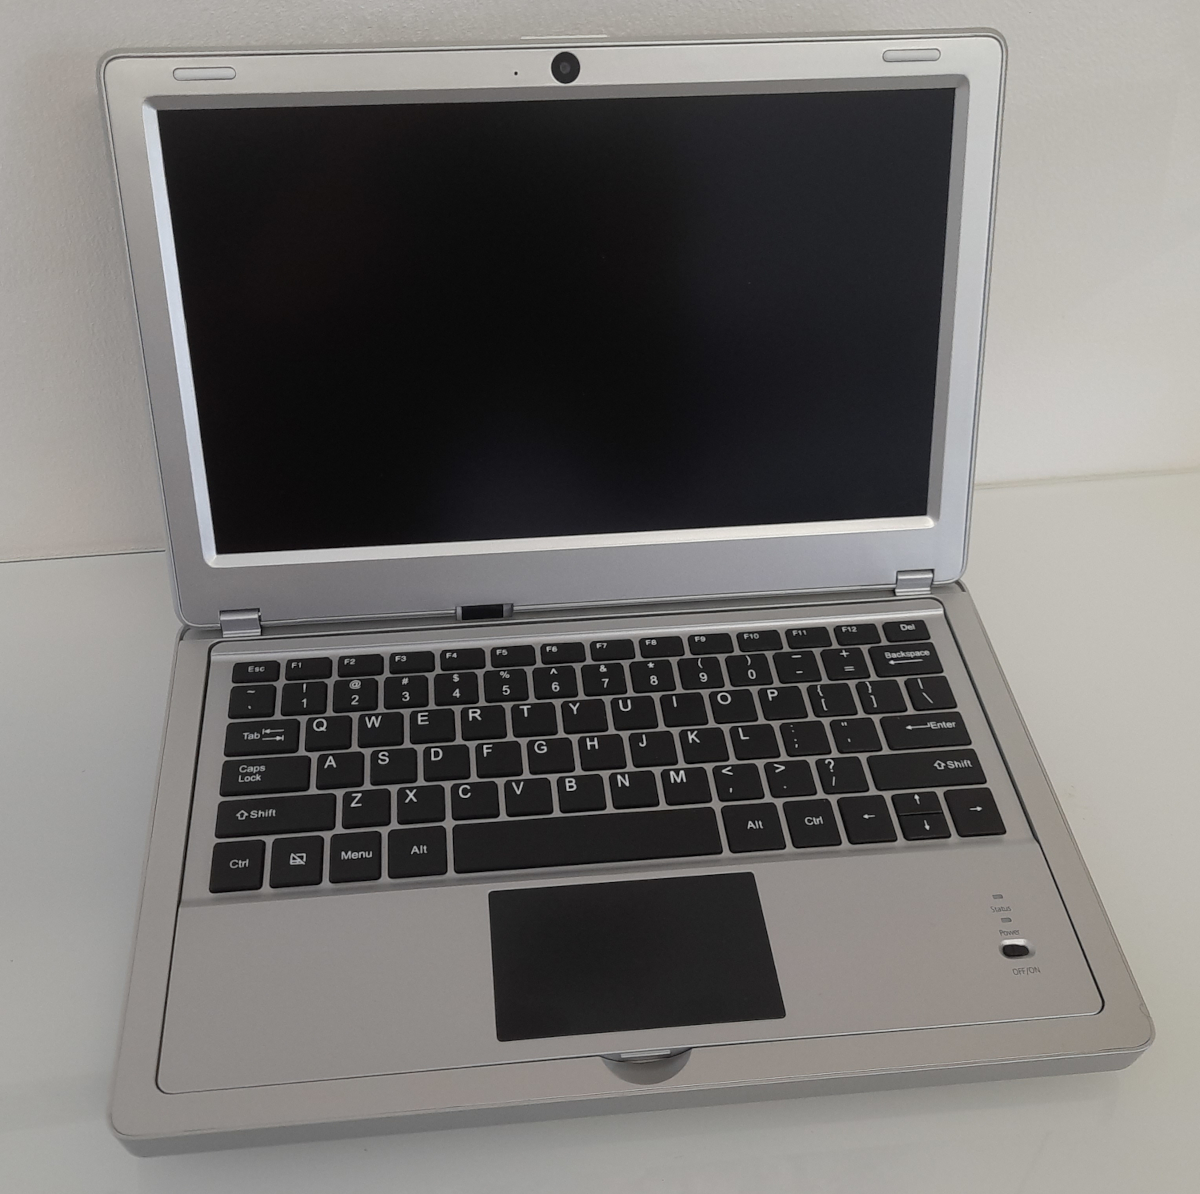
The CrowPi2 is a device which appears, at a first look, as classic netbooks, that were small and very cheap notebooks spreading the computer market in 2010.
A look at CrowPI2
Raspberry PI computer boards are famous for learning to code and small electronics projects. By using the beards as is, you will need cabling and buying the needed sensors. CrowPI2 gives a different way of thinking about Raspberry PI with an innovative laboratory layout
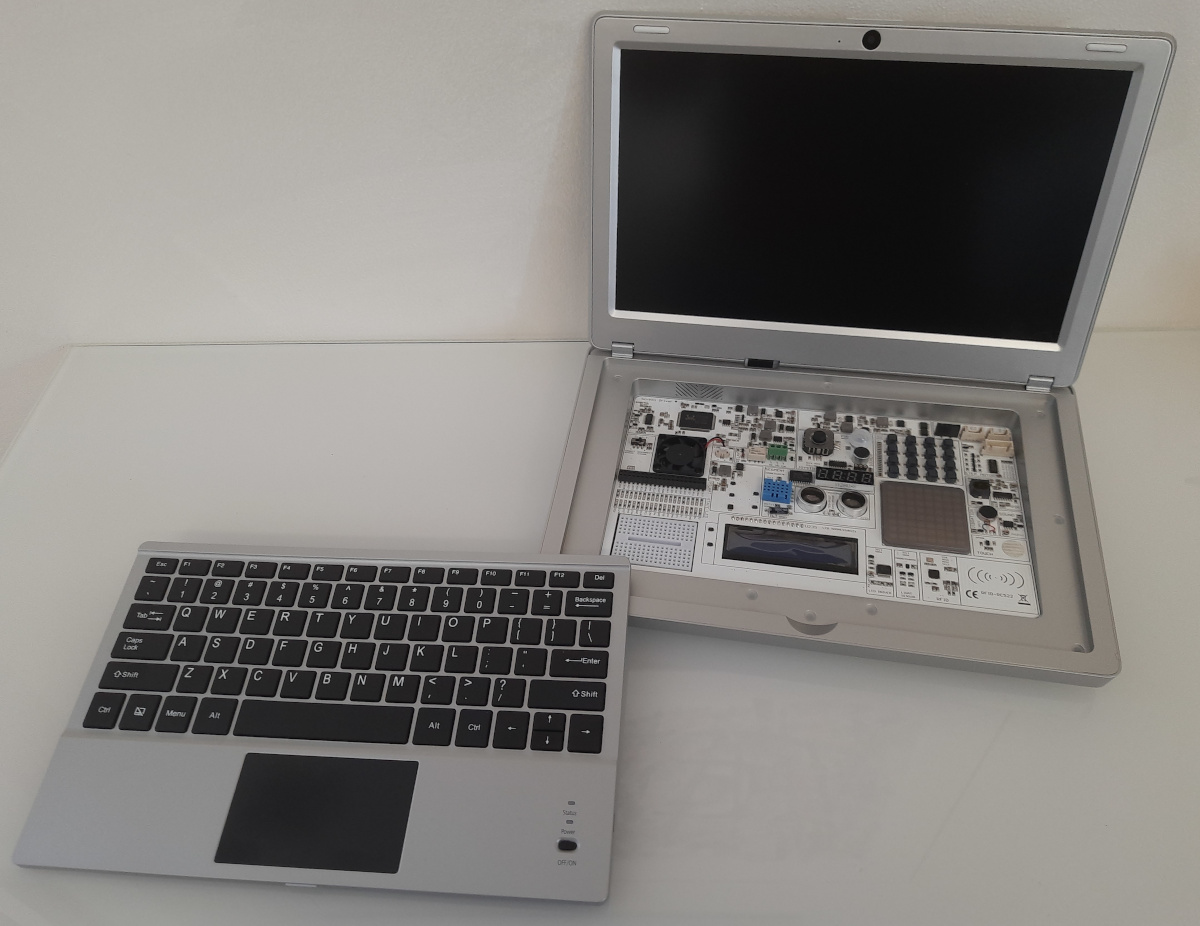
It has small dimensions (291 mm *190 mm * 46mm). It appears a more high compared to the ultra-thin portable computers produced in recent times, but its height is still manageable and has a specific reason: removing the wireless keyboard from its housing you will discover a complete and compact electronics lab. For this reason, the CrowPi2 is a unique solution for learning STEM education.
The brain of CrowPi2 is a Raspberry PI. You can install several RPI boards (compatible with Raspberry Pi3B+, 3B, 4), so being able to use all the OSes supported by our beloved board. By default, the CrowPi2 comes with a microSD card including an independent OS which makes it easier to learn Python, Scratch, AI, and Minecraft programming. Advanced and Deluxe kits add a second microSD card with a gaming operating system, transforming the CrowPI2 into a retro gaming station.
When you go to the official CrowPI2 store, you will be able to configure both the kit (Basic, Advanced and Delux), the presence or not of a Raspberry PI board, and the presence of a power bank (to make your CrowPi2 usable even without the power cable), the cover colour (silver or space grey), the keyboard layout and the power plug.
The CrowPI2 is an Elecrow product. Elecrow is a PCB (Printed Circuit Board) industry which adds to its industrial core services a special focus on products related to STEM education and smart home.
The CrowPI2 kit I’m going to show you is the Deluxe Kit with Raspberry PI 4 and is the device from where I’m writing this article.
Where to Buy the CrowPi2
You can buy the CrowPI2 from its official store. With the following link, you will get a 5% discount coupon: crowpi discount peppe8o.
Reviewing the CrowPI2
Datasheet and Available Kits
The following table resumes the CrowPi2 datasheet:
| Dimensions | 291 mm x 190 mm x 46 mm |
| Weight | 1.3 kg |
| Screen | 11.6-inch 1920*1080 IPS screen |
| Camera | 2.0MP camera with microphone |
| Power supply | DC12V/ USB 5V power supply |
| Power port | Micro USB/DC |
| Keyboard | 2.4G wireless |
| Mouse | 2.4G wireless |
| Audio output | Stereo speaker |
| Volume adjustment | Support |
| Screen brightness adjustment | Support |
| Induction screen function | Support |
| Audio port | 3.5mm headphone jack |
| Compatibility | Compatible with Raspberry Pi3B+, 3B, 4 |
| other function | storage box [power bank box] |
| Supporting operation system | Raspbian, Ubuntu, CentOS, Windows lOT, KALI, Pidora, ArchLinux, FreeBSD, Kodi, OpenWrt, RISC OS,RetroPie, LAKKA, Recalbox, LibreELEC,OSMC |
| Color | Silver, Space Gray |
| Certification | CE.FCC,RoHS |
As said, there are 3 main kits including the CrowPI2: Basic, Advanced and Deluxe.
None of the kits includes by default the Raspberry PI and/or a Power bank (all the kits include a wired power supply). You must specify it when buying into the selection fields.
The Basic kit includes:
- CrowPi2 (with its keyboard and mouse)
- RFID card + tag
- 12v power supply
- Crowtail-9G servo
- Stepper motor
- IR receiver
- IR remote controller
- Crowtail- Moisture sensor
- DC motor with mini fan
- Micro HDMI connector
- Standard HDMI connector
- Screwdriver
- Micro USB Cable
- 32GB TF card with Customized system
- TF card reader
- Components pack
- User manual
The Advanced kit brings a 128GB TF card with a customized system instead of the 32GB and adds to the Basic kit the following:
- 32GB TF card with RetroPie system
- 2 x Game controller
- 10 x NFC card
- 10 x Minecraft cube modelling
- Python programming book
- Scratch programming book
Finally, the Deluxe kit adds to Advanced Kit the following:
- Crowtail-llC HUB
- Crowtail-PULSE sensor
- MPU6050 Accelerometer & Gyro 2.0
- Crowtail- IR Reflective Sensor
- Crowtail- Gas Sensor 2.0(MQ2)
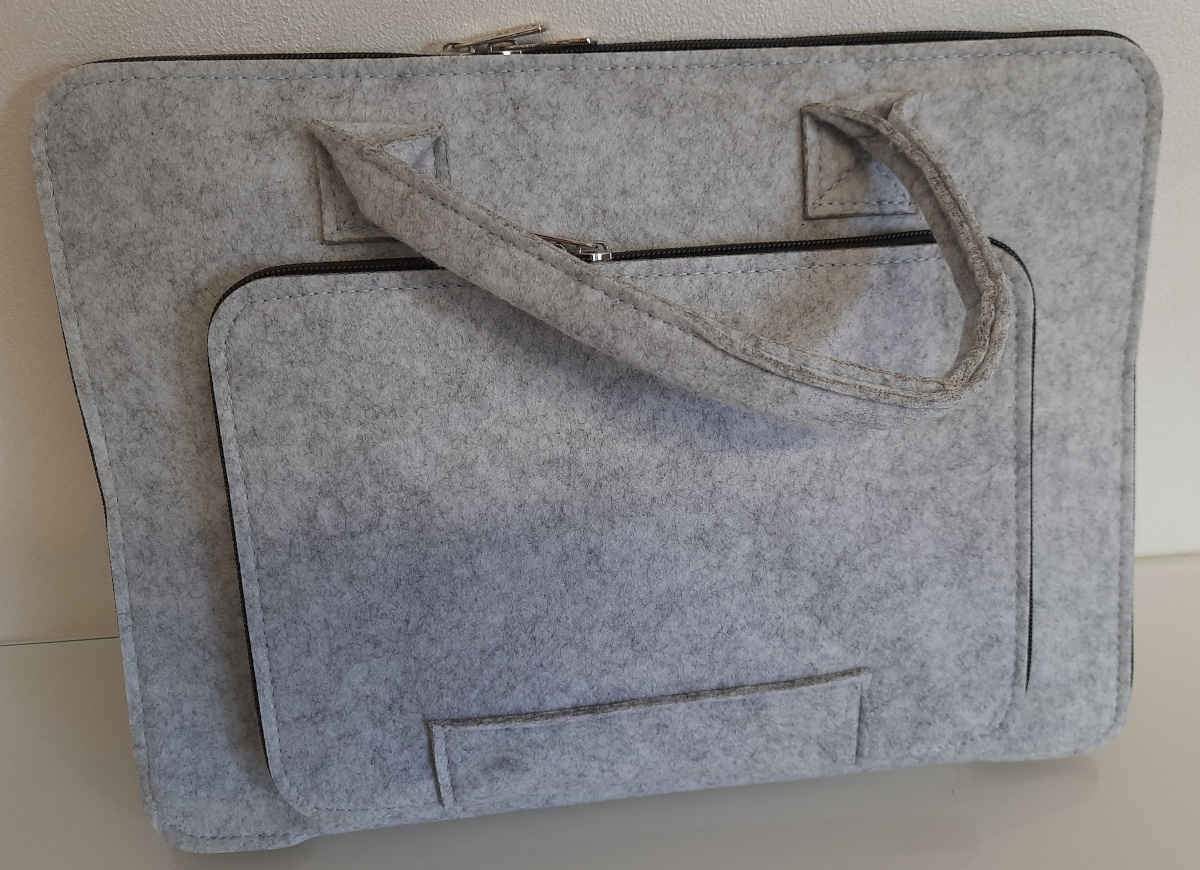
- Storage bag
Packaging
The CrowPI2 arrives in a package also containing the external components (like the mouse, game controllers and the external devices/sensors). Only the storage bag (available with the Deluxe kit) comes outside of the package:
All the parts are well ordered in the packaging and you can reuse it to ordinately store your components when they are not used:

The CrowPi2 case
At the touch, the CrowPI2 case seems solid. It isn’t of aluminium, but the plastic is well produced and robust. Surely it is made for kids and it must resist the stress that kids may apply to devices in general.
It isn’t so light as the modern notebooks (it’s 1.340 g with the Raspberry PI 4 Model B installed), but you can manage it easily with one hand.
When it is closed, it appears as a common mini laptop:

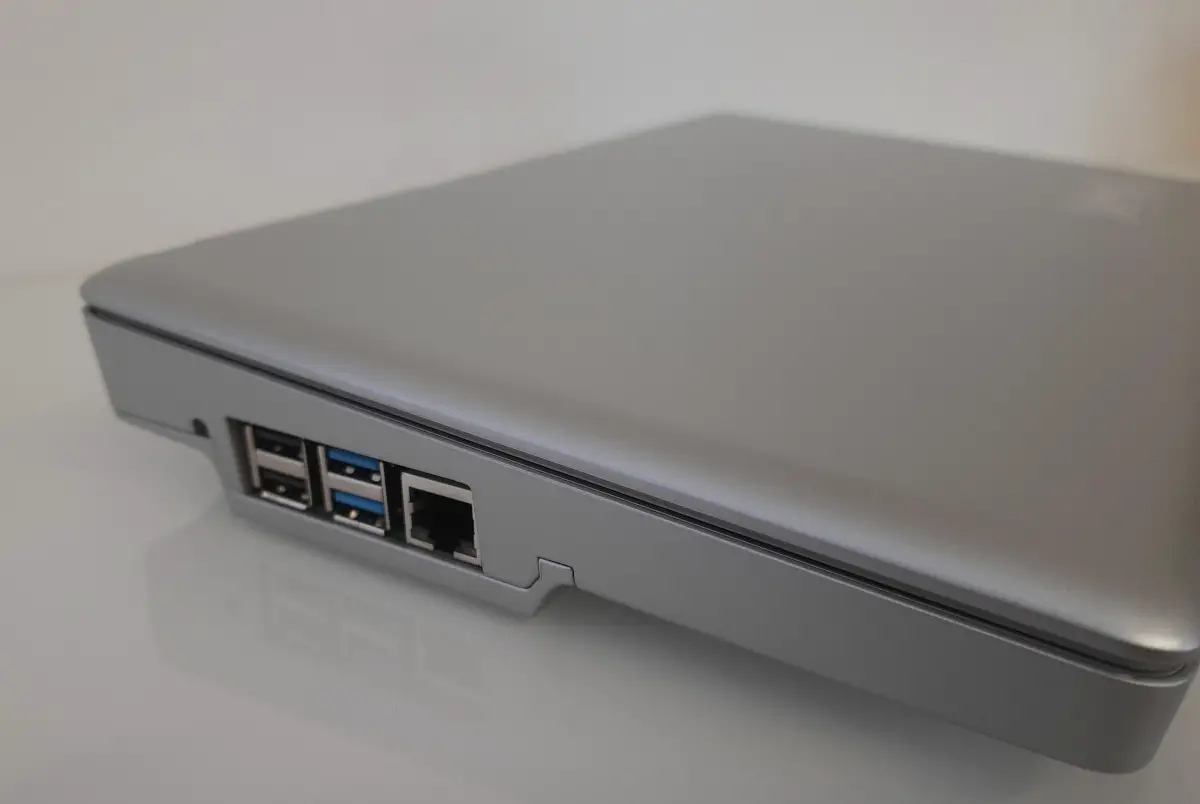
On the left side, USB ports of the installed Raspberry PI and its Ethernet port are accessible to easily plug your USB devices or your LAN cable to the CrowPi2:
On the right side, you will find in order, as shown in the following picture: headphones jack, volume adjustment buttons, power button, connector for the included power supply and a micro USB port that you can use with a power bank to use your CrowPi2 also out of home:

IMPORTANT NOTE: the Power Supply and USB power bank must NEVER be used together in order to avoid damaging the CrowPi2!
On the backside of CrowPi2, you will find a push-pull drawer useful to store electronics sensors:
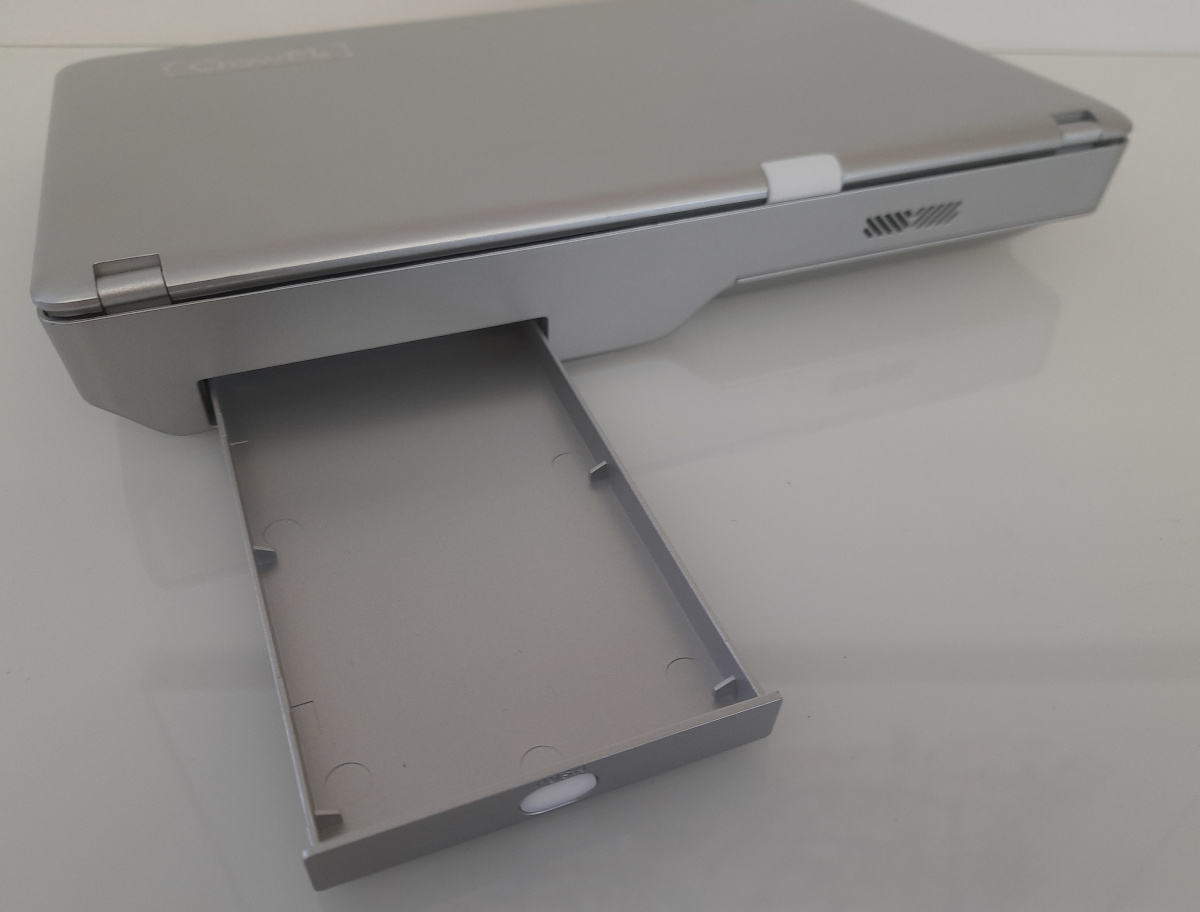
This drawer can be used also to store a thin power bank with sizes not higher than 145 x 70 x 8 mm (or 5.787 x 3.071 x 0.374 inches). There is a hole in the front of the tray for the power cord and a micro USB port for the power bank to plug into the power port. Because of these sizes, it’s really hard to find a power bank with enough autonomy that fits the drawer on the market.
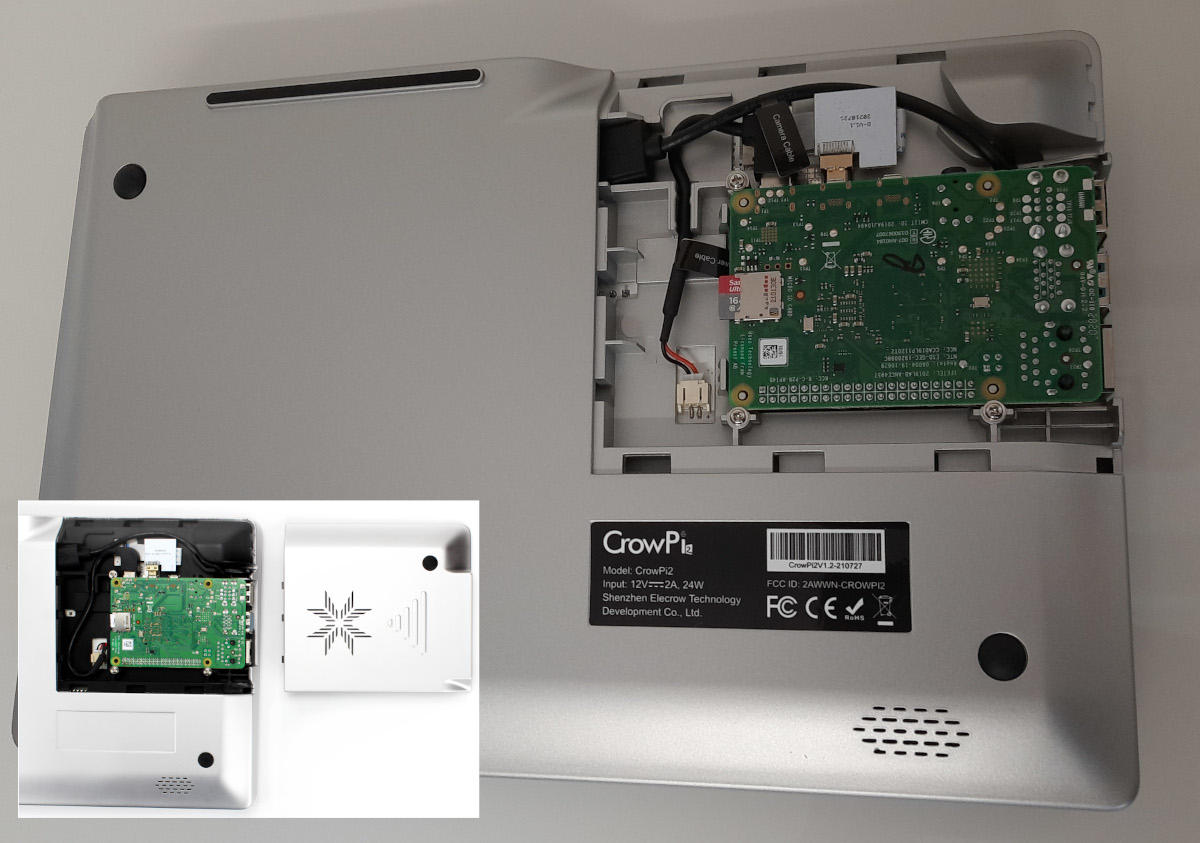
In the lower part of the case, we’ll find the Raspberry PI installation by easily removing the related cover.
The Raspberry PI computer board can be installed with 3 screws (a screwdriver is also provided with the kits) and connecting the cables as referred to in the CrowPi2 user manual. This is a really intelligent positioning as it allows changing the microSD card without the need to remove the whole RPI from its housing. In this way you can have different OSes installed on different microSD cards and you will be able to switch by changing the storage slot in a few moves.
The Software Included
As already said, at the hearth of CrowPi2 there is a Raspberry PI. For this reason, you can use whatever OS you like, from these compatible with RPI computer boards (like the official Raspberry PI OS Desktop or Raspberry PI OS Lite, check Raspberry PI OS Lite vs Desktop tutorial for differences).
But CrowPi2 also brings within the package a micro SD card including a custom version of Raspberry PI OS Desktop. This OS has pre-installed a lot of useful applications to start lear programming from zero.
NOTE: If you want to revert to factory defaults the custom OS or if you want to have another copy to a new microSD card, you can download this software from crowpi blog.
A special place in the installed software goes to the CrowPI application. This can be found in main Menu – Education – Crowpi2 as in the following picture:
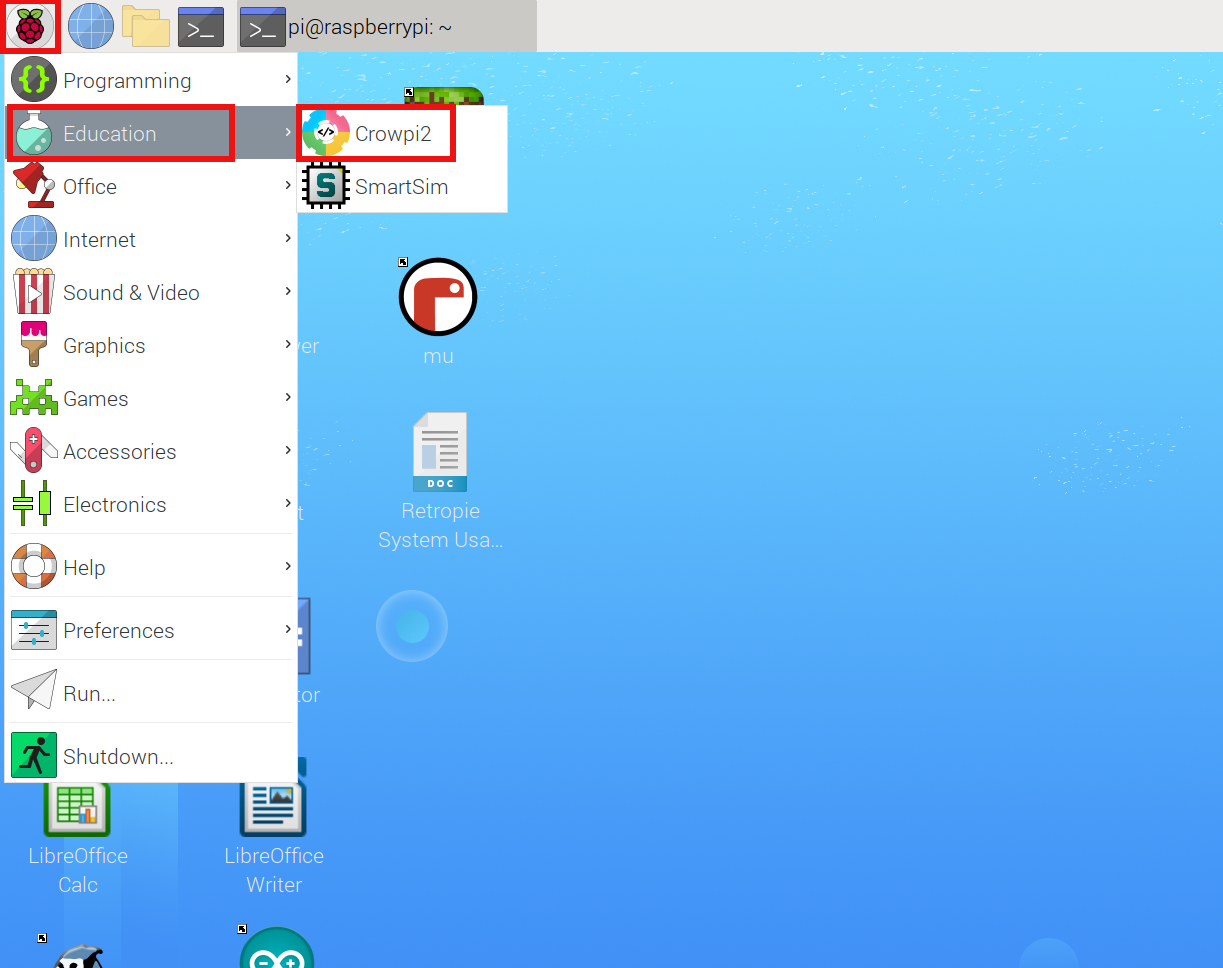
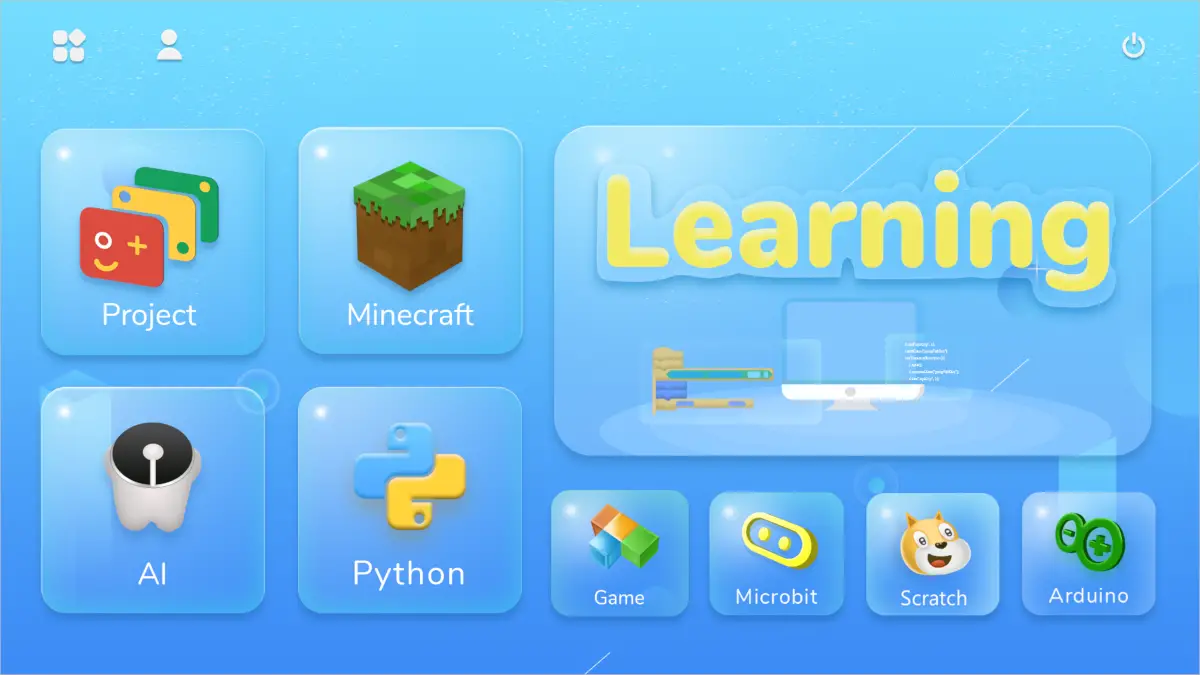
By launching it, you will enter into a full learning environment created for low skilled people in order to move the very first steps in programming:
The AI Learning Tutorials
Artificial Intelligence is a computer technology trend of our days. Tons of applications use AI for a lot of tasks, the main being face image recognition. Crowpi2 comes with 2 AI lessons: face and speech recognition.
First of all, please connect the camera USB cable to one of your Raspberry PI USB ports, as explained in CrowPi2 user manual:

Go to CrowPi2 software and selects AI button, then “Face Recognition”. By selecting this tutorial, your screen will split into 2 parts. On the left side, the Thonny Python IDE will open to write your code, while the right part will show the tutorial steps to follow, divided into lessons:
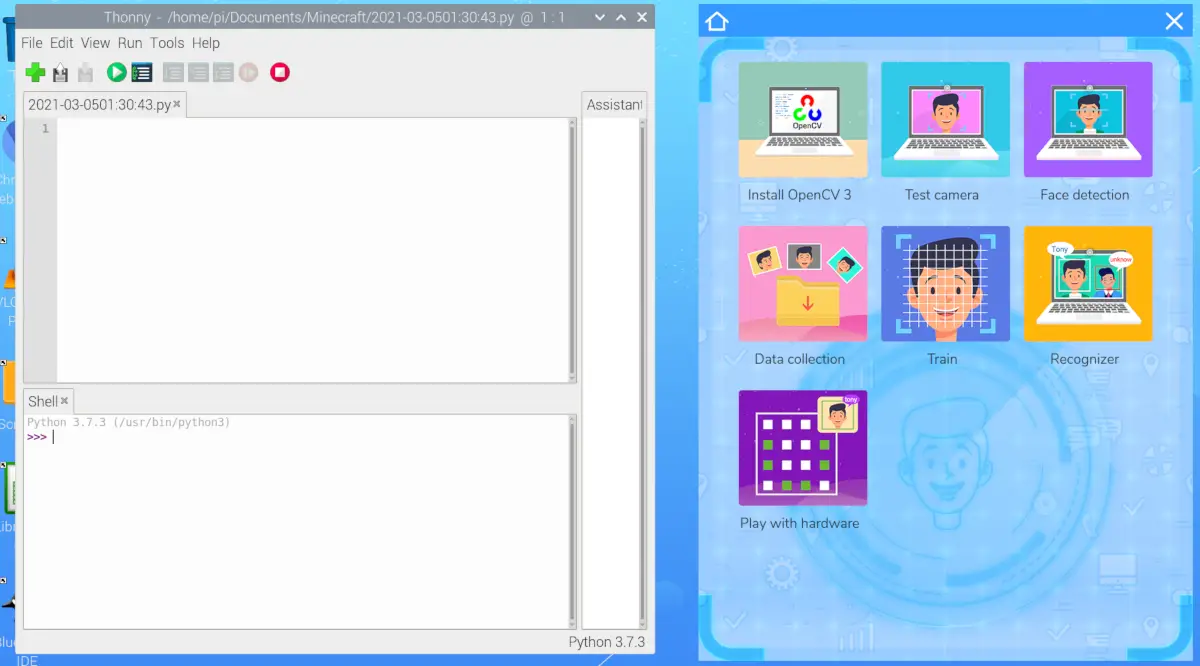
By opening the single lessons (they should be executed in the order they appear), a detailed guide on what to do is listed in the crowpi2 GUI, while in the left part you will always get the main programming interface:
A very new user could be confused about where to issue the commands if it hasn’t a clear idea of the difference between terminal commands and python code. Making it clear at the beginning of tutorials would be a great help for low experienced people. For that people, I would say that generally, the commands with a black background on CrowPi2 software are to be issued on terminal, while the code without a background has to be added to python IDE (Thonny for this lesson).
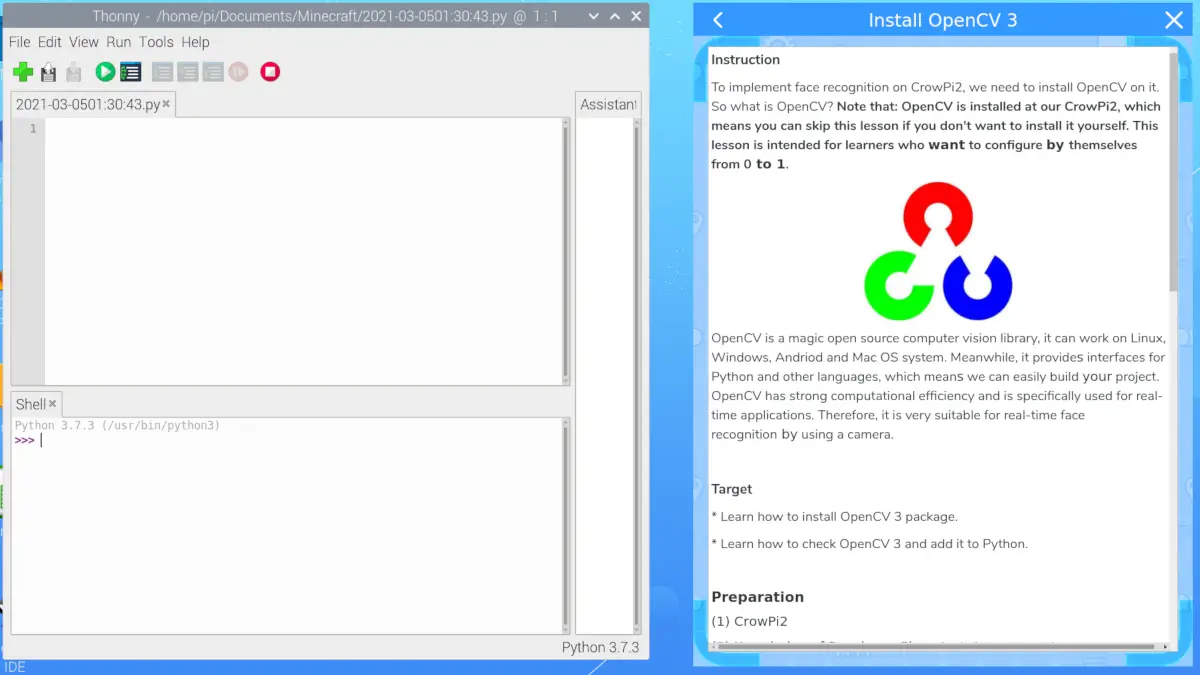
Some of these steps could be simplified/updated. For example, the “Install OpenCV 3” refers to a old guide. The way to correctly install OpenCV 3 is quite simple and is the following terminal command:
sudo apt install python3-opencvContinuing on the following lesson, you will soon note that the python code listed in the tutorials is not available to copy-paste. This means that you have to write manually every code line. This can trigger getting errors for bad typing and a beginner user may not be so experienced to troubleshoot from Thonny shell what’s happening. For this reason, I suggest you to carefully check the code if any error could arise. In this case, also reading the Thonny shell for the lines where the error comes is helpful in order to highlight the line breaking the code and compare it with the tutorial one.
For the first tutorials, you can also get a copy of the code from my download area. The following is the one required to check that camera and OpenCV 3 are correctly installed and configured.
Download the cam test code with the following link directly in your CrowPi2:
You can run python code in 2 different ways: from your terminal, you can use the command (where “code.py” is how your python code is saved):
python3 code.pyor visually, opening it from Thonny IDE and using the “Run Current Script” green button.
Please also note that you have to hide the active windows in your CrowPi2 desktop once the Python scripts are running as the start by default in the background. CrowPi software can be closed with the “X” button as it remains active in your CrowPi2 taskbar. The result for this first code will be similar to the following:
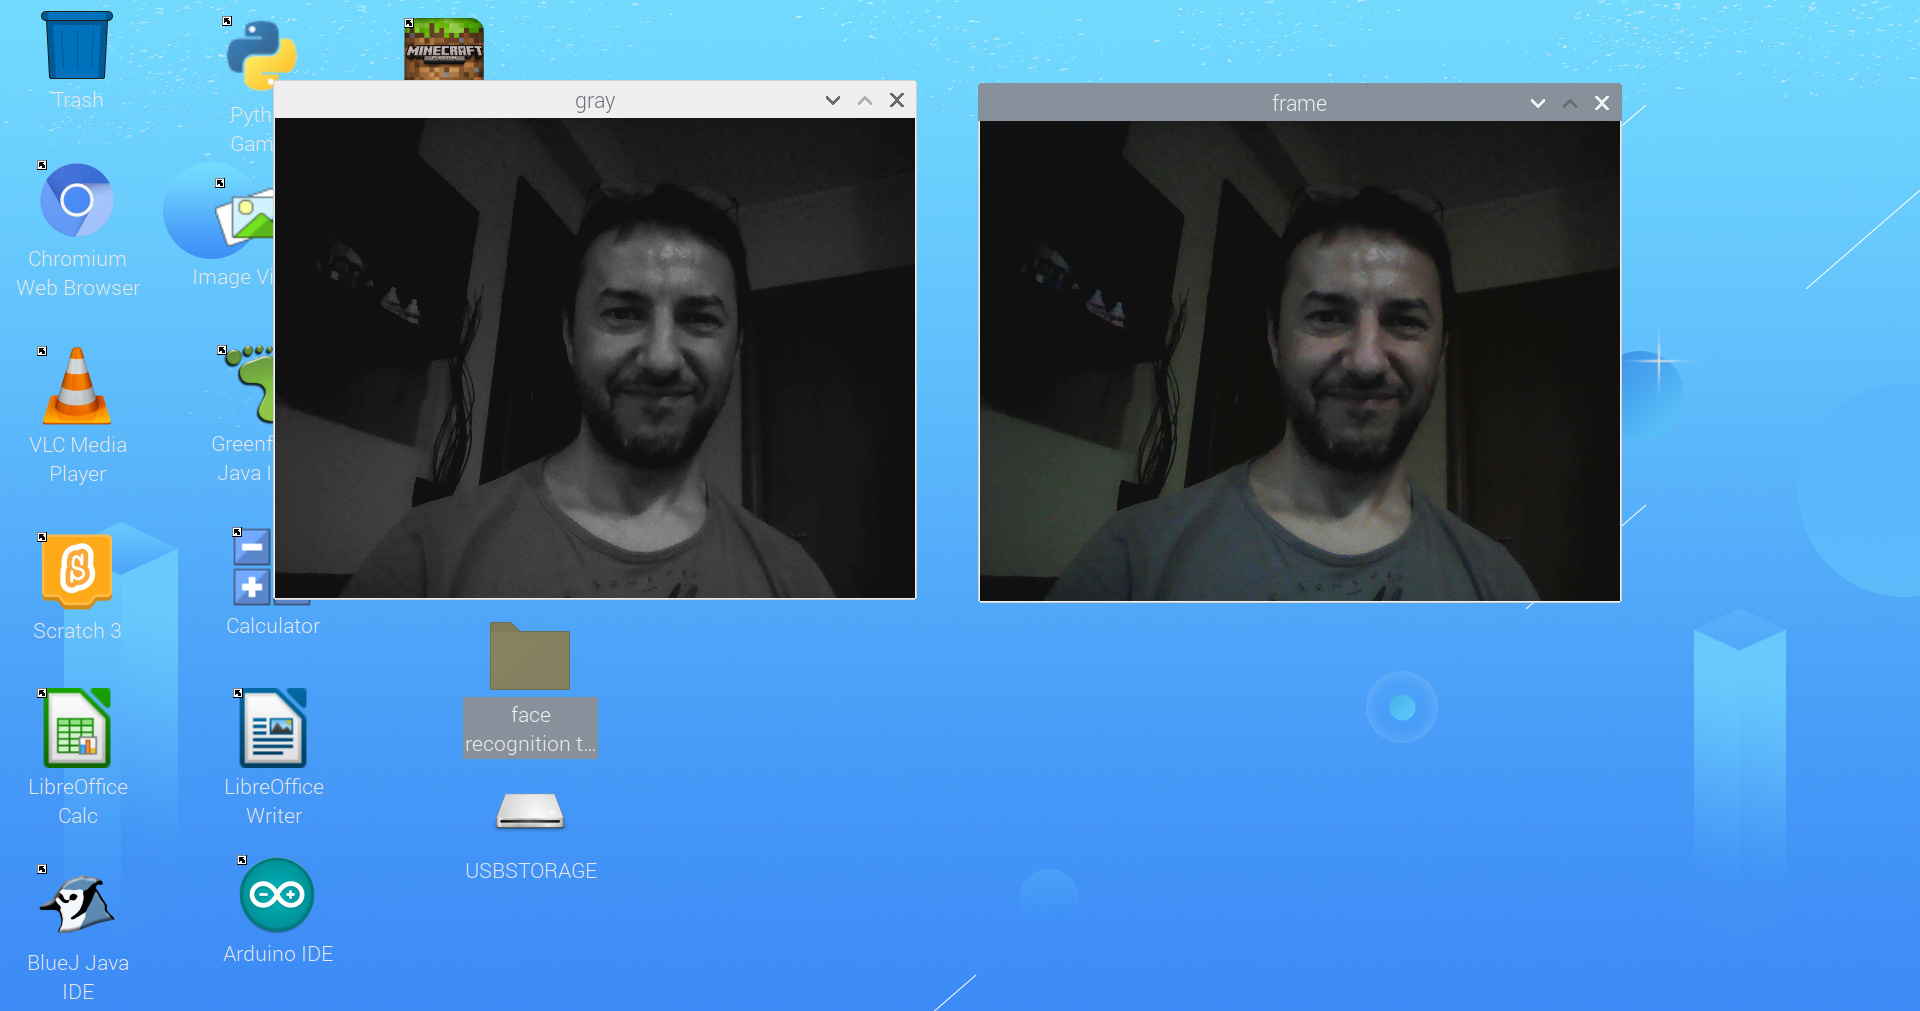
Please note that closing one of the windows that are showing the image stream will not stop the code execution (the closed window will re-open automatically). You have to stop the code (from terminal, with CTRL+C, from Thonny IDE with the “Stop/Restart backend” red button) to get the picture windows closed.
We can now move forward a bit quicker. The face detection lesson explains how to get a general face detected and highlighted with a square. The code is the following:
and it is perfectly explained in CrowPi2 software. Here’s another suggestion: our python script has to use pre-trained classifiers that are already included in CrowPi2 OS disk. For these references, it is better to add an absolute path reference instead of a relative path. That means that for beginners the following line:
faceCascade=cv2.CascadeClassifier('/home/pi/Documents/Face_recognition/Cascades/haarcascade_frontalface_default.xml')
is more robust than the following line, which requires running the code inside the “/home/pi/Documents/Face_recognition/” folder:
faceCascade=cv2.CascadeClassifier('Cascades/haarcascade_frontalface_default.xml')
The following picture shows the result:
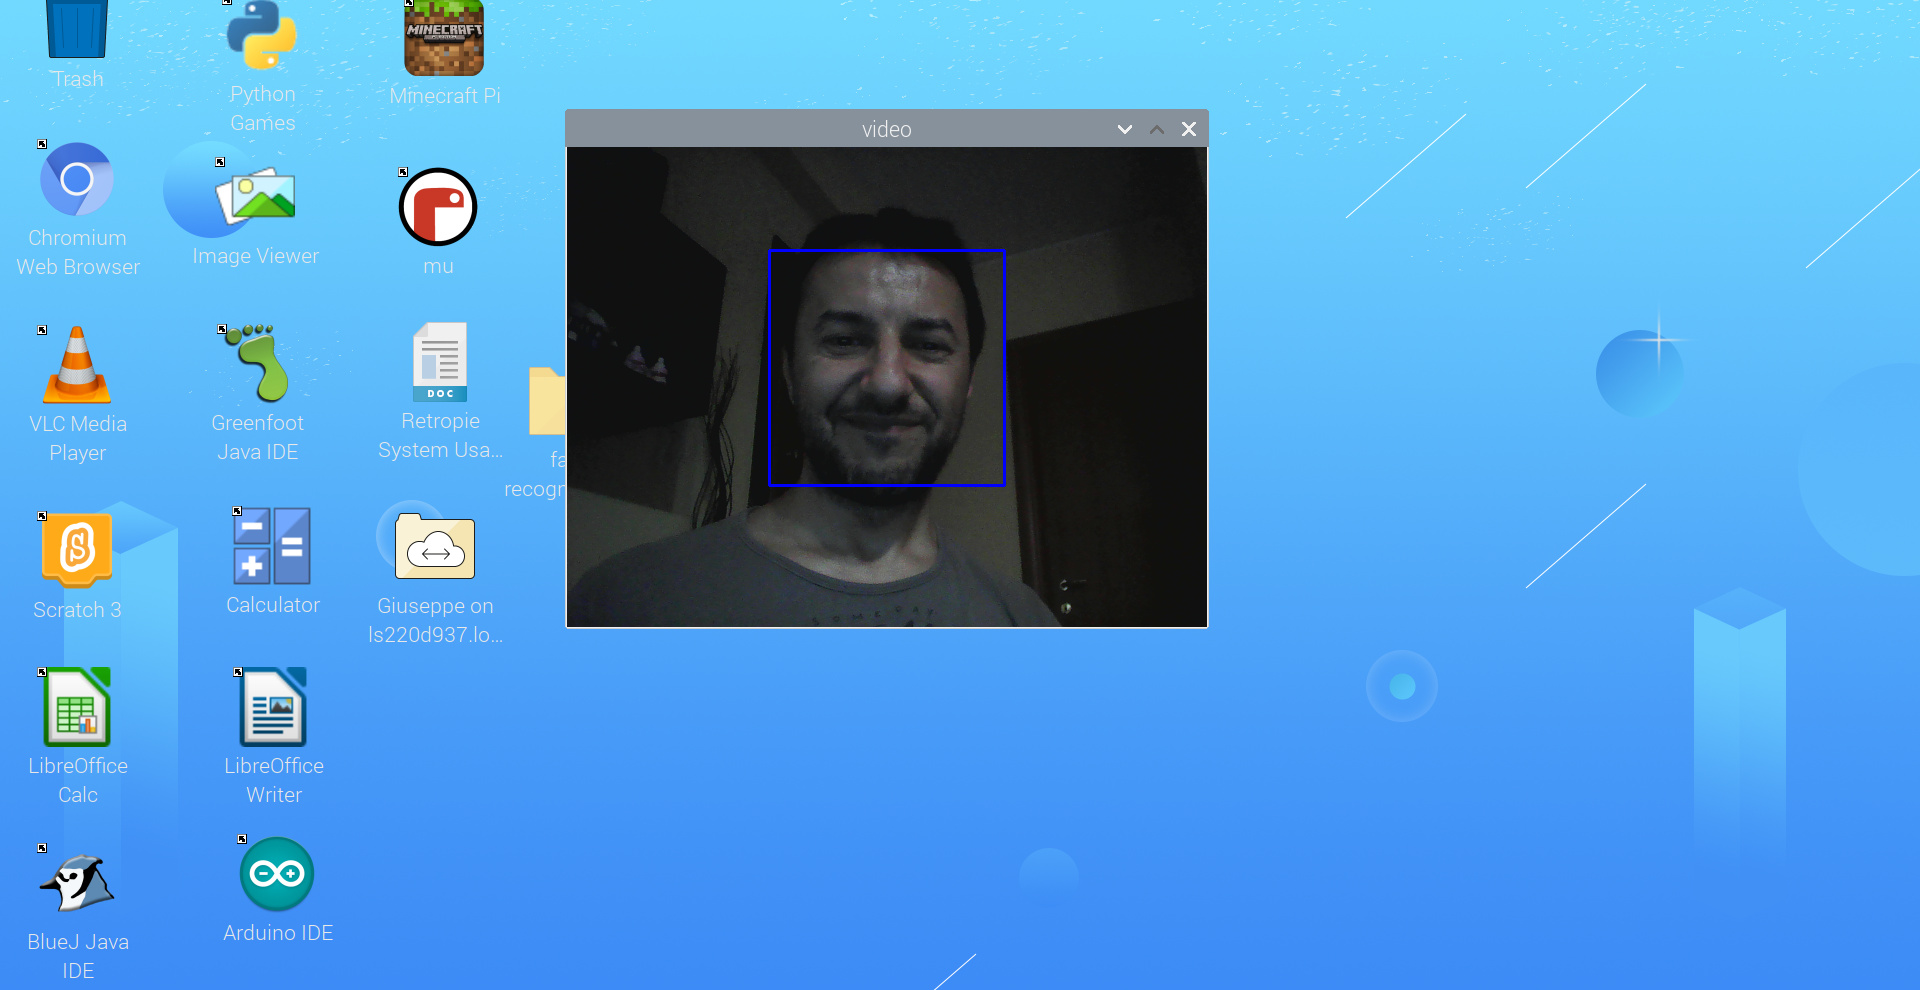
By continuing with the following tutorials in CrowPi2 software in this section, you will be able to add more features such as adding the detected name below the rectangle and triggering the CrowPi2 LED matrix for feedback based on the detected person.
Using the Sensors
The power of CrowPI2 comes when using the sensors. As said, it’s like a portable laboratory and the lessons explaining how to interface the GPIO peripherals are really well done.
In order to get started with the tutorials explaining how to use sensors both with python and scratch, you have to create an account in CrowPi2 software. This will also allow you to restart from a saved point when using lessons in different sessions.
From CrowPi2 software home, please click the “Learning” button, This will bring you to the login page. The very first time you probably won’t have an account. For this reason, the “Create Account” will be the first step:

You will be asked to fill in just a name and a password, as in the following picture. The “next” button will also allow you to add a secret answer to recover your password if you forget the account one:

At the end of account creation, you will get back to CrowPi2 software. But the difference will be the proof that you are now logged in, with your name appearing on top:

Please click again the “Learning” button. Now you will have 2 learning options: Python and Scratch.
Click the Python one:

In this course area, you will get the lessons on the left bar, while the main part will show you the board and its parts. Let’s start with the first lesson, “Python3 and GPIO usage”:

During every lesson, you will have 3 main areas.
The part on the right side will give you the explanations of how sensors work and the code to use them. The arrow buttons at the right-bottom part allow you to “navigate” the lesson and move forward/backwards in the instructions.
The left-top area is the code area. Here you will paste or write the code according to the lesson, but you can also change the code according to your preferences. On top of this area, the play/stop buttons will allow you to execute or stop the code added.
When your code includes a print statement, which prints to the IDE shell, the results will be available in the left-bottom part: the Output area.

While executing lesson steps, you can whenever exit from it and go back to the Python course window. It will show your lesson’s progress with a progress bar and a numeric indicator showing how many steps have been executed and the total steps for that lesson:

A different way to use the built-in sensors is by keeping in mind that they are physically cabled with the following CrowPi2 internal connection schema (available from https://github.com/Elecrow-RD/CrowPi2):
| Module | GPIO pin (Function name) | GPIO pin (BCM mode) | GPIO pin (Board mode) |
| Relay | GPIO29 | 21 | 40 |
| PIR motion sensor | GPIO4 | 23 | 16 |
| Sound sensor | GPIO5 | 24 | 18 |
| IR receiver | GPIO28 | 20 | 38 |
| Servo | GPIO24 | 19 | 35 |
| Stepper motor | GPIO21, GPIO22, GPIO23, GPIO6 | 5, 6, 13, 25 | 29, 31, 33, 22 |
| Buzzer | GPIO1 | 18 | 12 |
| Vibration motor | GPIO2 | 27 | 13 |
| Touch sensor | GPIO0 | 17 | 11 |
| RGB matrix | GPIO26 | 12 | 32 |
| Ultrasonic sensor | GPIO25, GPIO27 | 26, 16 | 37, 36 |
| Tilt sensor | GPIO3 | 22 | 15 |
| DHT11 sensor | GPIO7 | 4 | 7 |
Analog & SPI Module:
| Module | Analog channel |
| Joystick sensor | SPI1;y-axis:0;x-axis:1 |
| Button matrix | SPI1;4 |
| RFID-RC522 | SPI0 |
I2C Modules:
| Module | I2C address |
| Segment | 0x70 |
| LCD display | 0x21 |
| Light sensor | 0x5C |
The Gaming Side
Advanced and Deluxe kits of CrowPi2 come with 2 game controllers (similar to Super Nintendo ones) and an additional SD card with a gaming OS: RetroPie.

For people not knowing this fantastic distribution, RetroPie is a famous gaming emulator running perfectly on Raspberry PI. Besides the image coming with the CrowPi2 kits, you can also get it both from its official website (see the previous link) or from Raspberry PI Imager. It can emulate several gaming platforms like Atari, Super Nintendo, and so on. Please refer to RetroPie Systems list for the full list. Each platform can run different games, available as “ROMs”.
By default, the OS image of RetroPie comes without any ROM pre-loaded. You will have to find your preferred ROMs on the web and upload it to your RetroPie installation. Please note that some games may be protected by copyrights, so evaluate getting them only when they are not protected and if your country’s laws allow it.
So, connect at least one controller t CrowPi2 and power it on. After a few operations like filesystem expansione (only for the very first boot), your RetroPie installation will detect the gamepad connected:
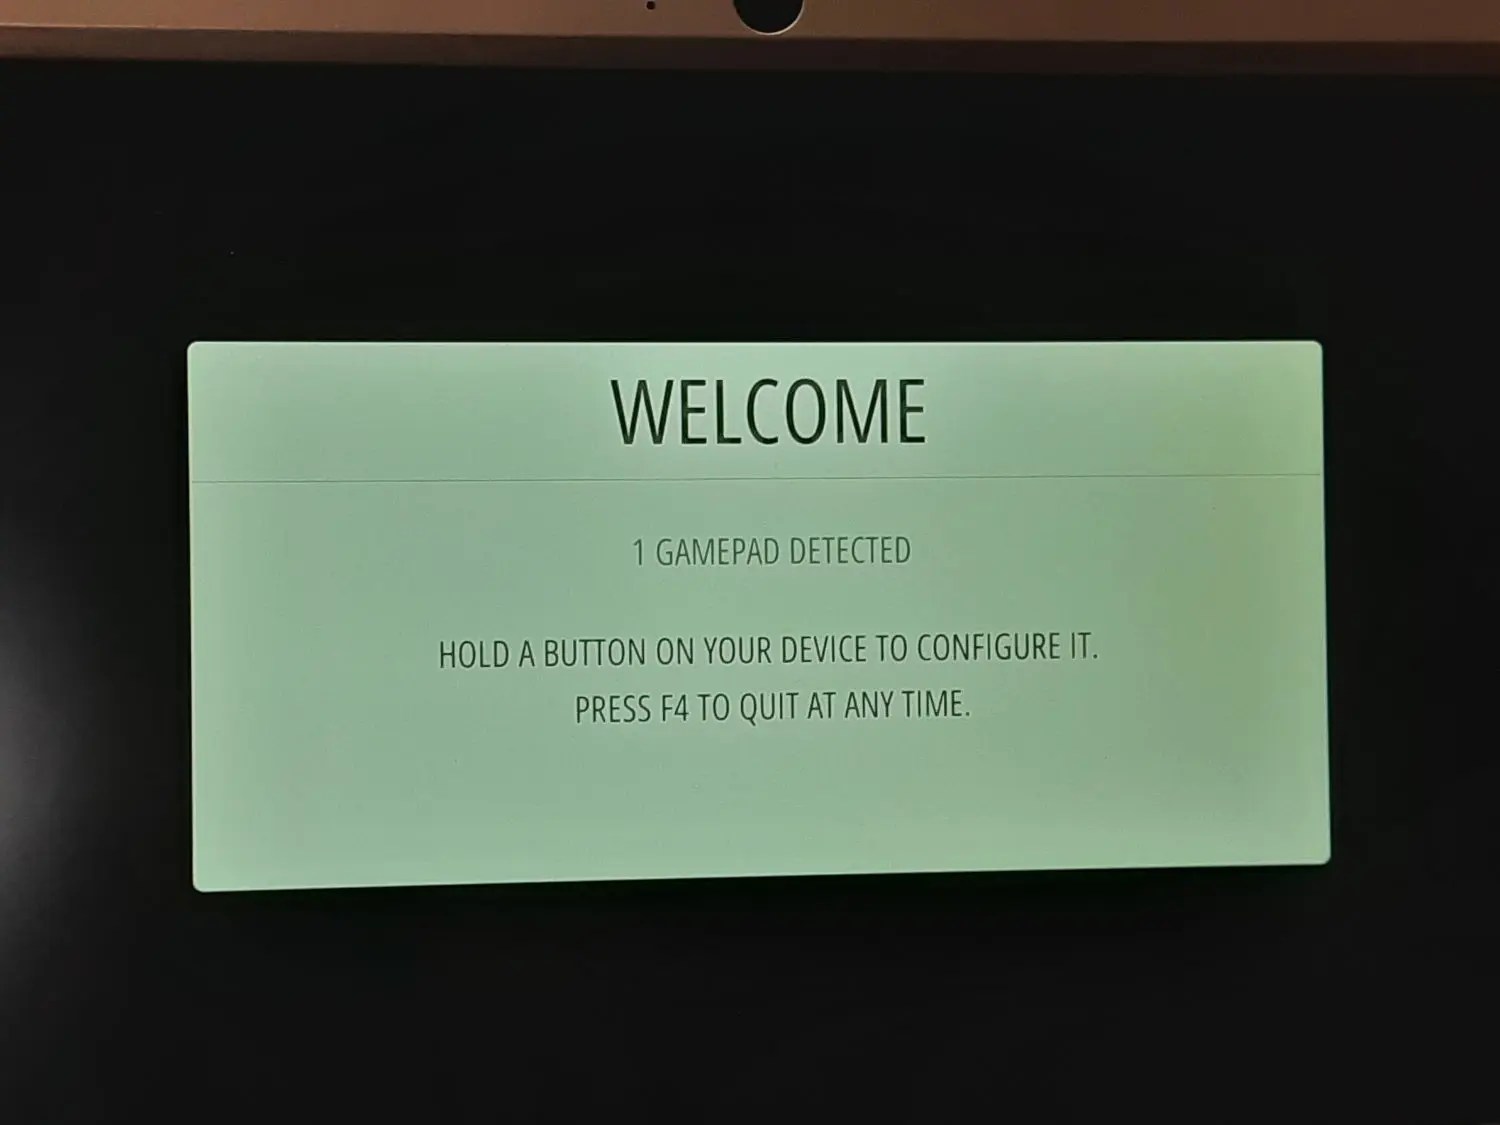
Push (and hold pushed) a random button on your gamepad to move to gamepad configuration.
For each line, you will configure the related button on your gamepad by pressing it. In order to skip some lines, you can hold a button pressed:

At the end, the “OK” button will complete the gamepad configuration. A message will warn that you haven’t set a Hotkey Enable button. Basically, it is needed for exiting from games (when running) and you can confirm as game exit will be configured by pressing START+SELECT buttons from gamepad:

Please note that you can repeat the gamepad configuration from RetroPie configuration section whenever you like.
Finally, the audio output configuration will allow you to setup where to get the sound. WIth CrowPi2, you can leave the “Auto” selectio in order to get it from CrowPi2 speakers:

In the next screen, please confirm this choice:

From here, you will have a screen where only the “RetroPie Configuration” can be selected. Use this to get to the related page:

You will be able to navigate the menu with the gamepad direction buttons. You can also enter a menu with the gamepad “A” button and exit with the “B” button.
One of the most common needs is configuring the WiFi connection. For this task, I suggest using the raspi-config -> Networking -> WiFi to set the correct Country or it will be really hard to get the WiFi connection working.
From here you have a working RetroPie, but without any game available. Download at least one ROM into a USB storage (formatted with FAT32). Please note that some ROMs are collected into compressed files (“.zip”, “.rar”, “.7z” or similar). You have to extract them from the compressed file in order to get the games usable. Every gaming platform will have its own file extension: for example, Super Nintendo files will have a “.smc” extension.
Connect the USB storage in your CrowPi2 with RetroPie running, from RetroPie configuration page, and use the File Manager to copy your ROM from the USB storage (usually available at the “/media/USB” path) to your RetroPie into the related platform folder (available at the “/home/pi/RetroPie/roms”).
A RetroPie restart (press the ‘Start’ button and then select ‘Quit’) will be required in order to get the new ROMs available for execution. After this restart, please select the platform where your ROMs are saved and execute them.

Again, please remember that you will be able to exit from a game by pressing “Select+Start” from your controller.
My Final Thoughts
I found the CrowPi2 device a fantastic board. I personally think that it must be available in every school in order to get kids approaching for the first time programming and electronics by using a combination of Raspberry PI power and the compact lab that CrowPi2 includes under the keyboard.
I also think that a few improvements can be performed to make it even better. Please find below my personal PROs and CONs:
PROS
- It’s plenty of built-in sensors in a compact form factor
- Well done tutorials in Learning mode, explaining how sensors work and how to use them. These tutorials are good for every skill level, from kids to older kids
- It combines a mini laptop with a learning platform, which makes this device useful for multiple purposes
CONS
- OS image file is provided instead of packages to be installed in your favourite Debian-based OS. The distro upgrade (“sudo apt upgrade” command) currently breaks the CrowPi2 OS. It would be far better to have a package to install (maybe via a dedicated repository) in order to get the CrowPi2 development team focused on their software instead of following the Raspberry PI OS distribution releases
- Code is not available to copy-paste in AI lessons (you have to write manually). On the other side, the copy-paste works in “Learning” lessons
- It’s really hard finding a battery both fitting the related case sizes with enough capacity to power the CrowPi2. Even with a power bank formally compatible with the datasheet specs, the OS runs but it frequently warns about “Under Voltage warning”. This should be fixed in order to make the device really portable.
Next Steps
In the meanwhile, if you want to discover many other projects for your Raspberry PI, you can take a look at peppe8o Raspberry PI tutorials.

Open source and Raspberry PI lover, writes tutorials for beginners since 2019. He's an ICT expert, with a strong experience in supporting medium to big companies and public administrations to manage their ICT infrastructures. He's supporting the Italian public administration in digital transformation projects.
![]()
![]()
![]()
![]()
![]()
![]()
![]()


