Last Updated on 23rd February 2026 by peppe8o
This tutorial will show you how to deploy Tailscale on Raspberry PI computer boards as a Docker container, giving your smartphone (or any Tailscale device) full access to your LAN services like Home Assistant, NAS, routers, and self-hosted apps.
For example, I will guide you to set up Tailscale on a Raspberry PI as a home router, so that you will be able to reach any device in your home from a remote device, even if you connect from an external network (away from home).
About Tailscale
Tailscale creates a private mesh VPN (called a tailnet) that connects your devices directly using WireGuard encryption—no central server bottleneck, no exposed ports, zero configuration. Unlike traditional VPNs that route everything through a single gateway, Tailscale uses peer-to-peer connections for maximum speed and reliability. (Ref. Tailscale docs)
Key benefits for homelabs:
- Zero trust security: Every device authenticates; traffic is encrypted end-to-end
- Subnet routing: Access your entire home LAN via one Raspberry PI
- MagicDNS: Reach services by name (
nas,homeassistant) not IP - Cross-platform: Works on Android, iPhone, Windows, macOS, Linux
By default, Tailscale sets the device with a “split-tunnel”. This means that you will navigate any internet website from your remote device directly from your remote connection, while you will be routed to the Tailscale network only when you use a local IP with announced (and approved) routes.
What We Need
As usual, I suggest adding from now to your favourite e-commerce shopping cart all the needed hardware, so that at the end you will be able to evaluate overall costs and decide if to continue with the project or remove them from the shopping cart. So, hardware will be only:
- Raspberry PI Computer Board (including proper power supply or using a smartphone micro USB charger with at least 3A)
- high-speed micro SD card (at least 16 GB, at least class 10)
Step-by-Step Procedure
Prepare the Operating System
The first step is to install the Raspberry PI OS Lite to get a fast and lightweight operating system (headless). If you need a desktop environment, you can also use the Raspberry PI OS Desktop, in which case you will work from its terminal app. Please find the differences between the 2 OS versions in my Raspberry PI OS Lite vs Desktop article.
Please make sure that your Operating System is up to date. From your terminal, use the following command:
sudo apt update -y && sudo apt full-upgrade -yWe also need to install Docker. You can use my tutorial for this: Beginner’s Guide to Install and Use Docker with Raspberry PI.
Now, please create a folder for Tailscale in your Raspberry PI and enter it:
mkdir tailscale && cd tailscaleRegister the first Tailscale Device
Before starting the operations on Raspberry PI, we need to register our free account on the Tailscale sign-up page. You can sign up in seconds if you use identity providers like Google or Microsoft.
Moreover, Tailscale requires at least 2 connected devices to enable your admin dashboard on its page. The first device will be the smartphone or computer that you want to connect to your home network via Tailscale and Raspberry PI. The second device will be the Raspberry PI itself.
For this reason, after you create and sign up for your account in Tailscale, please install it on your smartphone/computer and connect it to your Tailscale account as described in the Tailscale Install Docs.
The Tailscale admin page (https://login.tailscale.com/admin/) will wait for the second device.
Access the Second Device in your Dashboard: Tailscale on Raspberry PI
To enable the Tailscale Admin dashboard, we’ll use a temporary Tailscale container on our Raspberry PI. We’ll use a temporary container so that we’ll be able to reach the Dashboard and create an authentication key that we’ll need in our final Tailscale container on Raspberry PI.
To create this temporary container, please run the following terminal command from your Raspberry PI:
docker run -it --rm tailscale/tailscale:latestIt will start downloading the Tailscale container and install it in your Docker environment. At the end, the terminal will show you something like the following:
To authenticate, visit:
        https://login.tailscale.com/a/abcd12e34567f
health(warnable=warming-up): ok
Please use the URL returned from your terminal (the one similar to the highlighted from the previous output) from the computer or smartphone where you registered your Tailscale account. It will authenticate the Raspberry PI as a second device and enable the Tailscale dashboard, listing the available machines (devices).
Generate the Tailscale Authentication Key
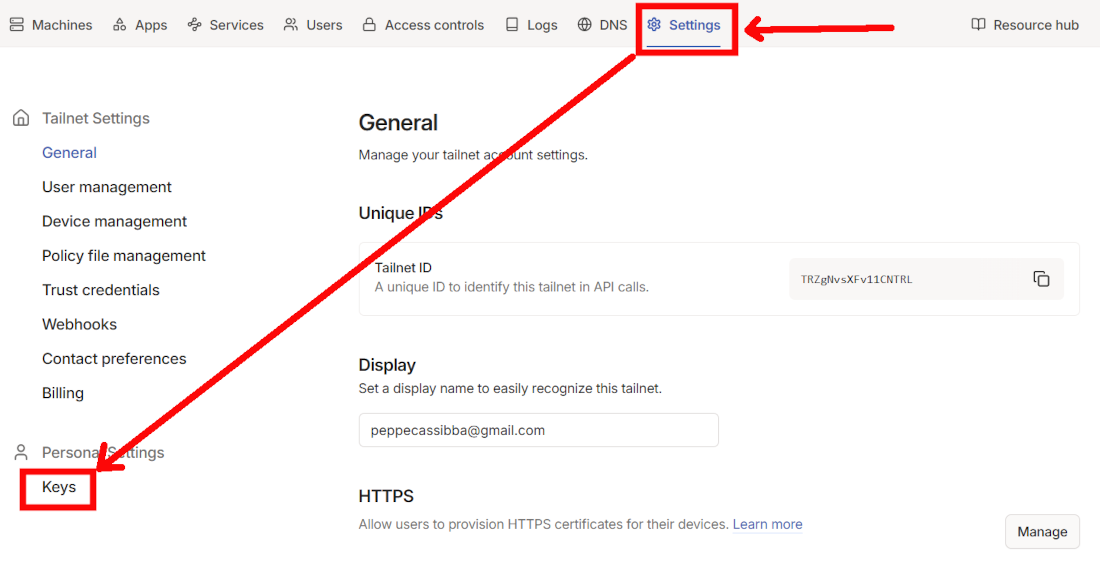
From here, please click the “Settings” button and select the “Keys” link:
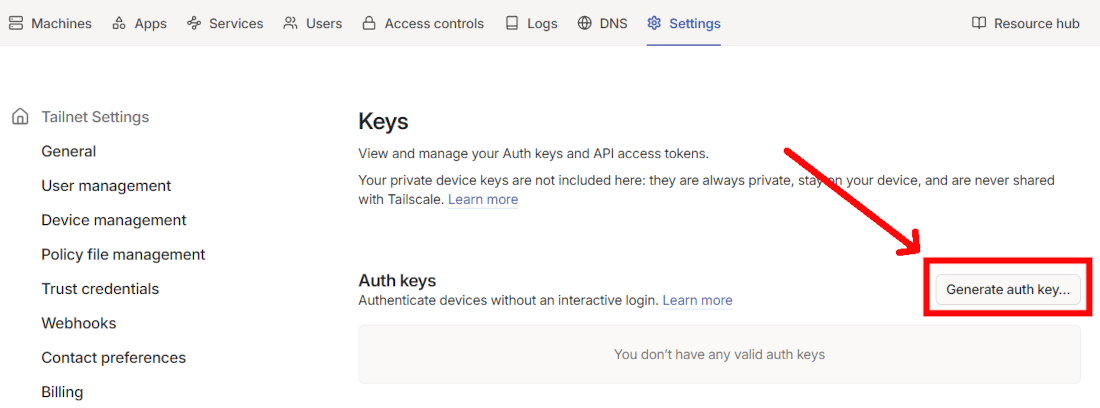
The following page will enable you to create a new authentication key by clicking the “Generate auth key” button:
You can optionally give a name to the new key, or you can directly click the “Generate key” button:
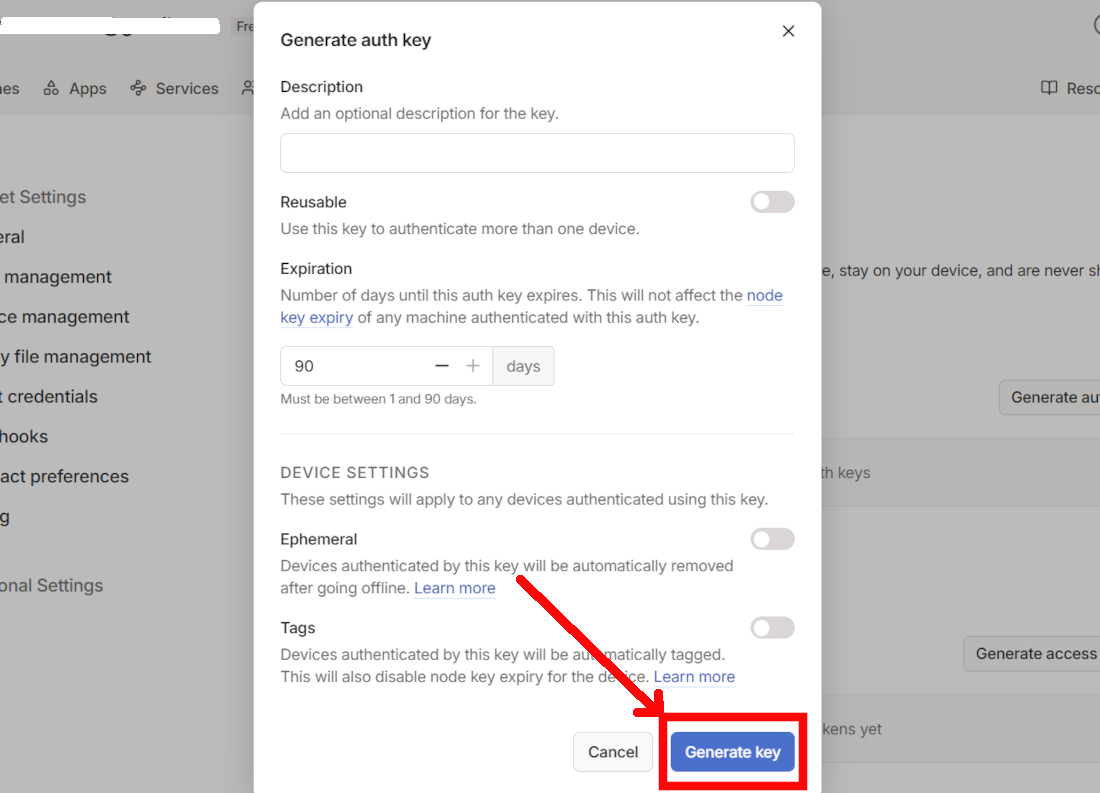
From the following window, please copy the generated authentication key:
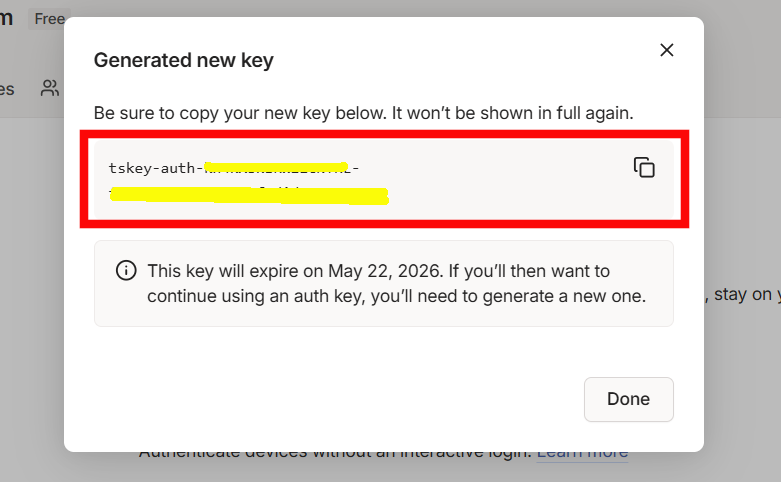
Create the Router with Tailscale on Raspberry PI
Back to the Raspberry PI terminal, you can now close the running container from your Raspberry PI with CTRL+C.
Please create a new Docker Compose file:
nano docker-compose.ymlFill it with the following code lines:
services:
  tailscale:
    image: tailscale/tailscale:latest
    hostname: tailscale-rpi
    container_name: tailscale
    environment:
      - TS_AUTHKEY=tskey-auth-*****************-********************************
      - TS_EXTRA_ARGS=--advertise-routes=192.168.1.0/24
      - TS_STATE_DIR=/var/lib/tailscale
      - TS_USERSPACE=false
    volumes:
      - ./tailscale/state:/var/lib/tailscale
    devices:
      - /dev/net/tun:/dev/net/tun
    cap_add:
      - net_admin
    restart: unless-stopped
Please change the “tskey-auth-*******” part with the authentication key previously generated. Also, please change the “192.168.1.0/24” network to one compatible with your home network.
Save and close the file.
You can now run the Tailscale container with the following terminal command:
docker compose up -dA new machine will appear in your Tailscale admin dashboard, with the same name as the hostname of the Docker container.
If you want, you can add more machines (devices) to the same Tailscale network.
Disable Tailscale Key Expire
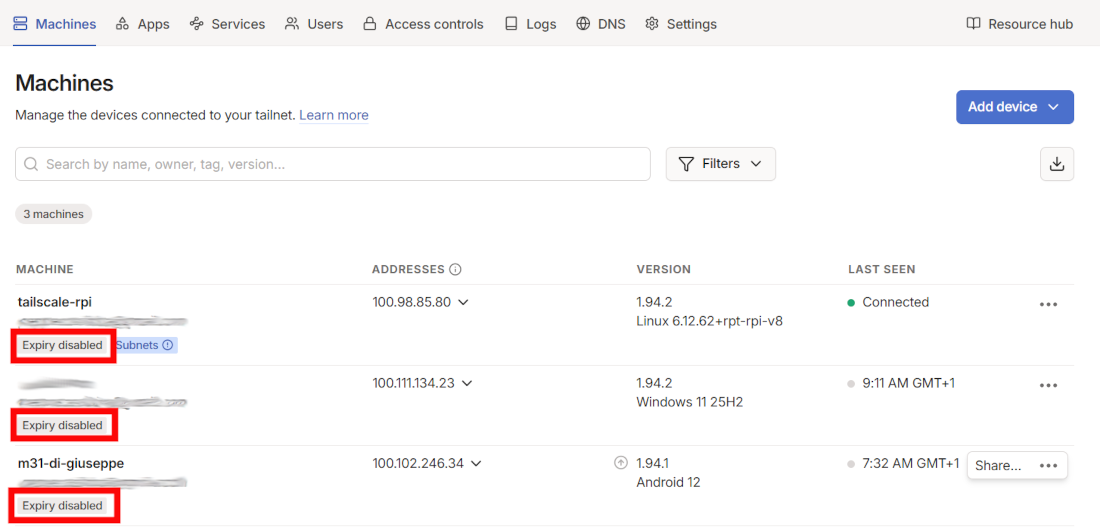
Each Tailscale machine will use the Authentication Key to authenticate again after a defined time. You can disable the key expiration from the Machines dashboard, by using the Options menu (3 dots, highlighted in the following picture):

After this action, you will see the “Expire disabled” notice at the bottom of each device where you performed this action:
Authorise Subnet Route for Tailscale on Raspberry PI
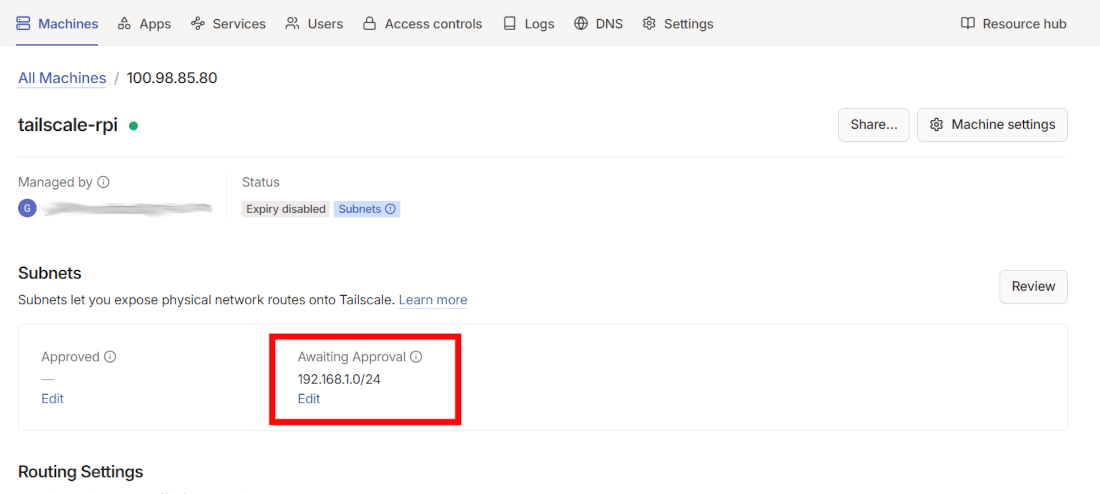
At this point, your Raspberry PI is running in your Tailscale network. But your devices still can’t access the Raspberry PI local network because the related route is not yet approved.
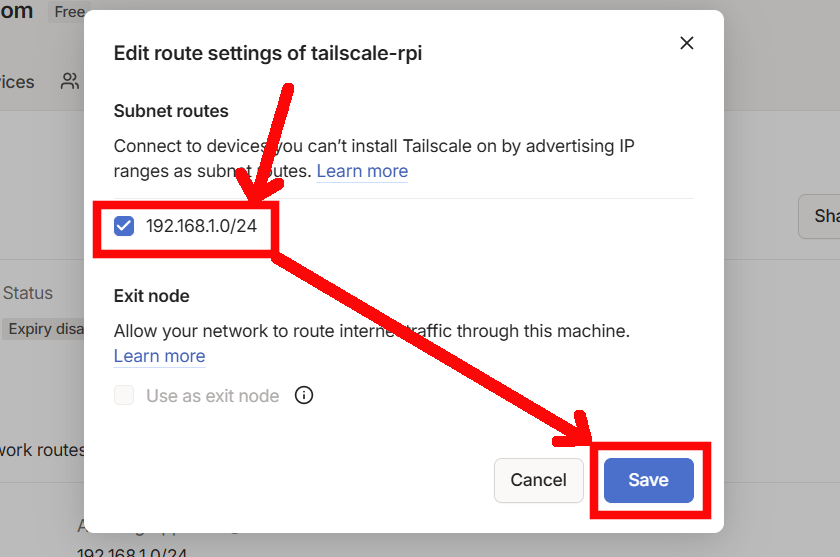
From the Machine section, please click the hostname related to your Raspberry PI (“tailscale-rpi” in my case). This will show you all the details for this machine and will show you that the network you added to your Raspberry PI configuration is awaiting approval. Please click the “Edit” link shown in the following screenshot:
You can now approve the subnet route by enabling the checkbox near the LAN subnet and clicking “Save”:
Now, you should be able to reach the services in your home network even from remote devices (where you enabled their Tailscale app).
Tailscale User Docs
More info and guides are available from the official Tailscale Docs.
Resources
- https://tailscale.com/docs/concepts/what-is-tailscale
- https://login.tailscale.com/start
- https://tailscale.com/docs/install
- https://tailscale.com/docs
Next Steps
If you are interested in more Raspberry PI projects (both with Lite and Desktop OS), take a look at my Raspberry PI Tutorials.
Enjoy!

Open source and Raspberry PI lover, writes tutorials for beginners since 2019. He's an ICT expert, with a strong experience in supporting medium to big companies and public administrations to manage their ICT infrastructures. He's supporting the Italian public administration in digital transformation projects.
![]()
![]()
![]()
![]()
![]()
![]()
![]()