

Last Updated on 4th January 2026 by peppe8o
This tutorial will show you how install BotWave in your Raspberry Pi and turn it into an FM radio transmitter using BotWave.
Up to a few years ago, FM radios were the most common way to listen to your favourite music. Internet changed the way we interface music, but radio are still alive and well worldwide.
If you already follow this blog, you may remember this article that talks about the same subject. However, BotWave comes with more advanced features.
IMPORTANT WARNING: Transmitting in FM band (87.5-108MHz) may be subject to your country’s regulations. Before using this project, please verify if allowed by your regional laws.
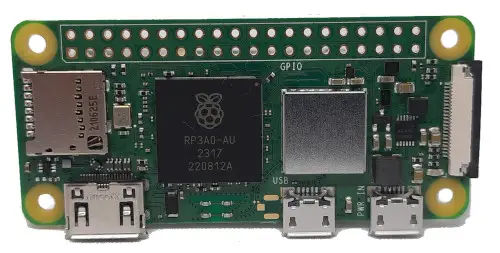
In this tutorial, I will be using a Raspberry Pi Zero W board, running Raspberry Pi OS 13 “Trixie”. However, these steps will work with every Raspberry Pi board, except for the Raspberry Pi 5 boards, which are not yet supported.
What We Need
As usual, I suggest adding from now to your favourite e-commerce shopping cart all the needed hardware, so that at the end you will be able to evaluate overall costs and decide if to continue with the project or remove them from the shopping cart. So, hardware will be only:
- Raspberry PI Zero W (including proper power supply or using a smartphone micro USB charger with at least 3A) or a newer Raspberry PI Board
- high speed micro SD card (at least 16 GB, at least class 10)
You will also need a common FM radio receiver, such as a small portable radio or your car’s radio.
Step-by-Step Procedure
Wiring Diagram
This project can be run without any antenna/wire. However, for the signal to reach more than a few meters, e.g. to cover a room, it is recommended to connect a single wire of about 75cm to the GPIO 4 (pin 7) of your Raspberry Pi board.
Note that the exact length depends on the frequency you aim to broadcast on, but 75cm is a good average. To get an approximate length you can use this formula: length_meters = 75 / frequency_mhz.
It is also recommended to keep the wire straight.

Prepare the Operating System And Install BotWave
Start by installing Raspberry PI OS Lite and grabbing the latest operating system available for your card. Also, you can use the Raspberry PI OS Desktop version if you prefer using graphical tools, even though BotWave only comes with a command line interface.
Once your OS is flashed and the Pi has booted, we need to update it. From a terminal, run the following command:
sudo apt update -y && sudo apt upgrade -yOnce done, be sure of having curl installed:
sudo apt install curl -yFinally, let’s install BotWave:
curl -sSL https://botwave.dpip.lol/install | sudo bashWhen run, the installer will ask you the installation mode, select client if you want to use the Pi as a standalone transmitter or as a node in a later network; you can add the server role on another machine later.
It will also ask you if you want to edit system files to enable live audio capture/streaming via ALSA, you can decide if you want to have this installed or not, but we won’t discuss about this feature in this tutorial. Therefore I am going to decide to not install it.

The installation may take some minutes, do not quit the installer thinking it froze.
Once the installer exited successfully, we can directly jump to the next step.
Go On-Air
Before starting to broadcast, you’ll have to download a wave file on your pi. You can either download one or convert an existing mp3, mp4, etc file using ffmpeg.
- Download an existing file:
wget https://file-examples.com/storage/feed8756ec69569209a5889/2017/11/file_example_WAV_10MG.wav - Convert an existing file (after installing ffmpeg):
ffmpeg -i myfile.mp3 myfile.wav
Once you have your .wav file ready, copy it to /opt/BotWave/uploads/ to give BotWave access to it.
cp myfile.wav /opt/BotWave/uploads/You can also copy a whole folder:
cp files/* /opt/BotWave/uploads/Once you got your files copied, you can finally launch BotWave, to do so, run:
sudo bw-localThis will launch a command line tool, where you will be able to run commands on. Let’s start by listing our files:
botwave> list
[INFO] Files in directory /opt/BotWave/uploads:
  file_example_WAV_10MG.wav
Once we got our file name, we can start a broadcast, but first, let’s understand the start command.
botwave> start <file_name> [frequency] [loop] [ps] [rt] [pi]Where:
file_name: Required, the.wavfile to broadcast.frequency: The frequency in MHz you want to broadcast on.loop: If you want your file to loop, or the broadcast to end when the file finishes.trueorfalse.ps: The Program Service. Basically the name of your radio. Max 8 characters.rt: The Radio Text. This is the “description” of your radio. Max 64 characters.pi: The Program Identifier. This allows radio to identify your broadcast. We will leave it empty and let BotWave use its defaults there.
Now that we know what means what, we can use the command: start file_example_WAV_10MG.wav 90 true "peppe8o" "Broadcasting a cool file !".
This command will then broadcast the example file at 90MHz, looping, and with the given radio name and radio description.
botwave> start file_example_WAV_10MG.wav 90 true "peppe8o" "Broadcasting a cool file !"
[INFO] Using bw_custom backend (76.0-108.0MHz, with RDS)
[INFO] PiWave initialized - Frequency: 90.0MHz, PS: peppe8o, Loop: True
[OK] Broadcast started for /opt/BotWave/uploads/file_example_WAV_10MG.wav on frequency 90.0 MHz
[BCAST] Playing /opt/BotWave/uploads/file_example_WAV_10MG.wav (looping) at 90.0MHz (PS: peppe8o)
Now, if we tune our radio to 90MHz, we should be able to hear our broadcast.
If the radio supports RDS, you should be able to see your radio name and description too.
Exiting the program
To exit BotWave, use the exit command, which will clean up and terminate the program. If you just want to stop the current broadcast, use the stop command.
There is plenty of other commands available. To get a list of them, run the help command. This tutorial will stop to the basics.
What’s Next
In the following tutorial, we’ll see how to use a BotWave server to manage a network of clients. The post is available at this link.
References:

Tried with a pi 3 and a 80cm wire. Works great👍. I reached a range of about 200m with it.
Thank you for your feedback, Noa. That’s more distance than what I could expect!