Last Updated on 30th October 2025 by peppe8o
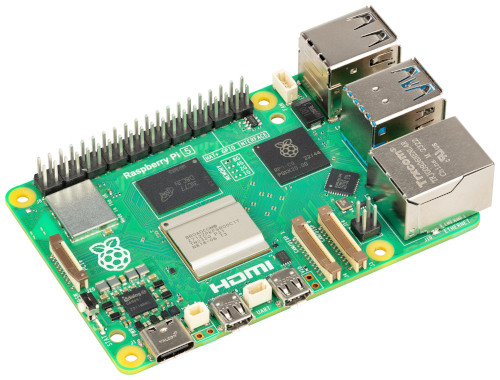
In this tutorial, I will show you how to install and setup a simple email server, based on DMS (Docker Mail Server) on a Raspberry PI computer board.
About Docker Mail Server
DMS is an open-source project aiming to give you a full-stack service able to provide a private email service. It includes all the main parts required from an email service like SMTP, IMAP, LDAP, Anti-spam, and Anti-virus.
On the other hand, currently, the project doesn’t offer a web interface for both reading emails and managing the service. For the first job, you will need to use an email client installed on your remote device. For the second job, you will need to use the (simplified) commands that DMS offer to the administrator to manage all of your settings.
Installing the service with Docker makes this project really simple to deploy on your Raspberry PI: you will be able to run it with 2 configuration files and a single Docker command!
Network Requirements
If you want to let your private email server communicate with the Internet, you will need a public IP address from your Internet Service Provider. Please ask it if this is available in your contract. Also, having a static and public IP address will help your project to make your email server able to send email messages with secure protocols, so avoiding your emails from failing to deliver messages rejected by the external email services.
For this simple project, I will use my free No-IP service and my dynamic, public IP address from my home. This basic configuration will allow me to receive emails from the web, see my mailboxes from a remote client, and send email messages only between the users of my email server.
What We Need
As usual, I suggest adding from now to your favourite e-commerce shopping cart all the needed hardware, so that at the end you will be able to evaluate overall costs and decide if to continue with the project or remove them from the shopping cart. So, hardware will be only:
- Raspberry PI Computer Board (including proper power supply or using a smartphone micro USB charger with at least 3A)
- high speed micro SD card (at least 16 GB, at least class 10)

Step-by-Step Procedure
Network Setup
From the network side, you must setup No-IP on your Raspberry PI computer board. Please use the provided link to get all the steps. Pick your free DDNS domain, it will match the domain name you will get in your email addresses. For example, I will use my myhomepi.webhop.me free domain. In this case, my email addresses will be like “giuseppe@myhomepi.webhop.me”.
You will also need to add an MX record to your DNS. With No-IP, you can follow their How To Add An MX Record guide from their Knowledge Base. You will need to set it with the content of the record exactly the same as the full domain. In my case, the content of this MX record will be exactly myhomepi.webhop.me. If you use a paid domain, this must be composed of “mail.” plus the domain name (for example, “mail.domain.com” if “domain.com” is your domain).
Home Router Setup
Moreover, you must setup your home router to forward the requests from the web to your Raspberry PI. This part depends on your router model, and you should look at the user guide to perform this task. Usually, this part is referred to as “Virtual Server” or “Port Forwarding”.
You will need to setup the forwarding for the following ports:
- 25: used for transferring email messages between mail servers
- 587: used for secure email submission by email clients to an email server
- 110: is the default TCP port for the POP3 protocol, which is used to retrieve emails from a mail server to an email client
- 143: is used for the IMAP protocol, an alternative protocol for retrieving and managing email from a remote server
Prepare the Raspberry PI Operating System
The next step is to install the Raspberry PI OS Lite (I suggest the 64-bit version) to get a fast and lightweight operating system (headless). If you need a desktop environment, you can also use the Raspberry PI OS Desktop, in which case you will work from its terminal app. Please find the differences between the 2 OS versions in my Raspberry PI OS Lite vs Desktop article.
Once installed, please make sure that your OS is up to date. From your terminal, use the following command:
sudo apt update -y && sudo apt full-upgrade -yWe also need Docker. For this task, please refer to my Beginner’s Guide to Install and Use Docker with Raspberry PI tutorial.
Getting DMS Files on Raspberry PI
As said, we can get DMS running by using 2 files:
- compose.yaml: this includes the configuration to get the Docker containers up and running. It manages the container at the infrastructure level
- mailserver.env: this file includes all the configurations at the application level, to configure the packages inside the container
Before getting the files, let’s create a folder which will include all the required parts and enter it:
mkdir dms
cd dms
Now, you can get these files with the following 3 commands:
DMS_GITHUB_URL="https://raw.githubusercontent.com/docker-mailserver/docker-mailserver/master"
wget "${DMS_GITHUB_URL}/compose.yaml"
wget "${DMS_GITHUB_URL}/mailserver.env"
Before running the DMS, we must set the correct domain in the compose.yaml file. Please open it for editing:
nano compose.yamlIdentify the following line:
hostname: mail.example.comYou must change the default “mail.example.com” hostname to your one. If you use a common domain name, you will probably want it to be “mail.” plus the domain name. In the case of No-IP, we can use the configuration known as “bare domain”, where the hostname matches the domain name. So, in my case, it will become:
hostname: myhomepi.webhop.mePlease note that the initial “mail.” string is absent.
Start DMS on Raspberry PI
We can run DMS with the following command:
docker compose up -dThis will start downloading the required packages and create the DMS container, naming it “mailserver”.
It will automatically create a new folder named “docker-data” where your container will save all the files you need to backup to keep your installation safe from problems (this is a mounted volume in Docker).
At any time, we can check how the installation proceeds by looking at the container logs:
docker logs mailserverYou will probably note that the logs are showing the request for the creation of at least one email address, as from the following warning:
WARN start-mailserver.sh: You need at least one mail account to start Dovecot (120s left for account creation before shutdown)We can perform this task with the following command:
docker exec -it mailserver setup email add my_user@domain.comThere, you should change the user name to your favourite and the domain to your one. Following my example data:
docker exec -it mailserver setup email add giuseppe@myhomepi.webhop.meThis command will ask you to type (and confirm) the password for this user.
You can check the email addresses configured in your server with the command:
docker exec -it mailserver setup email listFinalise Bare Domain Configuration
Only in case you are using a bare domain for your email server, we must perform a final setup. Please open the following file inside the mounted volume:
sudo nano docker-data/dms/config/postfix-main.cfProbably, this will be an empty file. Please insert the following line:
mydestination = localhost.$mydomain, localhostSave and close the file.
Setup the Email Client
Once you have the email server running and your user created, you can configure an email client on your remote device. Please use the full email address (“giuseppe@myhomepi.webhop.me” in my case) as username. The password is the one set at the user creation.
For the inbox email server, please set the IMAP server as your mail domain (“myhomepi.webhop.me” in my case, “mail.domain.com” in other cases, with your domain instead of “domain.com”). The security setting must be set to None, authentication to “PLAIN”, while the port must be set to 143.
For the outbound email server (SMTP), the server name must be set as the inbox one. Again, the security setting must be set to None, and the port must be set to 587.
Final Thoughts About Docker Mail Server on Raspberry PI
The configuration shown in this tutorial is a very simple setup, as it can receive messages from the Internet world but it can’t send (as the main email providers will probably block it at their antispam filter). This guide aims to show you what are the main steps.
If you want to use a complete email server, you must get a static and public IP address and a paid domain allowing you to set more records (as DKIM, DMARC, SPF, and PTR). The DMS guide for the first 3 records is available at the Docker mail server DKIM, DMARC & SPF guide, while the PTR notes are available from the Docker mail server usage tutorial.
Anyway, DMS on Raspberry PI is a strong solution to get your email messages private and allows you to get mailboxes with sizes limited only by the storage size of your Raspberry PI.
What’s Next
If you want to discover many other projects for your Raspberry PI, you can take a look at peppe8o Raspberry PI tutorials.
Enjoy!

Open source and Raspberry PI lover, writes tutorials for beginners since 2019. He's an ICT expert, with a strong experience in supporting medium to big companies and public administrations to manage their ICT infrastructures. He's supporting the Italian public administration in digital transformation projects.

