Last Updated on 13th April 2024 by peppe8o
In this tutorial I’m going to show you how to install Facebook Graph API in your Raspberry PI and publish posts on Facebook pages.
Facebook is the world most used social platform. In some cases, having a python robot able to post your messages can help with managing a lot of pages. Facebook Graph API, with Raspberry PI, can help this job.
The Facebook API
Facebook Graph API is the main (and official) way to develop applications able to interface and interact with your Facebook. You can use them to read and write to Facebook social graph.
All official Facebook products and software development kits interact using Graph API.
In this tutorial I’m going to use a cheap Raspberry PI Zero W, but this guide applies to all Raspberry PI computer boards.
What We Need
As usual, I suggest adding from now to your favourite e-commerce shopping cart all the needed hardware, so that at the end you will be able to evaluate overall costs and decide if to continue with the project or remove them from the shopping cart. So, hardware will be only:
- Raspberry PI Zero W (including proper power supply or using a smartphone micro usb charger with at least 3A) or newer Raspberry PI Computer Board
- high speed micro SD card (at least 16 GB, at least class 10)
Check hardware prices with following links:


Step-by-Step Procedure
Getting API token
Before writing our python script, we need to get (free) access in Facebook Developer Portal and registering our new app, to get a token able to give our script right permissions.
From Facebook for Developers website, click Get Started button:

Login using your facebook credentials and compile needed fields according to your preferences.
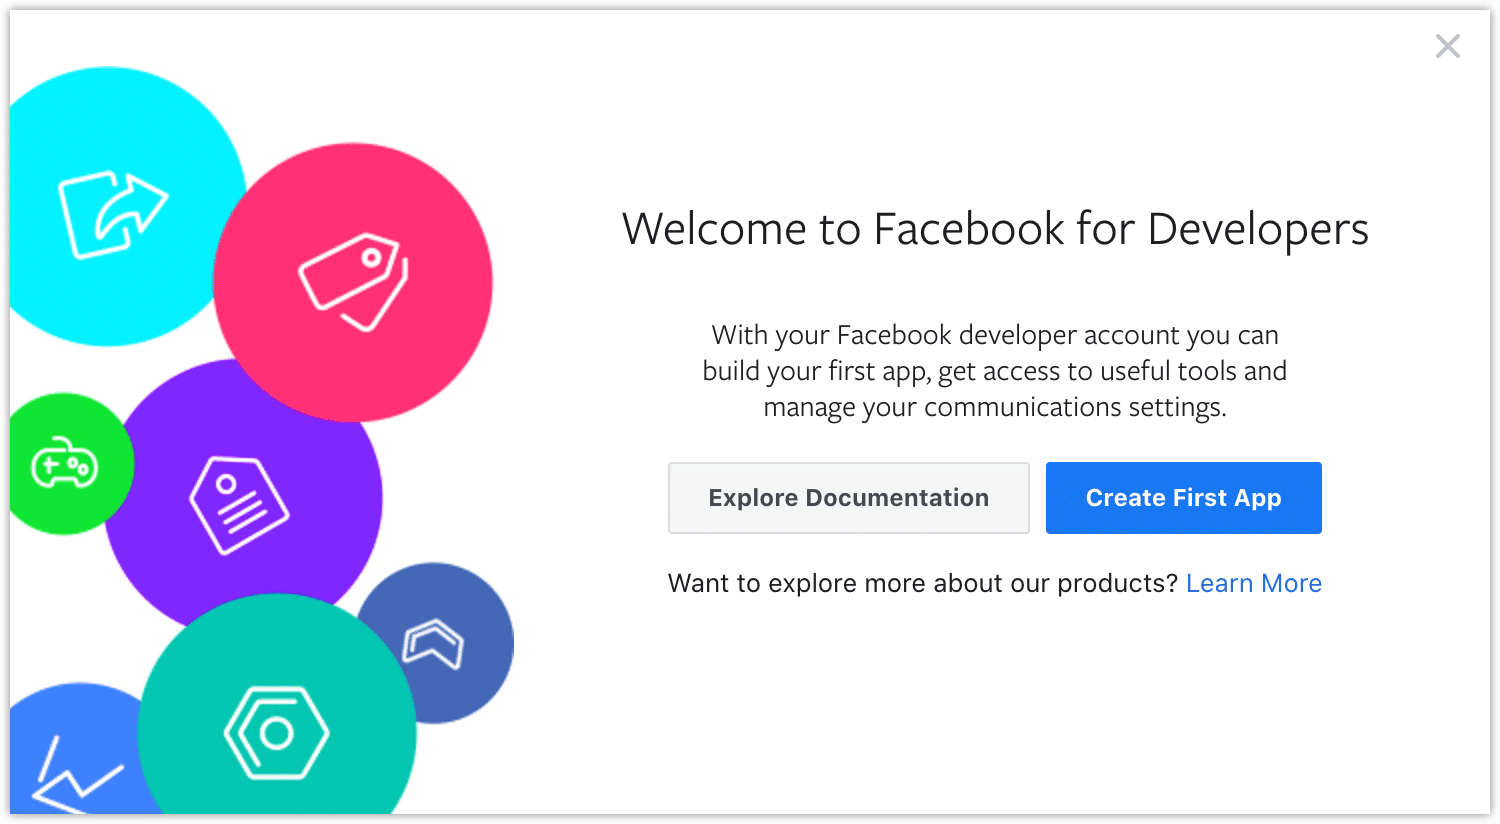
If you are coming from a first time registration flow, you will be redirected to a welcome page. Use “Create First App” button, whose name well explains its goal (otherwise, go to the Apps panel and click “Create App”):
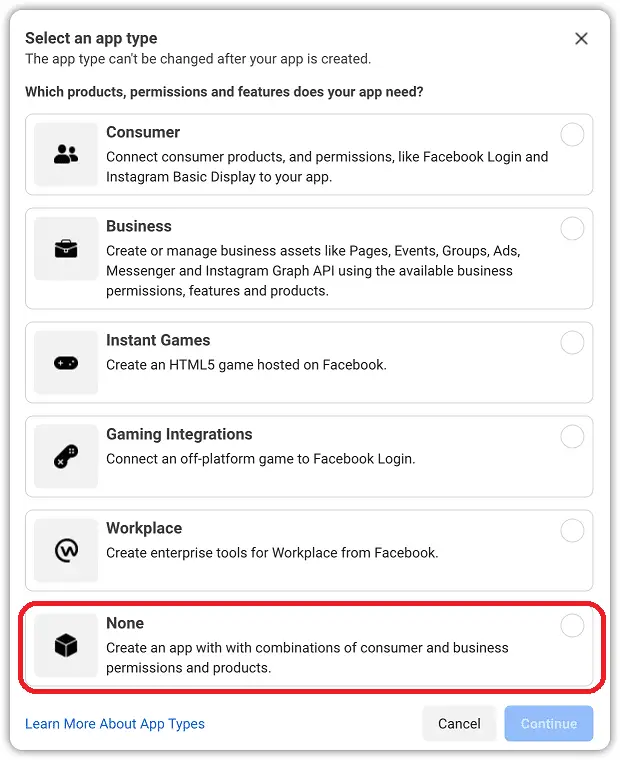
In next window, use the last (“None”) option as app type:
Add your app name and email address. You can leave the Business Manager option with its default:
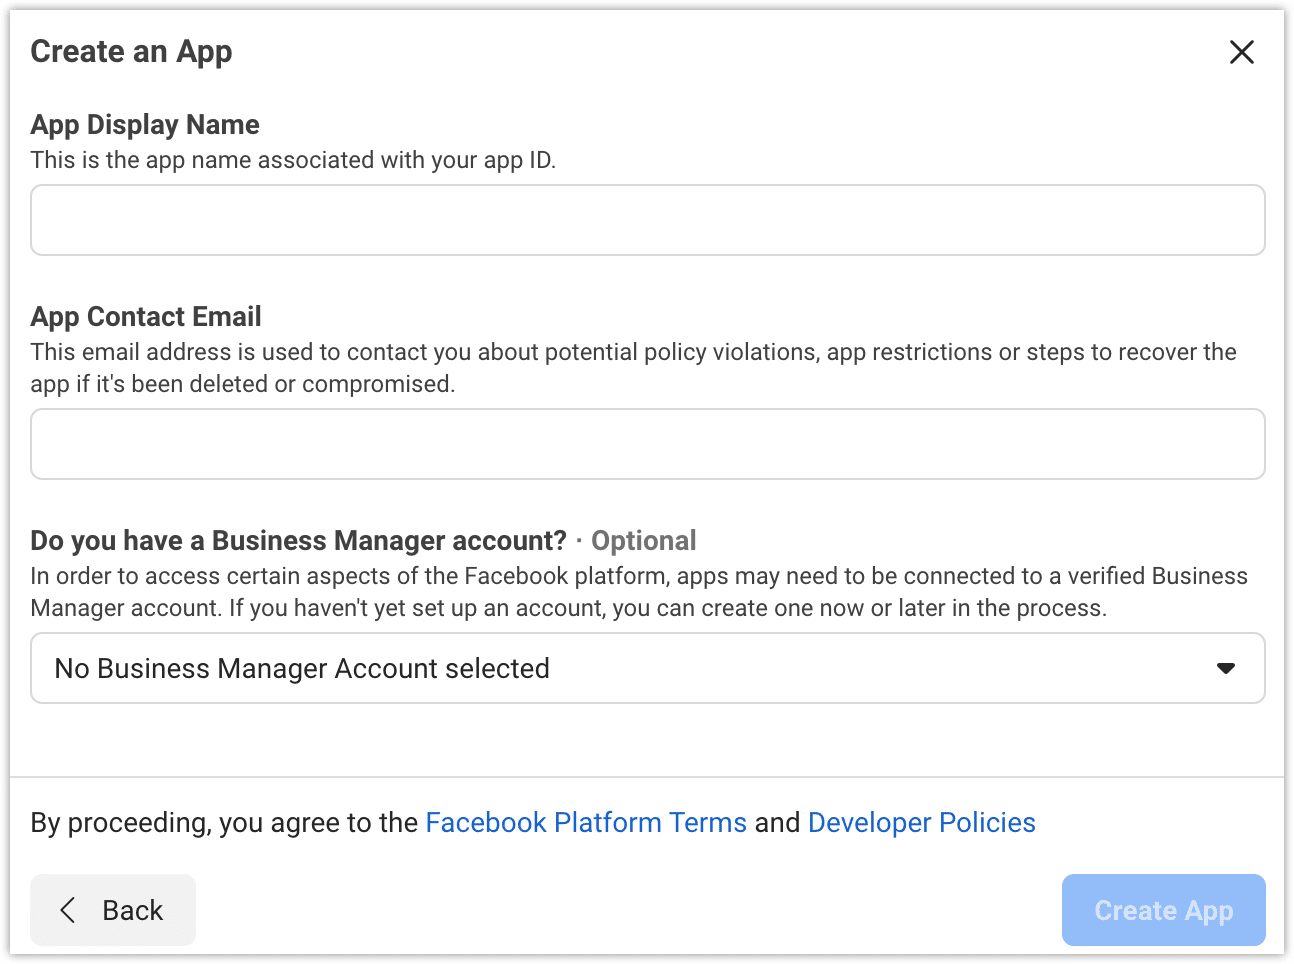
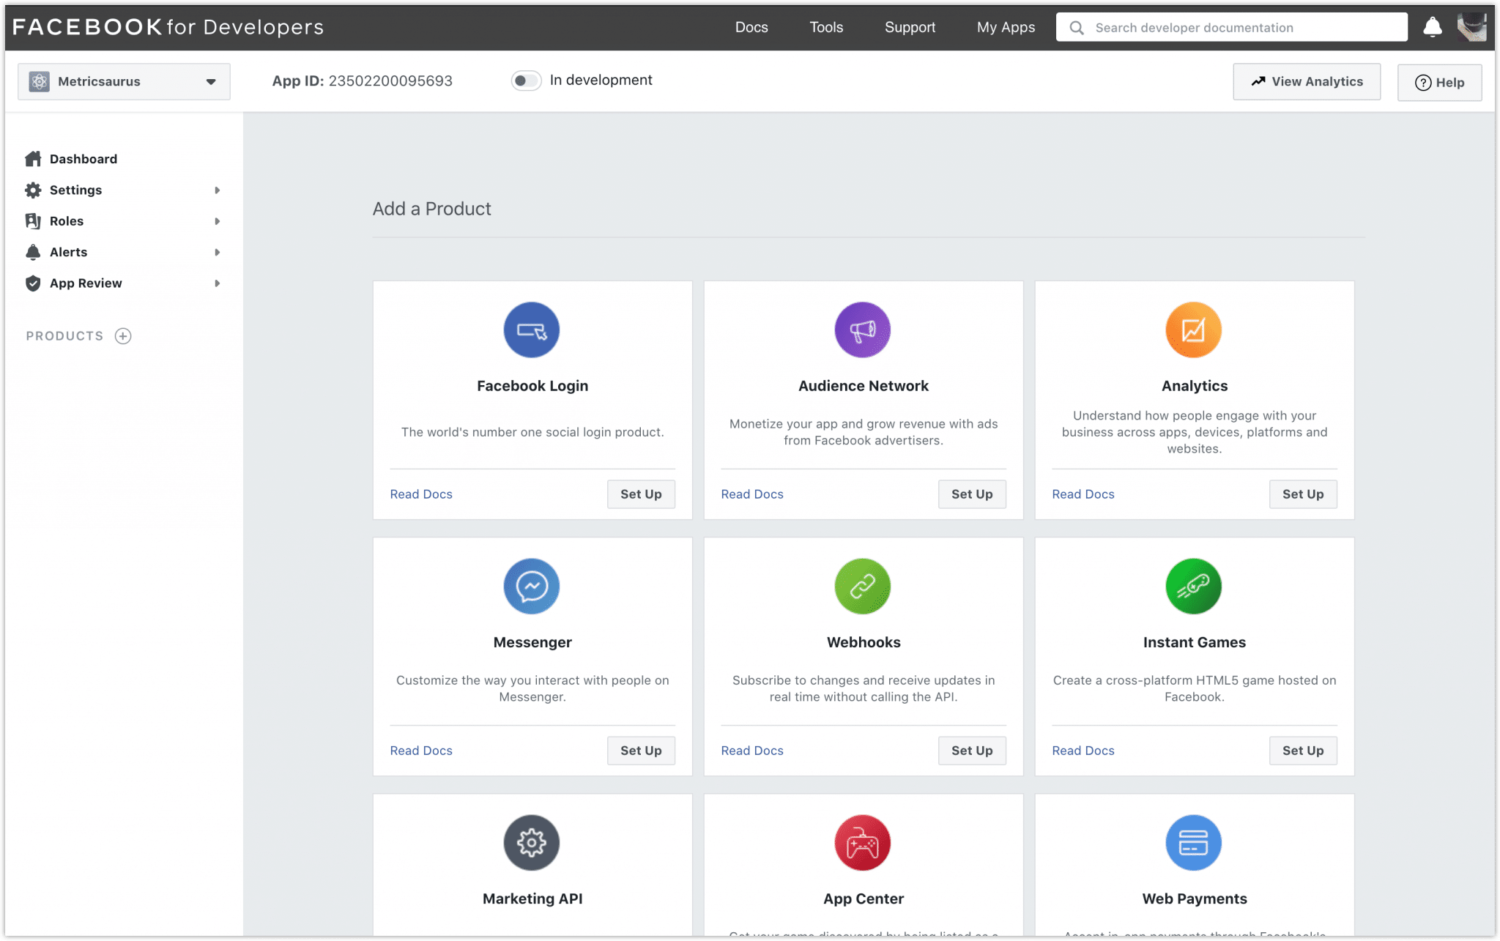
Once clicked final “Create App” button, you have completed the app creation flow and your app will be loaded in next Dashboard:
Go to Tools -> API Graph Explorer. Your new screen will show on right sidebar the Access Token menu:
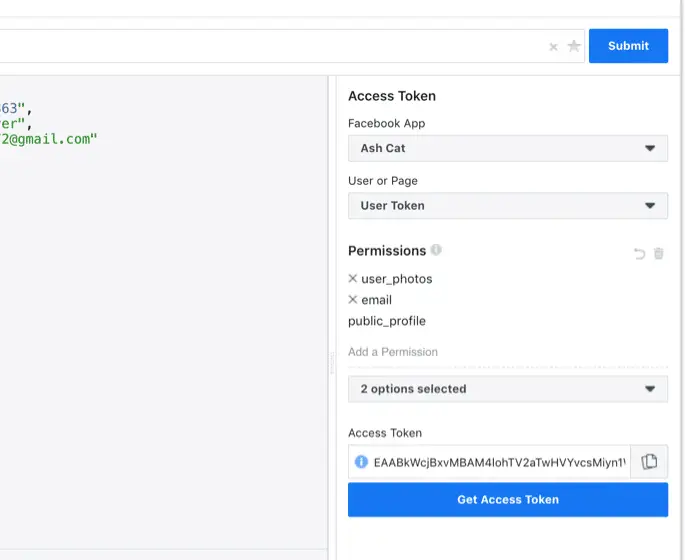
Here resided the most important part of this procedure. You need to create the right toke with right permissions to make your script working.
In Facebook App, select your created app name.
With drop-down menu, add following permissions:
- pages_show_list
- pages_read_engagement
- pages_manage_posts
In bottom part of this sidebar, if Access Token field is still empty, click “Get Access Token” to generate an alphanumeric token.
In “User or Page” menu, scroll down to Page access token and select your Facebook page name.
The resulting token is valid for our purposes but will have a low duration validity. To extend token expiration date, click on “i” icon near the token field:
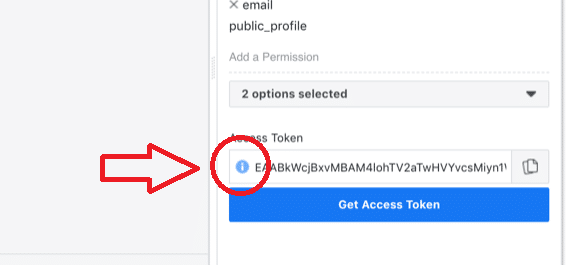
You will get a popup with access token info. Click “Open in Access Token Tool” button:

Scroll Down and click “Extend Access Token” button. This will show a new token:

Copy the token and save with you, as it will be used in your Python script.
Get Facebook Page ID
Facebook Page ID is another required parameter. You can find it in your Facebook page, in “Info” section. This is a number like “687947481647282”, which is Page Id for my peppe8o Facebook page.
Prepare your Raspberry PI OS
Finally, we are to funny stuff. Install your operating system, using Raspberry PI OS Lite (for a fast, headless OS) or Raspberry PI OS Desktop (in this case working from its internal terminal).
Install pip and then facebook-sdk with requests package to use Facebook Graph API:
sudo apt install python3-pip
python3 -m pip install facebook-sdk requests
Create Publish Script
You can create your own script with following instructions, which will explain line by line its code, or get a copy directly in your Raspberry PI, editing only token and page variables, with the following terminal command:
wget https://peppe8o.com/download/python/facePagePost.pyThis script starts, as usual, importing required modules:
from facebook import GraphAPIThe next lines associate your token (a very long string) to a variable (easier to manage) and connect to Facebook Graph API. Please remember to use your token (copied between brackets) instead of “your_Token_Goes_Here” string:
tk = 'your_Token_Goes_Here'
graph = GraphAPI(access_token=tk)
Preconfigure your message, by composing text (associated to postMsg variable), link (if needed, associated to postLink variabel) and page ID. Please remember to use your Facebook page Id instead of mine:
postMsg='Hello people from my Raspberry PI!'
postLink='https://peppe8o.com'
pageId='687947481647282'
Final line runs the publish command, using previous variables. You can also avoid adding a link (if not needed), by removing last “link” option):
graph.put_object(pageId,"feed", message=postMsg, link=postLink)Once modified with your token and page ID, you can run this script with following command:
python3 facePagePost.pyAfter execution, check your Facebook page for your published post.
Enjoy!

Open source and Raspberry PI lover, writes tutorials for beginners since 2019. He's an ICT expert, with a strong experience in supporting medium to big companies and public administrations to manage their ICT infrastructures. He's supporting the Italian public administration in digital transformation projects.

