
Last Updated on 27th August 2024 by peppe8o
In this tutorial I’m going to show you how to move your first steps with Raspberry PI Pico, installing the open-source Thonny IDE (integrated development environment) and running a very simple command.
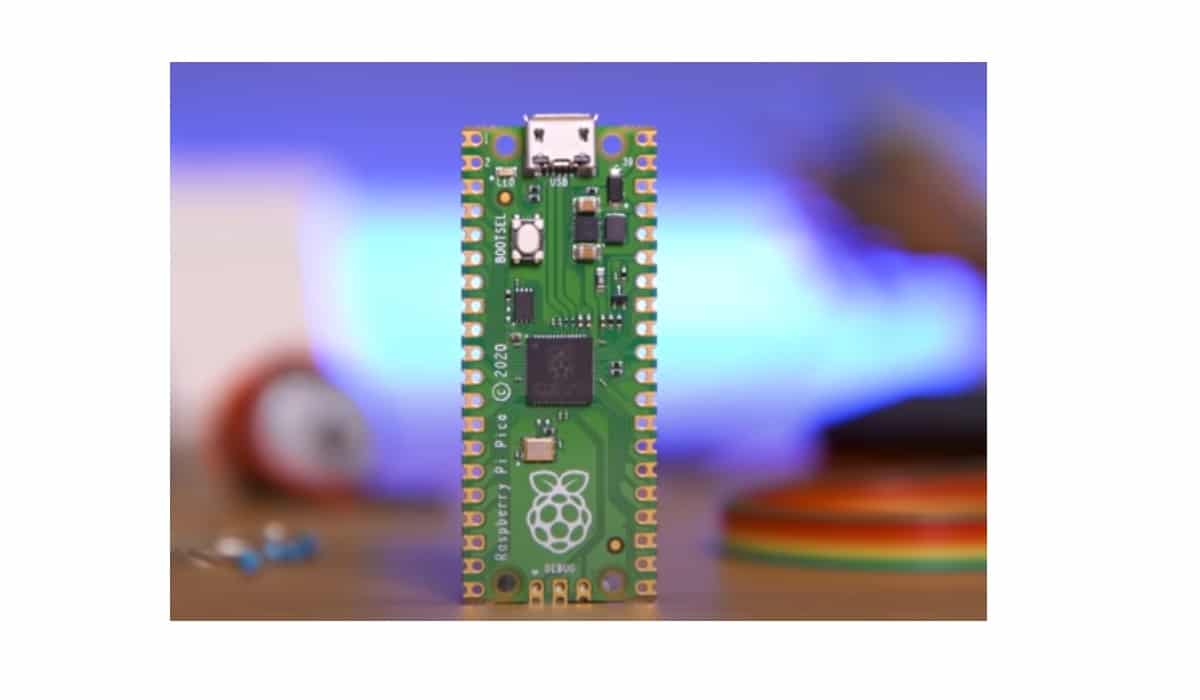
The new Raspberry PI Pico changes the user approach to this device because it works as a microcontroller (unlikely other Raspberry PI boards that work as Linux computers). For this reason, starting your first steps with RPI Pico requires a different approach
The Microcontroller
With the announcement of the new Raspberry PI Pico in 2021, the RPI Foundation took its first steps in the microcontrollers world. Common Raspberry PI users can be a little confused when getting this board and asking themselves “Where is the SD card slot?”. The answer is that no SD cards are present as Pico stores programs in its internal memory. Another common question is “What OS to use with Raspberry PI Pico?”. Same answer, there’s no operating system as with microcontrollers you will put your program directly on firmware and it will run until you won’t replace the main program.
Many of these questions are similar to ones when comparing the difference between Raspberry PI computer boards and microcontrollers (like Arduino). And Raspberry PI Pico is more similar to Arduino.
What is interesting with RPI Pico, is that you can use MicroPython to program your device.
In the following chapter, I will show you a bit more information about the most important part of the Raspberry PI Pico, the processor.
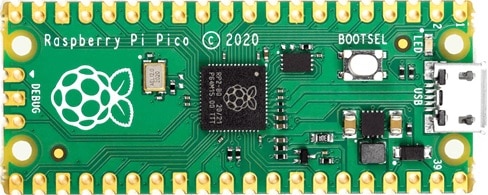
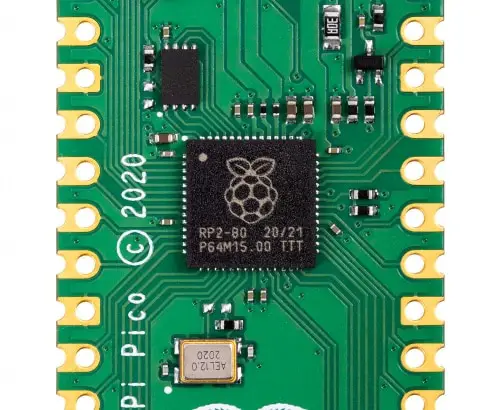
The Heart of Raspberry PI Pico: the new RP2040 Processor
The Raspberry PI Foundation put great effort into this part. The new RP2040 marks Foundation’s debut on microcontrollers, and they didn’t want to disappoint expectations.
Before digging into technical details, let’s look at the reason for its name. It uses the following naming convention:
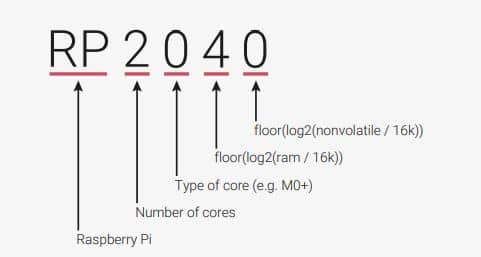
Main RP2040 features are described in the following list:
- Dual ARM Cortex-M0+ @ 133MHz
- 264kB on-chip SRAM in six independent banks
- Support for up to 16MB of off-chip Flash memory via a dedicated QSPI bus
- DMA controller
- On-chip programmable LDO to generate core voltage
- 2 on-chip PLLs to generate USB and core clocks
- 30 GPIO pins, 4 of which can be used as analogue inputs
- Peripherals
- 2 UARTs
- 2 SPI controllers
- 2 I2C controllers
- 16 PWM channels
- USB 1.1 controller and PHY, with host and device support
- 8 PIO state machines
A historical absence of analogic inputs in PI boards has so been filled with Pico. It is more important than what you can think, as many sensors still exchange analogic data with their microcontrollers and Raspberry PI boards have been always limited from this.
Deeper details can be found in RP2040 official datasheet.
In the following paragraphs, I will show you how to install Thonny on your computer to connect and program your Raspberry PI Pico.
What We Need
As usual, I suggest adding from now to your favourite e-commerce shopping cart all the needed hardware, so that at the end you will be able to evaluate overall costs and decide if to continue with the project or remove them from the shopping cart. So, hardware will be only:
- A common computer (maybe with Windows, Linux or Mac). It can also be a Raspberry PI Computer board
- Raspberry PI Pico microcontroller (with a common micro USB cable)
Step-by-Step Procedure
To move your first steps with Raspberry PI Pico you need to install Thony IDE. This application is already installed in Raspberry PI OS Desktop. With a different computer, you can install it from their official page: https://thonny.org.
Use the links on the top right side of Thonny’s page to download the installer:
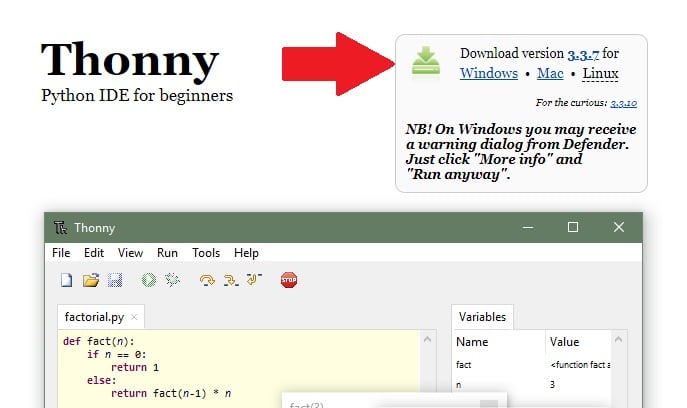
Execute the installation procedure according to your OS. With Windows, it is enough a double click on the downloaded installer and follow the setup wizard. If not present in your OS, this will also install Python on your computer.
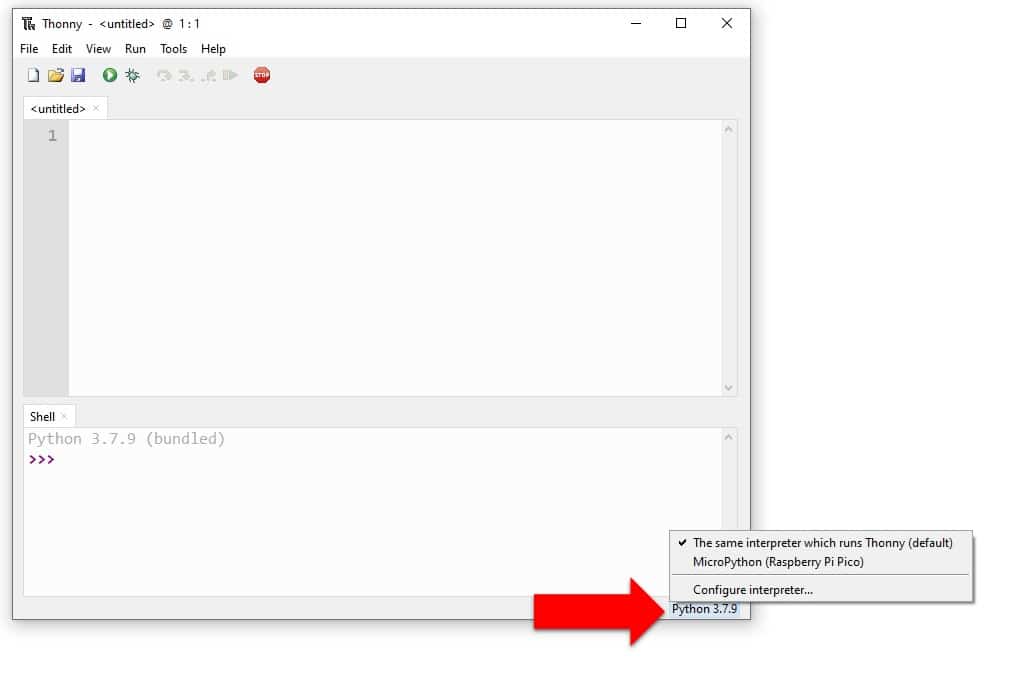
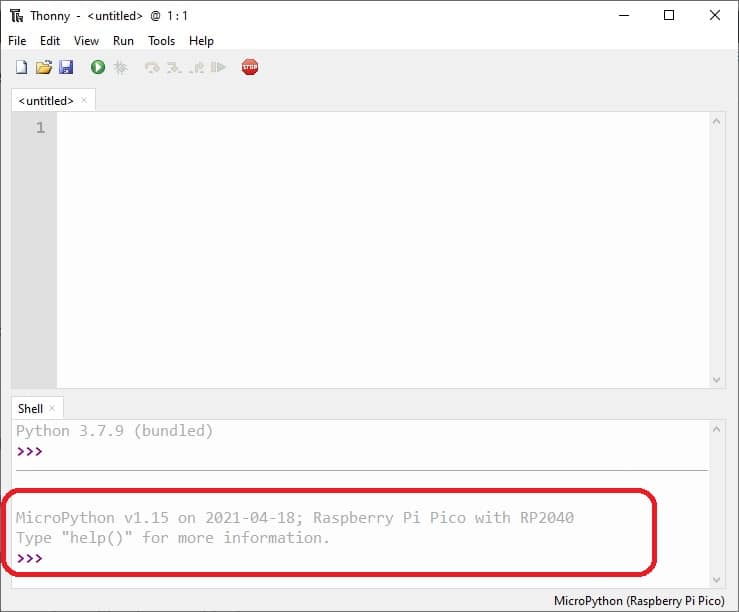
Once installed, run Thonny to get its home window:

This window is split into 2 areas. The top one (labelled as “untitled”) is where you can write your scripts before running them. The bottom “Shell” is where you can use an interactive mode to run line by line your commands.
You can see from this image that the shell is running on bundled Python. This means that Thonny is running Python commands on your current computer.
If you have never used your Thonny with Raspberry Pi Pico, you will need to add the MicroPython firmware to your Pico. Identify the BOOTSEL button on Pico:
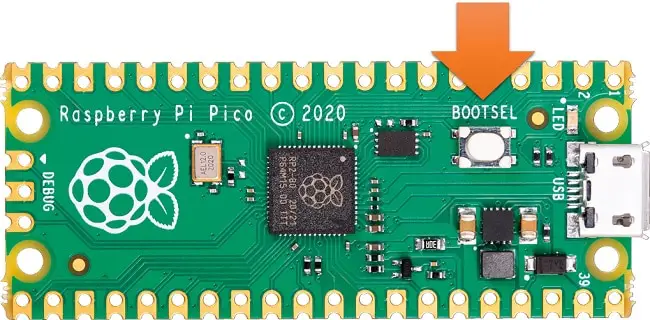
Press the BOOTSEL button and hold it while you connect the other end of the micro USB cable between RPI Pico and your computer. This installs your Raspberry Pi Pico as a mass storage device. You can release the BOOTSEL button once you see a new storage device in your computer, named “RPI-RPI2”.
Back to the Thonny window, click on the “Python” button on the bottom-right side (see picture below). This will allow you to select the Thonny interpreter:
Select “MicroPython (Raspberry PI Pico)” option. A dialog box will pop up to install the latest version of the MicroPython firmware on your Raspberry Pi Pico. Click the “Install” button to copy the firmware to your Raspberry Pi Pico.
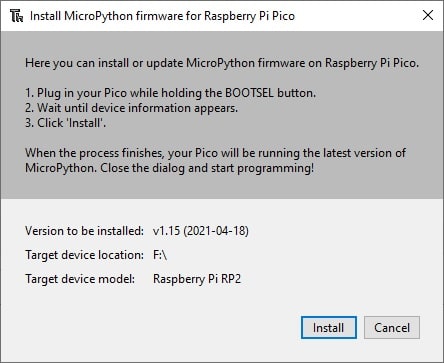
At the end of installation the following results will be shown:

Click Close. You have installed RPI Pico firmware and you will not require previous steps on the next connection.
Run MicroPython on Raspberry PI Pico
When the MicroPython installation on Pico has been finished, you will see that the shell has moved the interpreter to the Raspberry PI Pico’s prompt:
A very simple command test is importing the “os” python module and asking your PICO device for info about its OS version. From the Thonny shell, please use the following command:
import osThis will import the “os” module. Then:
os.uname()This will return the following info:

So showing you RPI Pico info.
Execute your First Python Script
Executing your first script is also simple, moreover if you are going to run it from your connected computer.
Our first example makes the Pico on-board LED blinking, following the most common microcontroller first example.
In your Thonny script section (top window) add the following code:
from machine import Pin, Timer
led = Pin(25, Pin.OUT)
timer = Timer()

def blink(timer):
    led.toggle()

timer.init(freq=25, mode=Timer.PERIODIC, callback=blink)
If you’re using a Raspberry PI Pico W board, please note that this board has a different addressing for the built-in LED and you should use the following code instead:
from machine import Pin, Timer
led = Pin("LED", Pin.OUT)
timer = Timer()

def blink(timer):
    led.toggle()

timer.init(freq=25, mode=Timer.PERIODIC, callback=blink)
This simple code imports the required modules. Then it associates the “led” variable (its internal LED PIN 25 or the Pico W’s LED) and sets this to output mode.
A “timer” variable is initialized, then a blink function is defined. This function is a timer callback function, which means this will be called in a timer instance and executed at each timer trigger. Its scope is only toggling our onboard LED: if the LED is on, this will put it off; if the LED is off, this will put it on.
The timer init statement will trigger the blink function 25 times per second (frequency value).
Click the “Run” icon from your Thonny IDE. This will require (only for your script’s first run) where to save your Python code:
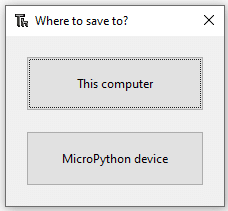
Select “This computer” and then select the path and file name on the following window.
After saving, your Python script will start running and you will see your board LED blinking. Use the “Stop” button from Thonny to stop script execution.
Where To Save Files?
Beginners could also ask where to save files on Thonny.
You can think of “.py” files for your MicroPython project divided into 2 main categories:
- Libraries
- running program
Libraries are “.py” files that include code that makes it simpler to execute functions or use objects in your running program. If you need to use a library, you don’t need to run it explicitly but you need to link them in your running program with the “import” statement. For example, “import mylib” will make your RPI Pico search for a “mylib.py” in the default libraries path (more info can be found in Adding external modules to MicroPython with Raspberry PI Pico tutorial). Some main libraries are already built in your McroPython firmware and you don’t need to make available it (for example the “machine” module). Libraries / external modules must be always saved in your Raspberry PI Pico storage.
Now, consider that Raspberry PI Pico is a microcontroller. This means that RPI Pico can run both connected to a PC or without a PC with a simple power supply plugged into its MicroUSB port.
If you need to run programs only when the Pico is connected to your PC, you can save the “.py” program to your local PC and run it. In this case, you will always need to start/stop the program from your IDE.
But if you need to execute your program also when your Pico is alone with a simple MicroUSB power supply (without a PC communicating him what to do), then the program has to be located in your Raspberry PI Pico storage. Moreover, once powered the Pico looks at its storage for a “main.py” file. This will be the file automatically executed every time the RPI Pico is powered.
Common Problems With Windows Computers
Some Windows users can experience problems connecting Raspberry PI Pico to their PC.
While the first part should go without problems, installing Pico firmware could result in RPI no more visible from your computer. They can see Raspberry PI Pico in computer devices but are listed as a generic “Board CDC” with a yellow warning icon. Moreover, when trying to force connection from Thonny by manually configuring the interpreter, it can result in access denied errors.
This problem is common to Windows 7 and requires manually installing drivers. Even if Thonny can be installed without an administrative user, drivers require administrator permissions. The procedure, shared by a user on the Raspberry PI forum, has the following steps:
- Download the USB CDC driver from microchip.com COM_Driver
- unzip the amtel_devices_cdc.inf file to a folder named “pico-serial”
- Change the name of amtel_devices_cdc.inf file to pico-serial.inf
- open/edit the “pico-serial.inf” in a basic editor like notepad
- remove and replace the lines under the following headings:
[DeviceList]
%PI_CDC_PICO%=DriverInstall, USB\VID_2E8A&PID_0005&MI_00

[DeviceList.NTAMD64]
%PI_CDC_PICO%=DriverInstall, USB\VID_2E8A&PID_0005&MI_00

[DeviceList.NTIA64]
%PI_CDC_PICO%=DriverInstall, USB\VID_2E8A&PID_0005&MI_00

[DeviceList.NT]
%PI_CDC_PICO%=DriverInstall, USB\VID_2E8A&PID_0005&MI_00

[Strings]
Manufacturer = "ATMEL, Inc."
PI_CDC_PICO = "Pi Pico Serial Port"
Serial.SvcDesc = "Pi Pico Serial Driver"- Close and save and make sure your file retains the name “pico-serial.inf”
- Go to your PC device list, find the pico under Ports, named something like CDC Device. A yellow exclamation mark indicates it.
- Right click on the CDC Device and update or install the driver choosing the file you created from the location you saved it at.
This procedure is available at https://www.raspberrypi.org/forums/viewtopic.php?t=300633.
A pre-configured “inf” file (compressed) can be get from my download area: pico-serial.zip
What’s Next
Interested in doing more with your Raspberry PI Pico? Try to look at my Raspberry PI Pico tutorials for useful and funny projects!
Enjoy!

Open source and Raspberry PI lover, writes tutorials for beginners since 2019. He's an ICT expert, with a strong experience in supporting medium to big companies and public administrations to manage their ICT infrastructures. He's supporting the Italian public administration in digital transformation projects.
![]()
![]()
![]()
![]()
![]()
![]()
![]()


Please explain the reason for storing a script on the Pico vs Computer. What are the advantages/disadvantages of each method. Thanks. It has never been explained to me.
Hi Noel. I updated my tutorial trying to explain where to store the files and the reason. Basically, external libraries/modules have to be stored always in your RPI Pico storage. Running program can stay in your local PC (if you need to run it only when the Pico is connected to it), or must stay in your RPI Pico storage both if you want to run it with or without a PC connected.
Thanks for the reply.
You are welcome!
Hello. I run the code and nothing happened. What can be the reason?
It shows me “>>> ” and just this.
Hi Vlad, please can you send me some pictures from your Thonny IDE by email? -> giuseppe@peppe8o.com.
Thanks
Hello,
Just trying out your tutorials and could not get the LED to blink. Problem is I’m using a PICO W and I assumed the PICO’s are all the same. Anyways I learned that there is no Pin for the LED connected to the RP2040 (according to the RPi website). Instead it is connected to a GPIO Pin on the wireless chip. Once I modified the code as they suggested it started flickering for me perfectly. Hopefully this helps anyone else who might find your tutorials. Still learning, and thank you for taking the time to share your knowledge.
from machine import Pin, Timer
led = machine.Pin(“LED”, machine.Pin.OUT)
timer = Timer()
def blink(timer):
led.toggle()
timer.init(freq=25, mode=Timer.PERIODIC, callback=blink)
Hi Shane,
the Raspberry PI Pico differs from the Raspberry PI Pico W in the management of the built-in LED, as you stated. With the W model you can test it with my Getting Started with WiFi on Raspberry PI Pico W and MicroPython tutorial.
Anyway, you are right and I should update this post in the next days in order to advice people.
many thanks,
peppe8o
Hello,
Thank you for publishing this tutorial.
After reading your tutorial I see often when a program begins there must be some import action. Sometimes it sounds like “import os” or
“from machine import Pin, Timer”.
Where is that imported from?
When is it from… import and when is it import alone? How do you discover that?
You write “import os” This will import the “os” module.
And what can I import with import?
Where will the “os” module be dropped? Where is the module coming from and where is it going to?
How do you know that you need os? Where are these modules documented?
Then you write os.uname (). Is this instruction anywhere documented?
In general when I find and where a list of instructions or commands (I suppose there are a lot) with their explanation and a short example then I can make a program succesfully (I hope).
But as long as I do not have any information then it is difficult to start with it.
As an example: in a random tutorial on internet I saw the instruction “display.update()” to make the result visible on the graphical display of my Pimoroni Explorer Base board
and in another tutorial I had to use “lcd.show()”. Why in one case this and in the other case different? For the same result?
Beside your interesting examples, where can I find good documented (online) papers or manuals which enables me to verify how and for what purpose an instruction is used for.
And how to learn this programming stuff for Pi.Pico (or Micropython) on the right way?
Thank you for your help.
Hi,
MicroPython (as well as Python) is built with a modular structure. With the basic MicroPython you can od just a few, basic operations allowing you to calculate some math operations, code loops, and basic functions like printing a text message in your console. The reason of this choice is to keep the microcontroller’s memory usage as low as possible. If you need more complex operations you must load in memory the related library: that’s the “import” operation.
Some libraries are already available with the firmware: they are saved in your microcontroller storage but they are not loaded in memory. The best reference for this is the official MicroPython documentation available at https://docs.micropython.org/en/latest/library/index.html.
Some libraries are not available with the firmware, otherwise the firmware file would be too big for microcontroller storages. So, sometimes you have to save specific files including the classes and functions that you need to run. You can save them in your microcontroller storage as “.py” files and then you can import them in your code. It is important to note that library files must be stored in specific folders in your microcontroller sotrage, as described in my adding external modules to micropython with Raspberry PI Pico tutorial.
I hope this can help you to better understand how MicroPython libraries work with Raspberry PI Pico and, generally, with microcontrollers.
Thank you very much with your quick reply!
You have pointed me to the right place with your link https://docs.micropython.org/en/latest/library/index.html
There I have found the necessary information about modules. Do I understand it well they are libraries in fact?
And the difference between (example) “import machine” and “from machine import Pin” is that in the latter you like to use a class Pin only that you prevent that the whole library “machine” is loaded in the memory of the device?
Both correct. The second way should use a lower amount of the Raspberry PI Pico’s memory
Thank you for your support.
Kind regards,
Kees