
Last Updated on 28th October 2024 by peppe8o
One of the main problems I’ve faced in the last years with my smartphone is that I have tons of photos that fill all my device memory. With Syncthing and Raspberry PI, you can easily move data to remote storage and easily manage your backup.
About Syncthing
Syncthing, from Kastelo, is an open-source file synchronization program.
It can perform continuous file synchronization between multiple devices. The devices can be of different kinds, as Syncthing can be installed on computers (Windows, Linux, and Mac) and on mobiles (Android, and iOS). Regarding mobiles, there is an official Syncthing app for Android smartphones, while iPhones and iPads currently must use the Möbius Sync app. I don’t have an iPhone, so my tests will be performed with Android smartphones.
The most important feature that Syncthing assures is privacy. As they assure “None of your data is ever stored anywhere else other than on your computers. There is no central server that might be compromised, legally or illegally.“
What I’m Going to Test
For this tutorial, I’m going to synchronize my Smartphone camera folder with my Raspberry PI. In this way, I will be able to map an external storage (maybe a NAS) and my smartphone files will go directly in my network storage, where I can comfortably organize them.
What We Need
As usual, I suggest adding from now to your favourite e-commerce shopping cart all the needed hardware, so that at the end you will be able to evaluate overall costs and decide if to continue with the project or remove them from the shopping cart. So, hardware will be only:
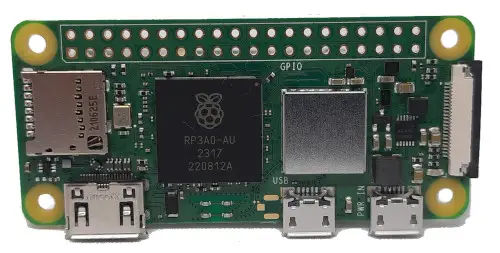
- Raspberry PI Computer Board (including proper power supply or using a smartphone micro USB charger with at least 3A)
- high speed micro SD card (at least 16 GB, at least class 10)
- a Smartphone or whatever other device you want to sync with your Raspberry PI (I will use my Android smartphone)
Step-by-Step Procedure
Prepare the Raspberry PI Operating System
The first step is installing the Raspberry PI OS. Please note that for my test I’m using the 64-bit version. You have 2 options:
- Raspberry PI OS Lite: This is a lightweight OS for Raspberry PI computer boards, without a Desktop environment (headless). Suggested for low-power Raspberry PI computers (like the RPI Zero 2 W), but also for newer computer models in order to get the full computing power working for your service.
- Raspberry PI OS Desktop: This is a less-performing OS (compared to the lite version), but it runs really well on many Raspberry PI computer boards. I suggest this only if you really need a desktop environment. In this case, you will work from its internal terminal.
You can check the difference between the 2 operating systems with my Raspberry PI OS Lite vs Desktop: comparison between the 2 distributions article.
After installing the OS, please make it up-to-date. From the Raspberry PI SSH session (or terminal):
sudo apt update -y && sudo apt upgrade -yWe also need a folder where to store the shared data. I will create this folder directly in my user home, so the command is just:
mkdir synchshareIf you’re going to use an external disk for storing the shared files, and you’re creating the “synchshare” inside this external storage, please remember to make the storage mount correctly at the same mount point even after every reboot. It is important, especially for Raspberry PI OS Lite, that you perform this job, for example using my Automount USB storage with Raspberry PI OS Lite: fstab and autofs.
Install Docker
To make the job simpler, I will use Docker a useful container management system. You can install Docker by referring to my Setup a Docker environment with Raspberry PI OS Lite tutorial. Please note that docker-compose and Portainer are not strictly required for this Syncthing.
Install Syncthing
With Docker, the Syncthing installation in your Raspberry Pi can be performed with just 1 command line, the following (changing the red part with your full path to the external storage, if you’re going to use it):
docker run -d --network=host -v /home/$USER/synchshare:/var/syncthing --hostname=my-syncthing --restart=unless-stopped --name=syncthing syncthing/syncthing:latestLet’s focus on this command option meanings:
- -d: this option runs the Syncthing container as a daemon. This means that you can detach your console and even logout from the Raspberry PI, with your Syncthing continuing to work
- –network=host: this networking mode allows the Syncthing container to share the network interface with the host. This means that you don’t need to specify the container port mapping, while the container will keep the same IP address as the host. This option is required in order to get better transferring performances, compared to the internal NAT of Docker containers
- -v /home/$USER/synchshare:/var/syncthing: the “-v” option maps persistent volume storages between a specific host folder (/home/$USER/synchshare in this case) and the container filesystem (/var/syncthing for our example). This will allow us to use a storage volume that will persist even after the container remotion. This will also keep our shared and configuration data safe
- –hostname=my-syncthing: this also sets the container’s internal hostname to “my-syncthing”, even if you can set it at your choice
- –restart=unless-stopped: this option allows our container to automatically restart even after any problem and, in particular, after the host reboots
- –name=syncthing: this option gives a name to our Syncthing container. It is useful to easily manage containers if you install more Docker applications in your Raspberry PI, as you can issue container commands by calling the container by the name you set instead of using random container names
- syncthing/syncthing:latest: this is the name of the Syncthing container to be pulled from the Docker Hub
At the end of the process, you can reach Syncthing from a remote browser, by using your Raspberry PI’s IP address, followed by the 8384 port. For example, my Raspberry PI’s IP is 192.168.1.18, and my URL will be “http://192.168.1.18:8384”.
First Settings with Syncthing on Raspberry PI
When you connect to Syncthing for the first time, you will be prompted about a request to send anonymous data for usage statistics:
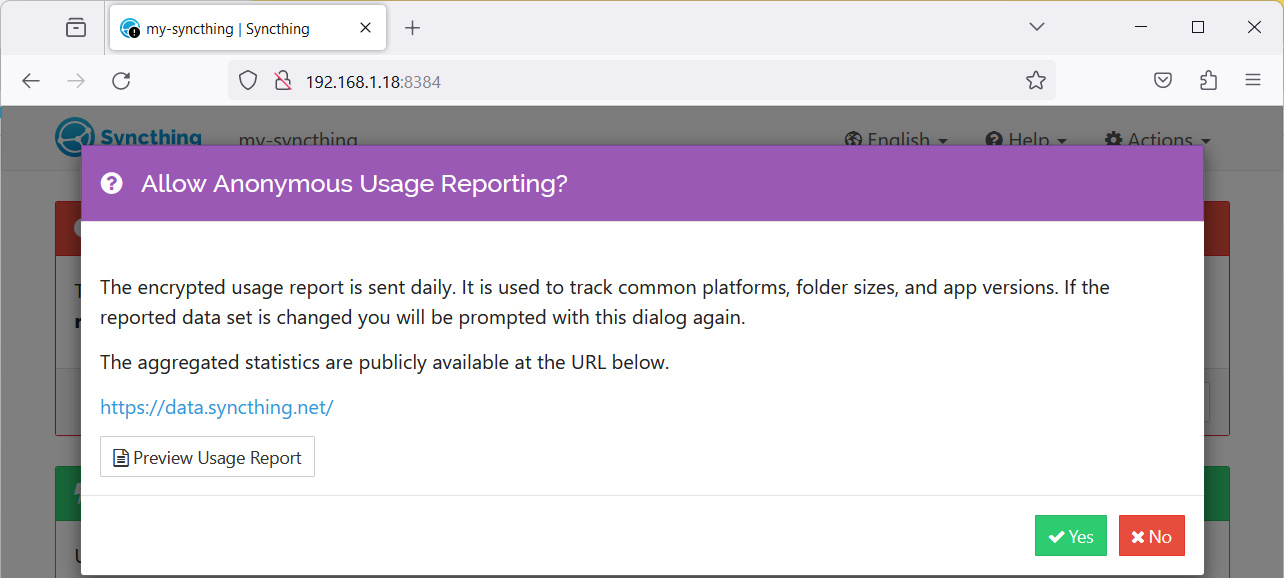
You can choose Yes/No according to your preferences. This will route you to the Syncthing home page. Two warning widgets will notify you that no user/password has been set for web authentication:
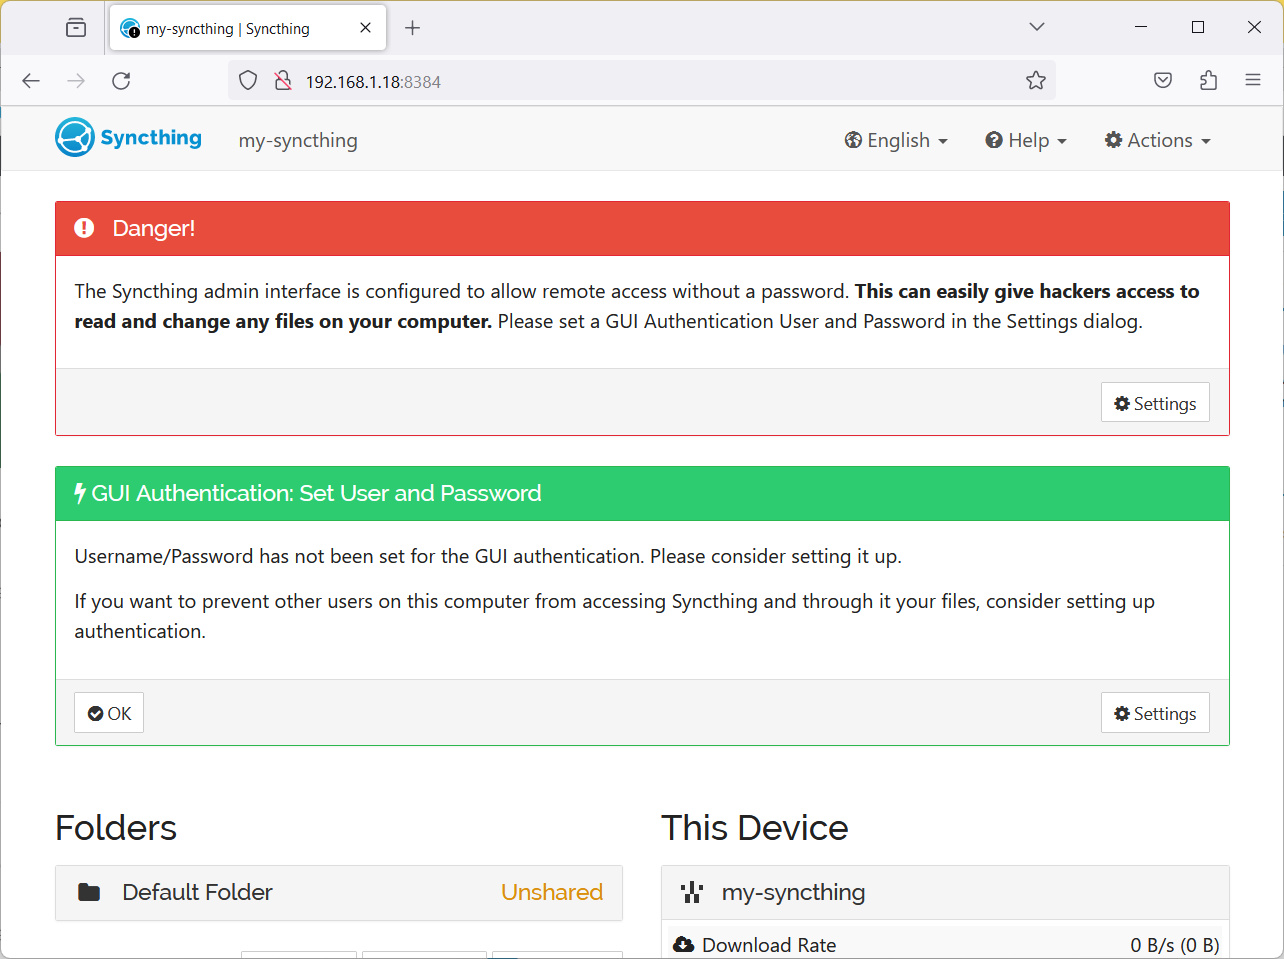
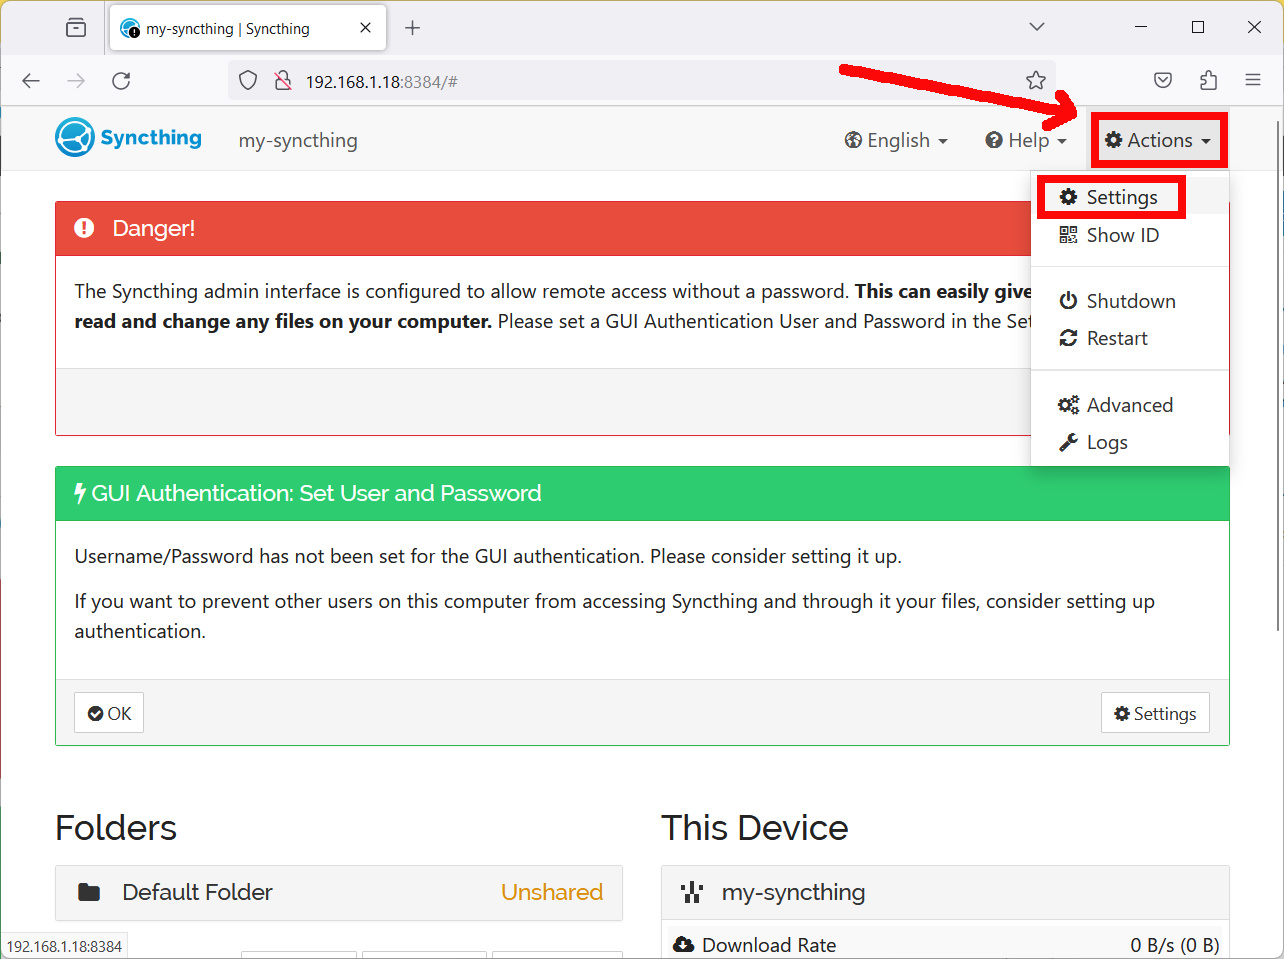
To set these credentials, you can use the buttons inside these widgets or you can reach the settings by selecting the related link in the Actions menu as shown in the following picture:
In the following window, you can set your username and password for GUI access by selecting the “GUI” tab and filling in your preferred credentials in the related boxes:
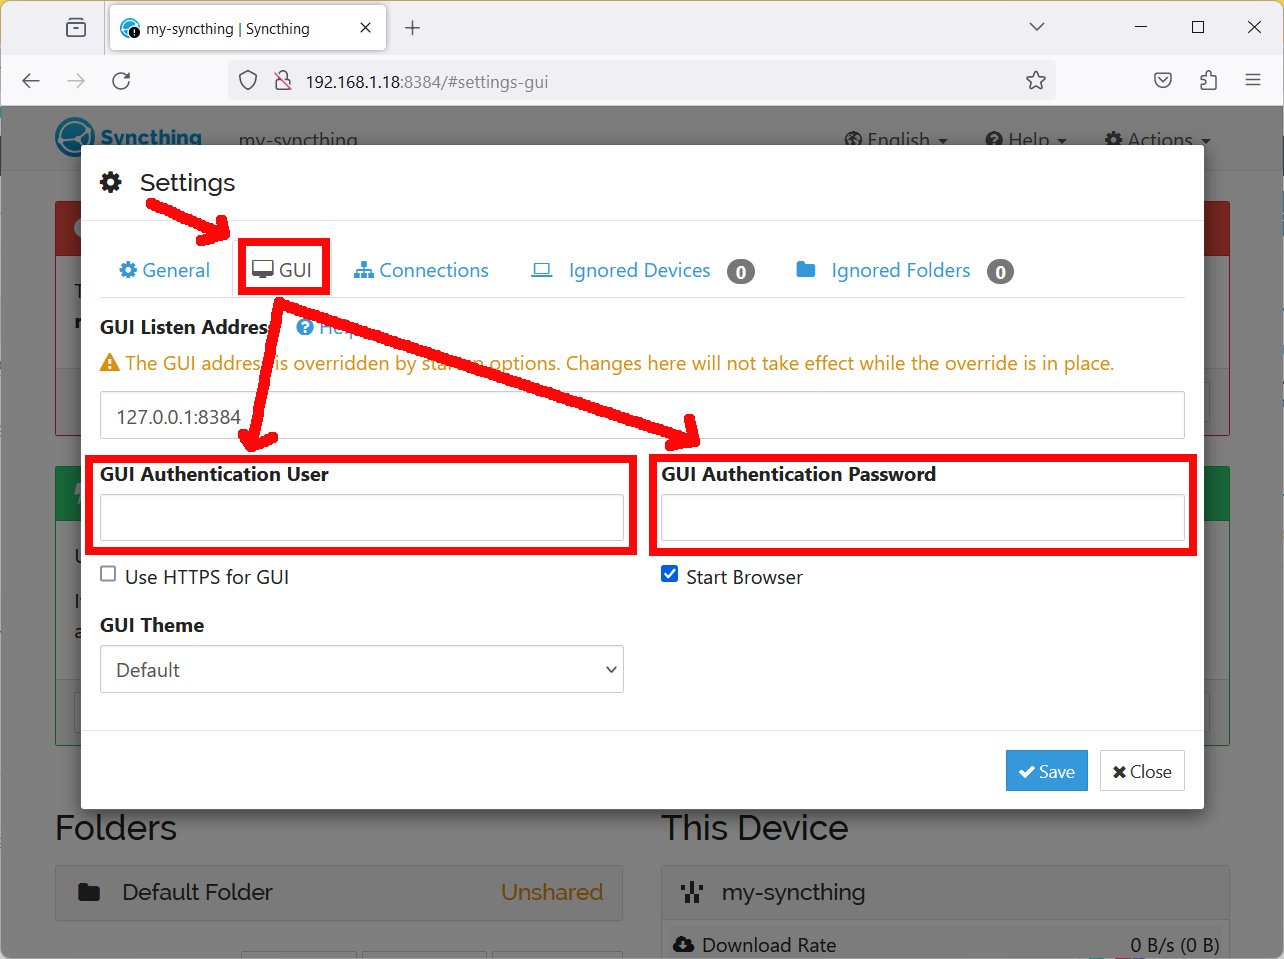
At the end, please use the Save button.
This will close the current session and drive you to the login page:
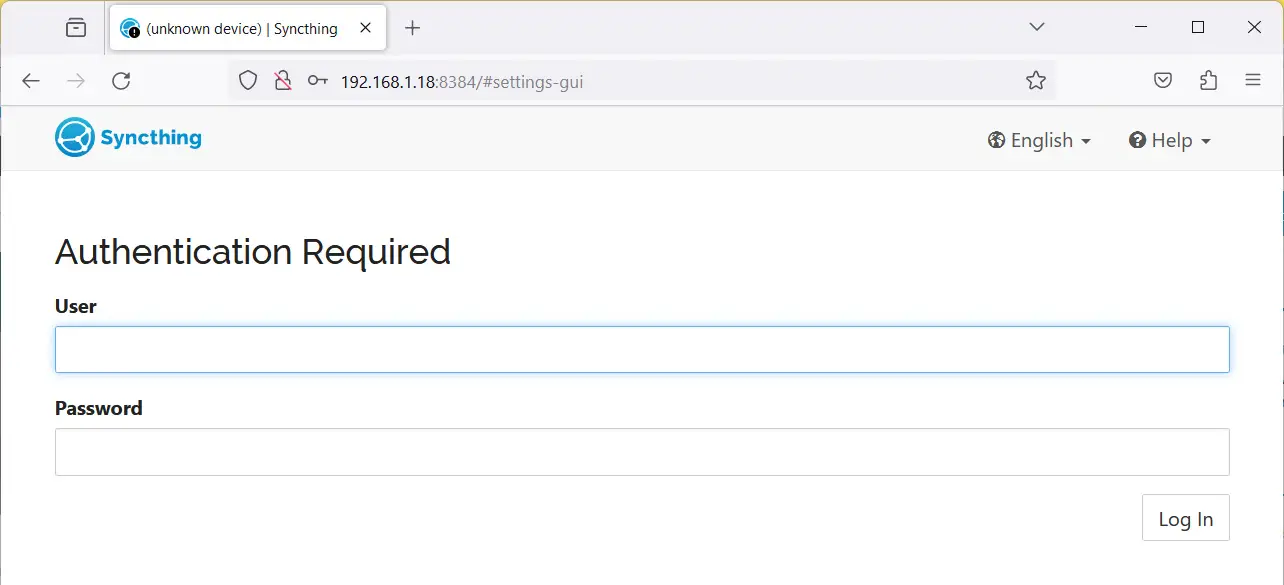
Insert your credentials and use the “Log In” button to enter again your Syncthing dashboard.
The Syncthing Dashboard
After setting our password, we can look deeper at the Syncthing dashboard.
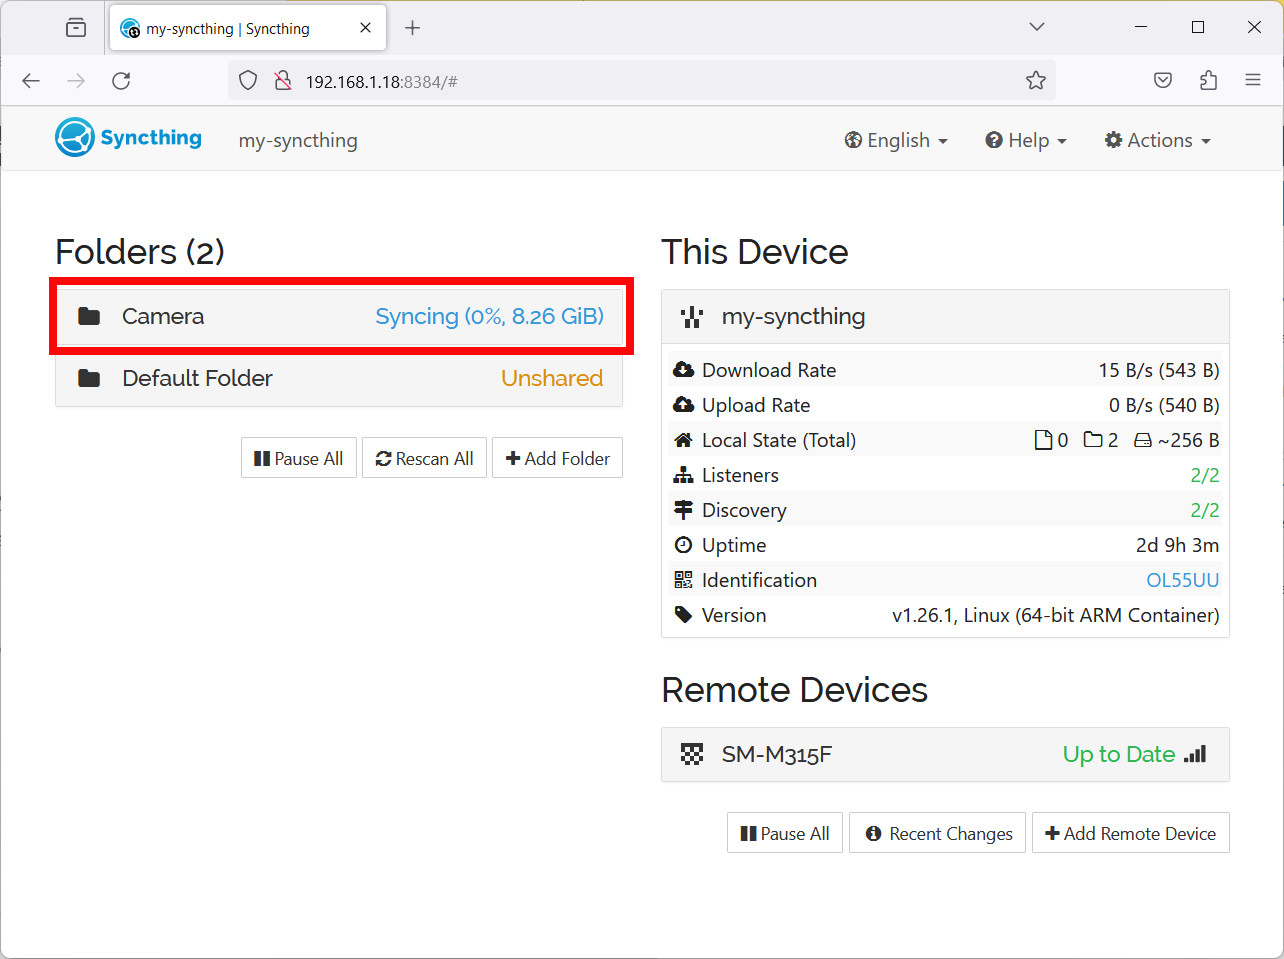
We have 3 main sections: Folders, “This Device” and “Remote Devices”:
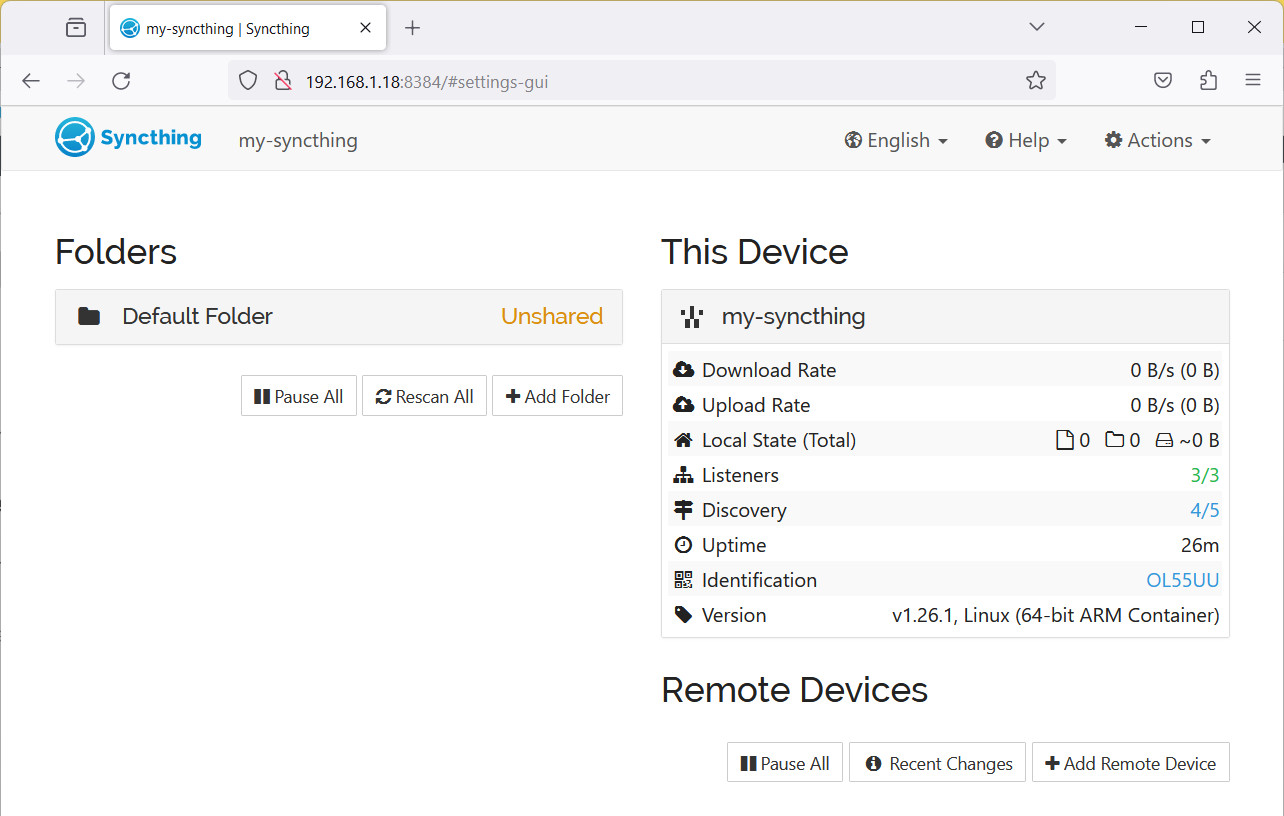
The Folders section enables you to see all the shared folders. You can see there both the local and the remote ones.
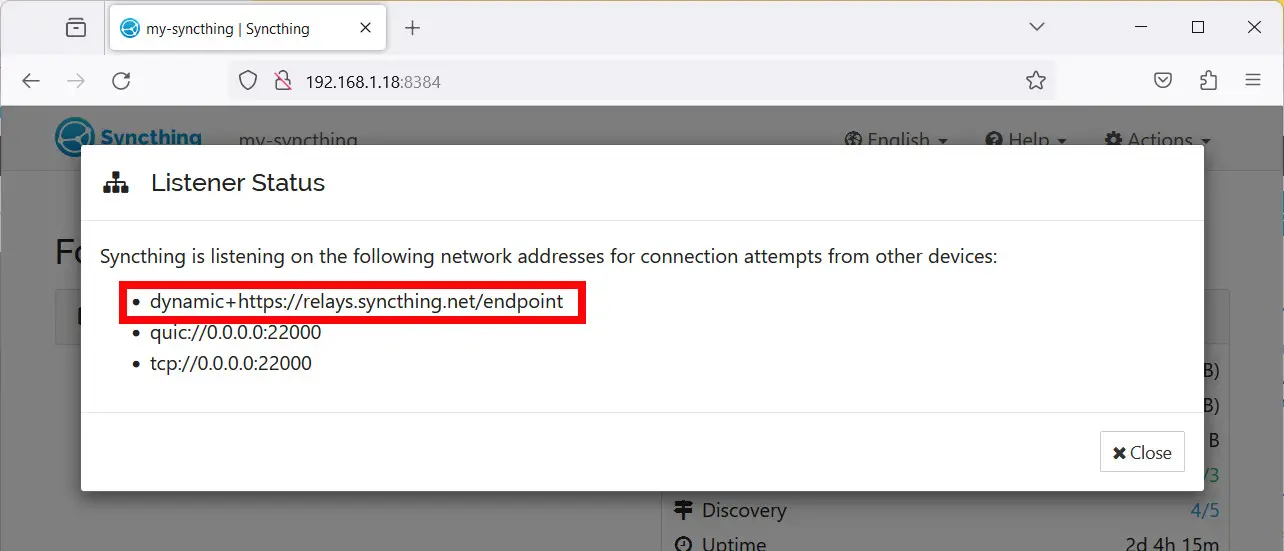
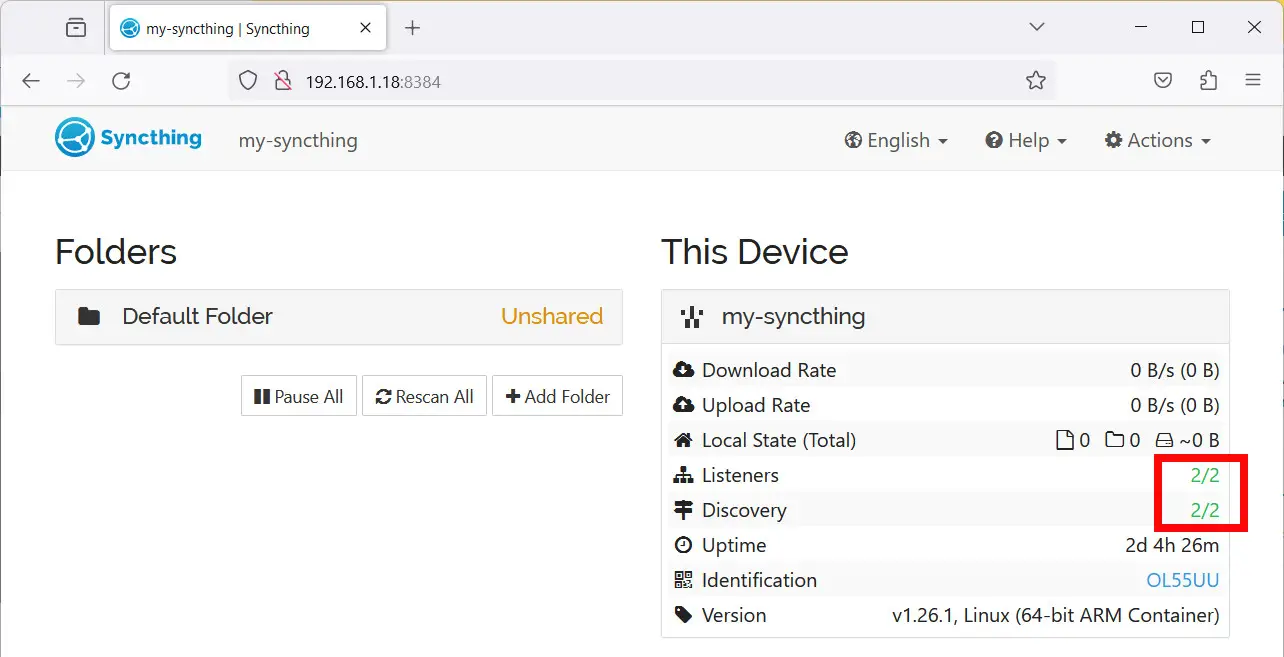
The “This Device” section gives you a little information about the current status of your Raspberry PI, including a link to the identification string. Two important parts are the Listeners (where you can find the addresses on which your Raspberry PI is listening for new incoming connections) and Discovery (where your Raspberry PI is searching for remote devices). I will deal with them in the following chapter.
The “Remote Devices” will list all the connected devices which are Syncing folders with your Raspberry PI.
Disable Listeners and Discovery Relays
By default, Syncthing has external relays enabled. From what I can suppose, these relays allow you to join a global community of peers and make it easier to reach your Syncthing installation from the internet. You can check these connections by clicking the links beside the Listeners or Discovery. The listeners, for example, will show you the external relay together (highlighted in the following picture) with the 2 “0.0.0.0” listeners (which are used for local network listening).
I have to tell the truth: when I install open-source software to make my data private, I don’t want any external communication enabled by default. It can be also helpful and I can decide to activate it after I’ve read what these external connections transmit but, until this point, I want my server to remain not connected to any external source. So, I will show here how to disable relays, letting you decide if you want to keep them enabled or not.
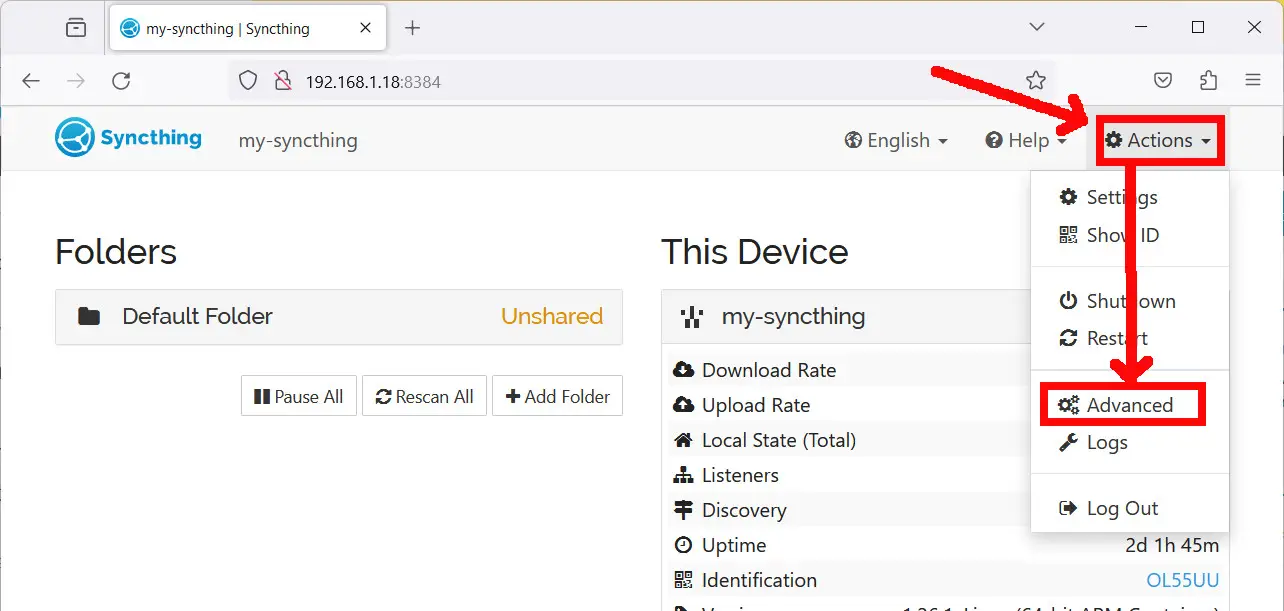
From the Dashboard, please open the “Action” menu and click “Advanced”:
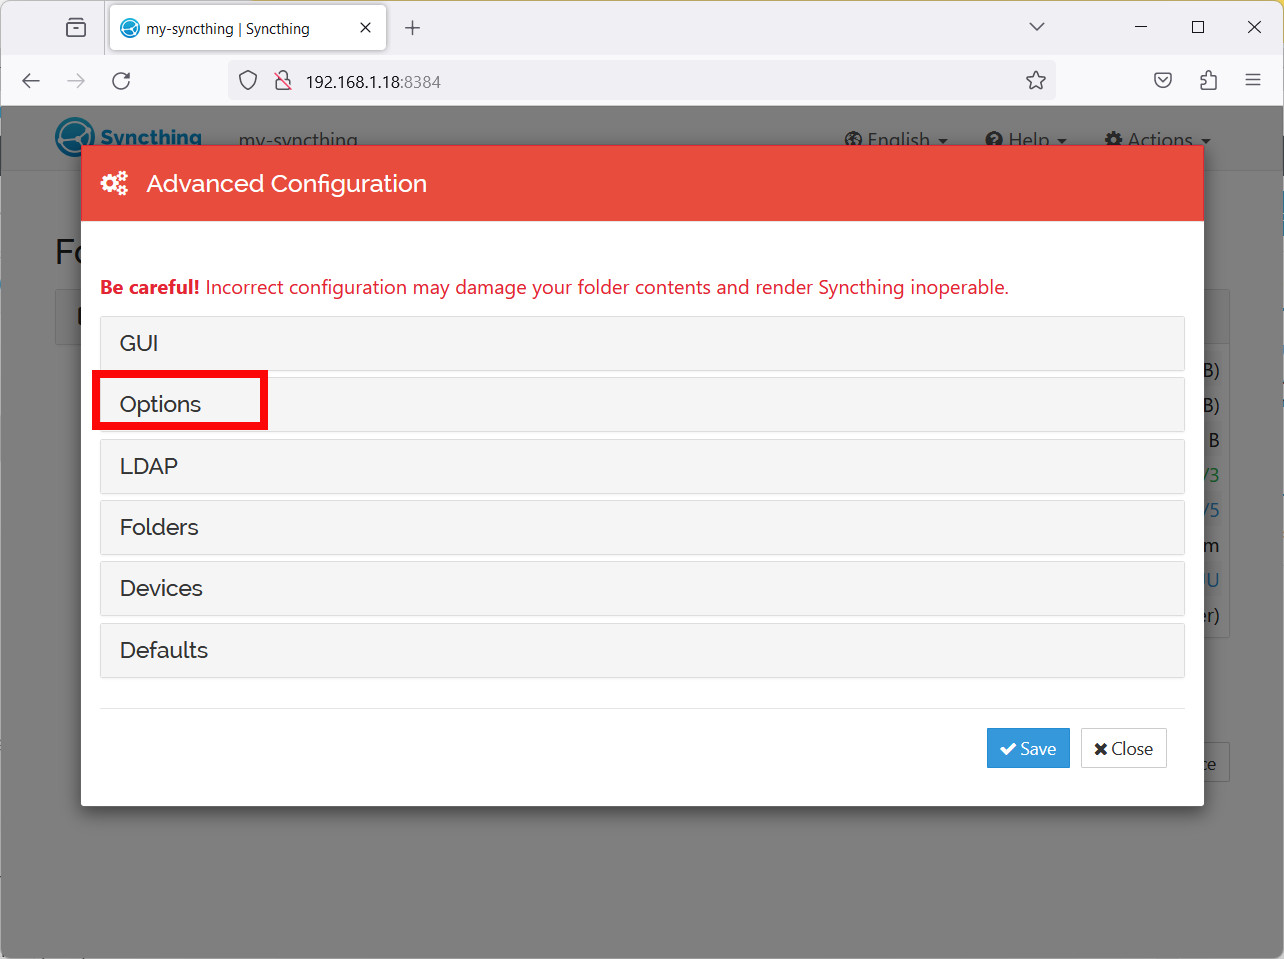
The Advanced menu groups the settings into 6 main categories. Please open the “Options” group bli clicking on the related button:
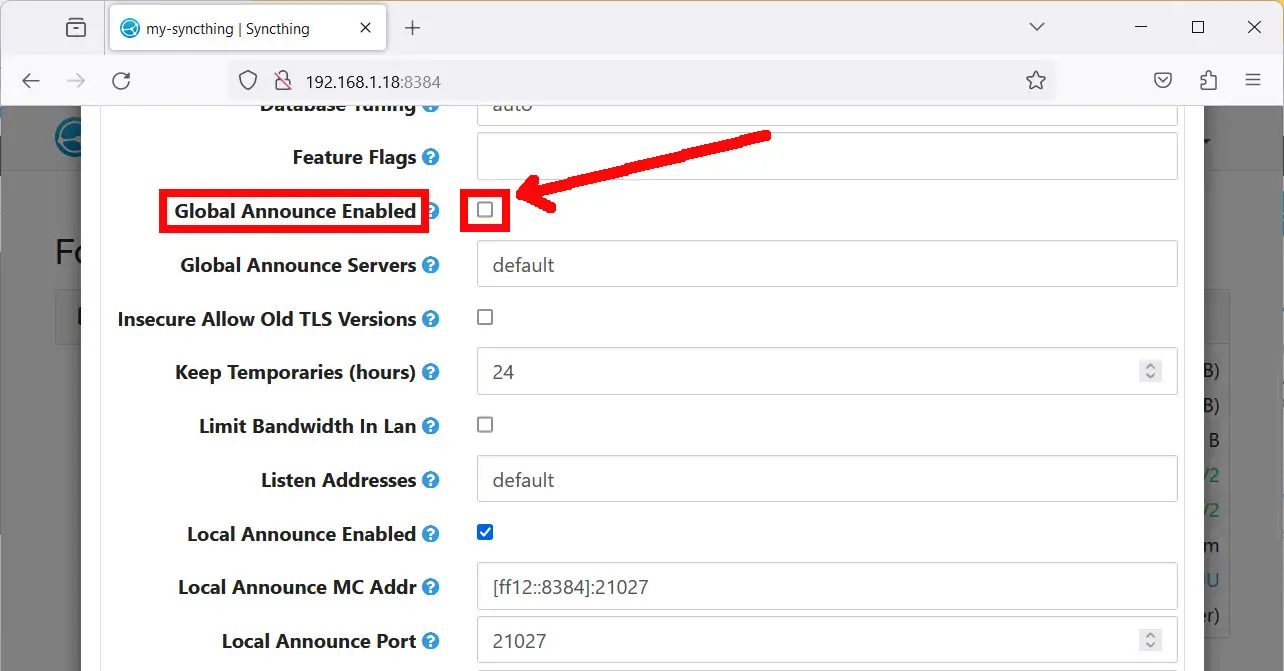
Scroll down to the “Global Announce Enabled” setting and make it un-flagged, as shown in the following picture:
Also, scroll down to the “Relays Enabled” setting and make it un-flagged, as shown in the following picture:
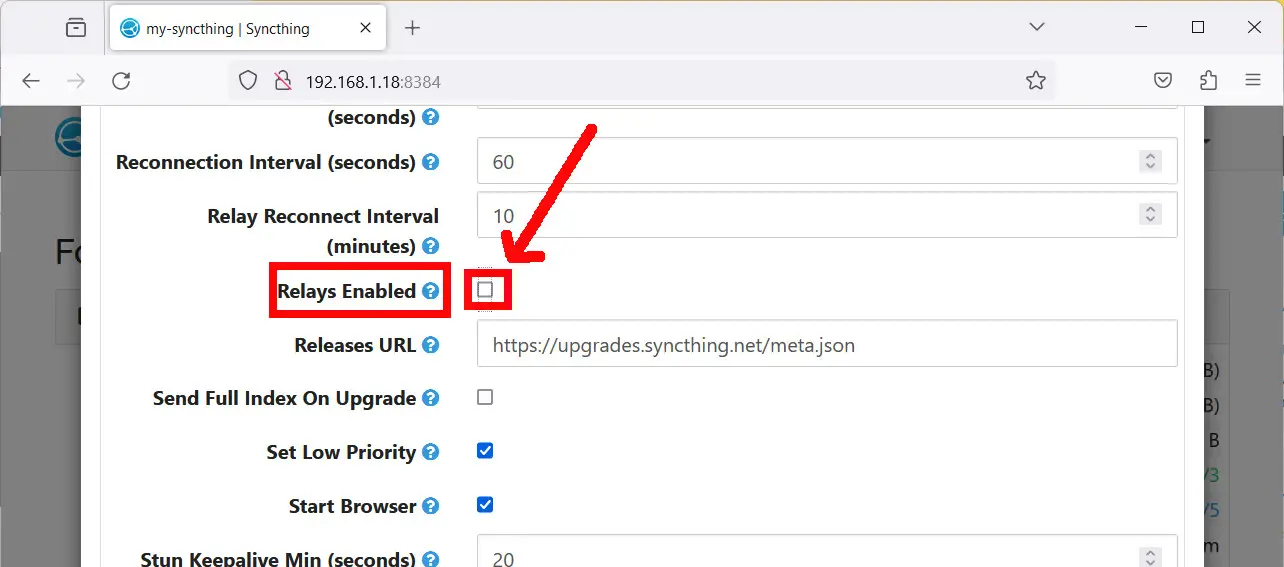
Scroll the page to the end, so that you can press the “Save” button to save your changes.
Your listeners and Discovery will soon reduce as shown below:
Adding a Remote Device
Before adding a device, let’s look at how our Syncthing on Raspberry PI identifies itself inside our local network.
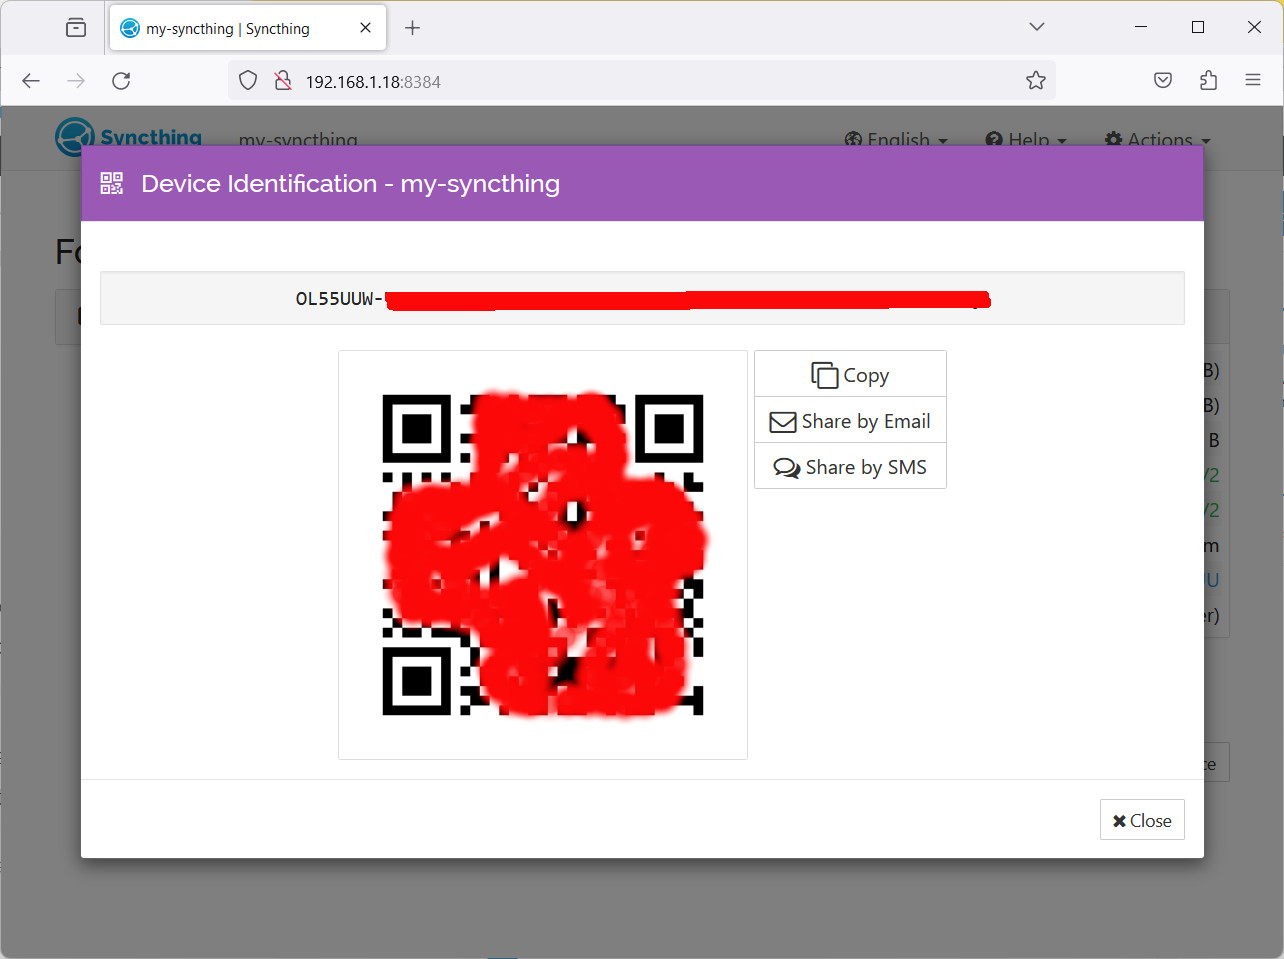
Syncthing allows the Devices to be discovered and paired by providing an identification string. It also provides a QR code, so that devices with QR code readers can find remote devices quickly.
You can find your Raspberry PI code by selecting the “Show ID” link from the “Actions” menu:

This will show you your Raspberry PI ID (some parts are hidden for privacy reasons):
From your Smartphone / Remove Device side: in order to share the files between a remote device (my smartphone in this case) using Syncthing with Raspberry PI, we need to install the software in our remote device. This step depends on your Smartphone (with Adroind you can just search Syncthing in the Google Play store and install it).
Moreover, as we’ve removed global relays we’ll need our Raspberry PI and our Smartphone (or whatever Remove Device) connected to the same local network.
My screenshots from my Android smartphone side are not useful here for you, as Syncthing shows me in my language (Italian), so I will tell you the main steps, mixed with some pictures from the Google Play page of the app. The following part has to be performed on your smartphone.
At the installation time, Syncthing will require you to:
- Grant access to your storage (required to access the folders to share from your smartphone)
- Grant access to your Position, in order to select the home WiFi and run synching only when you’re within known WiFi networks (not strictly required)
- Your mobile OS could also ask if you want to enable battery optimization. This is up to you, too
With these settings, you will reach your mobile home that will be similar to the following:
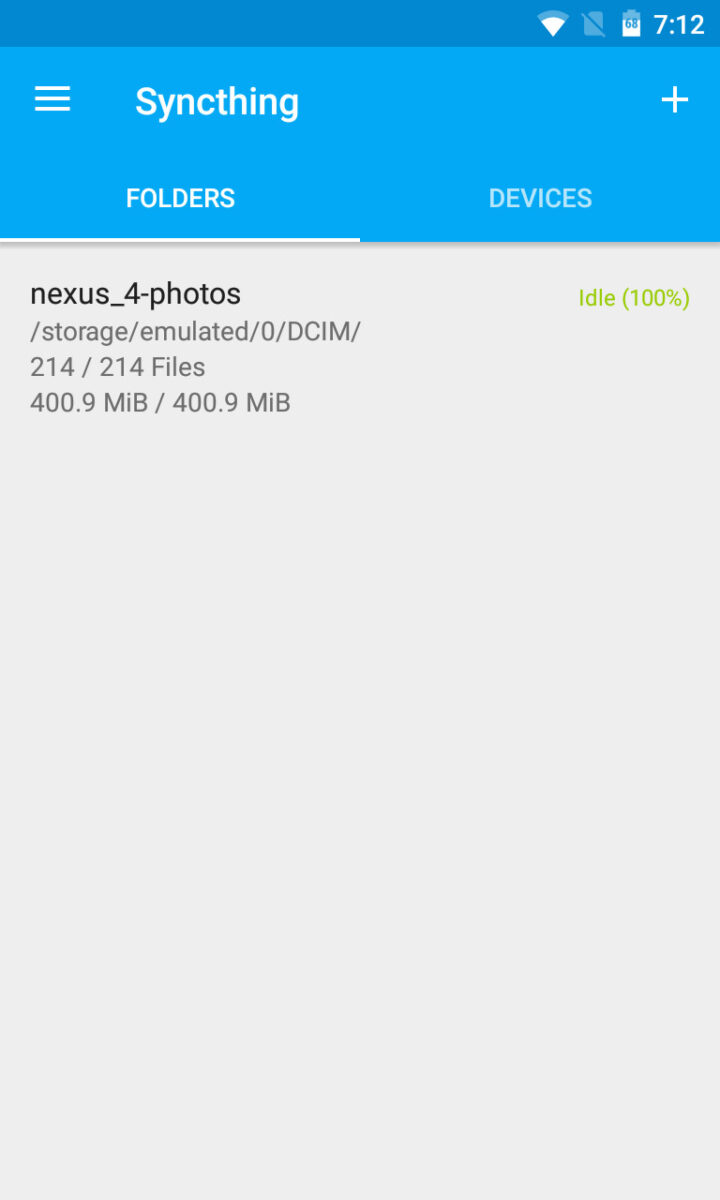
By default, the DCIM folder (where your Android smartphone stores pictures) is available, but still not shared.
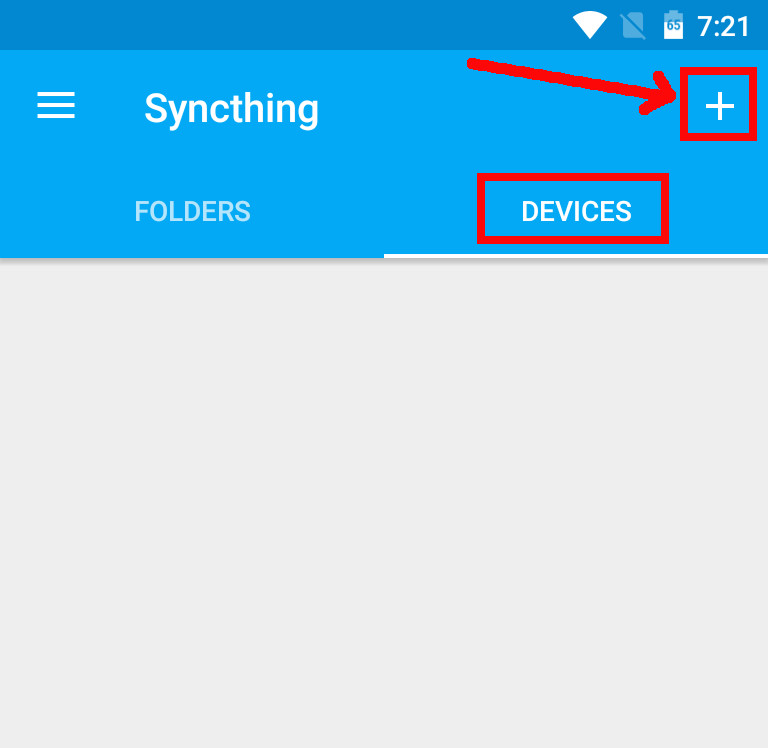
Going to the “DEVICES” tab, you can add a remote device by clicking the “+” (add) button:
This will open a new page where you can tap the QR code icon if you want to add a remote device by selecting it with this comfortable method:

With this, you can directly point your camera to the QR code generated from your Raspberry PI. It will fill the Device ID field, letting you add a mnemonic name for the device.
Finally, tap the “save” button to save this device.
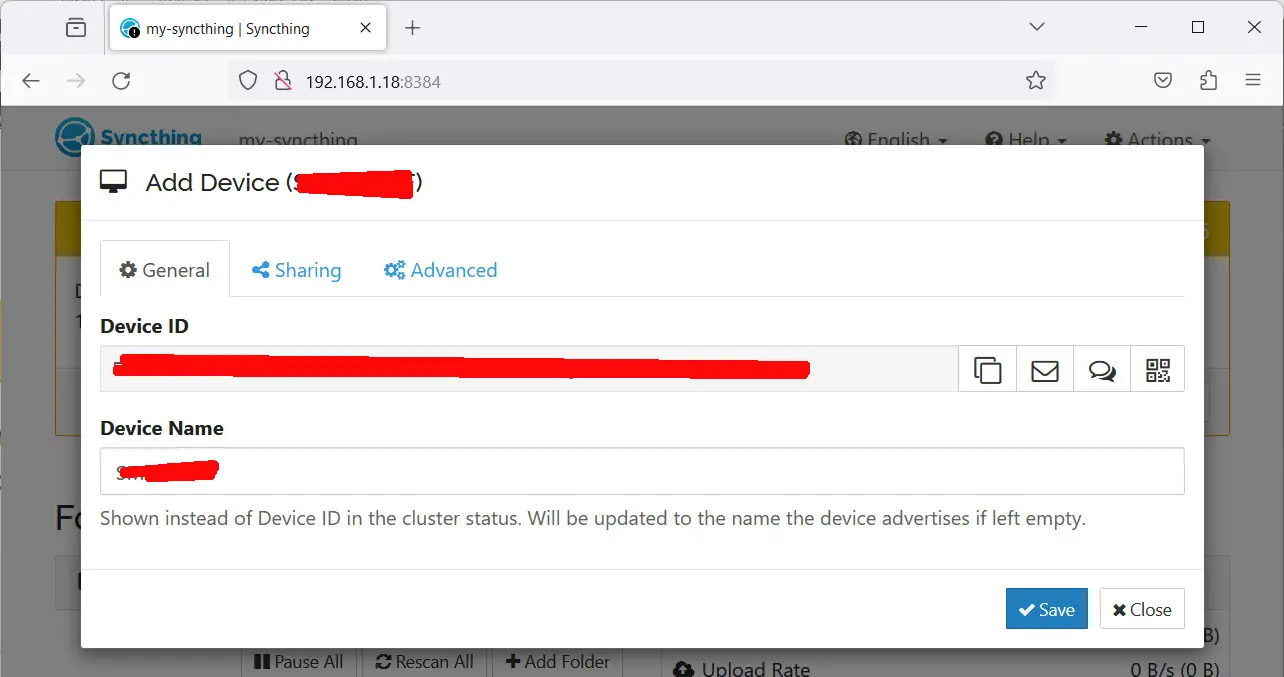
The device will not be immediately paired with the Raspberry PI as we need to confirm the pairing on the RPI side. Back to the Raspberry PI page, closing the Identification page, we’ll find the required message and we need to confirm the adding operation:

The following page will allow us to add more settings, but we can
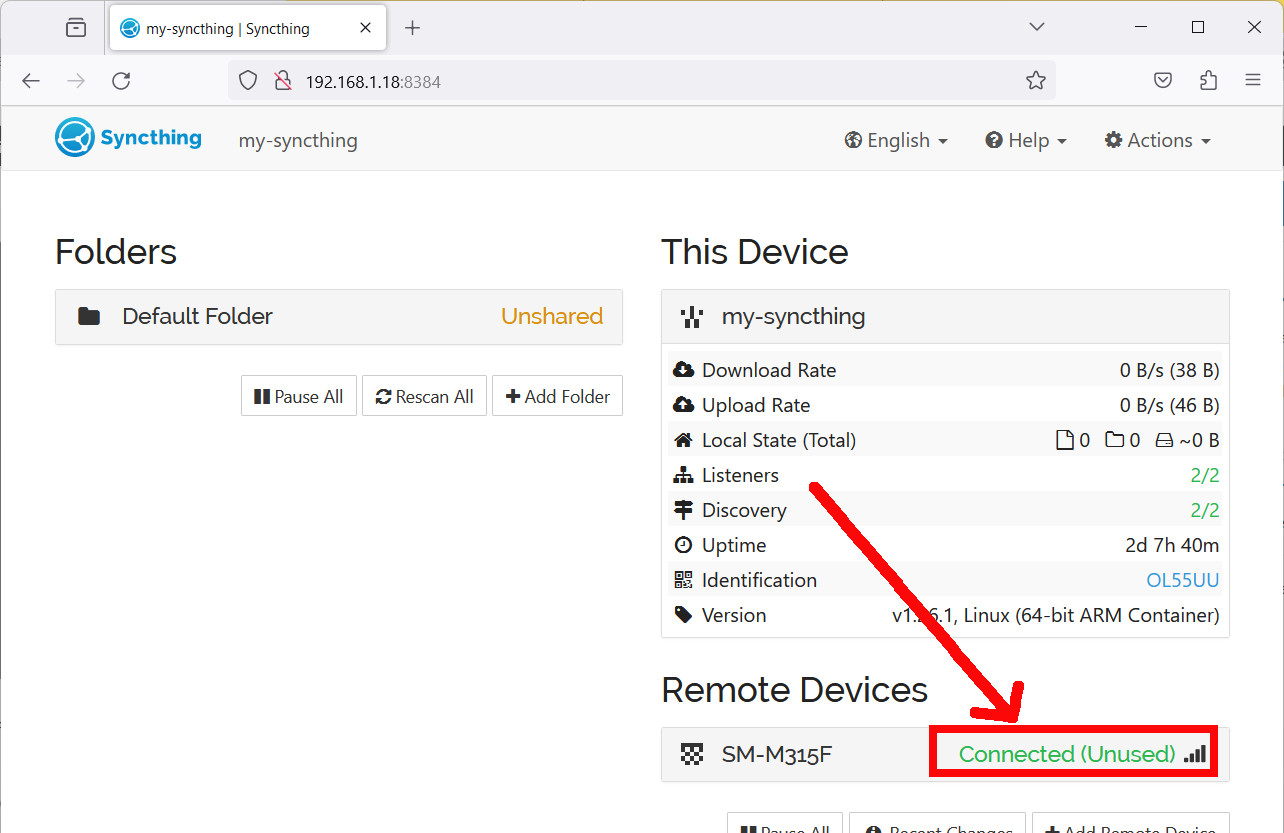
After a very few time, both devices will show the remote one as connected:
Syncing a folder
Finally, we can sync a folder between the 2 devices.
I will show you how to share your smartphone camera folder with your Raspberry PI so that you will find your pictures synchronized in your Raspberry PI Storage.
In your Smartphone App, please tap on the shared folder:

This will show you the Folder configuration and properties. You will find, between the properties:
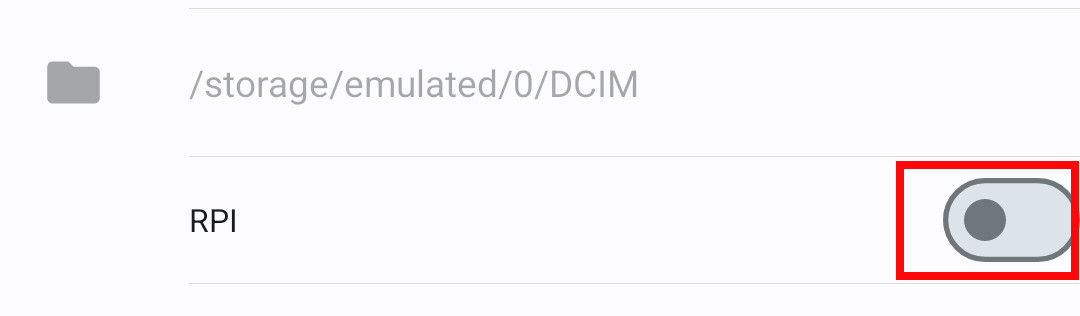
- A remote device list. This will show you all the paired devices so that you can choose which ones are allowed to get a copy of this folder. You can choose them with the proper selector:
- Folder Type: this option allows you to configure the folder as “Send Only”, “Receive Only”, or “Send and Receive”. The Send Only option will make it possible for you to make the content protected from changes coming from the other remote devices. The Receive Only, on the other hand, make the folder editable from remote devices, while your changes here are not synched with remote peers. The Send and Receive will make the folder exactly synched with all the other changes.
If you want to send a copy of your pictures from your smartphone to your Raspberry PI, and make it cancelable only from your smartphone, please enable the Raspberry PI in this folder property and set the folder to “Send Only” type.
This will start the synchronization process between the smartphone and your Raspberry PI. The progress status will be available both on your smartphone and your Syncthing dashboard in Raspberry PI:
Syncthing Docs
More info about Syncthing settings is available from Syncthing’s official docs.
What’s Next
Interested in more cool ways to use your RPI? Take a look at peppe8o Raspberry PI computer tutorials!
Enjoy!

Open source and Raspberry PI lover, writes tutorials for beginners since 2019. He's an ICT expert, with a strong experience in supporting medium to big companies and public administrations to manage their ICT infrastructures. He's supporting the Italian public administration in digital transformation projects.
![]()
![]()
![]()
![]()
![]()
![]()
![]()


