
Last Updated on 7th March 2026 by peppe8o
In this tutorial, I’m going to show you how to setup a private Git web portal on a cheap board, installing Gogs on a Raspberry PI. I’ll use a Raspberry PI 5 Model B, but this tutorial also works with newer Raspberry PI boards.
Code development requires continuous reworks, fixes, updates and downgrades. Managing it with Git allows easy code revision management, but it is fully terminal-only based. Installing Gogs in Raspberry PI grants a private Git web portal (similar to GitHub) to host your own code and share it with your friends.
More details on using Git can be found in Use GitHub with Raspberry PI OS from Terminal article.
What is Gogs
Gogs is a self-hosted Git service. From the software perspective, it seems to be composed of a simple web server, empowered with Git support, and a database.
Gogs has very low minimal hardware requirements since we can install it even on a Raspberry PI Zero. It is so lightweight that its homepage reports that some users even run instances on their NAS devices.
You can install from binary, source, packages or a Docker image.
What We Need
As usual, I suggest adding from now to your favourite e-commerce shopping cart all the needed hardware, so that at the end you will be able to evaluate overall costs and decide if to continue with the project or remove them from the shopping cart. So, hardware will be only:
- Raspberry PI Computer Board (including proper power supply or using a smartphone micro USB charger with at least 3A)
- high-speed micro SD card (at least 16 GB, at least class 10)
Step-by-Step Procedure
Prepare the Operating System
The first step is to install the Raspberry PI OS Lite to get a fast and lightweight operating system (headless). If you need a desktop environment, you can also use the Raspberry PI OS Desktop, in which case you will work from its terminal app. Please find the differences between the 2 OS versions in my Raspberry PI OS Lite vs Desktop article.
Please make sure that your Operating System is up to date. From your terminal, use the following command:
sudo apt update -y && sudo apt full-upgrade -yWe also need to install Docker. You can use my tutorial for this: Beginner’s Guide to Install and Use Docker with Raspberry PI.
Install Gogs on Raspberry PI
NOTE: At the date of this article, Gogs provides a new “next-latest” tag in its Docker Hub images to tag a new series of containers with enhanced security features. I suggest you use it if available. This branch will merge with the “latest” tag from Gogs version 0.16 (after this, you will just use the “latest” tag in the following Docker compose file). You can check the available tags from the Gogs page in Docker Hub.
With Docker, the Gogs installation is really straightforward. Please create the folder which will include all the files and enter it:
mkdir gogs
cd gogs
We need to create a folder which will include all the persistent data from Gogs and give it the proper permissions. For these tasks, please use the following commands:
mkdir gogs-data
sudo chown -R 1000:1000 gogs-data
Now, we’ll create the Docker compose file, which will include all the settings:
nano docker-compose.yamlFill the file with the following content:
services:
  gogs:
    image: gogs/gogs:next-latest
    container_name: gogs
    restart: unless-stopped
    ports:
      - "3000:3000"
      - "10022:22"
    volumes:
      - ./gogs-data:/data
    environment:
      - USER_UID=1000
      - USER_GID=1000
Close and save.
You can now build Googs on your Raspberry PI with the following terminal command:
docker compose up -dSetup Gogs on Raspberry PI
With your favourite browser, use your Raspberry PI IP address as URL, followed by port 3000. My Raspberry PI IP address is 192.168.1.218, so in my case URL will be http://192.168.1.218:3000. The Gogs installation page will appear as in the following picture:
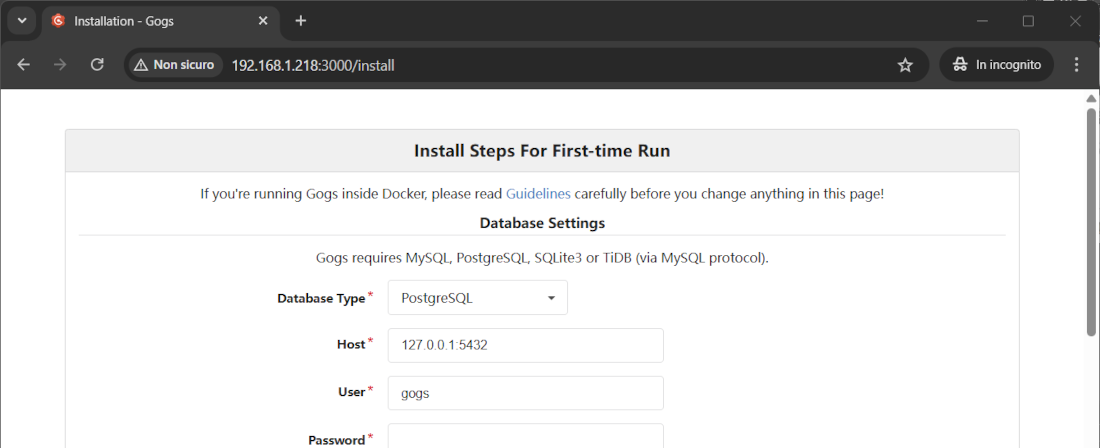
The initial setup requires a few pieces of data.
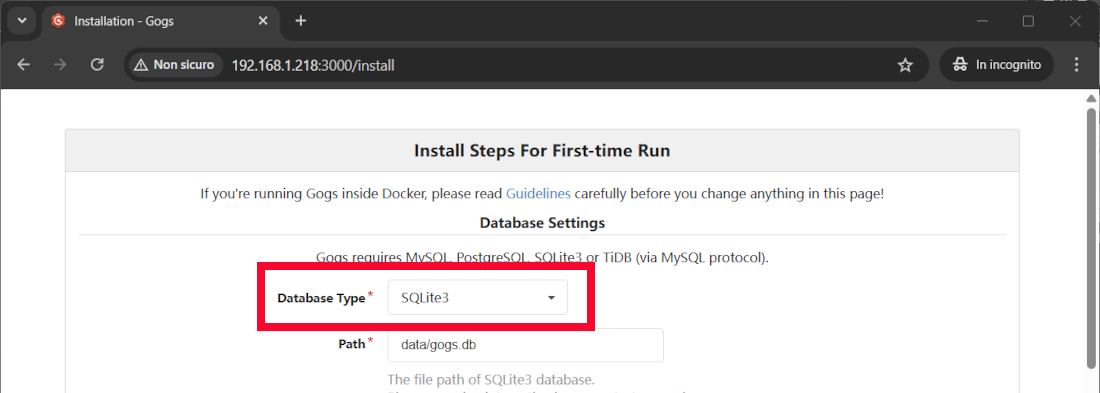
First of all, for personal use, we don’t need strictly a MySQL/PostgreSQL database and we can set a SQLite DB. If you need MySQL or PostgreSQL, you should change the Docker Compose file to create a container for the database too.
With SQLite, everything is simplified. Please set it in the Database Type field:
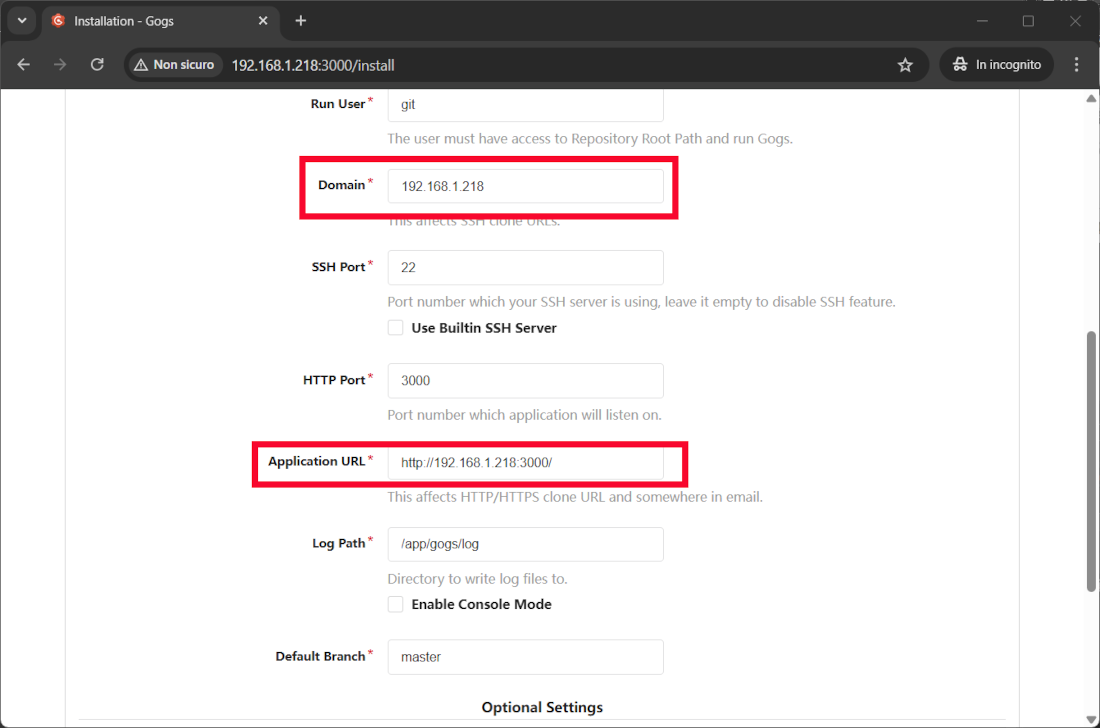
Another important setting regards the application address. Please change the localhost string with your Raspberry PI’s IP address, otherwise you won’t be able to reach Gogs from the network where the Raspberry PI is connected. You should set something similar to what is shown in the following picture:
Scroll down the install page and open the “Admin Account Settings” section by clicking it. Here, you can fill the form to set the first admin user with its password and (optionally) email:
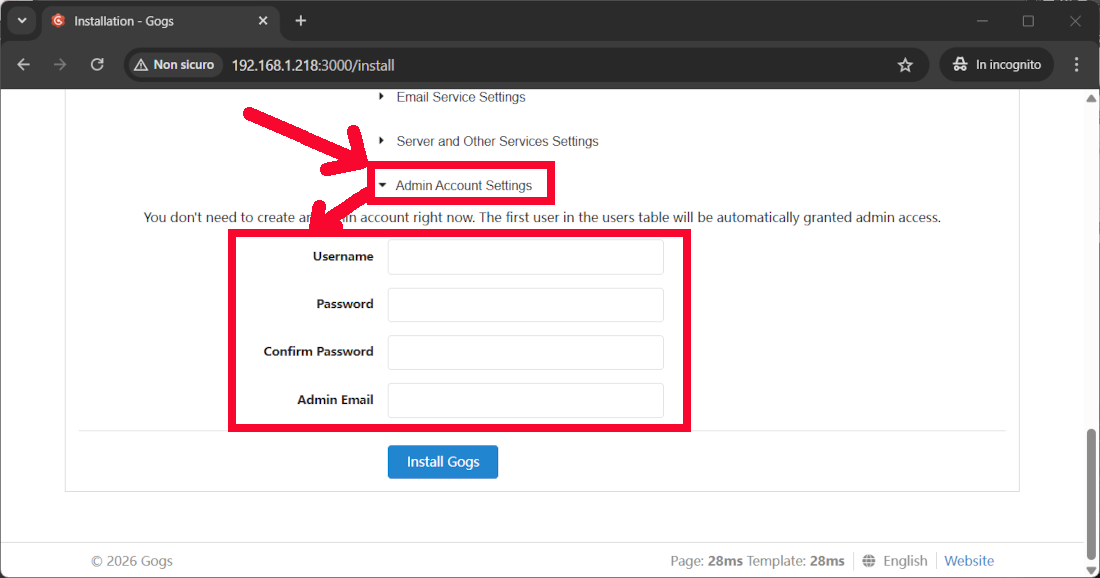
Finally, please click the “Install Gogs” button.
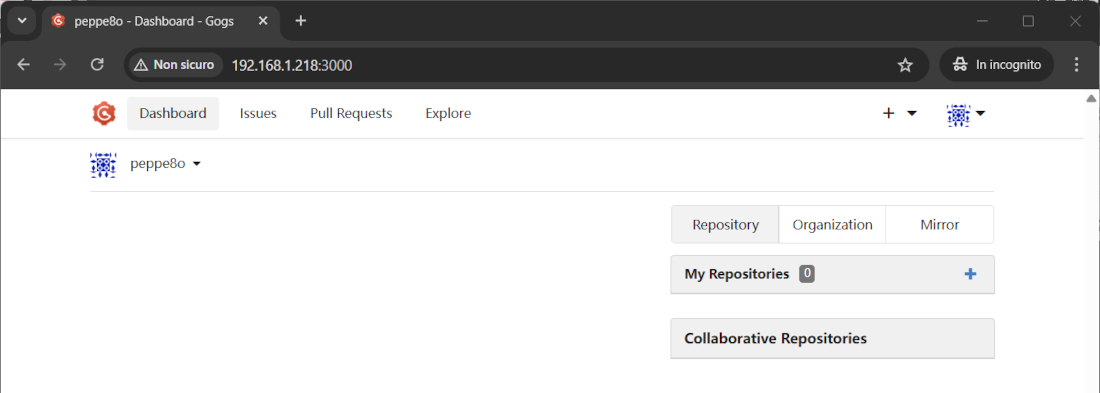
The Gogs page will then redirect to your user home page:
Test your Gogs Installation from Raspberry PI
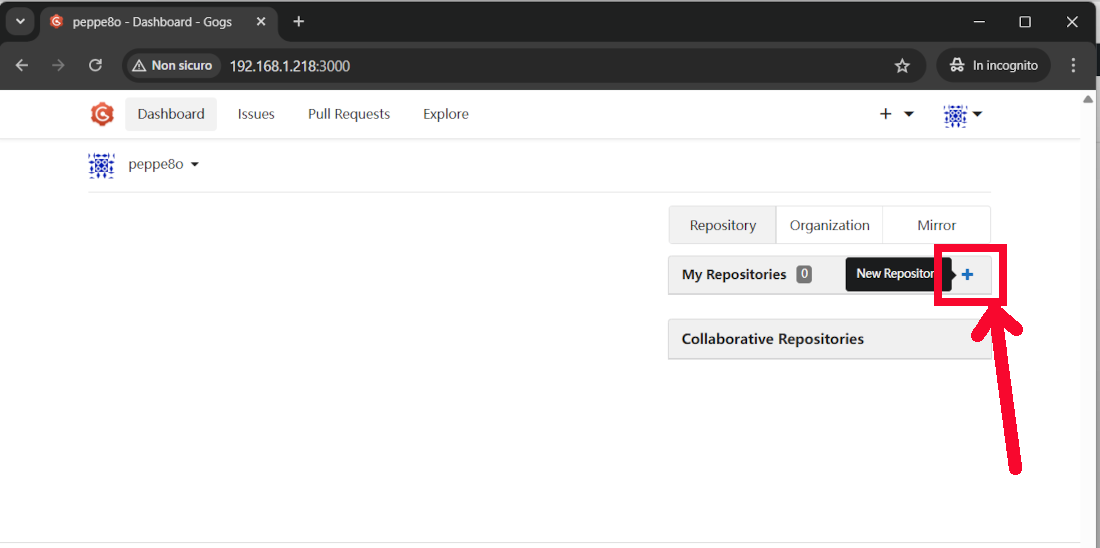
In this chapter, we’ll create a test repository in Gogs (via the Web UI), then run a git clone command from the Raspberry PI terminal. This will check that everything is working.
From the web UI, please click the button highlighted in the following picture to create a new repository:
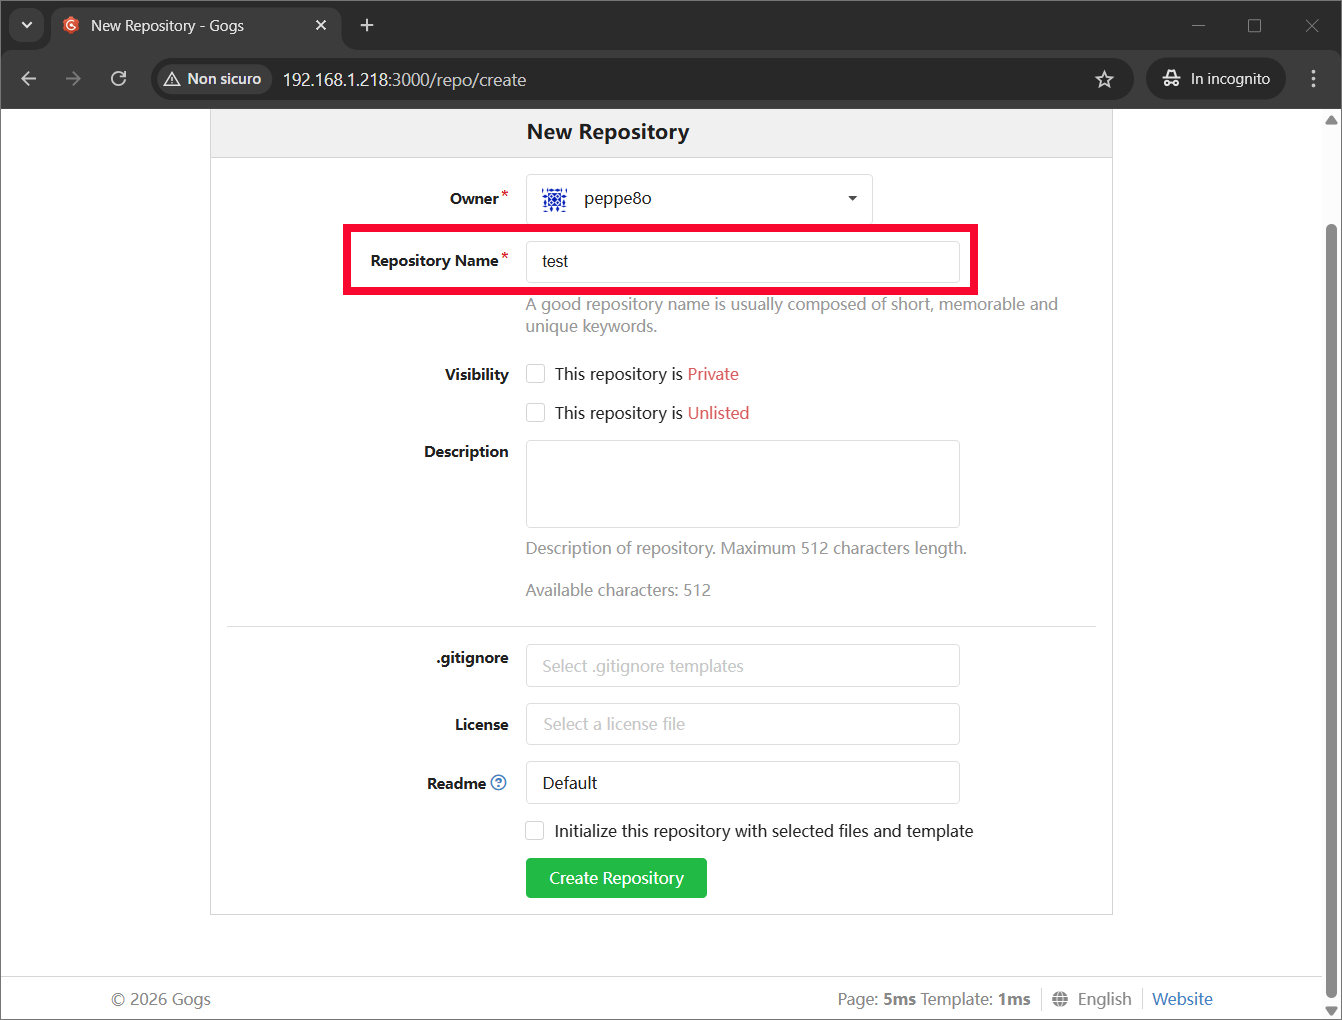
In the following screen, the repository name is the only mandatory field. Please fill it at your choice and click the “Create Repository” button at the bottom of the page:
After this, the new repository is already created and ready to be used. At the moment, the repository is empty. But it is enough to test the git commands. The resulting page will show you the link to clone it:
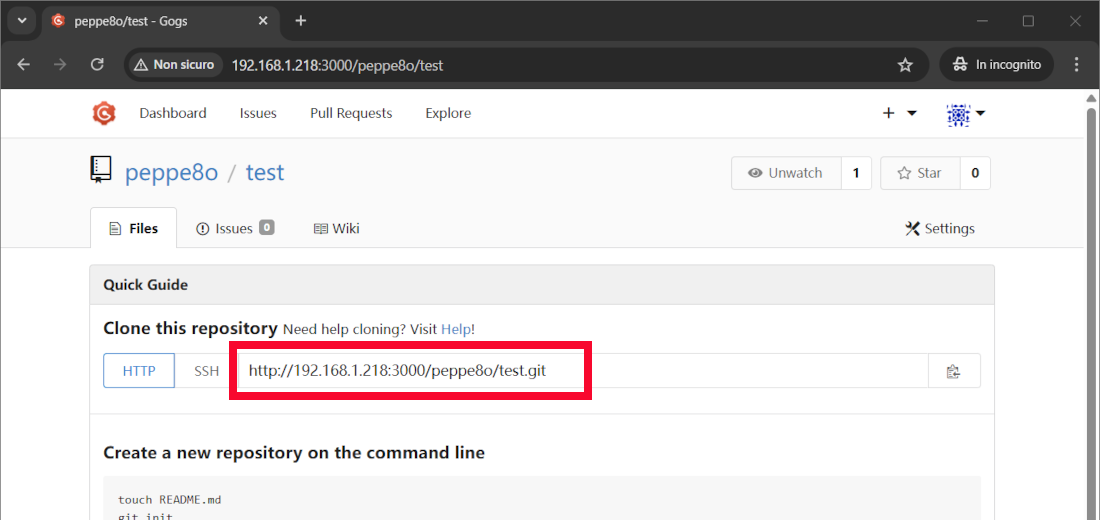
From the Raspberry PI terminal, please run the git clone command followed by the link provided from the previous page. In my case:
git clone http://192.168.1.218:3000/peppe8o/test.gitThis command will prompt you with a warning that the repository is empty. Let’s try to locally create a file in this repository and upload it to Gogs.
Before this test, we must set the username and email in our local git configuration. Please use the following 2 terminal commands, changing the bolded text with your name and email:
git config --global user.name "Giuseppe Cassibba"
git config --global user.email "giuseppe@peppe8o.com"
From the terminal, please enter the “test” folder just created:
cd testAnd create a README.md file with a simple text:
echo "Hello by peppe8o" > README.mdWe are now ready to push the added file to the Gogs repository. For this task, we must use the following commands:
git add .
git commit -m "Upload test"
git push origin master
The last command will ask you for the credentials you used to register in Gogs.
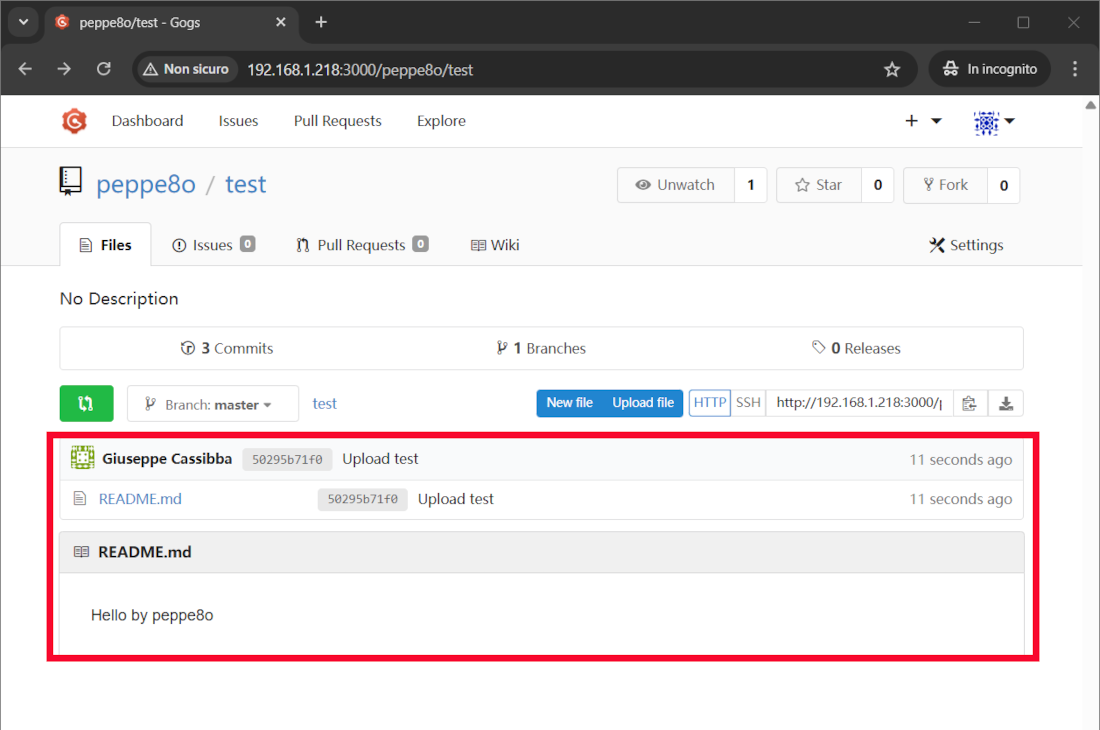
After this, the new file is uploaded to the Gogs repository, and you will find it in the files section:
You can find a complete guide to use git commands from the Raspberry PI terminal in my Use GitHub with Raspberry PI OS from Terminal.
Gogs Documents
More info can be found in Gogs Official Documentation page.
Resources
- https://gogs.io/getting-started/introduction
- https://gogs.io/getting-started/introduction
- https://hub.docker.com/r/gogs/gogs/tags
Enjoy!

Open source and Raspberry PI lover, writes tutorials for beginners since 2019. He's an ICT expert, with a strong experience in supporting medium to big companies and public administrations to manage their ICT infrastructures. He's supporting the Italian public administration in digital transformation projects.
![]()
![]()
![]()
![]()
![]()
![]()
![]()


