
Last Updated on 2nd February 2024 by peppe8o
This article shows you how to remotely control an SG90 (servo motor) from a Raspberry PI computer board with Python. I will show you how to connect the servo motor to the Raspberry PI, test it with a loop program and finally control it from your keyboard.
If you need to connect the SG90 with a Raspberry PI Pico microcontroller, please refer to my SG90 Servo Motor with Raspberry PI Pico.
About the SG90 Servo Motor
SG90 are cheap servo motors which can be used in many DIY projects as they can control the turning position.
It is a type of geared motor that can only rotate 180 degrees. It is controlled by sending electrical pulses which tell the servo what position it should move to.

The SG90 PINOUTservo motor has three wires, of which one is the ground wire (brown) and should be connected to GND, one is the power wire (red) and should be connected to a 5v port, and one is the signal wire (yellow) and should be connected to a PWM port.
| SG90 Wire color | Description |
|---|---|
| Brown (or Black) | Ground |
| Red | Vcc (5V) |
| Yellow | PWM Signal |
SG90 datasheet
The following are the main specs about these motors:
- Torque: 4.8V: 25.0 oz-in (1.80 kg-cm)
- Speed: 4.8V: 0.10 sec/60°
- Weight: 0.32 oz (9.0 g)
- Dimensions: Length: 0.91 in (23.1 mm) Width: 0.48 in (12.2 mm) Height:1.14 in (29.0 mm)
- Motor Type: 3-pole Gear
- Rotational Range: 180°
- Pulse Cycle: ca. 20 ms Pulse
- Width: 500-2400 µs
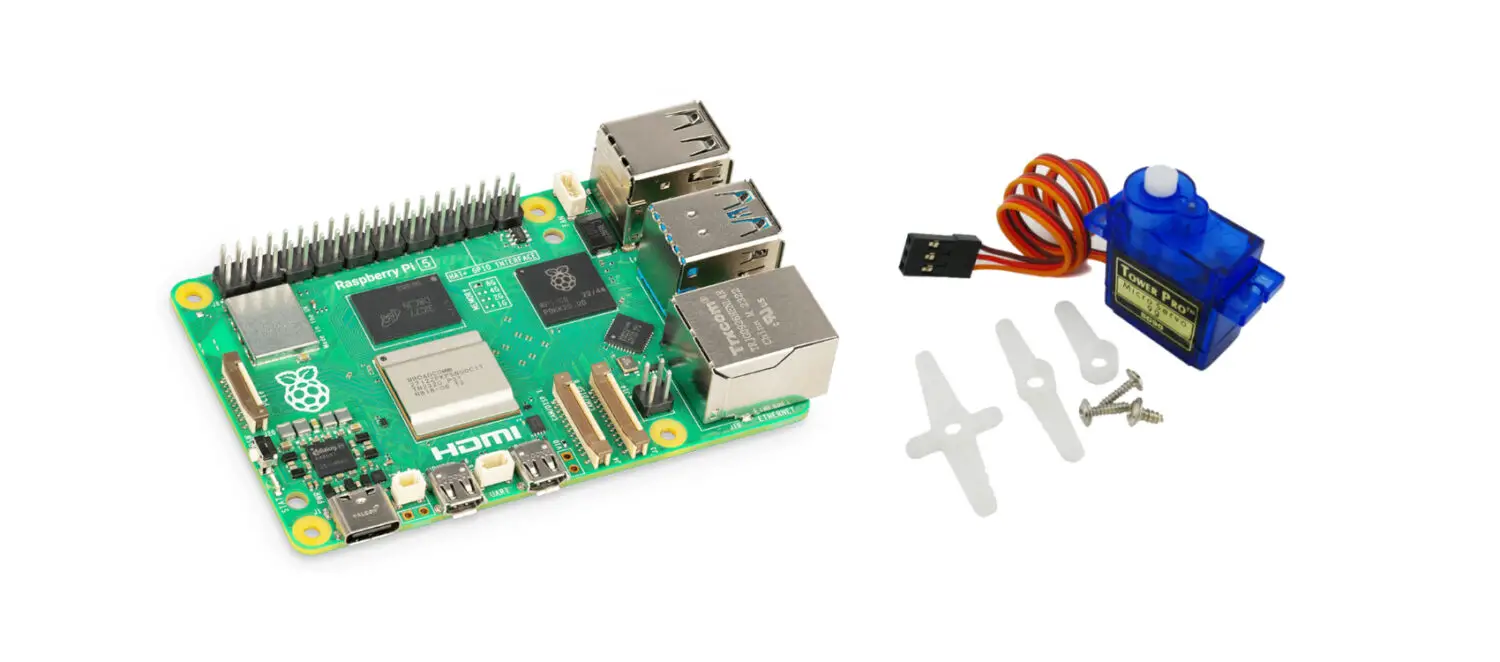
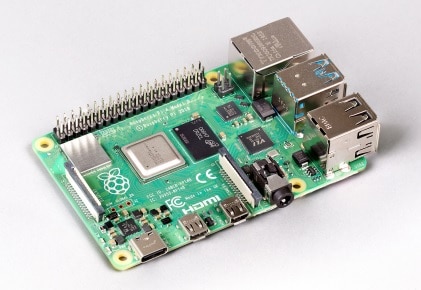
For this article, I’m going to use a Raspberry PI 5 computer board, but this article applies also to other Raspberry PI computer boards.
What We Need
As usual, I suggest adding from now to your favourite e-commerce shopping cart all the needed hardware, so that at the end you will be able to evaluate overall costs and decide if to continue with the project or remove them from the shopping cart. So, hardware will be only:
- Raspberry PI Computer Board (including proper power supply or using a smartphone micro USB charger with at least 3A)
- high speed micro SD card (at least 16 GB, at least class 10)
- SG90 servo motor
- Dupont wirings
Step-by-Step Procedure
Wiring Diagram
Please refer to the following picture for wiring, according to the Raspberry PI Pinout:
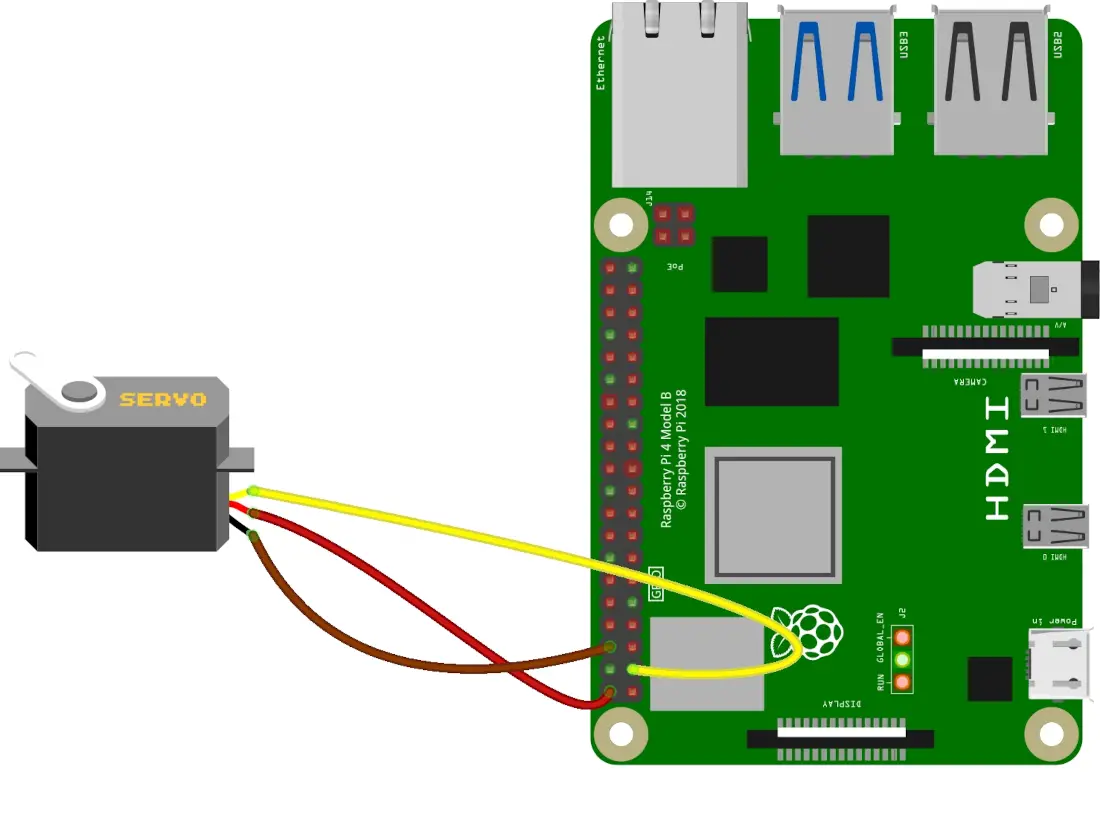
The following table summarizes the connections:
| Raspberry PI | SG90 Servo Motor |
|---|---|
| Ground | GND |
| 5V | VCC |
| GPIO2 | Signal |
Of course, you can use any GPIO port instead of the GPIO2, but keep track of the GPIO number in the following scripts.
Prepare the Operating System
For this project, you can install both Raspberry PI OS Lite (for a fast, headless OS) or Raspberry PI OS Desktop (with a complete desktop environment). The provided links will help you with the OS installation for both choices. If you need help with the difference between the two options, you can read my Raspberry PI OS Lite vs Desktop article.
Once installed, please make sure your OS is up to date with the following terminal command:
sudo apt update -y && sudo apt upgrade -yWe’ll need the GPIO Zero python library to manage with a few commands our servo motor. It is already installed in your Raspberry PI OS.
We’ll also use a Python virtual environment to develop the Python script which will help us in managing the SG90. It’s not mandatory, but I suggest it because it’s a good practice. From the terminal, let’s create a virtual environment named “my_project”:
python3 -m venv --system-site-packages my_projectPlease note that I’ve used the “–system-site-packages” in order to get in this virtual environment all the Python packages coming with the OS, including the “GPIO Zero”.
The command will create a folder named “my_project”.
To enter (and enable) the virtual environment, please use the following command:
source ./my_project/bin/activateYour terminal will notify you that you’re operating inside the virtual environment by adding the related name at the beginning of the terminal line:
(my_project) pi@raspberrypi:~ $At any time, you will be able to exit from the environment with the command:
deactivateTesting the SG90 Servo Motor with Raspberry PI
The first test will make the SG90 motor automatically turn from 0 to 180 degrees with 45-degree steps. Please create a new file, named “sg90-test.py” with the following command:
nano sg90-test.pyPaste the following lines inside the file, where the variable “signalPIN” identifies the Raspberry PI port where the SG90 signal wire is connected:
from gpiozero import AngularServo
from time import sleep

singalPIN = 2
servo = AngularServo(singalPIN, min_angle=0, max_angle=180, min_pulse_width=0.0005, max_pulse_width=0.0024)

while True:
    servo.angle = 0
    sleep(1)
    servo.angle = 45
    sleep(1)
    servo.angle = 90
    sleep(1)
    servo.angle = 135
    sleep(1)
    servo.angle = 180
    sleep(1)
As you can see, using the GPIO Zero library we just need to import the “AngularServo” class, initialize an AngularServo object and you can already set the desired angle.
The following line is the most important:
servo = AngularServo(singalPIN, min_angle=0, max_angle=180, min_pulse_width=0.0005, max_pulse_width=0.0024)Besides the other options, it sets the pulse width according to the specs coming from the SG90 datasheet.
Close and save the file. You can run it with the following command:
(my_project) pi@raspberrypi:~ $ python sg90-test.pyFlickering Servo Motor Issue
When running the Python code, you may notice that the SG90 will get flickering in some points. the issue is well known in the Raspberry PI community and this is caused by the fact that by default the Raspberry PI uses a software-defined PWM output. This introduces jitter noise in the PWM signal, which causes the servo motor problem.
The issue can be fixed by setting the pin_factory variable from the pigpiod service (also this, is already installed in your Raspberry PI OS).
The negative news is that, at the date of this article, the pigpiod service is not working with Raspberry PI 5, while it works with all the previous computer boards. In any case, you can test it to check if the library developers fixed it at the date of your test.
To fix the problem, we need to enable the pigpiod service and start it. From our terminal console, please use the following 2 commands:
sudo systemctl enable pigpiod.service
sudo systemctl start pigpiod.service
After these commands, you can update the script with the parts highlighted in red:
from gpiozero import AngularServo
from gpiozero.pins.pigpio import PiGPIOFactory
from time import sleep

singalPIN = 2

factory = PiGPIOFactory()
servo = AngularServo(singalPIN, min_angle=0, max_angle=180, min_pulse_width=0.0005, max_pulse_width=0.0024, pin_factory=factory)

while True:
    servo.angle = 0
    sleep(1)
    servo.angle = 45
    sleep(1)
    servo.angle = 90
    sleep(1)
    servo.angle = 135
    sleep(1)
    servo.angle = 180
    sleep(1)
Save the changes and try running again the script with the same terminal command:
(my_project) pi@raspberrypi:~ $ python3 sg90-test.pyYour servo motor should run correctly, this time.
Controlling the SG90 from Keyboard
To control the SG90 angle from your keyboard, the following Python script will wait for input from the user’s keyboard. You will be able to use the “a” and “d” keys (followed by the RETURN) to increase or decrease the servo motor angle. the “q” key will make the program exit.
Please create a new script as follows:
nano sg90-control.pyPaste the following code:
from gpiozero import AngularServo

from gpiozero.pins.pigpio import PiGPIOFactory

singalPIN = 2
factory = PiGPIOFactory()

servo = AngularServo(singalPIN, min_angle=0, max_angle=180, min_pulse_width=0.0005, max_pulse_width=0.0024, pin_factory=factory)

def angle(degrees):
    degrees = min(180, max(0, degrees))
    servo.angle = degrees

    return degrees

degrees = 0
angle(degrees)

while True:
    key = input()
    if key == 'd': degrees = degrees + 45
    if key == 'a': degrees = degrees - 45
    if key == 'q': exit()
    degrees = angle(degrees)
Of course, you must remove the code parts in red if you’re running it in a Raspberry PI 5 and if the pigpiod service hasn’t been fixed yet.
Here, we use a Python custom function named “angle()”:
def angle(degrees):
    degrees = min(180, max(0, degrees))
    servo.angle = degrees
    return degrees
This function takes as input the desired degrees you want to pass to the servo. The first line inside the function simply checks that the degrees are included in a range between 0 and 180. If the value is higher than 180, it will anyway cut the number to 180 and return it to the main program. A similar thing will happen if the value is lower than 0. The function also sets the servo motor to the required angle.
In the while loop, the code will change the degrees variable depending on the key you give as input. The “q” key will allow you to exit the program.
What’s Next
Interested in more cool ways to use your Raspberry PI computer board? Take a look at peppe8o Raspberry PI computer tutorials!
Enjoy!

Open source and Raspberry PI lover, writes tutorials for beginners since 2019. He's an ICT expert, with a strong experience in supporting medium to big companies and public administrations to manage their ICT infrastructures. He's supporting the Italian public administration in digital transformation projects.
![]()
![]()
![]()
![]()
![]()
![]()
![]()


