

Last Updated on 18th February 2026 by peppe8o
Project management involves strong communication requirements. Keeping all teams aligned on task progress and issue solutions requires strong tools to share info between involved owners and a strict timeline for sharing.
In this guide, I’ll show you how to install Redmine on your Raspberry PI computer board with Docker.
For this guide, I will use a Raspberry PI 5 model B (8GB), but this also works with all the Raspberry PI computer boards supporting the 64-bit OS.
What is Redmine
Redmine is an open source project management platform, based on a web application service. Written using the Ruby on Rails framework, it is cross-platform and cross-database. It allows for managing multiple projects and associated subprojects, with related objects like tasks, issues, file management and GANTT charts.
What We Need
As usual, I suggest adding from now to your favourite e-commerce shopping cart all the needed hardware, so that at the end you will be able to evaluate overall costs and decide if to continue with the project or remove them from the shopping cart. So, hardware will be only:
- Raspberry PI Computer Board (including proper power supply or using a smartphone micro USB charger with at least 3A)
- high speed micro SD card (at least 16 GB, at least class 10)
Step-by-Step Procedure
We’ll start by installing the Raspberry PI operating system, and then setting up Docker and Docker Compose. After that, we’ll prepare docker-compose configuration files to create our Redmine platform with only 1 command line.
Redmine requires a database and works well with MySQL. I use MariaDB instead of MySQL because it is fully compatible and requires fewer resources (which is a good idea working with low-capacity hardware like Raspberry PI).
Prepare the Operating System
The first step is to install the Raspberry PI OS Lite to get a fast and lightweight operating system (headless). If you need a desktop environment, you can also use the Raspberry PI OS Desktop, in which case you will work from its terminal app. Please find the differences between the 2 OS versions in my Raspberry PI OS Lite vs Desktop article. For low-RAM Raspberry PI models, I suggest setting the Swap Memory of Raspberry PI to a higher value (1028MiB) or more.
In both cases, we need the 64-bit version for the OS.
Please make sure that your Operating System is up to date. From your terminal, use the following command:
sudo apt update -y && sudo apt full-upgrade -yWe also need to install Docker. You can use my tutorial for this: Beginner’s Guide to Install and Use Docker with Raspberry PI.
Prepare the Docker-Compose Configuration File
Create a Redmine folder in your Raspberry PI. I’m going to name it “redmine”, but you can use whatever name you want. Then enter your folder. From terminal:
mkdir redmine
cd redmine
Create the docker-compose file:
nano docker-compose.ymland add the following code. Use your favourite credentials for “redmine_password” and “redmine_supersecretkey”. On the other hand, the name for the Redmine database must remain unchanged (“redmine”):
# Redmine form peppe8o.com
services:
  redmine:
    image: redmine
    restart: unless-stopped
    ports:
      - 8080:3000
    environment:
      REDMINE_DB_MYSQL: db
      REDMINE_DB_PASSWORD: redmine_password
      SECRET_KEY_BASE: redmine_supersecretkey
    volumes:
      - ./redmine_files:/usr/src/redmine/files

  db:
    image: mariadb:latest
    restart: unless-stopped
    environment:
      MYSQL_ROOT_PASSWORD: redmine_password
      MYSQL_DATABASE: redmine
    volumes:
      - ./mysql_data:/var/lib/mysql
Save and exit.
As you can see, our database (“db” service) will be built on the latest MariaDB image. If you have a 32-bit OS, you can optionally change this part with a custom MariaDB installation (please refer to create custom MariaDB container on Raspberry PI for more info).
From the Docker Compose file, we use the restart: unless-stopped policy. This allows our Redmine to automatically restart even after the Raspberry PI reboots, unless you manually stop the container.
The port mapping for the Redmine service allows us to reach the Redmine service from the 8080 port on the Raspberry PI’s IP address instead of using the 3000 (the default Redmine port).
The volumes will enable us to keep the Redmine data persistent over container stops and starts. This Docker Compose script creates the volumes in the same folder where the docker-compose.yml file is saved. This will result in a simpler backup process for you.
Finally, a brief explanation of the 2 passwords: the REDMINE_DB_PASSWORD sets the database password to use with the db service. This must be the same as the one used in the MariaDB container. The SECRET_KEY_BASE encrypts the Rails sessions and cookies.
Service Creation and Initialisation
With the previous file ready, you will be able to install and get Redmine up with the following terminal command:
docker-compose up -dThis process will take a while to download and extract the required images from Docker Hub. Once the container preparation has been completed, from the terminal, you will see something like the following:
[+] up 3/3
 ✔ Network redmine_default     Created
 ✔ Container redmine-redmine-1 Created
 ✔ Container redmine-db-1      Created
At this point, you can also check the Redmine logs with the following command:
docker logs redmine-redmine-1Please wait until the previous log command gives you something like the following:
(...)
*  Min threads: 0
*  Max threads: 5
*  Environment: production
*          PID: 1
* Listening on http://0.0.0.0:3000
Get Redmine Default Data
After the installation, Redmine offers you an empty database. You don’t have, for example, the definition of tasks or even their status.
Anyway, you can get a brunch of default settings with the following command:
docker compose exec redmine bundle exec rake redmine:load_default_data RAILS_ENV=productionAccess Redmine on Raspberry PI
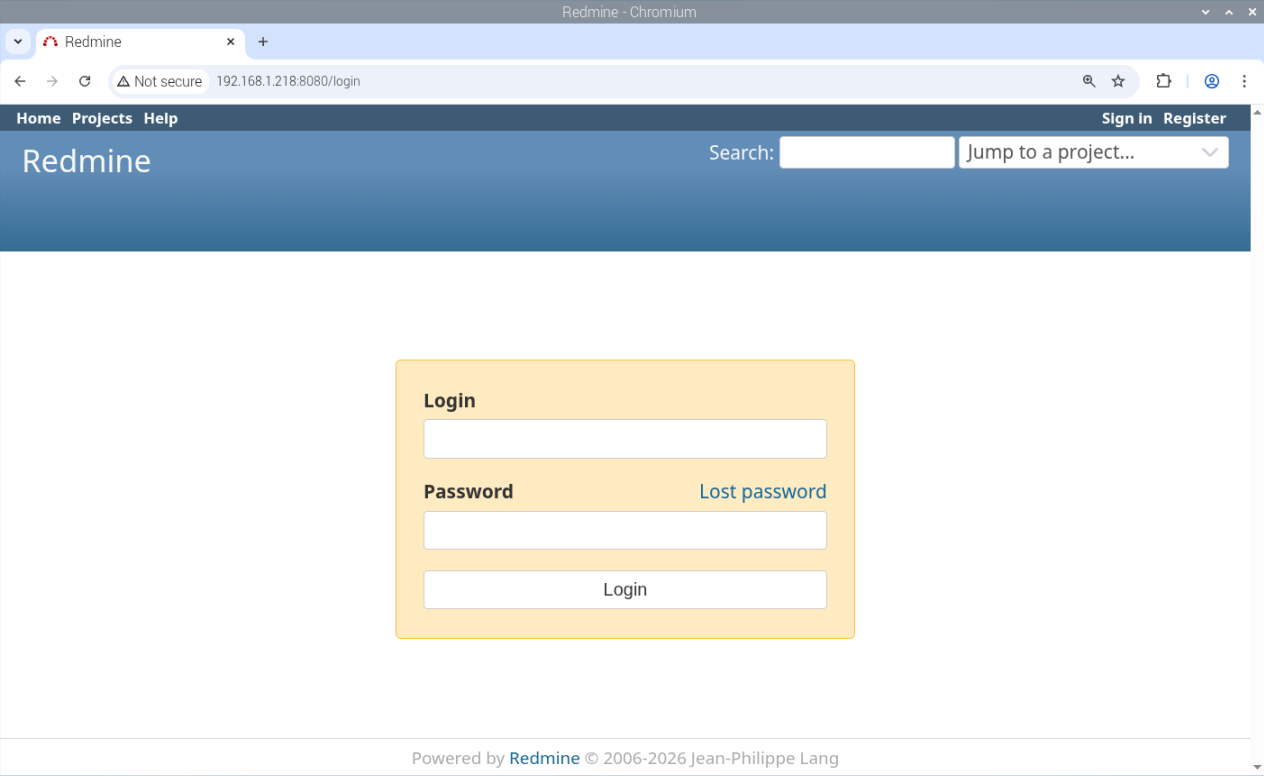
From your favourite browser, please use your Raspberry PI’s IP and port 8080 as the URL to access your Redmine service. For example, with my Raspberry PI my URL will be http://192.168.1.218:8080:

If this is your output, it means that everything went well.
Use the “Sign in” link on the top/right side of the page to reach the signing form:
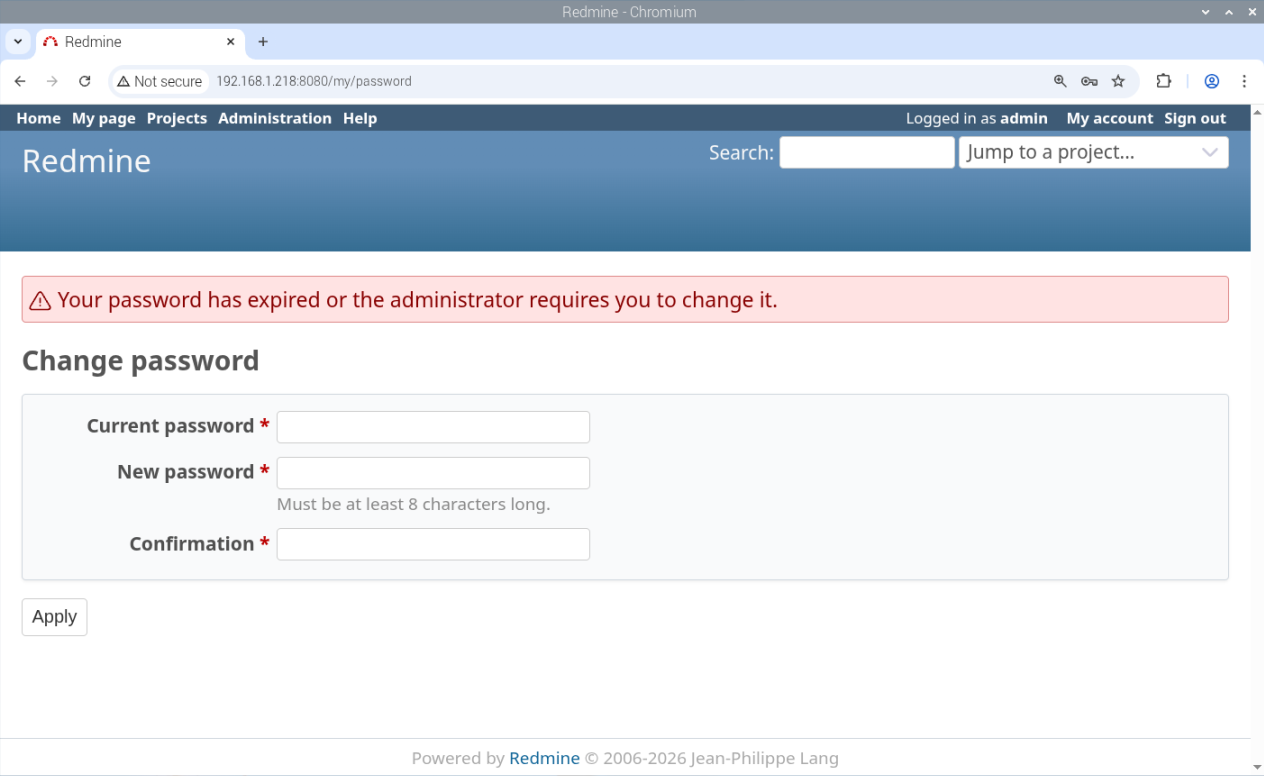
Use the following default Redmine credentials:
- login: admin
- password: admin
and click login.
You will be asked to change the admin password. Insert the old “admin” in the password field. Use a new password for the other 2 fields:
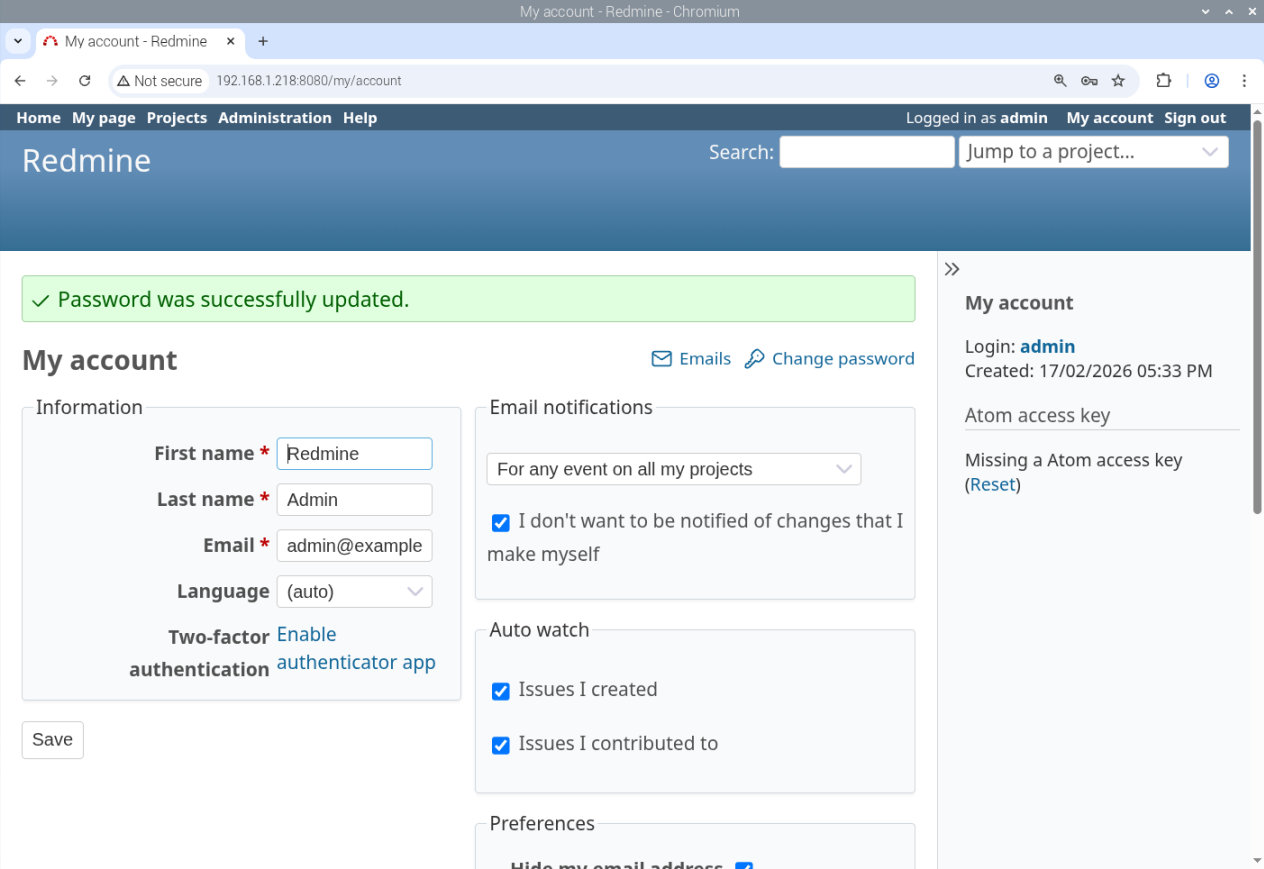
Then click the “Apply” button. You will be logged in.
Now, you can customise your installation by changing the account information and clicking SAVE:
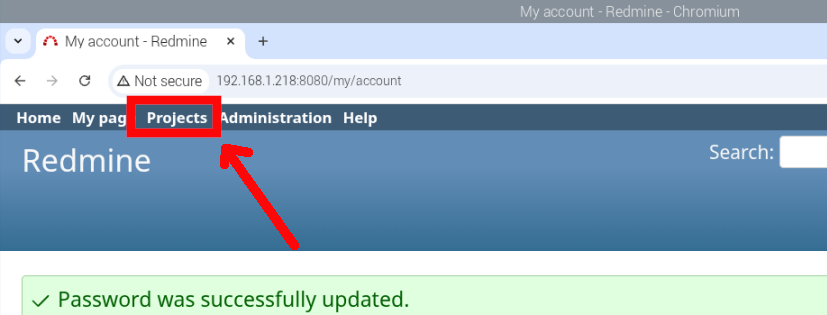
Create a Project with Tasks
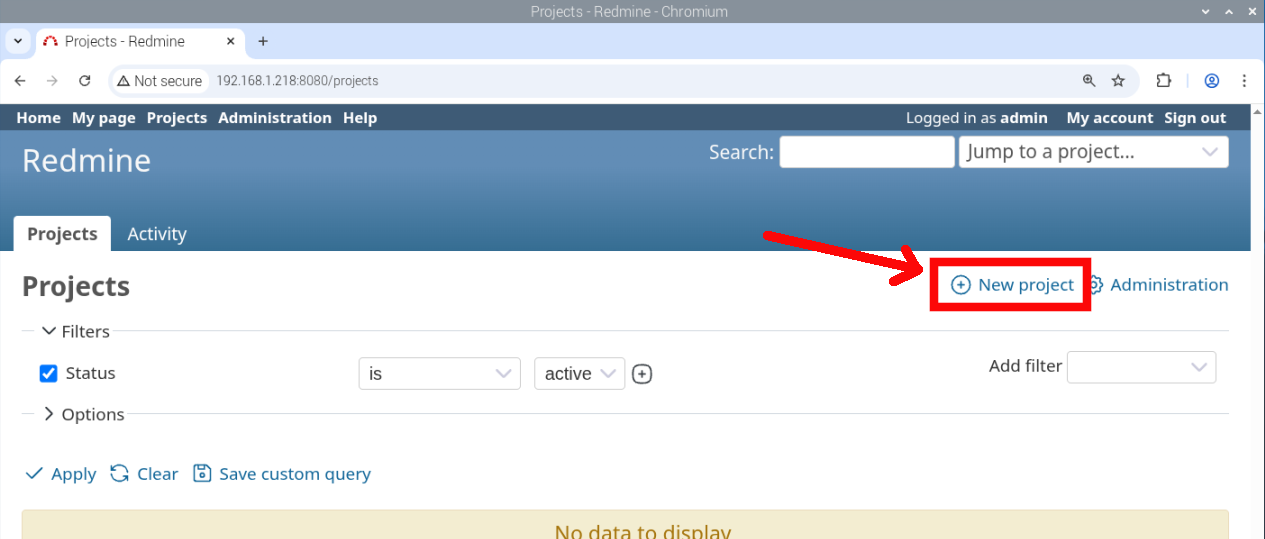
From the previous page, please click the “Projects” link at the top:
Create a new project by clicking the related link, as shown in the following screenshot:
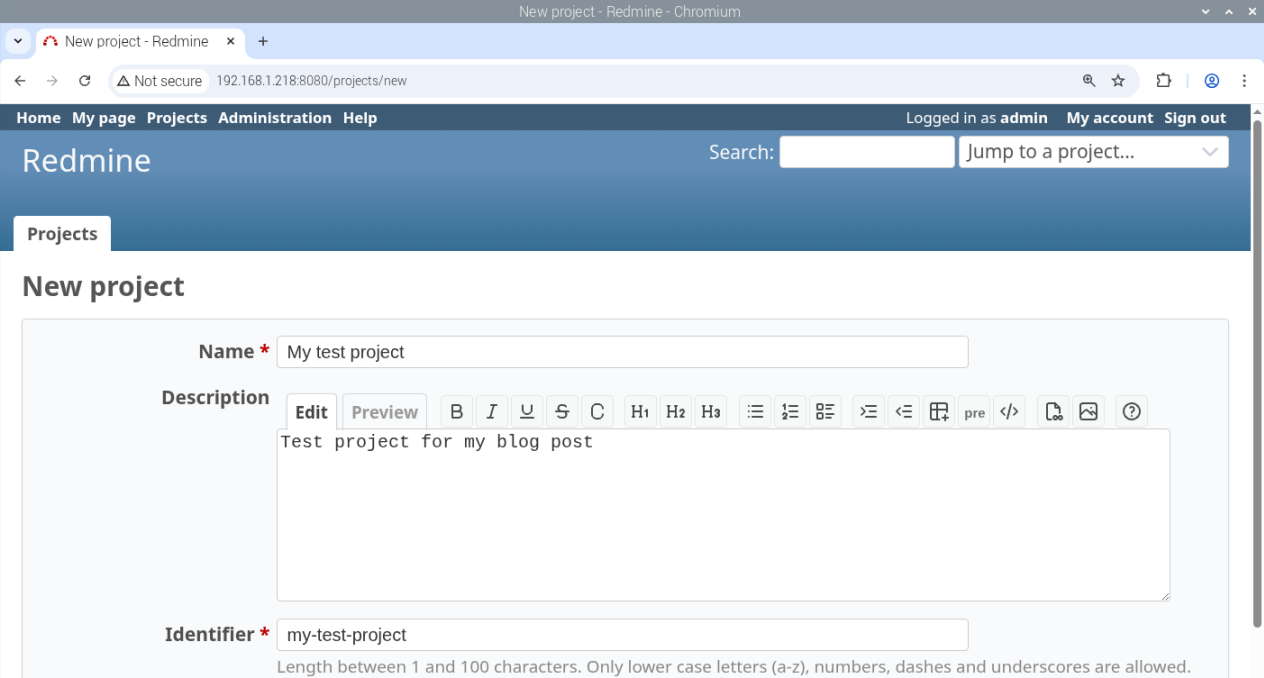
Please fill in the fields according to your preferences. Those with an “*” are mandatory:
Please check that the Issue Tracking module is enabled:
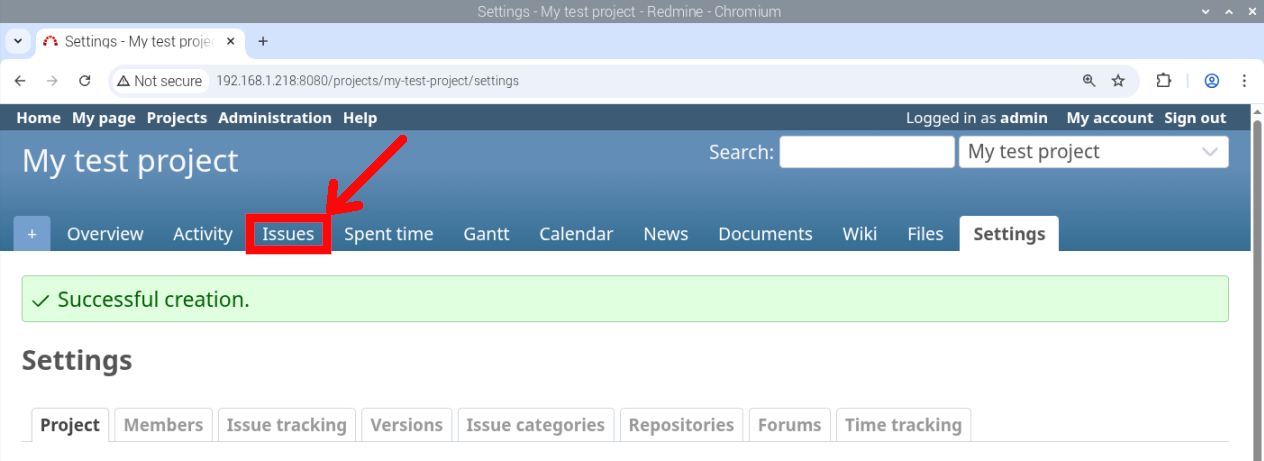
Scroll down and click the “Create” button at the bottom of the page.
Now, you will find a bar with all the modules for your project. Please select the “Issues” module:
By default, in the “Issue tracking” tab, you should find Bug, Feature, and Support tasks enabled:
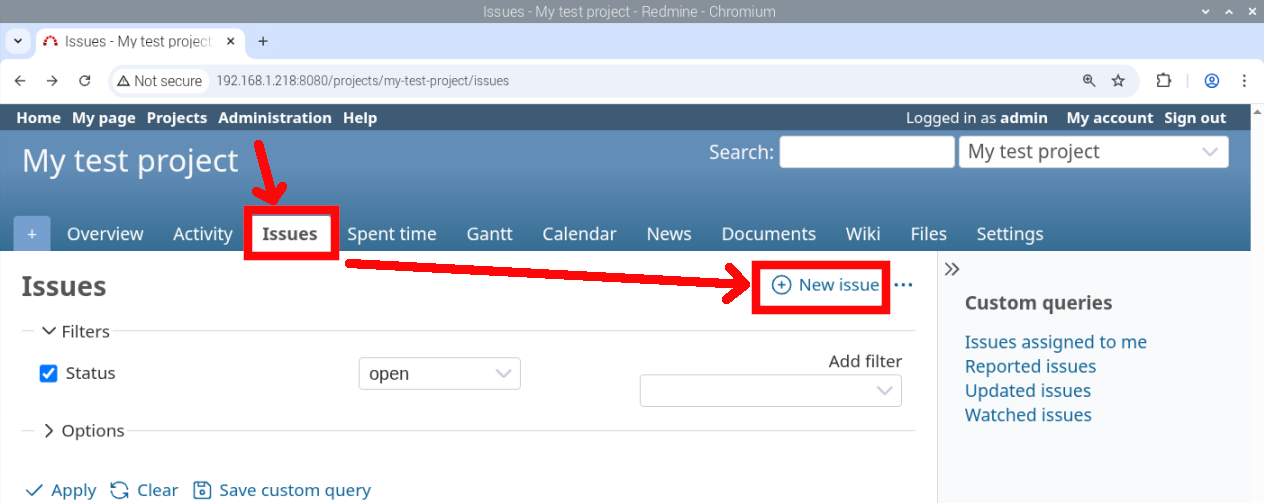
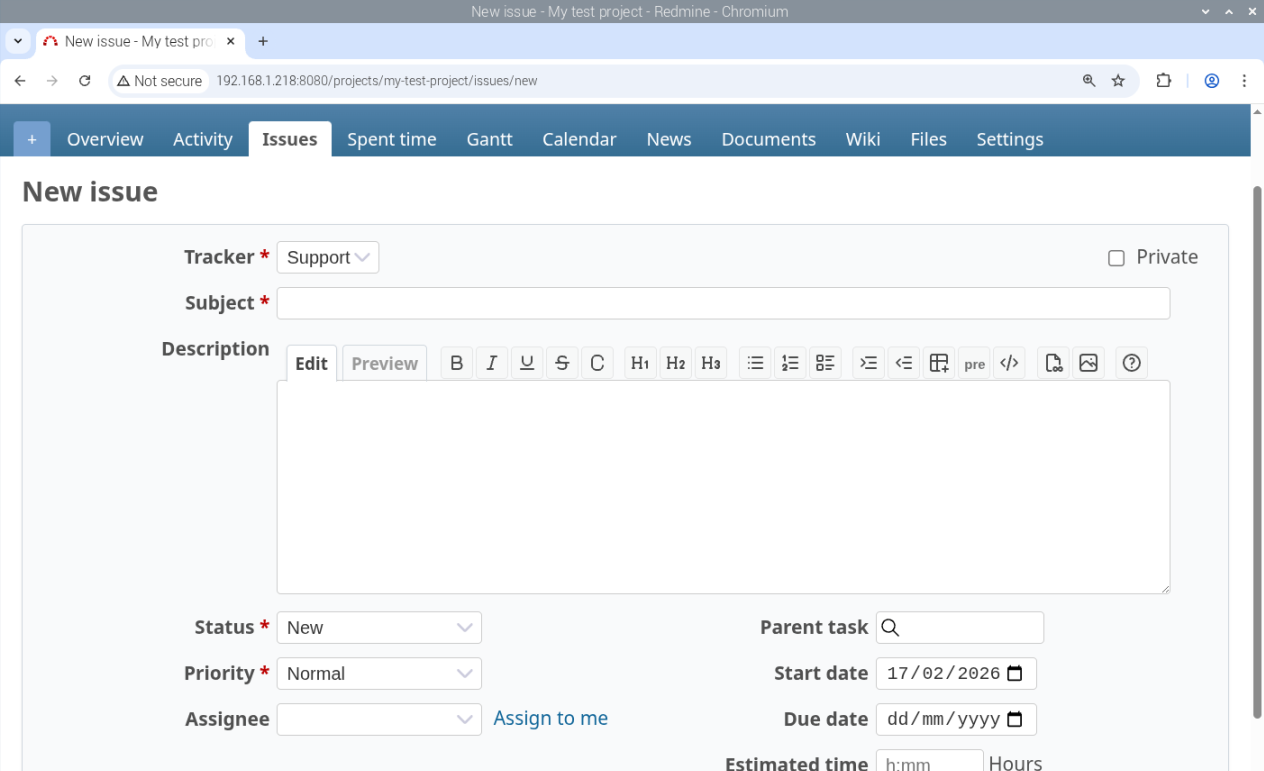
From the project, please go to the “Issues” tab, and click “New issue”:
Here you’ll find a form to compile to add as many tasks as you like:
When you finish creating your tasks, you can see them in a GANTT chart:

From here, you can refer to the Redmine Users Guide, and your Redmine platform is ready.
Resources
Next Steps
If you are interested in more Raspberry PI projects, take a look at my Raspberry PI Tutorials or subscribe to my newsletter!
Enjoy!

Open source and Raspberry PI lover, writes tutorials for beginners since 2019. He's an ICT expert, with a strong experience in supporting medium to big companies and public administrations to manage their ICT infrastructures. He's supporting the Italian public administration in digital transformation projects.
![]()
![]()
![]()
![]()
![]()
![]()
![]()


How can I solve this?
sudo docker-compose up -d
ERROR: The Compose file ‘./docker-compose.yml’ is invalid because:
Unsupported config option for services.redmine: ‘REDMINE_DB_MYSQL’
services.redmine.environment contains an invalid type, it should be an object, or an array
# My Redmine
# from peppe8o.com
version: ‘3’
services:
redmine:
image: redmine:latest
restart: unless-stopped
ports:
– 8080:3000
environment:
REDMINE_DB_MYSQL: mymariadb_database
REDMINE_DB_USERNAME: redmine
REDMINE_DB_PASSWORD: mypassword
REDMINE_SECRET_KEY_BASE: supersecretkey
db:
build: .
restart: unless-stopped
Hi Chris,
take care of the “-” sign near the port declaration (“- 8080:3000”). In your docker-compose extract it appears to me to be a different (even if the may appear similar). The best way is pasting the docker compose file into a notepad app and then again copy-> paste to yuoy file into Raspberry PI.
Also, please tale care of respecting the indentation as shown in my post.
Please let me know if this helps to fix
Me da este error:
/bin/sh: 1: /etc/init.d/mysql: not found
The command ‘/bin/sh -c /etc/init.d/mysql start && mysql -uroot –password=”” -e “source /mysql_scripts/mySqlScript.sql”‘ returned a non-zero code: 127
ERROR: Service ‘db’ failed to build : Build failed
Hi Juan,
please can you try to change the following line:
RUN /etc/init.d/mysql start && mysql -uroot –password=”” -e “source /mysql_scripts/mySqlScript.sql”
with this:
RUN /etc/init.d/mariadb start && mariadb -uroot –password=”” -e “source /mysql_scripts/mySqlScript.sql”
Hi! Thank you so much for this tutorial.
A few bugfixes though :
– Like Chris, if you get the following error : **”Unsupported config option for services.redmine: ‘REDMINE_DB_MYSQL’”**, just make sure the ‘REDMINE’ environment entries are correctly indented below the ‘environment:’ tag. I had to add two spaces for those ‘REDMINE’ environment entries ;
– Like Juan, if you get the following error :
**”The command ‘/bin/sh -c /etc/init.d/mysql start && mysql -uroot –password=”” -e “source /mysql_scripts/mySqlScript.sql”‘ returned a non-zero code: 127
ERROR: Service ‘db’ failed to build : Build failed” error, “**
You must change the last two lines in the ‘Dockerfile’ file : replace ‘mysql’ by ‘mariadb’
**RUN /etc/init.d/mariadb start && mariadb -uroot –password=”” -e “source /mysql_scripts/mySqlScript.sql”
CMD /etc/init.d/mariadb start && tail -f /dev/null**
However, don’t replace ‘mysqlscript’!
When everything is good, you have to be patient. Especially when Redmine is starting for the first time, it can take quite a while.
Cheers!
Thank you for your feedback.
Regarding the change from mysql -> mariadb, this has been a change in the way MariaDB calls its CLI interface from the last updates. In general, after the Raspberry PI published its 64-bit OS, there should be no need to build a custom MariaDB container in our docker-compose file, as MariaDB has its own arm64 docker image. But there could be people that still use the old 32-bit OS, especially those with old Raspberry PI models… I have to decide for a (near) future update of this post if I will move directly to the 64 bit or to split this tutorial into 2 parts (32-bit and 64-bit).
In the meanwhile, I’m going to fix the mariadb cli call.
Hello
Thanks a lot for this instruction!
However, after completing the process when I check with ‘docker PS’, the redmine_db_1 process is up and running, but the redmine_redmine_1 process in constantly restarting (every few seconds).
I have executed the installation on a clean 32 bit environment.
(in order to be sure I did not make a mistake, I have executed the process a couple of times).
Do you have an idea what is going wrong?
Thanks! Hugo
Hi Hugo,
please check the logs with the following command:
docker logs redmine_redmine_1This is the result of the docker logs redmine_redmine_1 command:
permission denied while trying to connect to the Docker daemon socket at unix:///var/run/docker.sock: Get “http://%2Fvar%2Frun%2Fdocker.sock/v1.24/containers/redmine_redmine_1/json”: dial unix /var/run/docker.sock: connect: permission denied
I hope you know what the issue is.
Thanks!
Hugo
When you installed Docker, did you also issued the command
sudo usermod -aG docker pi(or, if your user is different from the default pi,sudo usermod -aG docker $USER)?After this command you must reload your user profile, better if you reboot your Raspberry PI
I am one step further!
I don’t get this message anymore, but now it gives another error: LoadError: /usr/local/bundle/gems/nokogiri-1.15.6-arm-linux/lib/nokogiri/3.2/nokogiri.so: cannot open shared object file: No such file or directory – /usr/local/bundle/gems/nokogiri-1.15.6-arm-linux/lib/nokogiri/3.2/nokogiri.so (LoadError)
/
Hugo
After fixing the user group, did you tryied to remove the containers:
docker-compose downand create them again:
docker-compose up -dHi,
Unfortunately the docker-compose down and up did not help.
I am still getting the Nokogiri error..
Thanks for all your efforts!
Hugo
Are you using a 64-bit OS? Are you on Raspberry PI OS Lite or Desktop? I’ve just reproduced the installation steps from a fresh Raspberry PI OS Lite (64-bit) OS and it worked to me, but I need to check if we’re working on the same environment
This works like a charm!
So 2 lessons: you have to reboot after the sudo usermod -aG docker pi command and the process seemingly requires the 64 bit OS version.
A huge thanks for your help!!
Hugo
Happy it helped you too!
I have been playing with Redmine a bit, it works very nicely.
A bit off-topic, but I tried to install plugins, but I don’t know how/where to install them. I tried to Google this, but that did not bring a solution.
Do you know how to do this when Redmine is installed in Docker?
Thanks
Hugo
Hello,
I am using a raspberry pi 64 bit desktop OS and your installation process worked for me. Thank you very much.
Now I have a problem, I changed the password in Redmine, but after restarting Redmine I found that the password was not changed.
I use the ‘sudo’ prefix for all my installs, could it be causing the permissions issue?
“How do I configure email notifications in this Docker-based Redmine system?
Could you please share the configuration steps?”
Hi Louis,
I’m not a Redmine expert… nevertheless, do you want to send notification by using a plugin or by changing some Redmine configuration files? Do you have a link to Redmine docs as reference?