
Last Updated on 31st May 2024 by peppe8o
This tutorial will show you how to easily use your Raspberry PI to control your Android smartphone with ScrCpy and how to install it and view your smartphone display on your Raspberry PI Desktop. Please note that this article is intended only for Raspberry PI computer boards.
Main Features of ScrCpy
ScrCpy stands for Screen Copy. This name may appear as a simple mirror of your smartphone display. Looking at the GitHub pages of this open-source software, you will soon discover that it includes several options that allow you to control every aspect of device connection.
The main features of this software follow, as listed in the linked ScrCpy page:
- high video performance: 30~120fps, depending on the device
- high image quality: 1920×1080 or above
- low latency: 35~70ms
- low startup time: ~1 second to display the first image
- non-intrusive: nothing is left installed on the Android device
- freedom: free and open-source software
- Available Options:
- audio forwarding (Android 11+)
- recording
- mirroring with Android device screen off
- copy-paste in both directions
- configurable quality
- camera mirroring (Android 12+)
- mirroring as a webcam (V4L2) (Linux-only)
- physical keyboard and mouse simulation (HID)
- OTG mode
For this tutorial, I’m going to use my Raspberry PI 5 Model B, but it should work with any Raspberry PI computer board.
What We Need
As usual, I suggest adding from now to your favourite e-commerce shopping cart all the needed hardware, so that at the end you will be able to evaluate overall costs and decide if to continue with the project or remove them from the shopping cart. So, hardware will be only:
- Raspberry PI Computer Board (including proper power supply or using a smartphone micro USB charger with at least 3A)
- high speed micro SD card (at least 16 GB, at least class 10)
- an HDMI Monitor
- Keyboard
- Mouse

Step-by-Step Procedure
Prepare the Raspberry PI Operating System
Please install Raspberry PI OS Desktop on your micro SD card. I will use the Raspberry PI OS Desktop 64-bit version.
Insert your micro SD card into your Raspberry PI and power it on. From now on, we can work from the terminal available from the OS.
Make your OS update with the following command:
sudo apt update -y && sudo apt upgrade -yInstall ScrCpy
The ScrCpy page on GitHub claims that it can be installed on Linux computers via APT, but this method doesn’t seem to work with Raspberry PI. For this reason, we must install it from the GitHub sources.
Before this, we need to install all the required packages. You can use the following command to install all of them:
sudo apt install ffmpeg libsdl2-2.0-0 adb wget gcc git pkg-config meson ninja-build libsdl2-dev libavcodec-dev libavdevice-dev libavformat-dev libavutil-dev libswresample-dev libusb-1.0-0 libusb-1.0-0-devAfter this step, we can clone the SrcCpy repository from GitHub and enter into the clone folder:
git clone https://github.com/Genymobile/scrcpy
cd scrcpy
At this point, everything is ready to install with the following command:
sudo ./install_release.shEnable USB Debugging on your Android Smartphone
Before connecting our Android smartphone to the Raspberry PI, we must enable the USB debugging mode.
This task usually depends on your Android version, so I can’t provide a procedure valid for all the devices. Nevertheless, Google gives you a page where to find these instructions: enabled USB debugging.
As the ScrCpy developers warn, “on some devices, you also need to enable an additional option USB debugging (Security Settings) (this is an item different from USB debugging) to control it using a keyboard and mouse. Rebooting the device is necessary once this option is set.“.
So, usually the important steps to accomplish at this point are:
- Enable Developer Mode
- Enable USB Debug
Now, you can plug your USB cable between your Android smartphone and Raspberry PI computer.
Please note that some Android devices may ask you for a confirmation on their screen to the USB access when plugged with the USB cable or when launching ScrCpy. If this happens, please confirm it.
Running ScrCpy
We’re ready to use the Raspberry PI to control our Android smartphone.
The simplest way to do it is by running the following simple command:
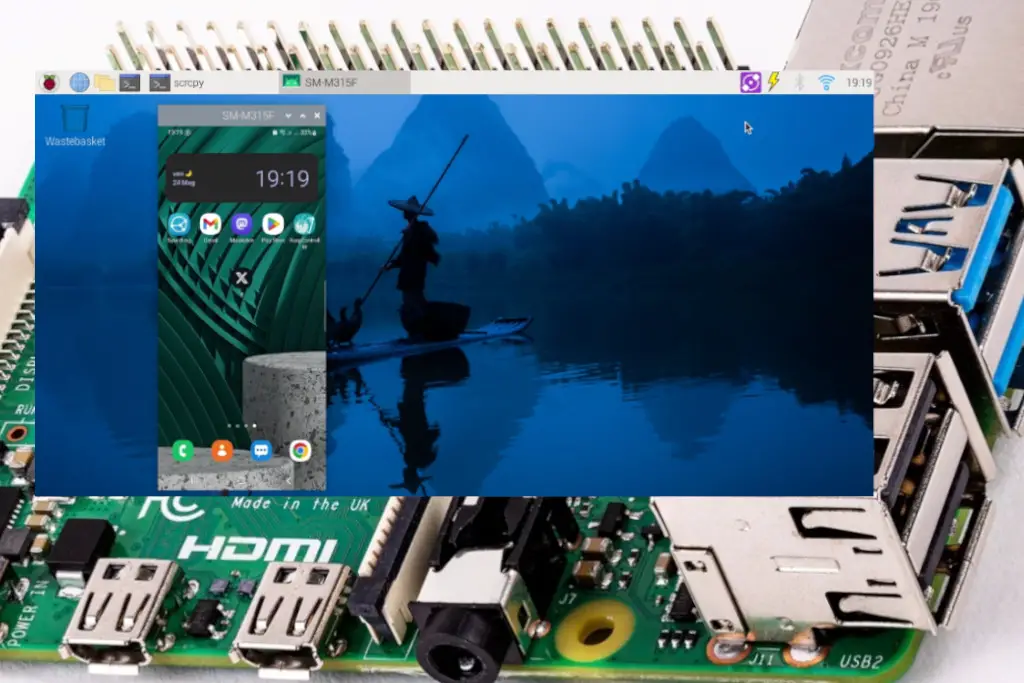
scrcpyYour smartphone display will appear on your Raspberry PI desktop as a new window:
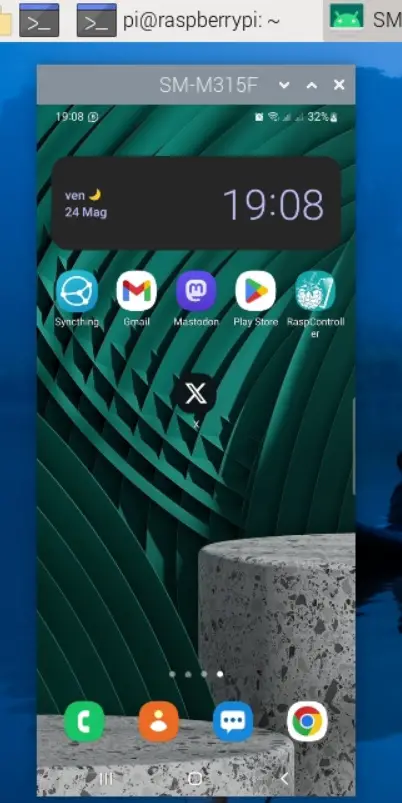
You will be able to control the display from your keyboard and mouse.
If you want to exit, you can just close the display window or press CTRL+C in your terminal to stop the ScrCpy command from running.
ScrCpy Options
ScrCpy offers you a lot of powerful options. You can get the complete list from the following terminal command:
scrcpy --helpAlso, you can find a detailed list of the options on the ScrCpy GitHub page.
What’s Next
Want to know more about cool projects to do with Raspberry PI computer boards? In this case, the right resource for you is my Raspberry PI tutorials pages.
Enjoy!

Open source and Raspberry PI lover, writes tutorials for beginners since 2019. He's an ICT expert, with a strong experience in supporting medium to big companies and public administrations to manage their ICT infrastructures. He's supporting the Italian public administration in digital transformation projects.
![]()
![]()
![]()
![]()
![]()
![]()
![]()


