
Last Updated on 26th September 2025 by peppe8o
In this tutorial, I will show you how to use your Raspberry PI with Hugging Face AI models, executing Artificial Intelligence programs with Python on your computer board.
Please note that I will use my Raspberry PI 5 Model B with 8GB of RAM for the test shown in this post. When executing them in boards with lower RAM, I suggest increasing the Raspberry PI Swap Memory to at least 2GB. In this way, you should avoid freezes of your board during processes requiring more RAM space.
About Hugging Face
The Hugging Face is a web platform where you can share and get free copies of pre-trained AI models and datasets, enabling you to share your work with other users and train them in virtual spaces.
It offers both free and paid services, but the free account is enough for the examples which will follow in this tutorial.
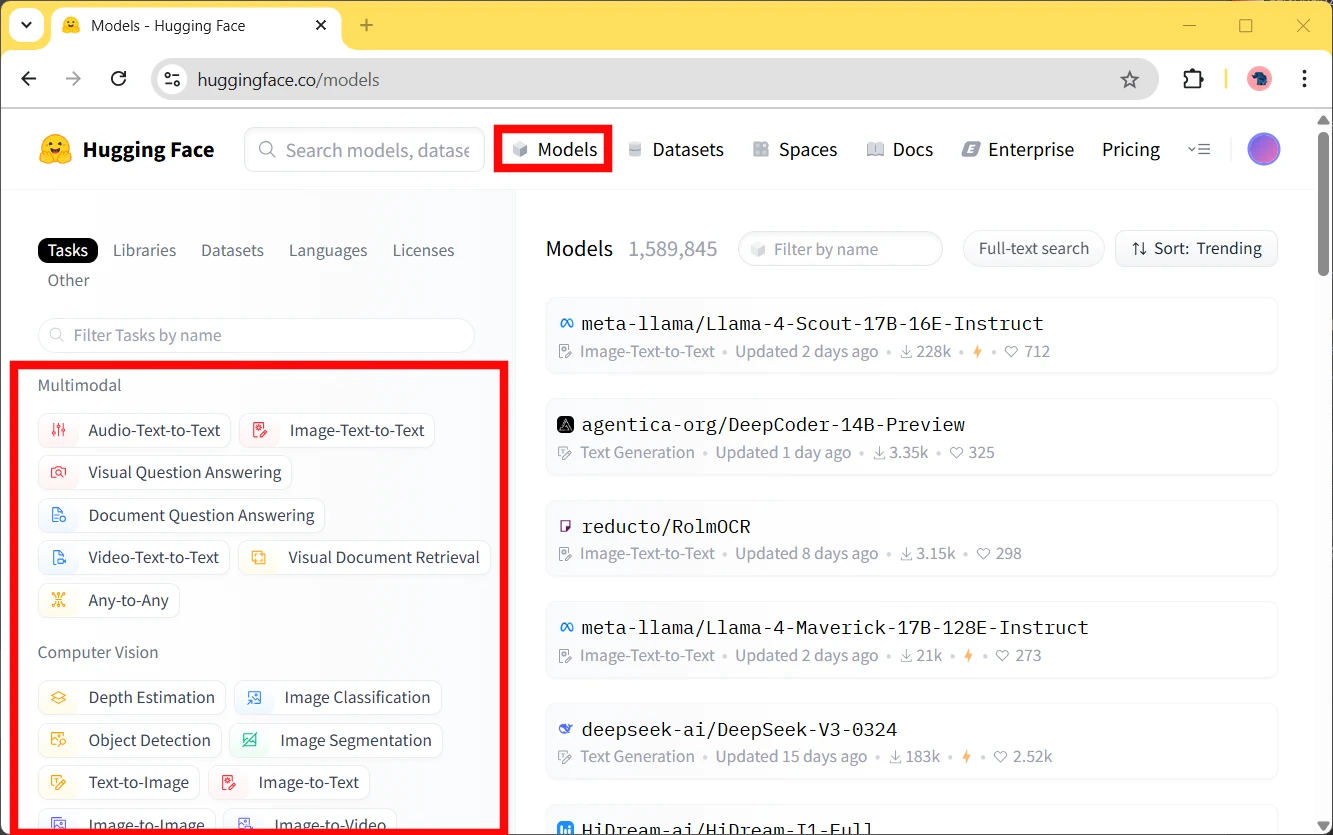
Going to their Models page, you can find a lot of AI models that you can filter by selecting the model tasks on the left-side column:
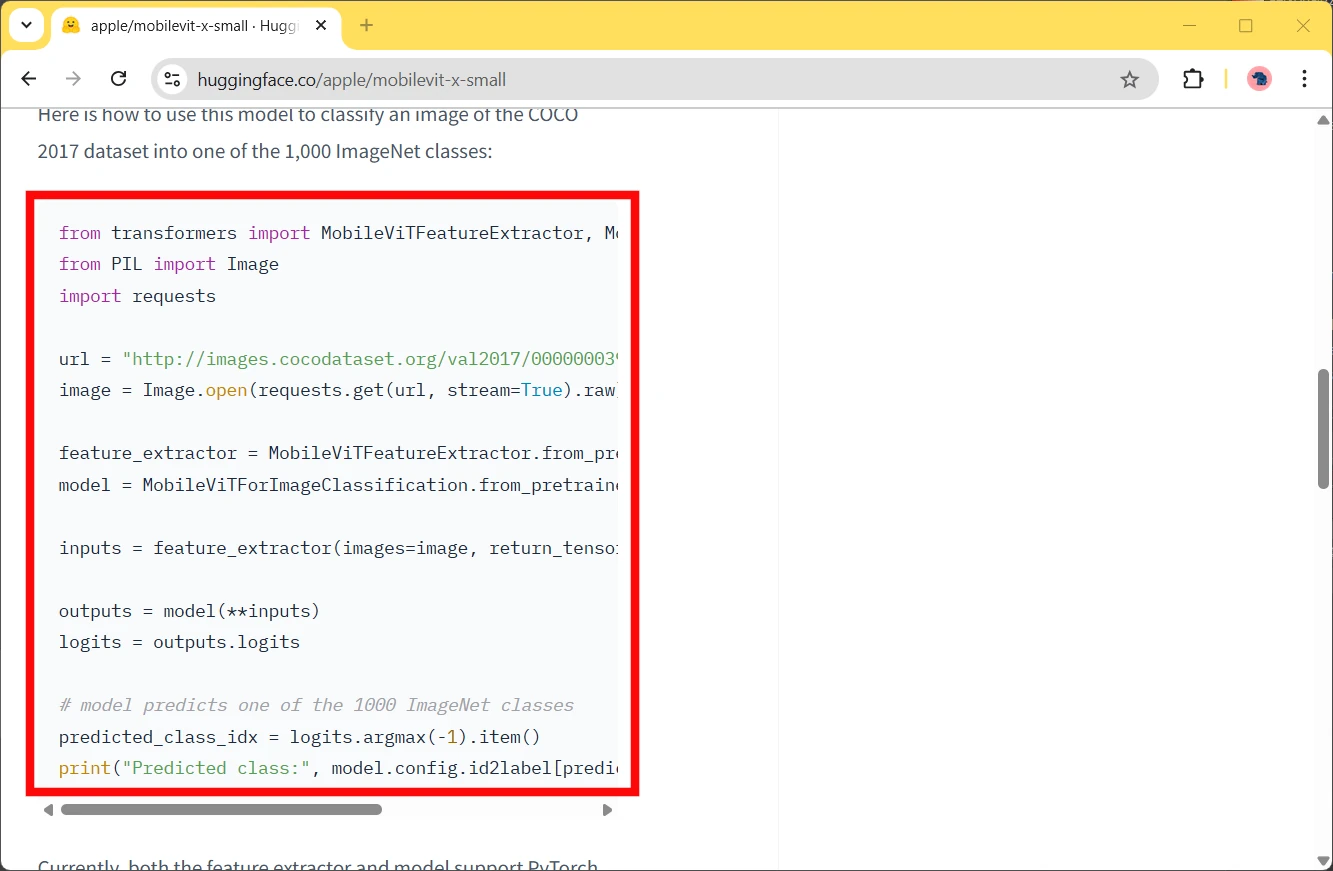
Every AI model, when selected, offers you an overview of the model and an example of how to use it with Python:
In this post, I will show you a simple way to use the models which should work with a large part of them.
What We Need
As usual, I suggest adding from now to your favourite e-commerce shopping cart all the needed hardware, so that at the end you will be able to evaluate overall costs and decide if to continue with the project or remove them from the shopping cart. So, hardware will be only:
- Raspberry PI Computer Board (including proper power supply or using a smartphone micro USB charger with at least 3A)
- high speed micro SD card (at least 32 GB, at least class 10). It is important to note that AI models and all the Hugging Face tools will require a lot of storage space, so a greater micro SD card (or SSD Storage) will be better for your AI projects.

Step-by-Step Procedure
Preparing the Raspberry PI Operating System
The first step is installing the Operating System. You can install the Raspberry PI OS Lite to get a fast and light operating system (headless). In this case, you will need to work from a remote SSH terminal.
If you need a desktop environment, you can also use the Raspberry PI OS Desktop, in this case working from its terminal app. The links provide you the procedures for both the OSs. Please find the differences between the 2 OS versions in my Raspberry PI OS Lite vs Desktop article.
Make sure that your system is up to date. Connect via SSH terminal and type the following command:
sudo apt update -y && sudo apt full-upgrade -yAt this point, you can increase the Raspberry PI Swap Memory if you have a low RAM board version.
Install the Hugging Face Tools
We need to add the Python bin folder to the Python PATH variable. For this reason, please open the bashrc file for editing:
nano ~/.bashrcPlease add the following line at the end of the file:
export PATH="$HOME/.local/bin:$PATH"We can make this line run effectively by rebooting the Raspberry PI or re-loading the bashrc file. In this second case:
source ~/.bashrcThe following step is installing all the Python packages required to get and run the AI models shared by the Hugging Face users. For this task, we must start by creating a Python Virtual Environment in Raspberry PI and activating it (you can use your preferred name instead of “my_project”):
python3 -m venv my_project --system-site-packages
source ./my_project/bin/activate
Now, we can install the referred tools with the following 3 commands:
pip install huggingface_hub transformers
pip install 'huggingface_hub[tensorflow,hf_xet,cli,torch]'
pip install tf-keras accelerate pillow
This process will require a while, so please wait.
Ultimately, you will have all the needed packages ready to run the following AI tests.
The Pipeline Operator
The “transformers” package brings us the pipeline operator (the link gives you the full pipeline official page). This allows us to use many of the AI models simply.
At the moment, I will show you how it works, in the following example I will show you how to use it.
Then, we can use it by referring to one of the model tasks already highlighted in the previous screenshot. At the date of this tutorial, the supported tasks are:
- “audio-classification”
- “automatic-speech-recognition”
- “depth-estimation”
- “document-question-answering”
- “feature-extraction”
- “fill-mask”
- “image-classification”
- “image-feature-extraction”
- “image-segmentation”
- “image-text-to-text”
- “image-to-image”
- “image-to-text”
- “mask-generation”
- “object-detection”
- “question-answering”
- “summarization”
- “table-question-answering”
- “text2text-generation”
- “text-classification” (alias “sentiment-analysis” available)
- “text-generation”
- “text-to-audio” (alias “text-to-speech” available)
- “token-classification” (alias “ner” available)
- “translation”
- “translation_xx_to_yy”
- “video-classification”
- “visual-question-answering”
- “zero-shot-classification”
- “zero-shot-image-classification”
- “zero-shot-audio-classification”
- “zero-shot-object-detection”
You can initialize the pipeline with the following command:
pipe = pipeline("object-detection")This command will use a default model as it isn’t provided. But you can specify the model by selecting it from those available at the Hugging Face Models pages by adding it as input:
pipe = pipeline("object-detection", model="hustvl/yolos-small")On this command, your Raspberry PI will start downloading the model and will return you the prompt when it is ready to analyze your request. You can perform this request as in the following command (where I ask it to analyze an image from the web):
pipe("https://cdn.pixabay.com/photo/2024/01/07/14/12/man-8493246_1280.jpg")The result will be a LIST object, including all the answers from the AI model.
Let’s look at some examples. There, I will give you examples to run inside a Python shell. Anyway, you can easily integrate these examples into your Python scripts.
Please note that before running any of the following examples, you must run the Python shell after activating the Virtual Environment previously created.
Object Detection
This example will show you how to detect all the objects in a picture by using the Raspberry PI with the Hugging Face “hustvl/yolos-small” AI model. We’ll analyze the following image:

At the beginning, we must enter the Python shell with the simple “python” command:
(my_project) pi@raspberrypi:~ $ pythonOnce you get the prompt, please start importing the pipeline operator:
>>>from transformers import pipelineLet’s create a pipeline object (named here as “pipe”, but you can give it whatever name):
>>>pipe = pipeline("object-detection", model="hustvl/yolos-small")Now, we can get any image (local or remote) analyzed by our AI model with the following command:
>>>pipe("https://peppe8o.com/wp-content/uploads/2025/04/man-8493246_1280.jpg")You will get a response similar to the following:
[{'score': 0.6023110747337341, 'label': 'car', 'box': {'xmin': 1257, 'ymin': 540, 'xmax': 1279, 'ymax': 615}}, {'score': 0.9994664788246155, 'label': 'person', 'box': {'xmin': 580, 'ymin': 317, 'xmax': 731, 'ymax': 764}}, {'score': 0.6346383094787598, 'label': 'truck', 'box': {'xmin': 46, 'ymin': 361, 'xmax': 1200, 'ymax': 753}}]Managing the indention, the above result can be seen as follows:
[{'box': {'xmax': 1279, 'xmin': 1257, 'ymax': 615, 'ymin': 540},
  'label': 'car',
  'score': 0.6023110747337341},
 {'box': {'xmax': 731, 'xmin': 580, 'ymax': 764, 'ymin': 317},
  'label': 'person',
  'score': 0.9994664788246155},
 {'box': {'xmax': 1200, 'xmin': 46, 'ymax': 753, 'ymin': 361},
  'label': 'truck',
  'score': 0.6346383094787598}]
The “score” will give you the precision estimated from the AI model on the object identified by the related “label”. Moreover, this AI model returns to you the box coordinates enclosing the detected object in this image.
Image Classification
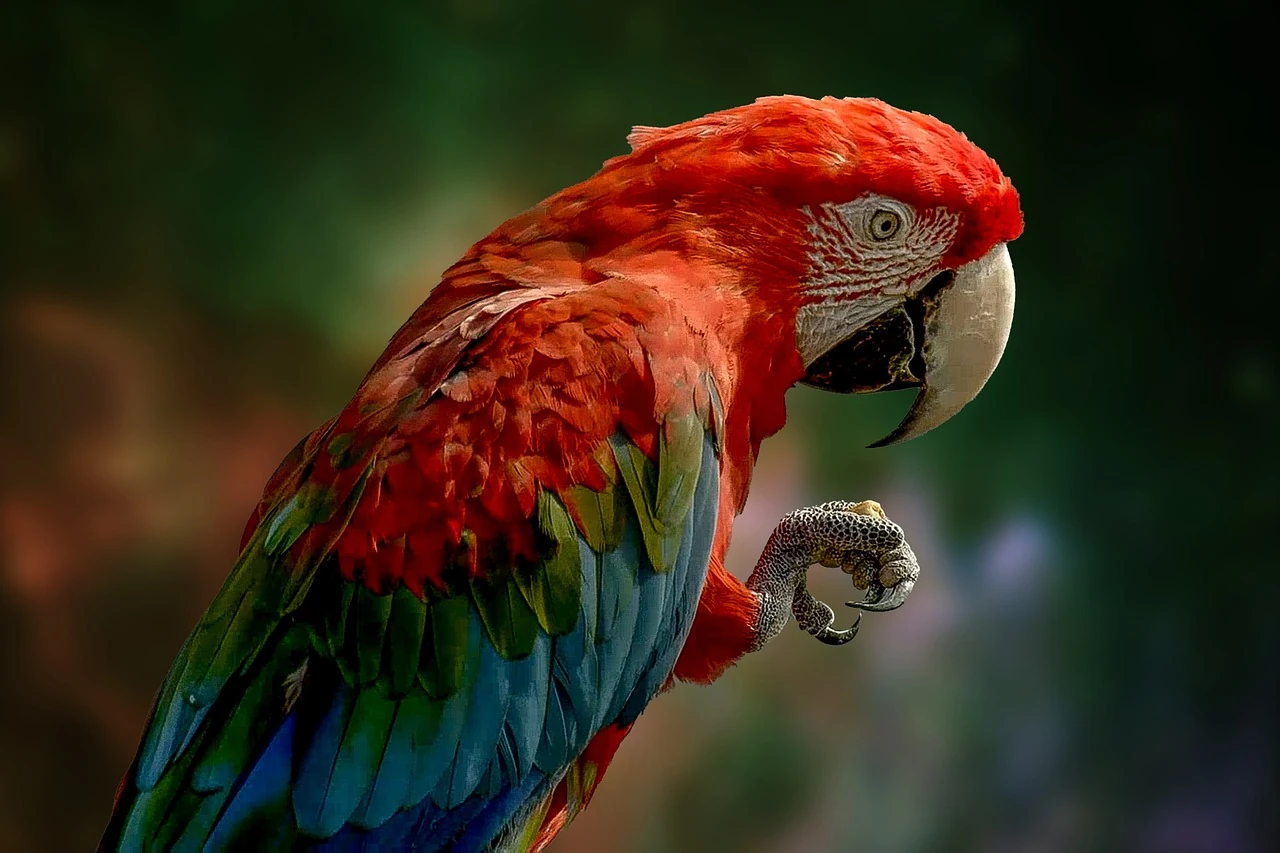
In this example, I will show you how to use an image classification AI model in your Raspberry PI with the Hugging Face’s “apple/mobilevit-x-small” model. We’ll analyze the following image:
If you left it, we must enter again the Python shell and import the pipeline operator:
(my_project) pi@raspberrypi:~ $ python
>>>from transformers import pipeline
Let’s create our pipeline object with the new task and model name:
>>>pipeline("image-classification", model="apple/mobilevit-x-small")Now, let’s analyze the new image:
>>>pipe("https://peppe8o.com/wp-content/uploads/2025/04/parrot-6342271_1280.jpg")You will get a response similar to the following:
[{'score': 0.9996553659439087, 'label': 'bird', 'box': {'xmin': 109, 'ymin': 93, 'xmax': 1017, 'ymax': 840}}]Final Thoughts
With Raspberry PI and Hugging Face AI models, you can create any project by using the AI model which better fits your needs. There can be some concerns in using it regarding the performance of the Raspberry PI, as the response may be not so fast. You can improve it by using a more powerful Raspberry PI computer model or using a faster micro SD card or even using an SSD storage (for those Raspberry PI models supporting it.
Also, decreasing the image resolution will give you better performance than analyzing high-resolution pictures.
A lot of AI models should work with the pipeline operator, while other models may require their specific python call, which you will find described in the model’s page.
Some models may also require Hugging Face authentication when downloading the models.
What’s Next
If you want to discover many other projects for your Raspberry PI, you can take a look at peppe8o Raspberry PI tutorials.
Enjoy!

Open source and Raspberry PI lover, writes tutorials for beginners since 2019. He's an ICT expert, with a strong experience in supporting medium to big companies and public administrations to manage their ICT infrastructures. He's supporting the Italian public administration in digital transformation projects.
![]()
![]()
![]()
![]()
![]()
![]()
![]()