Last Updated on 2nd September 2023 by peppe8o
Whether you’re a content creator looking to transcribe interviews, or just someone interested in the capabilities of speech recognition technology, SpeechRecognition with Raspberry PI offers a cheap solution to get this task automatically performed with a few Python code lines
Welcome to our tutorial on how to use SpeechRecognition in Raspberry PI to automatically transcribe audio files to text! With our step-by-step guide, you’ll be able to easily set up your RPI computer board to automatically transcribe audio files in no time.
What is SpeechRecognition
SpeechRecognition is an open-source Python library that allows you to easily transcribe spoken words from audio files or microphone input into text. It supports several popular speech recognition engines, including Google Speech Recognition, Microsoft Bing Voice Recognition, and CMU Sphinx. Additionally, with a few code tricks you can make it work with a range of audio file formats, such as WAV, MP3, and AIFF.
One of the key advantages of SpeechRecognition is that it simplifies the process of transcribing audio files. With just a few lines of code, you can set up the library to transcribe spoken words from a variety of sources, including recorded interviews, podcasts, and conference calls.
SpeechRecognition also provides a range of configuration options that allow you to fine-tune the transcription process. For example, you can adjust the language model used by the recognition engine, set the sample rate and chunk size of the audio file, and even filter out background noise.
Overall, SpeechRecognition is a powerful tool that can save you a lot of time and effort when it comes to transcribing audio files. In this tutorial, we’ll walk you through the process of setting up SpeechRecognition to transcribe audio files to text using Python.
What We Need

As usual, I suggest adding from now to your favourite e-commerce shopping cart all the needed hardware, so that at the end you will be able to evaluate overall costs and decide if to continue with the project or remove them from the shopping cart. So, hardware will be only:
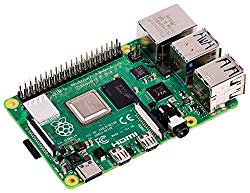
- Raspberry PI Computer Board (including proper power supply or using a smartphone micro USB charger with at least 3A)
- high speed micro SD card (at least 16 GB, at least class 10)
Step-by-Step Procedure
Prepare Raspberry PI Operating System
Please start installing your OS. You can use Raspberry PI OS Lite (for a performing, headless OS) or Raspberry PI OS Desktop (in this case, working from the internal terminal).
Make sure that your OS is up to date. From the terminal, please issue the following command:
sudo apt update -y && sudo apt upgrade -yTo use SpeechRecognition with Raspberry PI, we’ll need pip3 (that is the python package manager allowing us to install SpeechRecognition easily), flac (this package assures our Raspberry PI to have the codec required to manage the audio files) and ffmpeg (the Swiss army knife of media files management, will allow us to convert a wide range of media files to wav, in order to process them with SpeechRecognizer).
You can perform the installation of these packages and SpeechRecognition with the following 2 terminal commands:
sudo apt install python3-pip flac ffmpeg -y
pip3 install SpeechRecognition
The pip3 install command could raise the following warning, where instead of the classic “pi” user there will be your user:
  WARNING: The script normalizer is installed in '/home/pi/.local/bin' which is not on PATH.
  Consider adding this directory to PATH or, if you prefer to suppress this warning, use --no-warn-script-location.
You can fix this warning by opening for edit your bashrc file:
nano ~/.bashrcAnd append the following line at the end of this file:
export PATH="$HOME/.local/bin:$PATH"You can reload the bashrc with the following terminal command without the need to logout or reboot:
source ~/.bashrcGetting the code to run SpeechRecognition with Raspberry PI
I’ve already prepared a python script with all the required code lines. You can get it in your Raspberry PI computer board with the following terminal command:
wget https://peppe8o.com/download/python/speech-recognition/audio-to-text.pyHere I will also explain all the script lines. The first few lines import the required modules and libraries to make my script work:
import sys, os
from pathlib import Path
import speech_recognition as sr
from subprocess import Popen, DEVNULL, STDOUT
The silent_google_recognition() Function
By default, the main SpeechRecognition function that uses Google services, the recognize_google(), prints a lot of info regarding the recognition tests, confidence and more, before giving the final result. The “silent_google_recognition” function temporarily disables printing to the console and uses the recognize_google() method to transcribe the speech from the audio file using the Google Speech Recognition API. It then restores the console output and returns the transcribed text. the function returns only the final result with the required transcription. In order to get the full output, you can simply comment out the two “sys.stdout” lines.
def silent_google_recognition(audio_file):
    sys.stdout = open(os.devnull, 'w')
    result = r.recognize_google(audio_file)
    sys.stdout = sys.__stdout__
    return result
The console() Function
The following console() function just gets a string as input and executes it from your Raspberry PI OS bash shell. Additionally, the wait() command waits for the command execution to end before continuing the Python program flow. Also here, we hide the shell process output by adding the “stderr=STDOUT” option in Popen. You can get all the process printed in your console by removing this option and uncommenting the last 2 lines:
def console(cmd):
    p = Popen(cmd, shell=True, stdout=DEVNULL, stderr=STDOUT)
    p.wait()
    #out, err = p.communicate()
    #return out.decode('ascii').strip()
The convert_to_wav() Function
The last custom function, convert_to_wav(), gets in input the file name and converts the related file into a “.wav”. This is useful when your input file is different from the ones supported by SpeechRecognition (as, for example, the mp3 files). This conversion is performed with the console() function call, which uses the ffmpeg conversion and also sets an output bitrate of 192kbits (with the option “-b:a 192k”).
The remaining lines just deal with the file name, in order to save the generated wav file on the same folder of the input file, by appending “-converted” to the same file name. After the conversion both the original file and the converted one will remain available to you.
def convert_to_wav(file):
    file_name = str(Path(file).resolve())
    file_type = Path(file).suffix
    name=file_name.split(file_type)[0]
    output_wav = name + "-converted.wav"
    console("ffmpeg -i " + file + " -b:a 192k " + output_wav)
    return output_wav
The Main Program
Now, the main program starts, according to SpeechRecognition docs.
With my code, the input file will come from the script call as argument (as we’ll see later in this tutorial), so we get the audio filename from the sys arguments:
input_file = sys.argv[1]The following 2 code lines will perform a check at the input file type, by analyzing its file extension (the suffix, that is the last chars after the last dot in the file absolute path.
If the input file is a “.wav”, then the program will move on without additional actions. If the file has a different extension, this will be converted to a .wav media file with our convert_to_wav() custom function already described:
file_type = Path(input_file).suffix
if file_type != ".wav": input_file = convert_to_wav(input_file)
According to related docs, we create a SpeechRecognition object and initialize it with the record() property:
r = sr.Recognizer()
with sr.AudioFile(input_file) as source:
     audio = r.record(source)
Finally, we try to print the transcribed text to the shell. In case of errors (that may happen, for example, when the audio quality is too low, this script will print an error message instead of the transcribed audio:
try:
    print("Google Speech Recognition thinks you said:\n\n" + silent_google_recognition(audio))
except sr.UnknownValueError:
    print("Google Speech Recognition could not understand audio")
except sr.RequestError as e:
    print("Could not request results from Google Speech Recognition service; {0}".format(e))
Testing SpeechRecognition with Raspberry PI
To test our script, we need an audio file with voice. The fastest way is using these files already available on the web to test VoIP services. One of these is available from voiptroubleshooter.com. You can get one of them directly in your Raspberry PI with the following wget statement:
wget https://www.voiptroubleshooter.com/open_speech/british/OSR_uk_000_0021_8k.wavThis will download a 30 seconds voice file with some phrases, named as “OSR_uk_000_0021_8k.wav”. We can now test our SpeechRecognition script. From the terminal, please use the following command, where the argument is the audio file name:
python3 audio-to-text.py OSR_uk_000_0021_8k.wavThis will bring the following result:
pi@raspberrypi:~ $ python3 audio-to-text.py OSR_uk_000_0021_8k.wav
Google Speech Recognition thinks you said:

the boy was there when the sun Rose is used to catch pink Sam the source of this huge river is the clear spring kick the ball straight and follow through help the woman back to her feet a pot of tea helps to pass the evening smokey fires like flame and heat the soft cushion broke the man's for the salt breeze came across from the sea the girl at the Booth sold £50
You can also compare the result with List 2 from the source (cs.columbia.edu/~hgs/audio/harvard.html, which is the source text of the audio file). The red words are those not correct:
The boy was there when the sun rose.
A rod is used to catch pink salmon.
The source of the huge river is the clear spring.
Kick the ball straight and follow through.
Help the woman get back to her feet.
A pot of tea helps to pass the evening.
Smoky fires lack flame and heat.
The soft cushion broke the man's fall.
The salt breeze came across from the sea.
The girl at the booth sold fifty bonds.
As you can see, some words aren’t 100% precise, but the text transcription from our script is a great help to get the audio file written down.
Using Other Audio Types
If you already have an mp3 file, you can directly test it. On the other side, if you don’t have it immediately, you can just convert the audio file to a .mp3 with ffmpeg, so that the new file will be named “OSR_uk_000_0021_8k.mp3“:
ffmpeg -i OSR_uk_000_0021_8k.wav -vn -ar 44100 -ac 2 -b:a 192k OSR_uk_000_0021_8k.mp3We can now test also the mp3 input file:
python3 audio-to-text.py OSR_uk_000_0021_8k.mp3and the result will be:
pi@raspberrypi:~ $ python3 audio-to-text.py OSR_uk_000_0021_8k.mp3
Google Speech Recognition thinks you said:

the boy was there when the Sun Goes Around is used to catch pink Sam the source of the huge river is the clear spring kick the ball straight and follow through help the woman back to her feet apart of tea help to pass the evening smokey fired like flame and heat the soft cushion broke the man's Paul the salt breeze came across from the sea the girl at the Booth sold £50
Write the Transcription to a Txt File
To write the transcription to a txt file, you can simply change the following line:
print("Google Speech Recognition thinks you said:\n\n" + silent_google_recognition(audio))With these:
    f=open('transcription.txt', 'w')
    print("Google Speech Recognition thinks you said:\n\n" + silent_google_recognition(audio),file=f)
    f.close()
This change will write the transcription to a “transcription.txt” file that you can read with any text reader.
Final Considerations about SpeechRecognition with Raspberry PI
SpeechRecognition is a great tool to automate voice transcription from any language (not only English) to a text file. It allows you to set several tunings like reducing environmental noise. You can also use it to write down the text from a microphone audio source.
Finally, if you need to use a very long audio file, I suggest splitting the file into smaller packages (a common technique is to use ffmpeg split functions, that are well documented on the internet).
You can find more info about the library on the SpeechRecognition GitHub page.
Next Steps
Interested in more projects with your RPI? Take a look at peppe8o Raspberry PI computer tutorials pages.
Enjoy!

Open source and Raspberry PI lover, writes tutorials for beginners since 2019. He's an ICT expert, with a strong experience in supporting medium to big companies and public administrations to manage their ICT infrastructures. He's supporting the Italian public administration in digital transformation projects.

