Last Updated on 2nd September 2023 by peppe8o
In this tutorial I’m going to show how to install and use Dialog on Raspberry PI, as in many debian-based linux distributions.
Writing terminal scripts for Linux on shell can need at some point getting user inputs from a graphic box. A common and elegant solution uses Dialog (also available on Raspberry PI) to create terminal user interfaces, able to interact with user mouse
What is Dialog
Dialog is an application allowing to create text user interface widgets from a shell script, without the need for a desktop environment. An appreciated feature from dialog is that it provides users with the ability to interact with your boxe from a mouse.
Created by Savio Lam, dialog has its first versions from about 1994. Since 1999 it has been maintained by Thomas Dickey.
What We Need
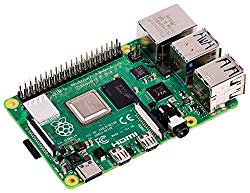
As usual, I suggest adding from now to your favourite e-commerce shopping cart all the needed hardware, so that at the end you will be able to evaluate overall costs and decide if to continue with the project or remove them from the shopping cart. So, hardware will be only:
- Raspberry PI Computer Board Raspberry PI 3 Model A+ (including proper power supply or using a smartphone micro usb charger with at least 3A)
- high speed micro SD card (at least 16 GB, at least class 10)
Check hardware prices with following links:


Step-by-Step Procedure
Prepare Operating System
For Raspberry PI users, if not already done, install your favourite OS. You can bot use Raspberry PI OS Lite (for a headless, performing OS) or Raspberry PI OS Desktop (in this case working from its internal terminal).
Remember to make your OS updated. From terminal, use following command:
sudo apt update -y && sudo apt upgrade -yInstall dialog from debian repository:
sudo apt install dialogThere’s a known issue for people (like me) using putty: if your dialog shows letters instead of box lines, you can fix with following command:
export NCURSES_NO_UTF8_ACS=1To make this persistent after each reboot, you can add this line in your /etc/environment.
Simple Dialog Message Box
The very first example creates a simple message interface with a custom text and an “OK” button for confirmation. From terminal, use following command:
dialog --title "peppe8o.com" --msgbox 'Hello readers!' 5 30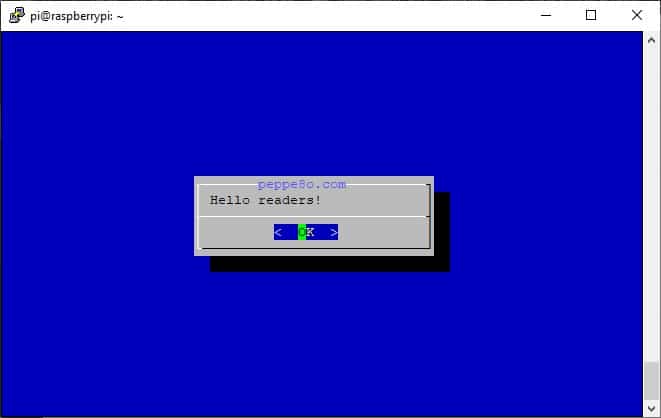
Used options are following:
- –title “peppe8o.com”: Set a title to be displayed at the top of the dialog box.
- –msgbox ‘Hello readers!’: Create a message box with “Hello readers!” message.
- 5: Set the height of the message box.
- 30: Set the width of the message box.
Add Backtitle
With Backtitle option you can display a different title line on your window background (which is detached from dialog boxes). From terminal, try following command:
dialog --backtitle "This is backtitle" \
--title "This is title" \
--msgbox 'Message goes here' 5 30
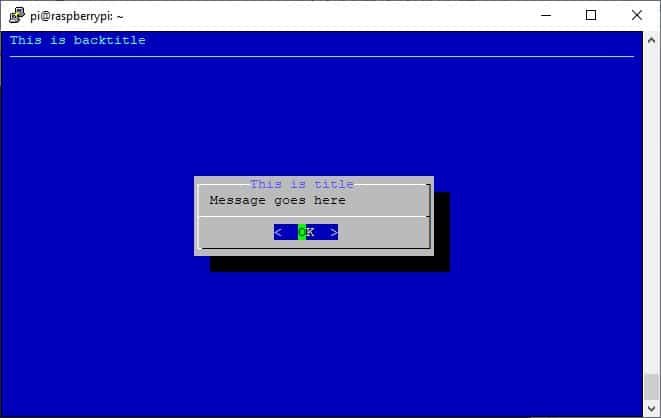
Options are same as in previous example.
Gauge Box
Gauge boxes are commonly used to make user aware of an execution progress. by dynamically increasing one of gauge options from 0 to 100 (in percentage):
dialog --backtitle "This is backtitle" \
--title "This is title" \
--gauge "In progress" 8 60 30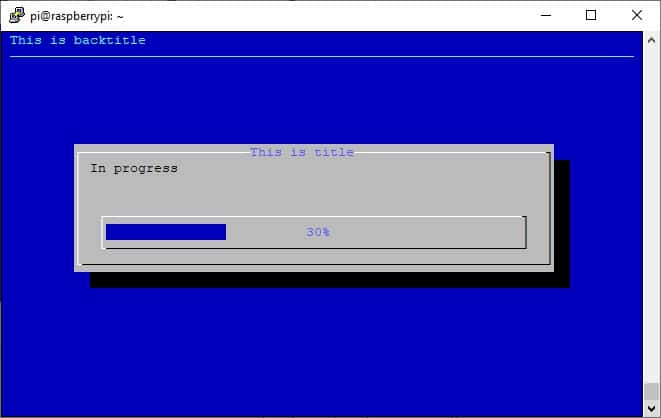
In this example:
- 8: Set the height of gauge box
- 60: Set the width of gauge box
- 30: Set the percentage of gauge box
Showing a Calendar
Adding a calendar can be useful when you need to get a date from your user. Following command enables a clean calendar box:
dialog --backtitle "This is backtitle" \
--title "This is title" \
--calendar "My calendar text" 3 40 19 04 1980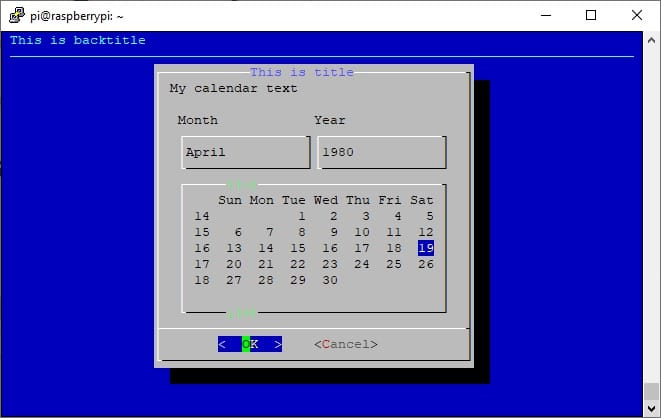
Specific options:
- “My calendar text”: Set the text to display
- 3: Set the height of calendar box
- 40: Set the width of calendar box
- 19: Set the default day of calendar box
- 04: Set the default month of calendar box
- 1980: Set the default year of calendar box
Showing a Time
If you want also to get a time, you can use timebox:
dialog --backtitle "This is backtitle" \
--title "This is title" \
--timebox "This is your time:" 5 20 12 30 00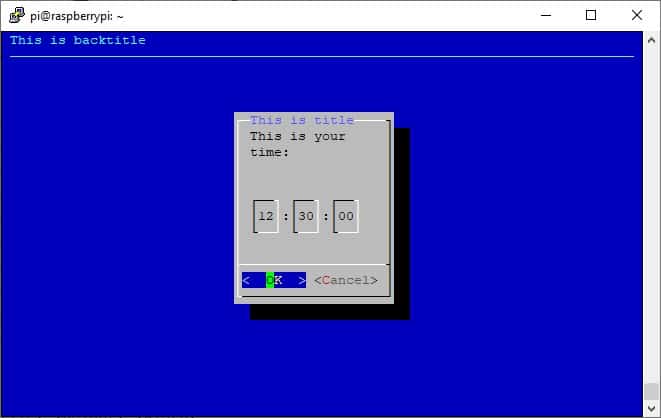
Where:
- “This is your time:”: Set the text for your timebox
- 5: Set the height for your timebox
- 20: Set the width for your timebox
- 12: Set the hour for your timebox
- 30: Set the minute for your timebox
- 00: Set the second for your timebox
Multiple Selections with Checklist
When you need user selection one or multiple choices from a list, checklist is what you want to use:
dialog --backtitle "This is backtitle" \
--title "This is title" \
--checklist "My list is following:" 20 40 3 \
"a)" "First selection" on \
"b)" "Second selection" off \
"c)" "Third selection" on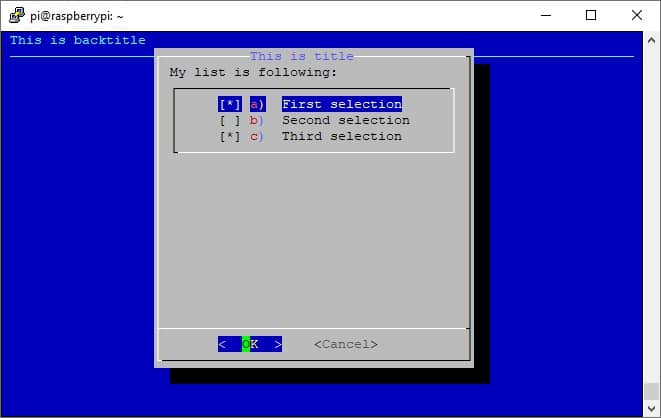
Checklist requires to set box general features:
“My list is following:” 20 40 3 from my example are meaning text, height, width and list height (how many choices you are going to show user).
After these, checklist expects, for each row, a tag, item description and its default status (on or off meaning selected or unselected). Again, one option example from my command is “a)”, which is the tag, “First selection”, which is the item description, and on, which is the status
Single Selection from Radiolist
Maybe that you need to get from user one (and only one) selection from a list. In this case:
dialog --backtitle "This is backtitle" \
--title "This is title" \
--radiolist "My list is following:" 20 40 3 \
"a)" "First selection" on \
"b)" "Second selection" off \
"c)" "Third selection" off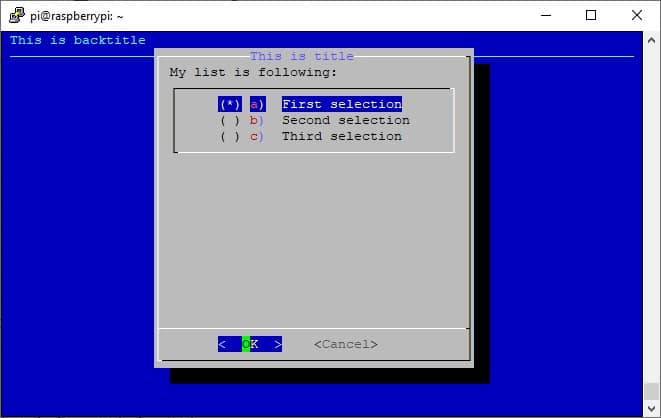
Options are the same as checklist, with the exception that even if you set “on” multiple options from command, it will result in only 1 active.
Get User Input from Dialog
To get user input, you will append the “–output-fd 1” option and associate your dialog command to a variable:
result=$(dialog --backtitle "This is backtitle" \
--title "This is title" \
--radiolist "My list is following:" 20 40 3 \
"a)" "First selection" on \
"b)" "Second selection" off \
"c)" "Third selection" off \
--output-fd 1)
After this execution I’ve selected second item. With echo command we can see result value:
pi@raspberrypi:~ $ echo $result
b)
Common Dialog Boxes
Following list shows common box types and their required options.
  --calendar     <text> <height> <width> <day> <month> <year>
  --checklist    <text> <height> <width> <list height> <tag1> <item1> <status1>...
  --dselect      <directory> <height> <width>
  --editbox      <file> <height> <width>
  --fselect      <filepath> <height> <width>
  --gauge        <text> <height> <width> [<percent>]
  --infobox      <text> <height> <width>
  --inputbox     <text> <height> <width> [<init>]
  --inputmenu    <text> <height> <width> <menu height> <tag1> <item1>...
  --menu         <text> <height> <width> <menu height> <tag1> <item1>...
  --msgbox       <text> <height> <width>
  --passwordbox  <text> <height> <width> [<init>]
  --pause        <text> <height> <width> <seconds>
  --progressbox  <height> <width>
  --radiolist    <text> <height> <width> <list height> <tag1> <item1> <status1>...
  --tailbox      <file> <height> <width>
  --tailboxbg    <file> <height> <width>
  --textbox      <file> <height> <width>
  --timebox      <text> <height> <width> <hour> <minute> <second>
  --yesno        <text> <height> <width>
You can see example screenshots from Dialog maintainer website figures.
Enjoy!

Open source and Raspberry PI lover, writes tutorials for beginners since 2019. He's an ICT expert, with a strong experience in supporting medium to big companies and public administrations to manage their ICT infrastructures. He's supporting the Italian public administration in digital transformation projects.

