Last Updated on 2nd September 2023 by peppe8o
In this tutorial, I’m going to show you how to install Monica CRM on Raspberry PI with docker.
Building a strong friend and customer relationship is a key factor to create trust and getting better life and job results. When you have a lot of contacts, it is really hard to remember all of their info. Monica CRM and Raspberry PI allow creating a cheap solution to make all these data secure (self hosted) and well organized.
About Monica CRM
Monica is an open source CRM that helps in organizing social interactions. It is built to manage family/friends relations. But, in my honest opinion, it has great potential with managing relations with customers when it comes to creating a strong relationship and trust.
Main Monica features include:
- a complete contact sheet, with main info like relations / parents names, addresses, phones, relations frequency (to remember to call it back in future), important dates and also gift offered in past. This, beside a space for general notes
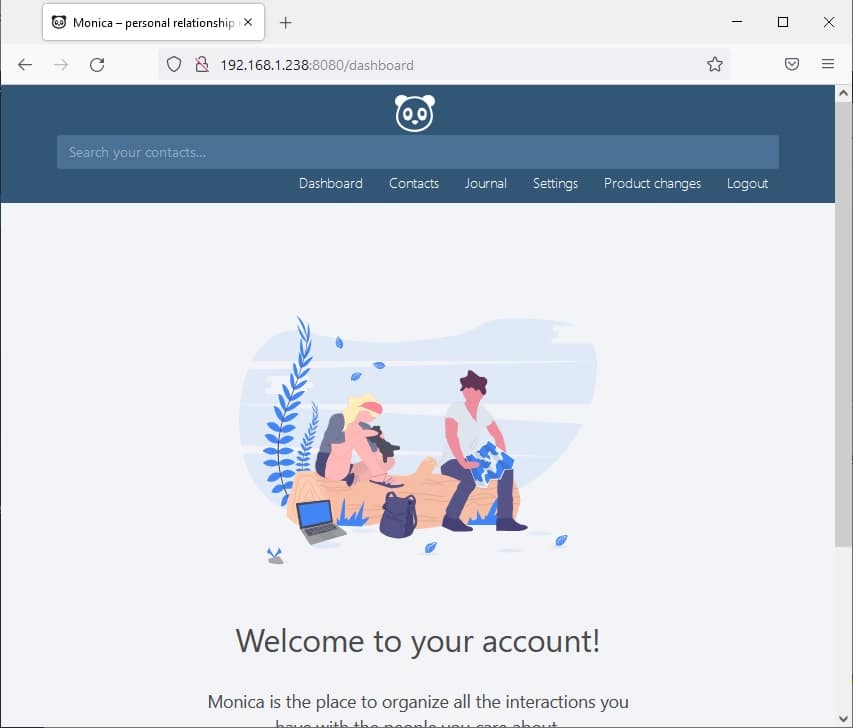
- a powerful dashboard, allowing to consult favourite notes about your contacts and a list of planned events or reminders about your contacts.
- a journal, allowing to take track of your daily log
Important thing, Monica is a web-based solution. So, once installed in your Raspberry PI you can use it from any device with a common browser without the need for client software.
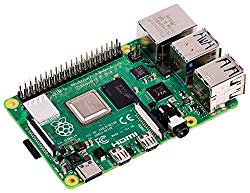
For this tutorial, I’m going to use a Raspberry PI 3 model B+, but this tutorial should work with any Raspberry PI computer board (not for Raspberry PI Pico, as this is a microcontroller).
What We Need

As usual, I suggest adding from now to your favourite e-commerce shopping cart all the needed hardware, so that at the end you will be able to evaluate overall costs and decide if to continue with the project or remove them from the shopping cart. So, hardware will be only:
- a Raspberry PI computer board (including proper power supply or using a smartphone micro usb charger with at least 3A)
- high speed micro SD card (at least 16 GB, at least class 10)
Check hardware prices with the following links:


Step-by-Step Procedure
Prepare Operating System
Start preparing your OS. Install Raspberry PI OS Lite for a fast, headless OS and to get the best performances from your board. You can also use Raspberry PI OS Desktop, in this case working from its internal terminal.
Make sure your OS is up to date. From your terminal, use the following command:
sudo apt update -y && sudo apt upgrade -yYou can now use my tutorial to install docker and docker-compose in your Raspberry PI.
Prepare Docker Files
We are going to use docker-compose in order to simplify installation. Once all files from this tutorial will be available on your board, you will be able to have Monica up with a single terminal command!
As MariaDB can’t run directly from Docker hub, we’ll build it from a Debian image, adding all the commands required to correctly go up in a Dockerfile.
Before getting files, please create a dedicated folder for your Monica installation. From terminal:
mkdir monicaCRM
cd monicaCRM
We’ll arrange 3 files for this directory, getting the following structure at the end:
pi@raspberrypi:~/monicaCRM $ ls -la
total 20
drwxr-xr-x 2 pi pi 4096 Oct  3 16:25 .
drwxr-xr-x 5 pi pi 4096 Oct  3 15:07 ..
-rw-r--r-- 1 pi pi  426 Oct  3 16:11 docker-compose.yml
-rw-r--r-- 1 pi pi  374 Oct  3 15:20 Dockerfile
-rw-r--r-- 1 pi pi  135 Oct  3 15:21 mySqlScript.sql
Dockerfile:
The Dockerfile is required to create the MariaDB container from a Debian image. It includes all the commands to create a custom image running on Raspberry PI.
Create a new “Dockerfile” file and enter editing with the nano editor.
nano DockerfileCopy and paste the following content in your Dockerfile:
FROM debian
RUN apt update -y && apt install mariadb-server -y
RUN sed -i 's/bind-address/bind-address = 0.0.0.0 #/i' /etc/mysql/mariadb.conf.d/50-server.cnf
RUN mkdir /mysql_scripts
COPY mySqlScript.sql /mysql_scripts/
RUN /etc/init.d/mariadb start && mysql -uroot --password="" -e "source /mysql_scripts/mySqlScript.sql"
CMD /etc/init.d/mariadb start && tail -f /dev/null
Close and save the file.
All of these lines are well explained in my Create a Custom MariaDB Container with Raspberry PI and Docker tutorial.
mySqlScript.sql
Also, mySqlScript.sql is required to initialize the MariaDB database for Monica CRM. This script will be executed only on the very first run of MariaDB container and will create a user able to manage the database (again, as explained in my Create a Custom MariaDB Container with Raspberry PI and Docker).
Create this as a new file with the nano editor, using the following terminal command:
nano mySqlScript.sqlCopy and paste the following content:
create user monicaDbUser@'%' identified by 'monicaDbPassword';
grant all privileges on *.* to monicaDbUser@'%';
flush privileges;
quit
Change “monicaDbUser” and “monicaDbPassword” with your favourite ones. Then close and save the file.
docker-compose.yml
Before creating the docker-compose file, we’ll need a random encryption key to get the app working. We don’t need and specific password and the app key can be self-generated on Raspberry PI with the already available openssl, by using the following command:
openssl enc -aes-128-cbc -k secret -P -iter 1 | grep key
This will give a result similar to the following:
key=013A6D029FDFEE2661FA0CE8E32DE73FThe key to use is all the row content excluding the initial ” key=” chars. Keep it on a notepad, as we need to copy it in the next file.
Now, create a new “docker-compose.yml” file with nano:
nano docker-compose.ymlCopy and paste the following content:
version: "3.4"

services:
 app:
  image: monica
  depends_on:
    - db
  ports:
    - 8080:80
  environment:
    - APP_KEY=013A6D029FDFEE2661FA0CE8E32DE73F
    - DB_HOST=db
    - DB_USERNAME=monicaDbUser
    - DB_PASSWORD=monicaDbPassword
  volumes:
    - data:/var/www/html/storage
  restart: always

 db:
  build: .
  volumes:
    - mysql:/var/lib/mysql
  restart: always

volumes:
 data:
  name: data
 mysql:
  name: mysql
Change the APP_KEY with your openssl key and the DB_USERNAME and DB_PASSWORD parameters with your ones saved in your mySqlScript.sql file. Save and close.
As you can see from this file, we use 2 main sections. The first one sets Monica as from the official installation procedure and parameters. The second one enables the building of our database (instead of default MySQL). Final volumes mapping create persistent data folders in your Raspberry PI so that even after a container stop/deletion you will find all files saved outside the container. These volumes are available from “/var/lib/docker/volumes” folder and are visible only from a root user (or with sudo).
Execute Docker-Compose
With all the work prepared in previous files, container creation becomes as simple as launching from the same directory where files are stored following command:
docker-compose up -dYou will see docker downloading Debian image (if not available locally), updating aptitude repositories, installing and configuring your MariaDB container, before getting MonicaCRM image.
At the end you should see something like the following:
pi@raspberrypi:~/monicaCRM $ docker-compose up -d
Creating network "monicacrm_default" with the default driver
Creating volume "data" with default driver
Creating volume "mysql" with default driver
Creating monicacrm_db_1 ... done
Creating monicacrm_app_1 ... done
Note for “At least one invalid signature was encountered.” error
After some release upgrades, a few people encountered an error on “docker-compose up -d” command. This error reports something similar to the following output:
Step 2/7 : RUN apt-get update -y && apt-get install mariadb-server -y
—> Running in 432c6c634d35
Get:1 http://security.debian.org/debian-security bullseye-security InRelease [44.1 kB]
Get:2 http://deb.debian.org/debian bullseye InRelease [113 kB]
Err:1 http://security.debian.org/debian-security bullseye-security InRelease
At least one invalid signature was encountered.
Err:2 http://deb.debian.org/debian bullseye InRelease
At least one invalid signature was encountered.
Get:3 http://deb.debian.org/debian bullseye-updates InRelease [36.8 kB]
Err:3 http://deb.debian.org/debian bullseye-updates InRelease
At least one invalid signature was encountered.
With container not running at all.
The root cause of the problem seems to be in libseccomp version installed by default on Raspberry PI OS. The newer version of libseccomp fixes the problem, but it is not yet available in Debian’s stable repos (from apt) and you need to install it manually. From terminal, download the deb package:
wget http://ftp.de.debian.org/debian/pool/main/libs/libseccomp/libseccomp2_2.5.1-1_armhf.debThen install the package:
sudo dpkg -i libseccomp2_2.5.1-1_armhf.debThis will solve the “At least one invalid signature was encountered” error. Then you can go on as for this tutorial with:
docker-compose up -dAccessing Monica
Once run the docker-compose up command, even if the “done” feedback from terminal, about one minute can be needed to get your installation working. At this point, our work on Raspberry PI has finished and we can start using Monica from external devices.
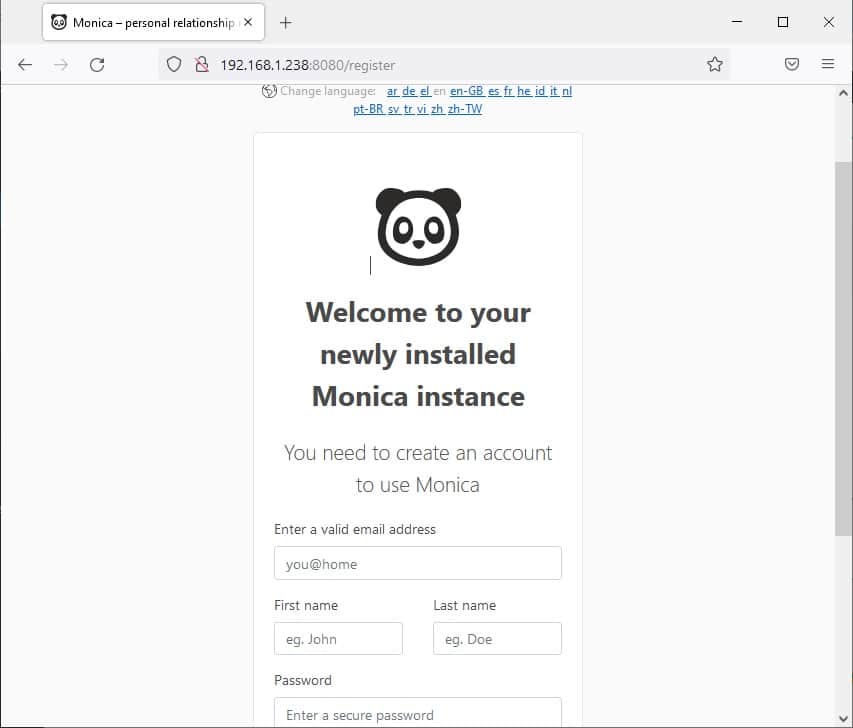
From your personal computer or any other device, open your favourite browser and use your Raspberry PI’s IP address with the 8080 port as URL. As my RPI address is 192.168.1.238, my URL will be “http://192.168.1.238:8080” and you will be redirected to the following screen:

Here you can choose your favourite language on the top part. Then, add your very first account to enter Monica by filling fields with your email, name, surname and password.
You will need to accept Privacy Policy and Terms of use, by picking the related flag and then you can enter by pressing the “Register” button at the end of the page:

Adding contacts and related info, as using the whole software is quite straightforward and doesn’t require complex fields, as well as using the whole software is really intuitive. However, I would suggest the Monica team to create a more complete user manual, as the GitHub User Docs for Monica is really poor in terms of how to. In any case, this doesn’t change my opinion of this software which has, for me, a very great potential.
Enjoy!

Open source and Raspberry PI lover, writes tutorials for beginners since 2019. He's an ICT expert, with a strong experience in supporting medium to big companies and public administrations to manage their ICT infrastructures. He's supporting the Italian public administration in digital transformation projects.

