
Last Updated on 22nd March 2026 by peppe8o
In this tutorial, I’m going to show you how to connect and use a passive buzzer with Raspberry PI Pico using MicroPython.
With Passive Buzzer you can give your Raspberry PI Pico a cheap way to emit sounds and modulate them according to your needs. It is so flexible that you can also let your RPI Pico sing!
The Passive Buzzer
The passive buzzer is a cheap and simple DC-powered element able to generate sound at different frequencies if triggered with a low voltage current.

A passive buzzer differs from an active buzzer because the active one has an internal oscillator able to generate a “standard” sound when simply activated with a continuous trigger. The passive buzzer, on the other hand, needs a square wave trigger (PWM).
Raspberry PI Pico has a lot of ports able to generate PWM (pulse-width modulation), as you can see from Raspberry PI Pico pinout.
Please consider that Raspberry PI Pico is a microcontroller, different from Raspberry PI computer boards (like Raspberry PI Zero W, RPI 4 model B, and so on). For these boards, you will refer to my Use Passive Buzzer with Raspberry PI and Python tutorial.
What We Need
As usual, I suggest adding from now to your favourite e-commerce shopping cart all the needed hardware, so that at the end you will be able to evaluate overall costs and decide if to continue with the project or remove them from the shopping cart. So, hardware will be only:
- A common computer (maybe with Windows, Linux or Mac). It can also be a Raspberry PI Computer board
- Raspberry PI Pico microcontroller (with a common micro USB cable)
- Passive Buzzer (I’m using an Elegoo one)
- breadboard (optional)
- dupont wirings
Wiring Diagram
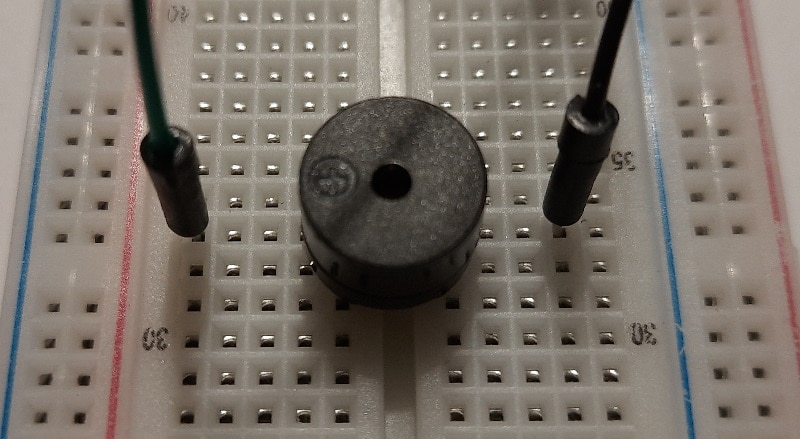
Following picture shows the wiring diagram adopted:
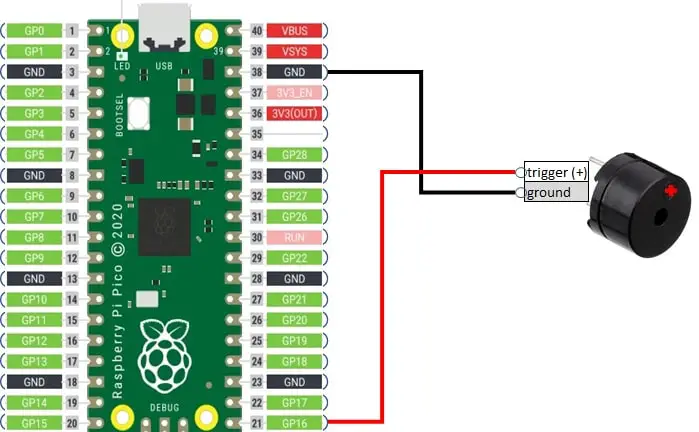
Note that passive buzzer have a “+” sign on top which identify the positive side, to be connected to PWM pin.
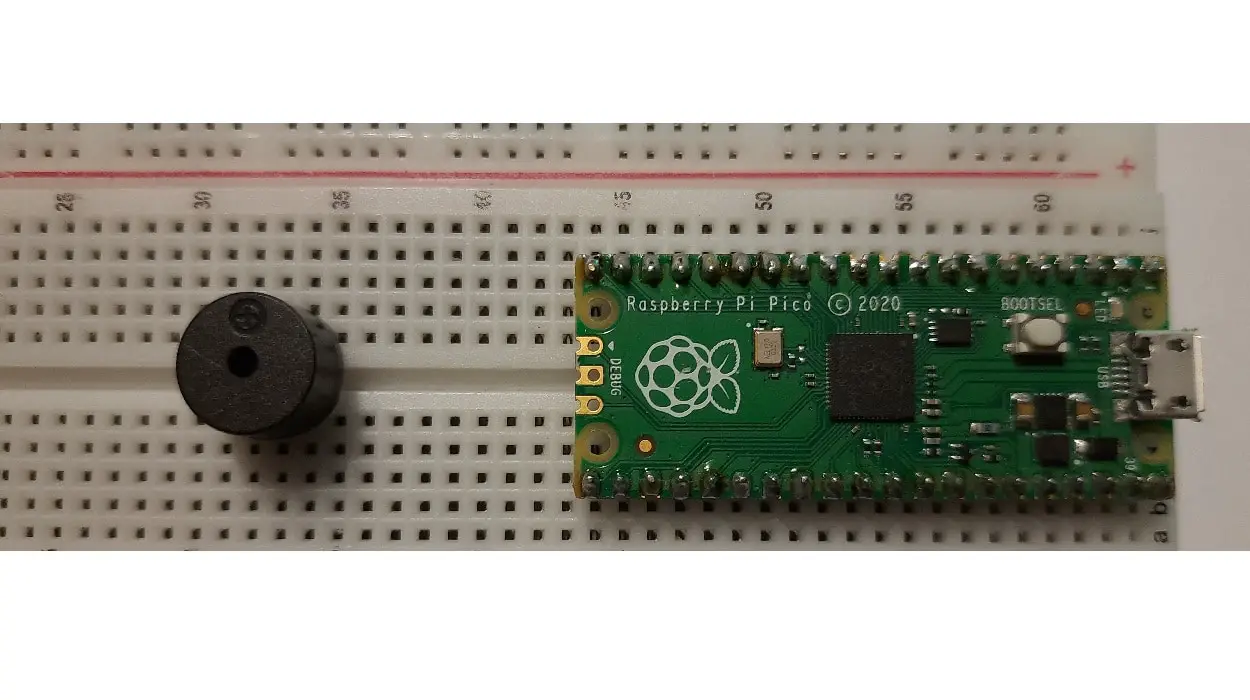
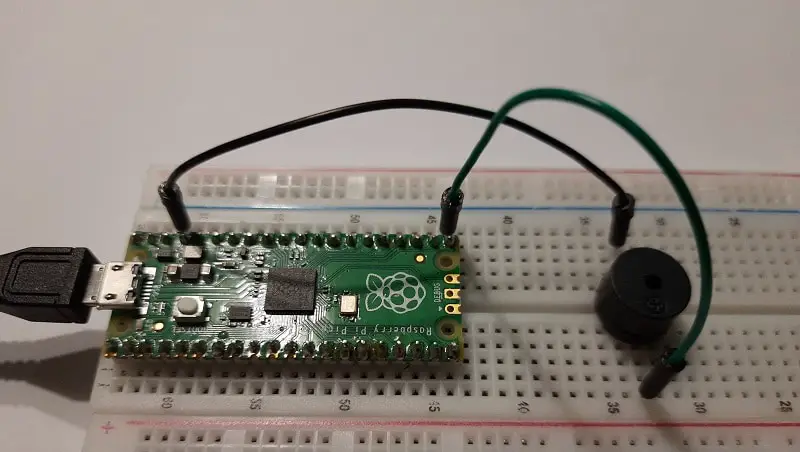
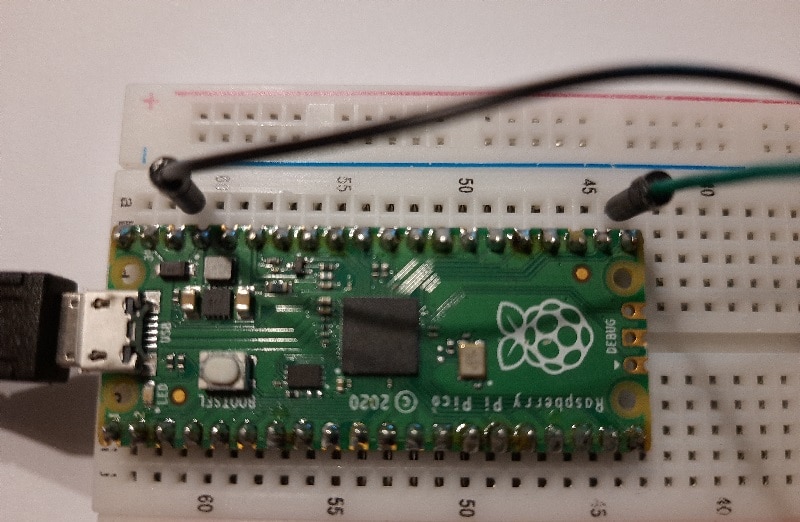
Please find below some more pictures from my wiring:
Step-by-Step Procedure
Prepare cabling according to the previous paragraph. Connect RPI Pico to Thonny (you can refer to my tutorial about the First steps with Raspberry PI Pico).
Get and Understand my picoPassiveBuzzer.py Code
Now download the following file to use your passive buzzer:
You can both load it in your Raspberry PI Pico storage or run it from your computer.
I’ll explain all code lines in the following paragraphs. It is really simple as passive buzzer just requires a PWM trigger to run.
First lines import required libraries:
from machine import Pin, PWM
from time import sleep
Then the PIN used to trigger the positive side on buzzer is associated to a variable for better code understanding and management. Remember to use your GPIO number if you use a different pin.
The second line initializes the PWM port with a PWM object:
buzzerPIN=16
BuzzerObj=PWM(Pin(buzzerPIN))
In my code, I also defined a function to make simple using the passive buzzer. It takes in input 4 parameters:
- buzzerPinObject: a PWM PIN object initialized as in previous line
- frequency: the frequency that has to be performed from our buzzer
- sound_duration: how long the sound must run
- silence_duration: if required, how long the sound should stop after the passive buzzer has run. If no silence is required, this can be set to 0 (zero)
I activate the passive buzzer with a duty cycle different from zero, while I deactivate it with a duty cycle to 0. Sound duration and silence duration are then performed with “sleep” statements which simply waits maintaining previous settings. This function is quite easy to read:
def buzzer(buzzerPinObject,frequency,sound_duration,silence_duration):

    buzzerPinObject.duty_u16(int(65536*0.2))
    buzzerPinObject.freq(frequency)
    sleep(sound_duration)
    buzzerPinObject.duty_u16(int(65536*0))
    sleep(silence_duration)
Following lines use our function by playing some notes:
buzzer(BuzzerObj,523,0.5,0.1)
 #C (DO)

buzzer(BuzzerObj,587,0.5,0.1)
 #D (RE)

buzzer(BuzzerObj,659,0.5,0.1) #E (MI)
buzzer(BuzzerObj,698,0.5,0.1) #F (FA)

buzzer(BuzzerObj,784,0.5,0.1) #G (SOL)
buzzer(BuzzerObj,880,0.5,0.1) #A (LA)
buzzer(BuzzerObj,987,0.5,0.1) #B (SI)
You can try, for example, some musical notes being approssimatively:
| Note | Frequency |
| A (LA) | 440 |
| B (SI) | 494 |
| C (DO) | 523 |
| D (RE) | 587 |
| E (MI) | 659 |
| F (FA) | 698 |
| G (SOL) | 784 |
Last line releases the PWM pin by de-initilizing it:
BuzzerObj.deinit()Running the picoPassiveBuzzer.py Script
Run this script in your Thonny IDE (F5) and you will start listening your passive buzzer emitting notes sound.
Bonus Example: Raspberry PI Pico Singing Beethoven
A funny way to use my script is performing complex sounds with the notes from previous table (and/or from its reference link at the bottom of table). I’ve prepared 2 scripts which will perform two of most famous symphony from Beethowen: Für Elise and Ode to Joy!
Differently from my “base” script, instead of passing directly frequencies to the buzzer() function, I added a translation table which converts notes in numbers, where numbers correspond to frequencies.
For example, I define the DO#5 as:
dod5=554I use the “d” instead of “#” char because the ashtag in python means a comment.
This note is then run in this new version of script with the following line:
buzzer(BuzzerObj,dod5,0.1,0.1)Now, let’s make our Pico singing. Below are the two downloadable scripts:
Dowload them, use into your Raspberry PI Pico.
Following YouTube video show result.
Fur Ode To Joy:
Fur Elise:
What’s Next
Interested to do more with your Raspberry PI Pico? Try to look at my Raspberry PI Pico tutorials for useful and funny projects!
Enjoy!

Open source and Raspberry PI lover, writes tutorials for beginners since 2019. He's an ICT expert, with a strong experience in supporting medium to big companies and public administrations to manage their ICT infrastructures. He's supporting the Italian public administration in digital transformation projects.
![]()
![]()
![]()
![]()
![]()
![]()
![]()


