
Last Updated on 13th April 2024 by peppe8o
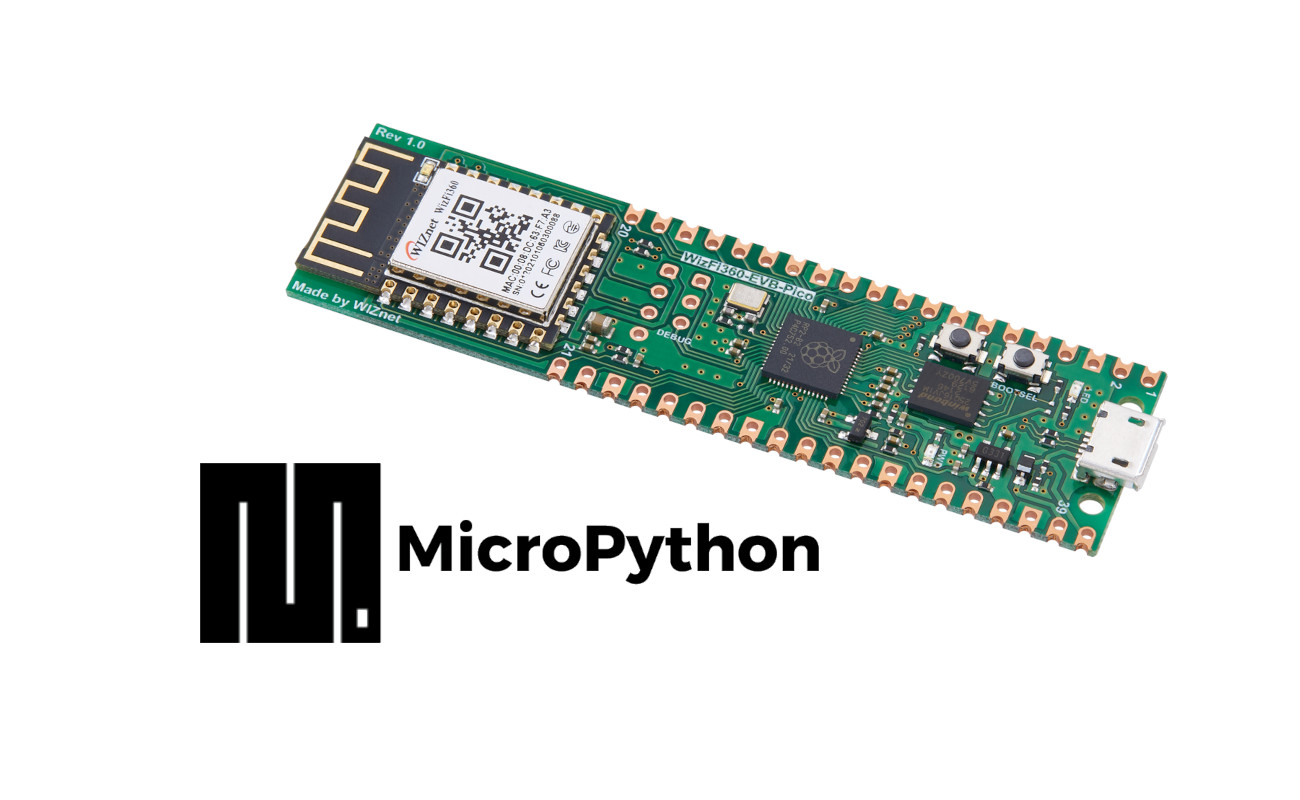
In this tutorial, I will show you how to use a WizFi360-EVB-Pico microcontroller with MicroPython.
In some special periods, the market may lack enough offer capacity to get the Raspberry PI Pico W available. The WizFi360-EVB-Pico can be an excellent alternative to get your MicroPython projects running with WiFi.
WizFi360-EVB-Pico features
WizFi360-EVB-Pico is a microprocessor board based on Raspberry Pi Pico (with the RP2040 chip). It includes Wi-Fi connectivity using a different networking chip: the WizNet proprietary WizFi360 instead of Infineon CYW4343. The following shows the main features of the WizFi360 WiFi chip:
- WiFi 2.4G, 802.11 b/g/n
- Supports Station / SoftAP / SoftAP+Station operation modes
- Supports serial AT command configuration
- Supports TCP Server / TCP Client / UDP operating mode
- Supports configuration of operating channels 1 ~ 13
- Supports auto 20MHz / 40MHz bandwidth
- Supports WPA_PSK / WPA2_PSK encryption
- Serial port baud rate up from 600bps to 2Mbps with 16 common values
- Supports up to 5 TCP / UDP links
- Obtaining IP address automatically from the DHCP server (Station mode)
- Supports DNS for communication with servers by domain name
- Supports “Keep-Alive” to monitor TCP connection
- Supports “Ping” for monitoring network status
- Built-in SNTP client for receiving the network time
- Supports built-in unique MAC address and user-configurable
- Supports firmware upgrade by UART Download / OTA (via WLAN)
- Industrial grade (operating temperature range: -40° C ~ 85° C)
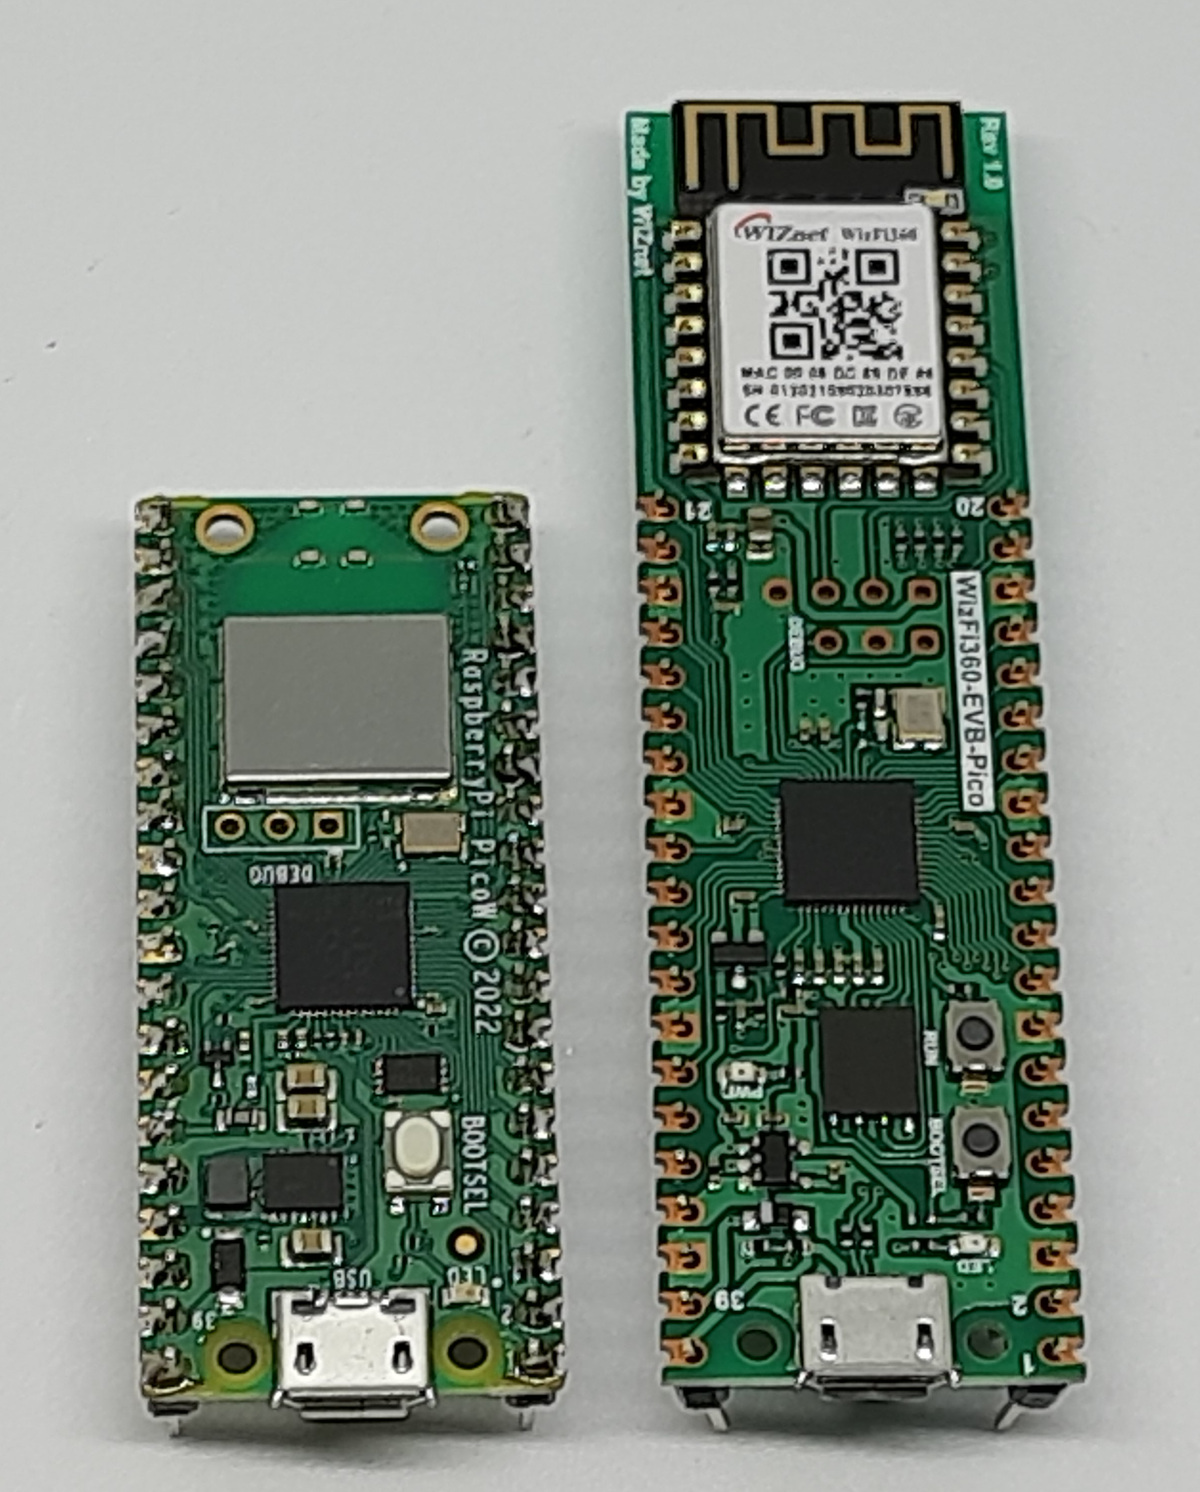
In terms of sizes, the WizFi360-EVB-Pico has the same width as Raspberry PI Pico, but the WizFi360 WiFi chip adds a few centimetres in length:
Comparing the two chips’ datasheets, (here the WizFi360 and the CYW4343), I’ve noted that one of the most important differences (for Industry uses) is in the operating temperature. While the WizFi360 declares to operate in a range between -40°C and +85°C, the CYW4343 limits this range to –30° to +70°C. This can be an essential factor in industrial applications requiring high-temperature stress allowance.
Regarding speed, both the WiFi chips can operate with 802.11n. Regarding this aspect, my personal opinion is that with IoT the WiFi connection speed can be a secondary aspect as an IoT device should send only elementary data metrics and should avoid sending high-size packages (otherwise, a microcomputer would be required). Moreover, the microcontroller’s limited speed on its storage and the speed limits for the WiFi UART connections will include a hardware speed limitation that hardly will allow you to use the whole bandwidth.
The WizFi360-EVB-Pico has a pin mapping compatible with the Raspberry Pi Pico pinout:
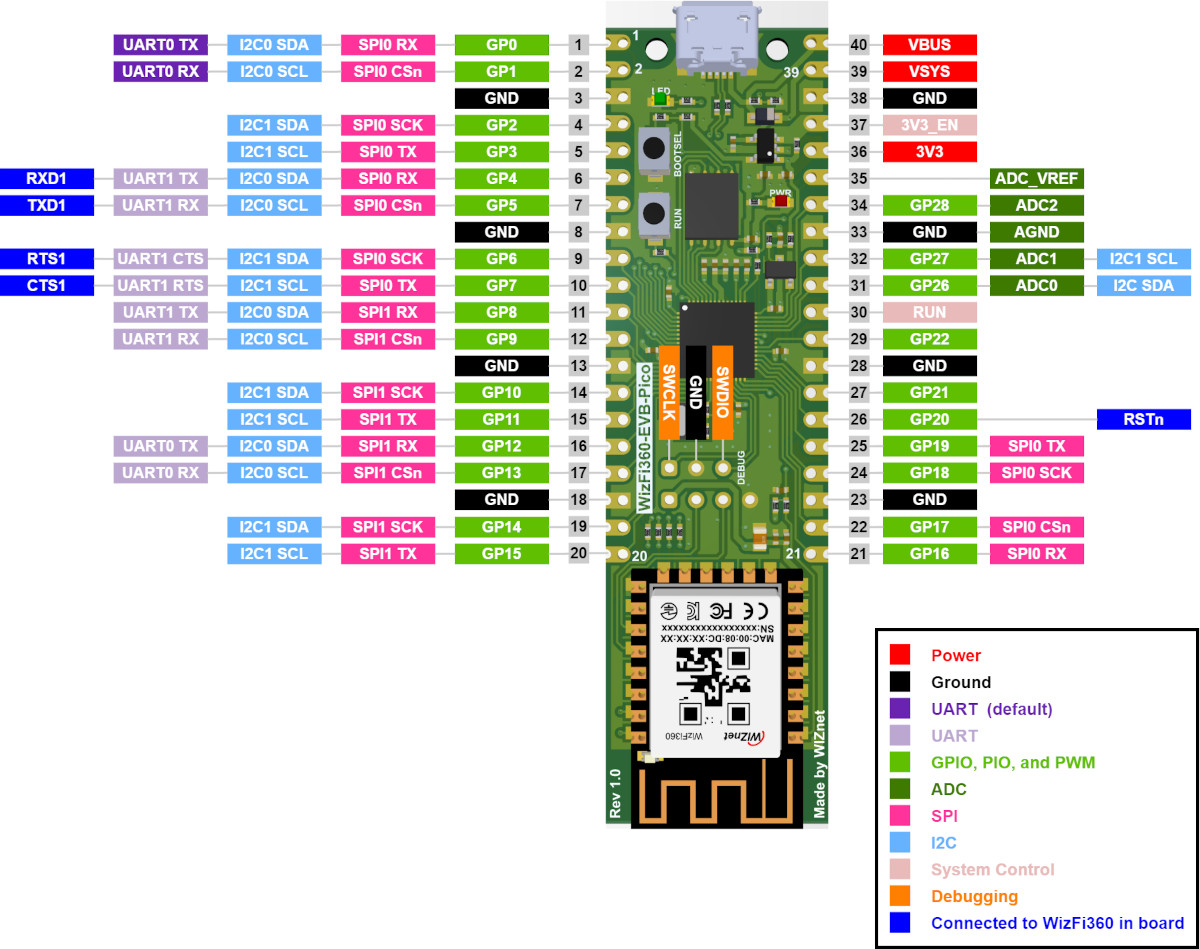
Turning back to the microcontroller, we can find that some GPs are labelled as connected to the WizFi360 module:
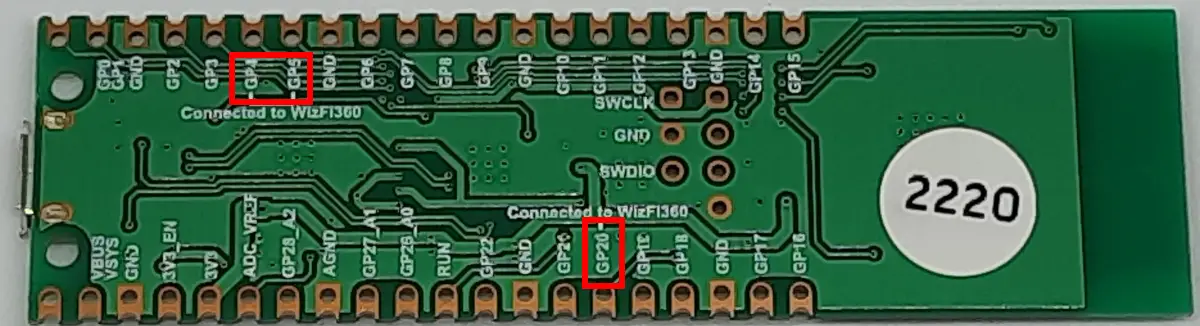
These pins are:
| GP4 | UART1 TX |
| GP5 | UART1 RX |
| GP20 | RSTn |
But, according to the pinout provided by WizNet, also the following are used with WizFi360:
| GP6 | RTS1 |
| GP7 | CTS1 |
This basically means that when you’ll use the Wi-Fi networking from this chip, you will not be able to use any additional device connected to these PINs. It is not a problem, as the microcontroller is plenty of more free Pins, but it is useful to remember what connections should NOT be used.
In the following paragraphs, I will show you how to use the WizFi360-EVB-Pico with MicroPython, also bringing an MQTT example.
What We Need
As usual, I suggest adding from now to your favourite e-commerce shopping cart all the needed hardware, so that at the end you will be able to evaluate overall costs and decide if to continue with the project or remove them from the shopping cart. So, hardware will be only:
- A common computer (maybe with Windows, Linux or Mac). It can also be a Raspberry PI Computer board
- WizFi360-EVB-Pico (with a common micro USB cable). You can search for it in your local Amazon Marketplace (if available) or in Mouser
Step-by-Step Procedure
In order to get this tutorial working, you need to have a PC (maybe Windows, Linux or a Raspberry PI computer board like the RPI 4 model B) with Thonny installed.
Install MicroPython Firmware on WizFi360-EVB-Pico
For this step, you can also refer to my First steps with Raspberry PI Pico for Beginners tutorial.
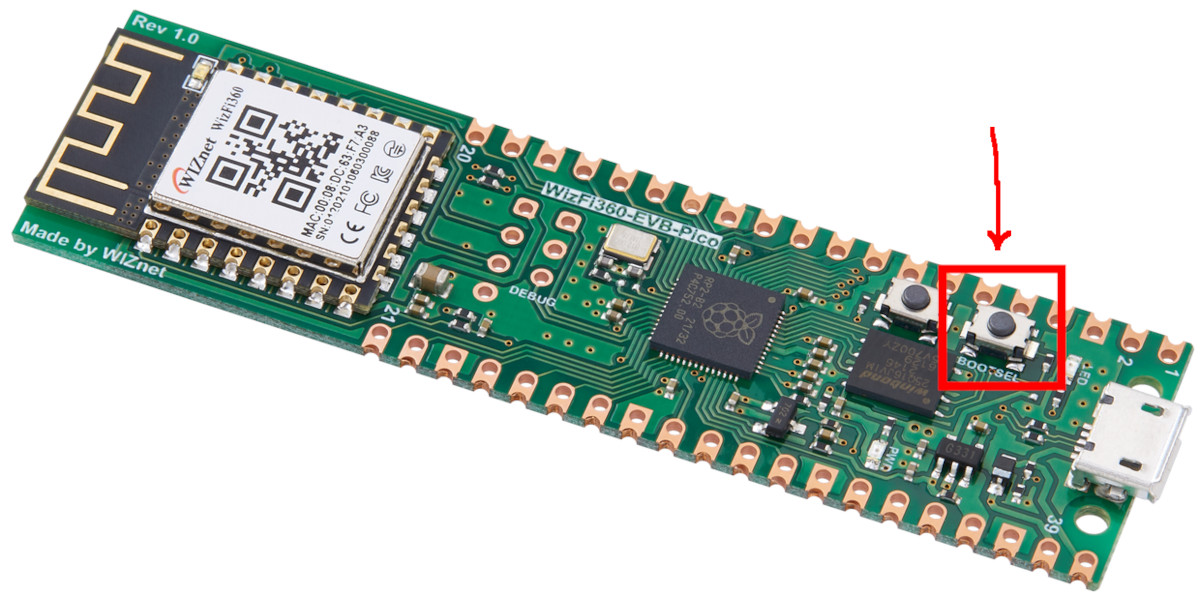
Basically, press (and keep pressed) the Bootsel button on your WizFi360-EVB-Pico board:
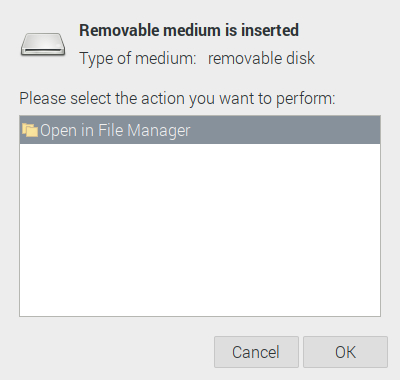
Now, please plug the USB cable between your WizFi360-EVB-Pico and your computer (where Thonny is installed). It will detect the microcontroller as external storage:
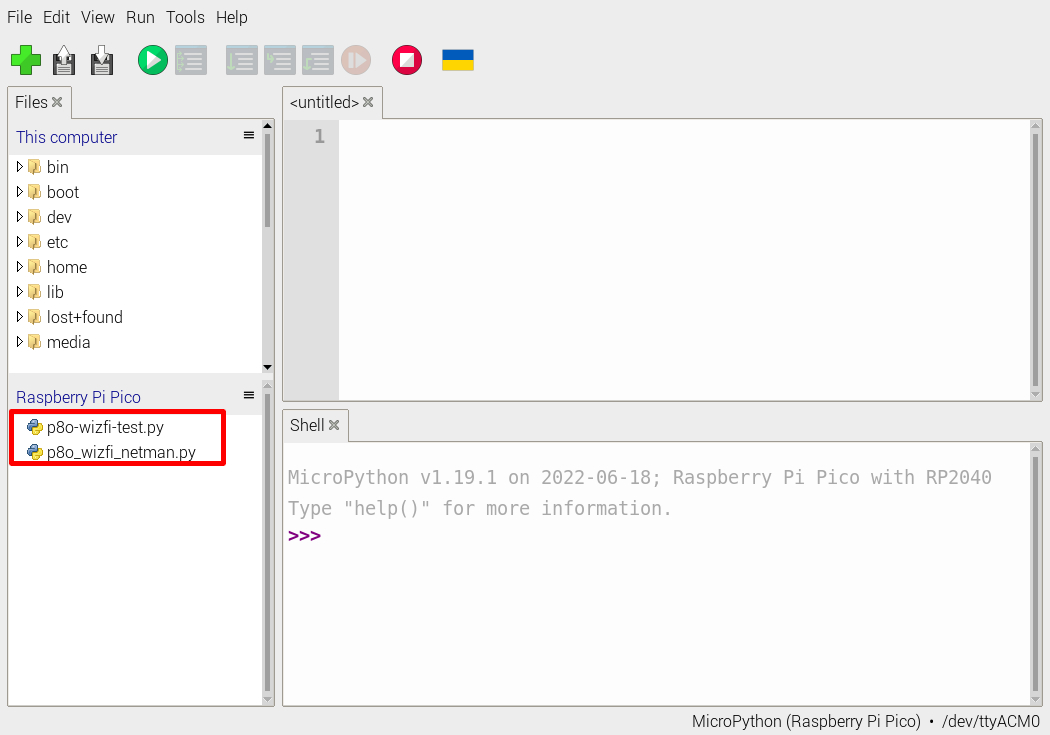
Opening the storage, only the following 2 files will be available:

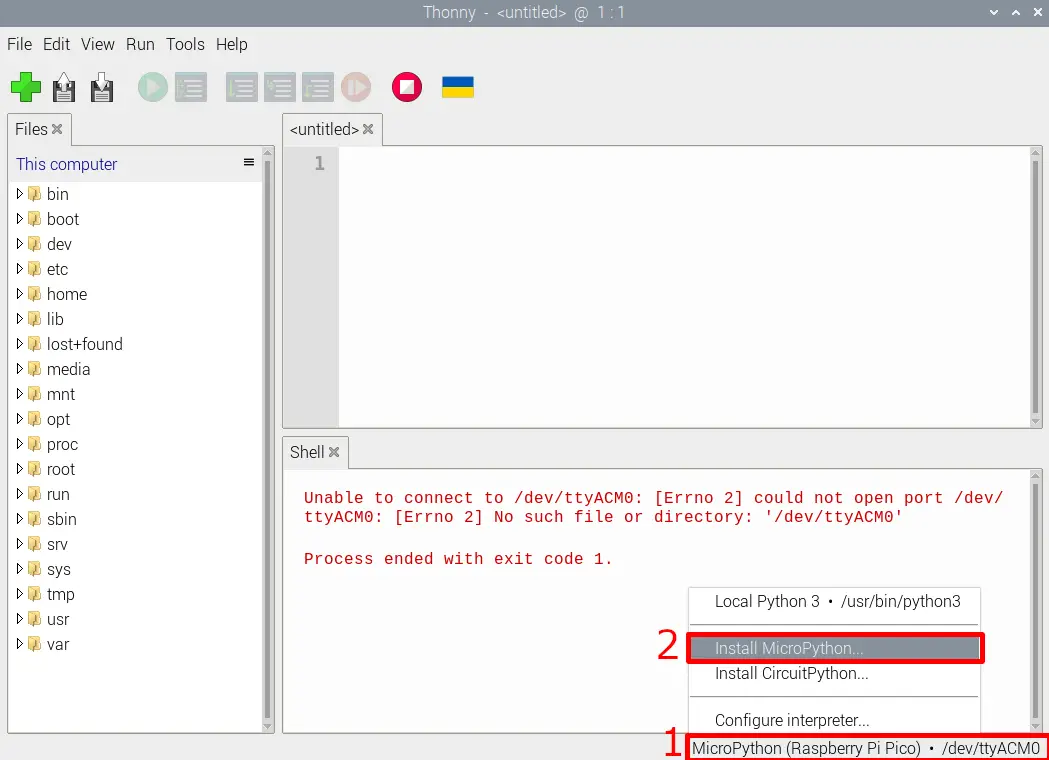
Open Thonny IDE. At the bottom-right side of the IDE, you can find the interpreter selector (marked with “1” in the following picture) that will allow you to use the “Install MicroPython” button. Please note that this button is available from Thonny 4. So, if you don’t have this option you can install the newer Thonny version (suggested) or you can follow the “Configure Interpreter” to find the similar path with older Thonny versions. Click “Install MicroPython”:
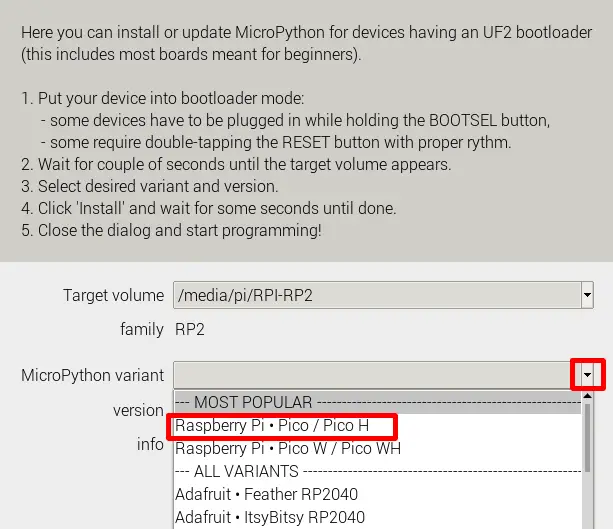
At the following window, the target volume should already be configured with your WizFi360-EVB-Pico storage. For the MicroPython variant, please select the one for “Raspberry PI Pico / Pico H”:
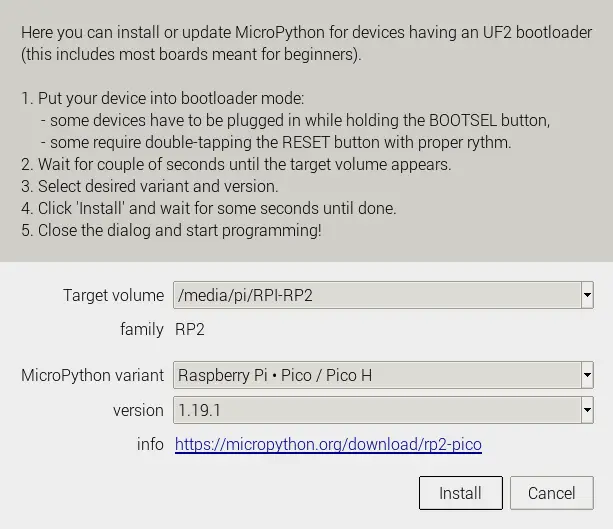
Your settings should be like the following picture, besides the version that could be newer depending on the date of your test for this tutorial. You can now click the “Install” button:
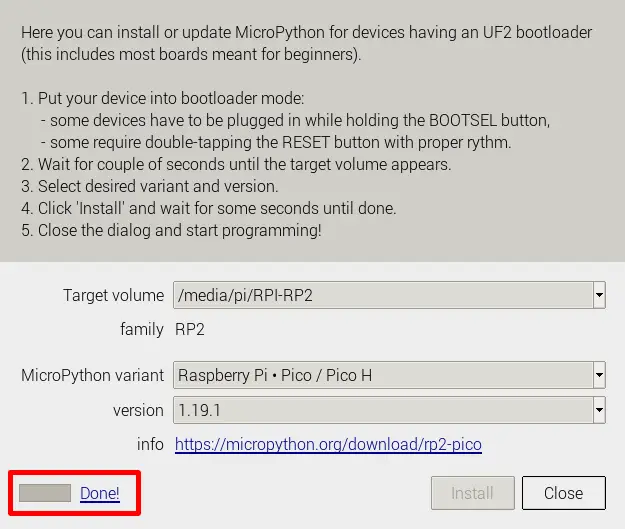
In the end, a “Done!” message at the bottom-left will notify you that everything worked correctly. In case of errors during the install stage, please try to close Thonny IDE and run it with administrative permissions:
With the “Close” button, you go back to the Thonny IDE. The “Stop/Restart backend” button will restart the WizFi360-EVB-Pico microcontroller, running the installed firmware:

The firmware installation stage is now completed. We can move to the next steps.
Get my MicroPython Library and Test Code
I wrote a small library to manage the main networking stuff for WizFi360-EVB-Pico with MicroPython. It converts basic networking and MQTT commands into the related “AT” commands and transmits them using the UART interface. Please get it to your local PC (where Thonny is installed) from my download area with the following link:
Or you can get it from my public GitHub repository: github.com -> p8o_wizfi_netman.py. Here you can also contribute with issues fixes (if any) or implementing new features.
More info on how to use MicroPython libraries and what are the correct folders can be found in my Adding external modules to MicroPython with Raspberry PI Pico tutorial.
Finally, you can also get from my download area a MicroPython file with tests:
Please upload them to your WizFi360-EVB-Pico microcontroller with Thonny. You can put both in the root folder:
Prepare MQTT Server (for MQTT test)
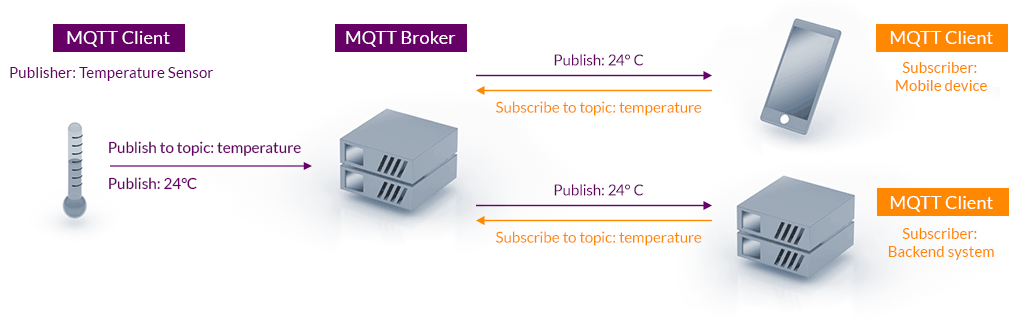
Before running the tests, we’ll require an MQTT server that will perform both the broker and the client functions. For this task, a larger description is available in my MQTT and Raspberry PI Pico W: Start with Mosquitto (MicroPython) tutorial, where I already explained the functions of Mosquitto Publisher, Broker and Subscriber as summarized in the following picture:
You can install your own MQTT Broker/Subscriber in a Raspberry PI computer board (or in any Debian-based PC) with the following commands. Please see to the above-referenced tutorial for more details.
So, please switch to your Raspberry PI computer board terminal and issue the commands:
sudo apt update -y && sudo apt upgrade -y
sudo apt install mosquitto mosquitto-clients -y
sudo mosquitto_passwd -c /etc/mosquitto/credentials pico # "pico" will be our user_t variable
Here type your MQTT password (“picopassword” for my example) and then:
sudo nano /etc/mosquitto/mosquitto.confappend the following:
allow_anonymous false
password_file /etc/mosquitto/credentials
listener 1883
Save and close. Finally:
sudo systemctl restart mosquitto.serviceRunning and Code Explanation
Now, we can perform our tests. I will write row by row the test commands with related explanation ad results, even if you can find the whole tests altogether in my “p8o-wizfi-test.py” and run them by running this file in your WizFi360-EVB-Pico board.
The following commands must be run on Thonny IDE.
The first line imports my p8o_wizfi_netman.py module. There is also an “as” statement that will make it simpler to call the module function without having to write the whole module name (it’s a so called “alias”). With this line, I will be able to refer to the module functions with “nm”:
import p8o_wizfi_netman as nmWe now set our WiFi SSID and password variables. The following assignment line will make both assignments in one single line:
(ssid,pwd)="your_SSID","your_WiFi_password"Perform a simple AT test and configure Station Mode
The first test is just checking that our WizFi360 chip correctly answers to the AT commands. I suggest performing this initial test in any script, as the very first command at the microcontroller boot could return spurious chars at the beginning of communication that will risk creating errors (just re-running the script will solve in any case):
print(nm.UARTcomm("AT"))The result will print both the command and the “OK” response:
AT

OK
We need now to configure the WizFi360-EVB-Pico to Station Mode (in the sense that it will be a Wi-Fi client). Also Here an AT command is required:
print(nm.UARTcomm("AT+CWMODE_CUR=1"))and the resulting response will be:
AT+CWMODE_CUR=1

OK
Scan available Access Points
The following command will scan the Wi-Fi access points that can be reached from our WizFi360-EVB-Pico and print a formatted list with interesting info on the Wi-Fi networks available. The command:
nm.scanAP()will return a list like the following (where the available access points will be the ones detected locally to you. Of course, I’ve hidden part of the name of mine ones for security reasons:
Scanning Access Points:
List of available APs:

SSID:                        ***********67872
Encryption Method:           WPA2_PSK
Signal strength:             -85
AP MAC Address:              90:35:6e:a2:7c:c8
Channel Number:              2
WPS (0-disabled, 1-enabled): 1


SSID:                        ***********iFi
Encryption Method:           OPEN
Signal strength:             -87
AP MAC Address:              90:35:6e:a2:7c:ca
Channel Number:              2
WPS (0-disabled, 1-enabled): 0


SSID:                        ***********er-1
Encryption Method:           WPA2_PSK
Signal strength:             -40
AP MAC Address:              ac:9e:17:6b:d6:40
Channel Number:              10
WPS (0-disabled, 1-enabled): 1


SSID:                        ***********TWEB
Encryption Method:           WPA2_ENTERPRISE
Signal strength:             -73
AP MAC Address:              ca:5a:9f:dc:a4:37
Channel Number:              11
WPS (0-disabled, 1-enabled): 0
Connect to your WiFi network
The APconnect() command will make it possible to connect to your WiFi network. It will return your WizFi360-EVB-Pico IP and mac address, in order to make it possible to you to identify the board in your router settings, if required:
ip,mac=nm.APconnect(ssid,pwd)
print("IP Address = "+ip)
print("MAC Address = "+mac)
The result will be similar to the following, where you will get the SSID and password of your WiFi and the IP and MAC address of your microcontroller instead of mine:
Connecting to WiFi:
AT+CWJAP_CUR="your_SSID","your_WiFi_password"
WIFI DISCONNECT
WIFI CONNECTED
WIFI GOT IP

OK
Retrieving IP and Mac Address:
IP Address = 192.168.1.200
MAC Address = 00:08:dc:69:de:66
Performing ping tests
The ping_test() command will try to perform a ping test, returning the test results. Those performed successfully will get back the test duration, while the ones failing will get a timeout warning.
A basic ping test to an IP address can be performed as follows:
nm.ping_test("8.8.8.8")This ping to the Google servers and will likely answer positively:
Ping test to 8.8.8.8 successful.
Response get in +22 milliseconds
Also, ping to domain names can be performed with a similar line:
nm.ping_test("www.google.com")With a similar result:
Ping test to www.google.com successful.
Response get in +16 milliseconds
Let’s look at a failing test. Here I will use a pseudo-domain composed of random chars, after checking that it doesn’t really exist:
nm.ping_test("saacss.com")And the result will be:
Ping test to saacss.com failed!Publishing MQTT messages
Before running the MQTT tests, we need to setup some variables according to what was configured during the MQTT broker installation. Please note that here the “192.168.1.91” is the IP address of my MQTT broker. You can leave the other params as default unless changed in your broker settings:
mqtt_server = '192.168.1.91'
client_id = 'PicoW'
user_t = 'pico'
password_t = 'picopassword'
topic_pub = 'hello'
SUBSCRIBE_TOPIC = 'hello' # can be same as topic_pub
mqtt_port = 1883
auth = 0
keep_alive = 300
We’ll set now the text message to send:
message="Hello from Peppe8o.com!"We are now ready to configure the WizFi360-EVB-Pico to our MQTT broker, set the topic, and connect with the following 3 lines:
nm.mqtt_userinfo_config(user_t, password_t, client_id,keep_alive)
nm.mqtt_set_topic(topic_pub, SUBSCRIBE_TOPIC)
nm.mqtt_connect(auth, mqtt_server, mqtt_port)
With the following response:
MQTT user info set
Registered on topic hello
Connected to Broker 192.168.1.91
Now, sending an MQTT message to our defined broker/topic is as simple as issuing the following command:
nm.mqtt_publish(message)With the shell returning:
Message: Hello from Peppe8o.com! sentFinally, we can disconnect from the MQTT broker with the following line:
nm.mqtt_disconnect()From the MQTT Broker side (a Raspberry PI computer board, in my example), if installed as previously described we can monitor the connections and messages with the following terminal command:
pi@raspberrypi:~ $ mosquitto_sub -d -t hello -u pico -P picopasswordAnd we’ll have the following messages:
pi@raspberrypi:~ $ mosquitto_sub -d -t hello -u pico -P giuseppe
Client (null) sending CONNECT
Client (null) received CONNACK (0)
Client (null) sending SUBSCRIBE (Mid: 1, Topic: hello, QoS: 0, Options: 0x00)
Client (null) received SUBACK
Subscribed (mid: 1): 0
Client (null) sending PINGREQ
Client (null) received PINGRESP
Client (null) received PUBLISH (d0, q0, r0, m0, 'hello', ... (23 bytes))
Hello from Peppe8o.com!
What’s Next
Interested in more cool Raspberry PI Pico guides to test also with your WizFi360-EVB-Pico microcontroller? Take a look at my Raspberry PI Pico tutorials for useful and funny projects!
Enjoy!

Open source and Raspberry PI lover, writes tutorials for beginners since 2019. He's an ICT expert, with a strong experience in supporting medium to big companies and public administrations to manage their ICT infrastructures. He's supporting the Italian public administration in digital transformation projects.
![]()
![]()
![]()
![]()
![]()
![]()
![]()


